Detecting Ultrabook Sensors
Ultrabook and Tablet Windows 8* Sensors Development Guide
How to Upload to the Marketplace
1. Connect via FTP to files.gamedev.net using your Gamedev.net username and password
2. Upload your content packs
3. Create individual marketplace entries by clicking on the "Upload File" button in the marketplace.
4. When you go to select the file just choose "Submit file uploaded to files.gamedev.net (enter filename of file)" option and enter the exact filename of the file you uploaded to our server. Our software will grab that file from your FTP and tuck it away in a secure location with a different filename as well. After the file is moved to our file vault it will no longer exist in your FTP space.
5. Make sure you give your files a few attached images as well as a nice description. That should at least get you started. Let me know if you have additional questions. You control the pricing on your items, but remember that it's only worth what people will pay for it.
Good luck!
How To Publish on GameDev.net
The Submission Process
First and foremost, all authors are required to create an account here on GameDev.net so that your articles can be linked to your account, moderators can be notified of your submissions, and you can edit your articles. Once you have completed this step, you are ready and able to submit content.
1. The Draft
You begin by creating an article using the submission form. The draft stage is perfect for beginning the process of writing your article here. Whenever you save an article as a draft it is visible only to you and the moderation team, so you can take the time you need to get the article finished without having to worry about doing it all in one go. If you already have the article completed, then the draft stage is where you check that the article shows up looking the way you want it to prior to making it public. Either way, you should also use this time to check that the article meets our content guidelines (see below) to avoid any problems in the next step.
For more details on using the article submission form, please read this help article.
If your content is already an entry in your developer journal here on GameDev.net, you can submit it directly to the moderator review stage using the Promote To Article link.
2. Moderator Review
Once you are satisfied with the article as it appears on the site you can choose for it to be published and made public. Before this happens, and within 24-48 hours, a moderator will look over your article to ensure it falls within our content guidelines. This is not a technical check, nor a grammatical check - it's only to ensure your content, including images and file attachments, is suitable for our audience to view. We will email you any issues via the account in your profile, otherwise the article will be approved and you will receive notification that the content is now publically available and open for peer review.
3. Peer Review
The peer review process can be more lengthy than the previous moderator review - here both moderators and users granted the privelege will review your article for both technical and grammatical issues. This process is meant to make your contribution as robust as possible and all critisicm should be taken (and given) constructively towards this goal. Reviewers can comment suggestions on your article and you can edit your article to take these comments into consideration if you so choose. Eventually, reviewers will individually vote to either approve or deny your article. For every denial vote the reviewer will submit feedback to go along with their vote. This feedback, as well as the number of approval/denial votes and the members who made them, will be visible to all readers. When you have received three votes of approval, your article will be marked as Peer Reviewed.
If your article receives three votes of denial it will be moved to a private closed section and flagged for additional review. Articles can be denied for serious reasons such as suspected plagiarism, abusive language or offensive material. Articles can also be denied for reasons such as missing images, erroneous code or unclear sections - things that were pointed out by reviewers but not addressed by authors in a timely manner. Closed articles can be resubmitted for publishing approval by the author and will begin the peer-review process anew if the reasons for denial have been suitably addressed.
Once an article has been marked Peer Reviewed, a badge next to the title will let readers know that the content therein has been vetted by knowledgeable members of the GameDev.net community and these members will be listed. As a peer reviewed author, you will receive a reputation bonus and, depending on your repuation score, the ability to moderate other contributions under peer review if you have not been granted this privelege already.
Please note that an article does not have to attain peer reviewed status to be considered published or valid content. We respect that contributors have the knowledge and experience necessary to submit accurate and informative work, but at the same time we recognize that mistakes are easily made and missed even through multiple self-reviews by the author. The peer review process helps to ensure that any issues, if they exist, are found and, if not corrected, are pointed out to inform readers of their existence.
Content Guidelines
Please read the following sections carefully. These guidelines are in addition to our Terms of Service and Contributor Agreement. For more information on some of the terms used below make sure you are familiar with how the article submission form works. Do not be afraid to submit if you feel you may be in conflict with these guidelines - any ambiguity will be dealt with during moderator review.
Attachments
Images
All images to which you own the rights to must be uploaded as Media Resource attachments. The option to link to external images using the "img" tag may only be used for images which you do not own and have permission or free license to do so from the copyright holder. This is to minimize the number of broken images that may show up in the content as the years go on.
Acceptible image formats include GIF, JPG, PNG and BMP.
Downloadable Files
For the same reasons, any source or included files for the content must be uploaded using the article submission form so long as you have the right to do so. Relevant files for which you do not own must be externally linked unless permission or free license is granted by the copyright owner for you to upload.
All file attachments must be in ZIP format.
Content Types
There are several different types of content you can contribute. If you don't think your submission falls under any of these categories, we suggest you email the editor to ensure that your content will be a good fit for the GameDev.net audience. For more specific information on how to best compose these various content types, including structure and formatting guidelines, see this help article.
Topical Article
This type of content will focus around specific techniques, methodologies, languages, fields of game development, etc. Examples include designing levels for First-Person Shooters, working with new DirectX features, learning the ins and outs of a specific API, exploring the basics of game design, managing teams with Scrum, etc.
Code Snippet
If you have a handy piece of code you would like to share that doesn't need 1,000 words to explain, then you should consider submitting it as a code snippet. This will give you a standard template to adhere to and give easy access for others to download and share your snippet across the community.
How-To Guide
If you would like to give instruction or advice on how to use a library, engine, tool, etc. then you must do so without promotion in any way. These articles should be written towards current owners and users and should not include any information related to purchase or download other than a link to the main web site. Authors of these articles may include anyone who is associated with the subject of the how-to guide, as long as this is declared within the article and non-promotional conditions are met. All guides should be tagged "how to" and titles prefixed with "How To..."
Product Review
We welcome your thoughts on products (including books) available for game developers, both payware and freeware. Help spread the word about a great tool or warn people away from a buggy engine. Product reviews must be tagged "Review" and follow the structure guidelines. We will judge if the review is unbiased, non-promoting (there is a difference between praise and promotion) and balanced. Authors of these articles may not under any circumstances include anyone who is associated with the product being reviewed.
Video Article
Articles can be submitted with embedded video from supported providers such as Vimeo and YouTube. They must at least include in the article body the same description featured on the video host site. While some people may read faster than others, everyone must watch a video at the same pace so it is essential that they are properly edited and kept as concise as possible. We suggest you plan your video and script your dialogue as much as possible. Any obvious rambling, empty space, and other signs of lack of editing will not pass review.
External Content
The option to provide a link to external content is available and falls under the following usage conditions:
- The Teaser Paragraph must include an adequate description of the link
- The link must be to a content source for which you do not have permission to repost
- This content source may be an individual article or a page that lists individual articles - so long as those articles all fall under the same Article Category chosen for the link
- Authorship must be given to the actual content owner. This can be a website or individual
Authorship
We have always required full accountability in our published authors, and this means no pen names, nick names or screen names may be used for the Author Name attached to your work. If you are not comfortable attaching your real name to your work we are not comfortable publishing it. We recognize however that many of our popular community members are recognized by their forum name rather than their real name, so we do allow your GameDev.net display name to be used in the author field as long as you have filled out the Full Name field of your member profile.
Foreign Language Submissions
While our community comes from all over the world, GameDev.net is an English-language site. All articles submitted must be written in English. If English is not your primary language do not worry - while the moderator review stage will not catch many small grammatical errors, if it is obvious you are not used to writing in English we will use this stage to work with you on cleaning the wording up. If you would like to seek help in translating your article or are interested in translating one of our articles, please contact the editor.
License
Authors are required to choose a license for their article that defines the use of content being submitted to GameDev.net. This is for your protection as well as ours from potential litigation and we suggest you fully review all available licenses here. By default the GameDev.net Open License is selected.
Terms and Conditions
If you didn't do it earlier in this document, this is a reminder that you review our Terms of Service and Contributor Agreement documents. You must agree to both when you submit your article for moderator review.
Questions? Comments? Feedback?
If you are unclear on anything mentioned above or have thoughts on how to improve the article system, please email our editor Drew Sikora with your questions and concerns. Thank you for helping to improve GameDev.net and expand the available resources for the game development community.
GPGPU image processing basics using OpenCL.NET
Introduction
OpenCL is a cross-platform framework used mostly for GPGPU (General-purpose computing on graphics processing units). There are plenty of tutorials available on image processing with OpenCL using C/C++, however there's not much information that would cover OpenCL image processing with .NET.I won't go into details about OpenCL kernels/queues/etc. (there's plenty of information available on the internet), however I'll provide you with a bare minimum code required to load an image from disk, process it with OpenCL on the GPU and save it back to a file.
Before we get started, make sure that you download the source code of OpenCL.NET from http://openclnet.codeplex.com/ and add it to your project.
We'll use a simple OpenCL kernel that converts an input image into a grayscale image. The kernel should be saved to a separate file.
Kernel source code:
__kernel void imagingTest(__read_only  image2d_t srcImg,
					   __write_only image2d_t dstImg)
{
  const sampler_t smp = CLK_NORMALIZED_COORDS_FALSE | //Natural coordinates
	CLK_ADDRESS_CLAMP_TO_EDGE | //Clamp to zeros
	CLK_FILTER_LINEAR;
  int2 coord = (int2)(get_global_id(0), get_global_id(1));

  uint4 bgra = read_imageui(srcImg, smp, coord); //The byte order is BGRA

  float4 bgrafloat = convert_float4(bgra) / 255.0f; //Convert to normalized [0..1] float

  //Convert RGB to luminance (make the image grayscale).
  float luminance =  sqrt(0.241f * bgrafloat.z * bgrafloat.z + 0.691f * bgrafloat.y * bgrafloat.y + 0.068f * bgrafloat.x * bgrafloat.x);
  bgra.x = bgra.y = bgra.z = (uint) (luminance * 255.0f);

  bgra.w = 255;

  write_imageui(dstImg, coord, bgra);
}
Namespaces Used
using System;
using System.Collections;
using System.Collections.Generic;
using System.Drawing;
using System.Drawing.Imaging;
using System.IO;
using System.Runtime.InteropServices;
using OpenCL.Net;
Error handling
Since OpenCL.NET is a wrapper for C API, we'll have to do all the error checking on our own. I'm using the following two methods:
private void CheckErr(Cl.ErrorCode err, string name)
{
	if (err != Cl.ErrorCode.Success) {
		Console.WriteLine("ERROR: " + name + " (" + err.ToString() + ")");
	}
}

private void ContextNotify(string errInfo, byte[] data, IntPtr cb, IntPtr userData) {
	Console.WriteLine("OpenCL Notification: " + errInfo);
}
Setting Up
The following two variables should be declared in the class itself and will be shared across all of the methods:
private Cl.Context _context;
private Cl.Device _device;
And this is the method that sets up OpenCL:
private void Setup ()
{
	Cl.ErrorCode error;
	Cl.Platform[] platforms = Cl.GetPlatformIDs (out error);
	List<Cl.Device> devicesList = new List<Cl.Device> ();

	CheckErr (error, "Cl.GetPlatformIDs");

	foreach (Cl.Platform platform in platforms) {
		string platformName = Cl.GetPlatformInfo (platform, Cl.PlatformInfo.Name, out error).ToString ();
		Console.WriteLine ("Platform: " + platformName);
		CheckErr (error, "Cl.GetPlatformInfo");

		//We will be looking only for GPU devices
		foreach (Cl.Device device in Cl.GetDeviceIDs(platform, Cl.DeviceType.Gpu, out error)) {
			CheckErr (error, "Cl.GetDeviceIDs");
			Console.WriteLine ("Device: " + device.ToString ());
			devicesList.Add (device);
		}
	}

	if (devicesList.Count <= 0) {
		Console.WriteLine ("No devices found.");
		return;
	}

	_device = devicesList[0];

	if (Cl.GetDeviceInfo(_device, Cl.DeviceInfo.ImageSupport, out error).CastTo<Cl.Bool>() == Cl.Bool.False)
	{
		Console.WriteLine("No image support.");
		return;
	}

	_context = Cl.CreateContext(null, 1, new[] { _device }, ContextNotify, IntPtr.Zero, out error);	//Second parameter is amount of devices
	CheckErr(error, "Cl.CreateContext");
}
The Image Processing Part
The main problem is that OpenCL.NET is a wrapper around C API of OpenCL, so it can only work with unmanaged memory. However, all of the data in .NET is managed, so we'll have to marshal the data between managed/unmanaged memory. Usually it would be much easier to handle the RGBA color components in float [0..1] space. However, the input image should be in byte[] array, because it would really affect the performance to do the byte=>float conversion on the CPU (we would have to divide each component by 255 for every pixel of the image twice - once before the image processing and once after).
public void ImagingTest (string inputImagePath, string outputImagePath)
{
	Cl.ErrorCode error;

	//Load and compile kernel source code.
	string programPath = Environment.CurrentDirectory + "/../../ImagingTest.cl";	//The path to the source file may vary

	if (!System.IO.File.Exists (programPath)) {
		Console.WriteLine ("Program doesn't exist at path " + programPath);
		return;
	}

	string programSource = System.IO.File.ReadAllText (programPath);

	using (Cl.Program program = Cl.CreateProgramWithSource(_context, 1, new[] { programSource }, null, out error)) {
		CheckErr(error, "Cl.CreateProgramWithSource");

		//Compile kernel source
		error = Cl.BuildProgram (program, 1, new[] { _device }, string.Empty, null, IntPtr.Zero);
		CheckErr(error, "Cl.BuildProgram");

		//Check for any compilation errors
		if (Cl.GetProgramBuildInfo (program, _device, Cl.ProgramBuildInfo.Status, out error).CastTo<Cl.BuildStatus>()
			!= Cl.BuildStatus.Success) {
			CheckErr(error, "Cl.GetProgramBuildInfo");
			Console.WriteLine("Cl.GetProgramBuildInfo != Success");
			Console.WriteLine(Cl.GetProgramBuildInfo(program, _device, Cl.ProgramBuildInfo.Log, out error));
			return;
		}

		//Create the required kernel (entry function)
		Cl.Kernel kernel = Cl.CreateKernel(program, "imagingTest", out error);
		CheckErr(error, "Cl.CreateKernel");

		int intPtrSize = 0;
		intPtrSize = Marshal.SizeOf(typeof(IntPtr));

		//Image's RGBA data converted to an unmanaged[] array
		byte[] inputByteArray;
		//OpenCL memory buffer that will keep our image's byte[] data.
		Cl.Mem inputImage2DBuffer;

		Cl.ImageFormat clImageFormat = new Cl.ImageFormat(Cl.ChannelOrder.RGBA, Cl.ChannelType.Unsigned_Int8);

		int inputImgWidth, inputImgHeight;

		int inputImgBytesSize;

		int inputImgStride;

		//Try loading the input image
		using (FileStream imageFileStream = new FileStream(inputImagePath, FileMode.Open) ) {
			System.Drawing.Image inputImage = System.Drawing.Image.FromStream( imageFileStream );

			if (inputImage == null) {
				Console.WriteLine("Unable to load input image");
				return;
			}

			inputImgWidth = inputImage.Width;
			inputImgHeight = inputImage.Height;

			System.Drawing.Bitmap bmpImage = new System.Drawing.Bitmap(inputImage);

			//Get raw pixel data of the bitmap
			//The format should match the format of clImageFormat
			BitmapData bitmapData = bmpImage.LockBits( new Rectangle(0, 0, bmpImage.Width, bmpImage.Height),
													  ImageLockMode.ReadOnly, PixelFormat.Format32bppArgb);//inputImage.PixelFormat);

			inputImgStride = bitmapData.Stride;
			inputImgBytesSize = bitmapData.Stride * bitmapData.Height;

			//Copy the raw bitmap data to an unmanaged byte[] array
			inputByteArray = new byte[inputImgBytesSize];
			Marshal.Copy(bitmapData.Scan0, inputByteArray, 0, inputImgBytesSize);

			//Allocate OpenCL image memory buffer
			inputImage2DBuffer = Cl.CreateImage2D(_context, Cl.MemFlags.CopyHostPtr | Cl.MemFlags.ReadOnly, clImageFormat,
												(IntPtr)bitmapData.Width, (IntPtr)bitmapData.Height,
												(IntPtr)0, inputByteArray, out error);
			CheckErr(error, "Cl.CreateImage2D input");
		}

		//Unmanaged output image's raw RGBA byte[] array
		byte[] outputByteArray = new byte[inputImgBytesSize];

		//Allocate OpenCL image memory buffer
		Cl.Mem outputImage2DBuffer = Cl.CreateImage2D(_context, Cl.MemFlags.CopyHostPtr | Cl.MemFlags.WriteOnly, clImageFormat,
													  (IntPtr)inputImgWidth, (IntPtr)inputImgHeight, (IntPtr)0, outputByteArray, out error);
		CheckErr(error, "Cl.CreateImage2D output");

		//Pass the memory buffers to our kernel function
		error = Cl.SetKernelArg(kernel, 0, (IntPtr)intPtrSize, inputImage2DBuffer);
		error |= Cl.SetKernelArg(kernel, 1, (IntPtr)intPtrSize, outputImage2DBuffer);
		CheckErr(error, "Cl.SetKernelArg");

		//Create a command queue, where all of the commands for execution will be added
		Cl.CommandQueue cmdQueue = Cl.CreateCommandQueue(_context, _device, (Cl.CommandQueueProperties)0, out error);
		CheckErr(error, "Cl.CreateCommandQueue");

		Cl.Event clevent;

		//Copy input image from the host to the GPU.
		IntPtr[] originPtr = new IntPtr[] { (IntPtr)0, (IntPtr)0, (IntPtr)0 };	//x, y, z
		IntPtr[] regionPtr = new IntPtr[] { (IntPtr)inputImgWidth, (IntPtr)inputImgHeight, (IntPtr)1 };	//x, y, z
		IntPtr[] workGroupSizePtr = new IntPtr[] { (IntPtr)inputImgWidth, (IntPtr)inputImgHeight, (IntPtr)1 };
		error = Cl.EnqueueWriteImage(cmdQueue, inputImage2DBuffer, Cl.Bool.True, originPtr, regionPtr, (IntPtr)0, (IntPtr)0, inputByteArray, 0, null, out clevent);
		CheckErr(error, "Cl.EnqueueWriteImage");

		//Execute our kernel (OpenCL code)
		error = Cl.EnqueueNDRangeKernel(cmdQueue, kernel, 2, null, workGroupSizePtr, null, 0, null, out clevent);
		CheckErr(error, "Cl.EnqueueNDRangeKernel");

		//Wait for completion of all calculations on the GPU.
		error = Cl.Finish(cmdQueue);
		CheckErr(error, "Cl.Finish");

		//Read the processed image from GPU to raw RGBA data byte[] array
		error = Cl.EnqueueReadImage(cmdQueue, outputImage2DBuffer, Cl.Bool.True, originPtr, regionPtr,
									(IntPtr)0, (IntPtr)0, outputByteArray, 0, null, out clevent);
		CheckErr(error, "Cl.clEnqueueReadImage");

		//Clean up memory
		Cl.ReleaseKernel(kernel);
		Cl.ReleaseCommandQueue(cmdQueue);

		Cl.ReleaseMemObject(inputImage2DBuffer);
		Cl.ReleaseMemObject(outputImage2DBuffer);

		//Get a pointer to our unmanaged output byte[] array
		GCHandle pinnedOutputArray = GCHandle.Alloc(outputByteArray, GCHandleType.Pinned);
		IntPtr outputBmpPointer = pinnedOutputArray.AddrOfPinnedObject();

		//Create a new bitmap with processed data and save it to a file.
		Bitmap outputBitmap = new Bitmap(inputImgWidth, inputImgHeight, inputImgStride, PixelFormat.Format32bppArgb, outputBmpPointer);

		outputBitmap.Save(outputImagePath, System.Drawing.Imaging.ImageFormat.Png);

		pinnedOutputArray.Free();
	}
}
Now you should have a good foundation for more complex image processing effects on the GPU.
How to complement TDD with static analysis
Introduction
TDD is one of the most popular software development techniques. I like this technology in general, and we employ it to some extent. The main thing is not to run to extremes when using it. One shouldn't fully rely on it alone forgetting other methods of software quality enhancement. In this article, I will show you how the static code analysis methodology can be used by programmers using TDD to additionally secure themselves against errors.
TDD is wonderful
Test-driven development (TDD) is a technique of software development based on iteration of very short development cycles. You write a test first which covers the change you want to introduce, then you write a code to pass the test, and finally you carry out refactoring of the new code to meet the corresponding standards. I won't dwell on what TDD is: there exist many articles on this subject which you can easily find on the Internet.
I think it's especially important not to let yourself be carried away by creating numerous tests when using TDD. Tests allow you to show a delusive whirl of activity writing a huge number of code lines per day. But at the same time the product's functionality will grow very slowly. You may spend almost all your effort and time on writing test codes. Moreover, tests are sometimes labor-intensive to maintain when the functionality changes.
That's why we don't use TDD in its pure form when developing PVS-Studio. If we write tests for individual functions, the development time will grow several dozens of times. The reason is this: to call a function expanding a type in typedef or perform some code analysis, we have to prepare quite a lot of input data. We also need to build a correct fragment of the parse tree in memory and fill a lot of structures. All this takes too much time.
We use another technique. Our TDD tests are small C/C++ code fragments marked in a special way. At first we write various situations where certain warnings are to be generated. Then we start implementing the code to detect them. In rough outline, these tests look something like this:
int A() {
            int x;
            return x; //Err
}
This test checks that the program generates a warning about the use of an uninitialized variable. This error doesn't exist at first, of course. We implement the diagnostic and then add new tests for unique situations.
int B() {
            static int x;
            return x; //Ok
}
All is good here, as the variable is a static one.
This is, of course, not a canonical way of using TDD. But it's the result which is important, not the form, isn't it? The idea is the same: we start with a set of tests which are not passed; then implement the diagnostic, write new texts, carry out refactoring, and so on.
TDD in its pure form cannot be used everywhere. For example, such is our case. If you want to use this methodology, but it's not convenient to you, try to look at it from a higher abstraction level. We think we've managed that.
TDD is wonderful but don't go mad about it
If you use a huge number of tests, it may give you a false sense of safety, which makes programmers reduce the code quality control. TDD allows you to detect many defects at the development stage - but never all of them. Don't forget the other testing methodologies.
When studying the source codes of many open-source applications, I constantly notice the same two drawbacks of unit-test usage. TDD does have other ones, but I won't speak on them now. At least, they don't attract my attention that much.
So, these are the two typical problems when making tests:
1) Tests themselves are not tested.
2) Tests don't check rare critical cases.
Writing tests for tests is really too much. But we should keep in mind that a test is a program code too, and errors may occur there as well. There are frequent cases when tests only pretend to check something.
What to do? You should use additional tools for code quality control, at least. These may be dynamic or static code analyzers. They don't guarantee detection of all the errors in tests, of course, but the use of various tools in a complex produces very good results.
For example, I often come across errors in test codes when running PVS-Studio to check a new project. Here is an example taken from the Chromium project.
TEST(SharedMemoryTest, MultipleThreads) {
            ....
            int threadcounts[] = { 1, kNumThreads };
            for (size_t i = 0;
                                     i < sizeof(threadcounts) / sizeof(threadcounts); i++) {
            ....
}
Some of the tests must be launched in one thread and then in several threads. Because of a misprint, the parallel algorithm work is not tested. The error is here: sizeof(threadcounts) / sizeof(threadcounts).
The following principle will to a large extent secure you against mistakes in tests. A freshly written test mustn't be passed: it helps you make sure that the test really checks something. Only after that you may start implementing the new functionality.
However, it doesn't prevent errors in tests all the times. The code shown above won't be passed at first too, since the error is only in the number of parallel threads to be launched.
We have some more examples. A typical mistake when comparing buffers is mixing up pointer sizes and buffer sizes: quite often the pointer size is calculated instead of the buffer size. These errors may look something like this:
bool Test()
{
            char *buf = new char[10];
            FooFoo(buf);
            bool ok = memcmp(buf, "1234567890", sizeof(buf)) == 0;
            delete [] buf;
            return ok;
}
This test works "by half": it compares only the first 4 or 8 bytes. The number of bytes being compared depends on the pointer size. This test may look good and correct but don't trust it.
Another weak point of TDD is absence of tests for critical situations. You can create these tests, of course. But it is unreasonably labor-intensive. For instance, it will take you many efforts to make malloc() return NULL when needed, while its use is very little. The probability of this situation may be lower than 0.0001%. So you have to make a compromise between the tests' fullness and laboriousness of their implementation.
Let's play with numbers a bit. Assume the malloc() function is used 1000 times in the code. Let the probability of memory shortage when calling each of them is 0.0001%. Let's calculate the probability of the memory allocation error when executing the program:
(1 - 0.999999^1000) * 100% = 0.09995%
The memory shortage probability is approximately 0.1%. It's wasteful to write 1000 tests for these cases. On the other hand, 0.1% is not that little. Some users will definitely have them. How to make sure they will be correctly handled?
That's a difficult question. Writing unit-tests is too expensive. Dynamic analyzers are not suitable for the same reasons: they require that you create a situation when the program lacks memory at certain moments. Manual testing goes without mentioning.
There are two ways. You may use special tools returning the error code when calling certain system functions. I never dealt with these systems myself, so I can't say how much simple, efficient and safe they are.
Another way is to use the static code analyzer. This tool doesn't care how often this or that program branch is executed: it checks almost the whole code. The word "almost" means that C/C++ programs may contain "#ifdef" and explicitly disabled branches (through "if(0)") about whose contents we'd better not speak.
Here is an example of a bug detected through static analysis in error handlers:
VTK_THREAD_RETURN_TYPE vtkTestCondVarThread( void* arg )
{
....
if ( td ) <<<---
{
....
}
else
{
cout << "No thread data!\n";
cout << " Thread " << ( threadId + 1 )
<< " of " << threadCount << " exiting.\n";
-- td->NumberOfWorkers; <<<---
cout.flush();
}
...
}
If the error occurs, the message is generated and the variable "td->NumberOfWorkers" gets modified. One mustn't do it because the 'td' pointer equals zero.
Conclusions
This is my summary of the article:
1. TDD is a wonderful technology. You should spend some time on studying it and start using it in your work. If the classic TDD doesn't suit you, don't abandon this methodology right away. Perhaps you will be able to use it if you consider using it a bit differently or at a higher abstraction level.
2. Don't go mad about it. Ideal methodologies don't exist. Tests check far not all the code in practice, and tests themselves are also error-prone. Use other testing methods: load testing, static code analysis and dynamic code analysis.
2D Animation Basics
Introduction
Simply put, 2D animation is movement and transformation of objects on the screen in two dimensions. A good example of 2D animation is classic cartoons – multiple pictures of Mickey Mouse or Donald Duck alternating over time and producing the effect of moving objects. The modern 2D animation software allows creating animation much easier though, without making oodles of frames.
Frames and Keyframes
Just like with classic animation, computer 2D animation also consists of frames. Frame is a single picture of an object illustrating certain position, size and other properties of that object. Adjacent frames are slightly different from each other, so when the animation is played at the full speed – usually 24 frames per second – the effect of motion appears. This is similar to cartoons and movies.
But in computer animation you typically don’t have to draw each and every frame manually. Most of 2D animation software allows you to set up keyframes – frames that specify intermediate positions of an object. The motion of the object between these keyframes is built by the software automatically. So you end up with creating keyframes only, while the animation tool calculates and builds the rest of frames automatically. This process is called interpolation.
Curve Animation
The motion between two keyframes can be different – accelerating, slowing down, steady or even all of these in one move. The simplest way to specify how exactly one keyframe should translate to another is curves. A curve defines how a specific parameter of an object, such as a coordinate or a scale should vary over time.
Let’s take a look at a simple animation example made in one of 2D animation programs – GameDev Animation Studio. We want to make a ball move from up to down and then bounce back.

Basically, this means the vertical coordinate of the object, or simply the Y-coordinate should change from zero (the top of the screen) to the maximum value that corresponds to the bottom of the screen. Then the ball “bounces”, i.e. its form gets distorted in the vertical direction and restored again. After that, the ball moves up, which means the Y-coordinate should decrease back to zero. Also note, that due to gravity, the ball moves down with acceleration, while the backward movement must be decelerating. This is mirrored in the slope of the curve: a sharper slope means faster movement and vise versa.
Position Curve
So the curve describing vertical movement of the ball looks as follows:

As you see, the curve here gradually develops from zero to its maximum, and then, after the peak, it goes back to zero again. The highest value of the curve corresponds to the moment the ball hits the ground – this happens in the 30th frame on the timeline. After that moment, the ball starts moving up.
Zoom Curve
When the ball is just to hit the ground, it starts deforming. Indeed, the ball is elastic, so it kinda must deform. This animation can be done with another curve – the zoom curve. We’ll change the vertical scale (Y-scale) of the ball to reflect the way it gets distorted during the hit.
<div>
 </div>
Above is the Y-scale zoom curve. As you see, prior the 29th frame the curve is at its maximum. This corresponds to the non-deformed ball falling down. In 29th, the curve goes down, and the ball’s image is zoomed down along the vertical axis. Then, after the curve passes the “hit-the-ground” point in 31st frame, the image is zoomed up to normal, so the curve goes up again to its maximum.
Note, that the higher the zoom factor is, the more elastic the ball will look. Thus, experimenting with curves in 2D animation tools is an easy way to find the most spectacular and satisfying animation effects. On the other hand, the classic animation approach would require you to discard all the work already done and start from scratch if you decided to change something.
Adding Details to Animation
Obviously, the ball just moving up and down doesn’t look too realistic, that is why we need a shadow. We should place a shadow picture beneath the ball and use curves to make it look real. Overall, the process is pretty much similar to above steps. We’ll need to scale the shadow and modify its transparency level in accordance with the ball’s movement.
Here is the final result of the jumping ball animation.
Conclusion
Making 2D animation is a piece of cake with proper software. Thanks to automated image transformation between keyframes, curve animation and multiple transition effects, creating an animated picture or a movie can be done in several minutes, even by a beginner.
GameDev.net Open License DRAFT 1
GameDev.net Open License
TERMS AND CONDITIONS FOR USE, REPRODUCTION, AND DISTRIBUTION
1. Definitions.
"Article" shall refer to any body of text written by Author which describes and documents the use and/or operation of Source or describes some process for It specifically does not refer to any
"Author" means the individual or entity that offers the Work under the terms of this License.
"License" shall mean the terms and conditions for use, reproduction, and distribution as defined by Sections 1 through 9 of this document.
"Licensor" shall mean the copyright owner or entity authorized by the copyright owner that is granting the License.
"You" (or "Your") shall mean an individual or entity exercising permissions granted by this License.
"Source" shall include all software text source code and configuration files used to create executable software
"Object" shall mean any Source which has been converted into a machine executable software
"Work" consists of both the Article and Source
"Publisher" refers to GameDev.net LLC
This agreement is between You and Author, the owner and creator of the Work located at Gamedev.net.
2. Fair Dealing Rights.
Nothing in this License is intended to reduce, limit, or restrict any uses free from copyright or rights arising from limitations or exceptions that are provided for in connection with the copyright protection under copyright law or other applicable laws.
3. Grant of Copyright License.
Subject to the terms and conditions of this License, the Author hereby grants to You a perpetual, worldwide, non-exclusive, no-charge, royalty-free, irrevocable copyright license to the Work under the following stated terms:
- You may not reproduce the Article on any other website outside of Gamedev.net without express written permission from the Author
- You may use, copy, link, modify and distribute under Your own terms, binary Object code versions based on the Work in your own software
- You may reproduce, prepare derivative Works of, publicly display, publicly perform, sublicense, and distribute the Source and such derivative Source in Source form only as part of a larger software distribution and provided that attribution to the original Author is granted and that a copy of this License is included.
- The origin of this Work must not be misrepresented; you must not claim that you wrote the original Source. If you use this Source in a product, an acknowledgment of the Author name would be appreciated but is not required.
4. Restrictions.
The license granted in Section 3 above is expressly made subject to and limited by the following restrictions:
- Altered Source versions must be plainly marked as such, and must not be misrepresented as being the original software.
- This License must be visibly linked to from any online distribution of the Article by URI and using the descriptive text "Licensed under the GameDev.net Open License"
- Neither the name of the Author of this Work, nor any of their trademarks or service marks, may be used to endorse or promote products derived from this Work without express prior permission of the Author
- Except as expressly stated herein, nothing in this License grants any license to Author's trademarks, copyrights, patents, trade secrets or any other intellectual property. No license is granted to the trademarks of Author even if such marks are included in the Work. Nothing in this License shall be interpreted to prohibit Author from licensing under terms different from this License any Work that Author otherwise would have a right to license.
5. Grant of Patent License.
Subject to the terms and conditions of this License, each Contributor hereby grants to You a perpetual, worldwide, non-exclusive, no-charge, royalty-free, irrevocable (except as stated in this section) patent license to make, have made, use, offer to sell, sell, import, and otherwise transfer the Work, where such license applies only to those patent claims licensable by such Contributor that are necessarily infringed by their Contribution(s) alone or by combination of their Contribution(s) with the Work to which such Contribution(s) was submitted. If You institute patent litigation against any entity (including a cross-claim or counterclaim in a lawsuit) alleging that the Work or Source incorporated within the Work constitutes direct or contributory patent infringement, then any patent licenses granted to You under this License for that Work shall terminate as of the date such litigation is filed.
6. Limitation of Liability.
In no event and under no legal theory, whether in tort (including negligence), contract, or otherwise, unless required by applicable law (such as deliberate and grossly negligent acts) or agreed to in writing, shall any Author or Publisher be liable to You for damages, including any direct, indirect, special, incidental, or consequential damages of any character arising as a result of this License or out of the use or inability to use the Work (including but not limited to damages for loss of goodwill, work stoppage, computer failure or malfunction, or any and all other commercial damages or losses), even if such Author has been advised of the possibility of such damages.
7. DISCLAIMER OF WARRANTY
THE SOFTWARE IS PROVIDED "AS IS", WITHOUT WARRANTY OF ANY KIND, EXPRESS OR IMPLIED, INCLUDING BUT NOT LIMITED TO THE WARRANTIES OF MERCHANTABILITY, FITNESS FOR A PARTICULAR PURPOSE AND NONINFRINGEMENT. IN NO EVENT SHALL THE AUTHORS OR COPYRIGHT HOLDERS BE LIABLE FOR ANY CLAIM, DAMAGES OR OTHER LIABILITY, WHETHER IN AN ACTION OF CONTRACT, TORT OR OTHERWISE, ARISING FROM, OUT OF OR IN CONNECTION WITH THE SOFTWARE OR THE USE OR OTHER DEALINGS IN THE SOFTWARE.
8. Publisher.
The parties hereby confirm that the Publisher shall not, under any circumstances, be responsible for and shall not have any liability in respect of the subject matter of this License. The Publisher makes no warranty whatsoever in connection with the Work and shall not be liable to You or any party on any legal theory for any damages whatsoever, including without limitation any general, special, incidental or consequential damages arising in connection to this license. The Publisher reserves the right to cease making the Work available to You at any time without notice
9. Termination
This License and the rights granted hereunder will terminate automatically upon any breach by You of the terms of this License. Individuals or entities who have received Deriviative Works from You under this License, however, will not have their licenses terminated provided such individuals or entities remain in full compliance with those licenses. Sections 1, 2, 6, 7, 8 and 9 will survive any termination of this License.
Subject to the above terms and conditions, the license granted here is perpetual (for the duration of the applicable copyright in the Work). Notwithstanding the above, Licensor reserves the right to release the Work under different license terms or to stop distributing the Work at any time; provided, however that any such election will not serve to withdraw this License (or any other license that has been, or is required to be, granted under the terms of this License), and this License will continue in full force and effect unless terminated as stated above.
The Game Development Library (GDL) Project
Every game developer on this planet is entitled to the very best learning and resource information on their craft.. and this information needs to be free to use and easily accessible.
The community needs your help to build this resource library.
As a developer of any skill level sharing just one tip or one technique that you have learned can help thousands of others become better. Even beginners can share information that is of use to other beginners! We created the Game Development Library (GDL) Project as a way to capture in one place all the great articles and helpful bits of information available online related to making games.
Literally thousands of great articles on game development are scattered on blogs throughout the net and you'll never know about them. Or even worse, if those blogs go offline they'll be lost forever. Join us in building up our library of both new articles and republished information.
The foundation of our project is sharing. I have a two year old son named Josh that loves his Buzz Lightyear action figure. He is also very protective of that toy and I know that it takes a bit of explaining to get him to understand the concept of sharing. To understand sharing I think it takes an understanding of what it's like to not have what you want or need sometimes.. to have empathy for others. Josh still doesn't quite understand why he needs to share, but he knows it's a good thing to do because mom and dad said so.
This is where you come in. You know what it's like to struggle and I'm sure there are still future challenges to solve that could use a little help from your peers. Every programmer stands on the shoulders of countless people whose work got them to where they are today.
Make sharing your mantra, and do it without fear. So many developers think they aren't enough of an expert to put your work out there. That's absolutely not true. Every single person has some level of experience they can share with others.
Many of the ideas that drive game development come in cycles and get recycled and refined over and over again. In fact, we have articles in our existing archive that still get widely used today. Techniques that you have picked up can be used again by other developers.
If you want to join our effort, read more about how to publish articles on Gamedev.net.
Pac-Man: Zero To Game.
The Tools
Prequisite
As a programmer, before jumping into this tutorial, here are a few things you should know:
- Understand core-programming concepts
- Understand basic input
- Understand basic game loop
Tools used by the author
- FlashDevelop 4.0
- Flash CS 5.5 for graphics
Introduction
Good day reader, today we are going to be building PAC-MAN, an iconic game released in 1980. We will be covering setting up the classic pac-man grid, tossing in the player and ghosts, and by the end of this tutorial we well have a fully working PAC-MAN game.
I will be using Actionscript 3.0 and FlashDevelop to demonstrate building this game. I do this because Flash takes care of input, graphics, and sound. I will attempt to keep the code that is tossed out in this article to be easily translatable into any other programming language. The game, tile, and unit classes are nearly completely self-contained. It will be up to the user to modify their main game loop to process the input, and update functions for the game board. Flash also has built in animation and sprite classes. Other languages will require writing supplimentary classes to support these extra functions.
Please note that this is my first article and I apologize if I did not explain everything as clearly as possible.
The Result
Pacman Game
This is what you can expect to have after following this tutorial.
The Grid
The very first thing when building PAC-MAN is to think about how you will represent the game's world. PAC-MAN is a very simple world. The world consists of a series of tiles where most tiles contain a pellet. Once all the pellets are eaten we reset the grid.
We will use a 1D array to represent our tiles:
package  {
	//Import some librarys from flash that we will need.
	import flash.display.Bitmap; //For Images
	import flash.display.Sprite; //A sprite is essentially a container object for drawable objects.
	public class Game { //We will call this class Game, it will be responsible for controlling the entire game.
		public static const TileWidth:Number = 32.0; //Each tile will be 32 pixels wide.
		public static const TileHeight:Number = 32.0; //Each tile will be 32 pixels high.
		public var m_Tiles:Array = []; //The array for containing all of our Tiles.
		public var m_Width:int  //How many tiles wide is the grid.
		public var m_Height:int; //How many tiles high is the grid.
		public var m_Sprite:Sprite = new Sprite(); //We have our own sprite for drawing into, this will also be helpful for translating the camera around the player later.

	}
};
now, we need to know what type of information that the tile should contain. Since the game class is going to be responsible for the Player, and the Ghosts, this means that the Tile doesn't have to be directly responsible for other objects navigating from tile to tile. So what we do need to know is: is the tile passable? Does the tile have a pellet? What type of pellet is it? We have two types of pellets, the standard editable one, and the pellets that give us the ability to eat ghosts. So the tile has to not only tell us if it has a pellet, it also has to tell us what type.
To make life easier for us, we will also keep track of where the tile is in the array, by giving it an field for identifying it's index position. The tile should also be responsible for how it's drawn, this isn't strictly neccesary. However by giving it information on how it should be drawn, we allievate the responsibility from the game class.
package  {
	//Import some librarys to allow the tile to control it's own rendering.
	import flash.display.Bitmap;
	import flash.display.Sprite;
	public class Tile {
		//We require 4 boolean values, is the tile closed, does it have a pellet, is that pellet big. and when reseting the tile, we need to know if we should give it a pellet.
		//Insead of using 4 variables, we instead use 4 bits from an int variable, and use bit-wise operations to check the flags.

		//So we statically define each flag, and the bit that represents flag.
		public static const CLOSED:int = 1;       //Used to tell if the tile is passable or not.
		public static const HASPELLET:int = 2;    //Used to check if the tile currently has a pellet or not.
		public static const HASBIGPELLET:int = 4; //Used to check if the pellet is a normal pellet, or a pellet that allows us to eat the ghosts.
		public static const NOPELLET:int = 8;     //An additional flag, that allows the tile to be open, but allows us to not to give it a pellet when we don't have to.
		public var m_Flag:int;  //The flag used for representing the tile's current state.
		public var m_Sprite:Sprite = new Sprite(); //The sprite that well be used for rendering the tile.
		public var m_Index:int; //The index of the tile, in the game tile array.

		public function Tile(Flag:int, i:int){ //The constructor for the tile, we pass the starting flag, and the index position.
			m_Flag = Flag;
			m_Index = i;
		}

	}

}
So now that we have the tile well defined we can go back to our game class and begin to define some methods to generate the grid. Since the grid does not have to change, we can construct the tile array in the game class constructor:
public class Game{
	... //The ... represents the code segment from above.

	public function Game(S:Sprite){ //Defining the constructor for the game object, we also want to pass a sprite that we will use for drawing into.
		//To start off, we are going to generate a 10x10 grid.
		m_Width = 10;
		m_Height= 10;
		//If you are using another language, this would be where you would define the size of the array.
		for(var i:int = 0; i < m_Width*m_Height; i++) m_Tiles[i] = new Tile(0, i); //we define each initial tile as open
		//Let's close a few tiles, so we can demonstrate the rendering capabiltys of tiles which are closed off:
		//To calculate a tile based on an x, and y position, we simply use the following formula: Tile = x+y*m_Width;
		m_Tiles[11].m_Flag|=Tile.CLOSED; //Let's close the tile at 1,1 on the grid, which is Tile = 1+1*10 = 11
		m_Tiles[12].m_Flag|=Tile.CLOSED; //Let's also close the tile next to 1,1 at 2,1.  which is Tile = 2+1*10 = 12;
		m_Tiles[21].m_Flag|=Tile.CLOSED; //Let's close a couple tiles undeaneath the above two tiles, 1,2 and 2,2 which is Tile = 1+2*10 = 21
		m_Tiles[22].m_Flag|=Tile.CLOSED; //Tile = 2+2*10 = 22


		CalculateSprites(); //Now let's figure out how to draw the tiles.
		for(int i=0;i<m_Width*m_Height;i++) m_Sprite.addChild(m_Tiles[i].m_Sprite); //Add all the tiles to our sprite.
		S.addChild(m_Sprite); //then let's add our sprite to the parent sprite.
	}
};
Now you are probably asking, what is CalculateSprites()? Good question. But before we lay it out, we need to define a helper function for figuring out neighbor tiles. If i were to say "Hey, i'm tile #10, what's the tile to my right?" we need to be able to say "Let me check, I see that the tile on your right is #11."
public class Game{
	...
	//We need a couple helper functions for determing the position of the tile in screen coordinates.
	public function GetTileX(T:Tile):Number {
		return (T.m_Index % m_Width) * TileWidth; //we need to find the x position of the tile in the grid, so we take the index, and mod it against the width of the grid, to get the screen position, we multiply by each tile's size(defined above.)
	}

	public function GetTileY(T:Tile):Number {
		return (int) (T.m_Index / m_Width) * TileHeight; //we need to find the y position of the tile in the grid, so we take the index, and divide if against the width of the grid, why divide by width, because our formula for calculating an x/y to tile index is: x+y*m_Width, as such, we to get back to a y position, we need to divide by width, not height.
		//we also need to truncate the value to the floored integer value, otherwise we won't get a real number for y.  since we want the floored number, simply typecasting to int drops the decimals after division.
	}

	//A few things we pass to the function, the Tile that we want to find the neighbors for.
	//the x and y distance we want to translate around, for example -1,0 is left, 1,0 is right, 0,-1 is above, and 0,1 is below.
	//Finally, should we wrap the value and get the tile on the other side, or should we say that we are a border tile?
	public function GetTileNeighbor(T:Tile, xd:int, yd:int, wrap:Boolean):Tile {
		var TileX:int = T.m_Index % m_Width + xd; //Let's calculate the target tile's x position, we take our index and mod it against the total width of the world, finally we add the x distance we want to travel.
		var TileY:int = T.m_Index / m_Width + yd; //Let's calculate the target tile's y position, we take our index, and divide it gainst the total width of the world.  why the width, because our function for caluclating tiles is: x+y*m_Width, so we natually have to divide by width to get the y position, we also neet to truncate the value to the floored whole integer.  finally we add the y distance we want to travel.
		if (wrap) { //If we want to wrap to the other side of the grid, then we check this boolean.
			if (TileX < 0) TileX += m_Width; //if our target x position is less than 0, we add the width to it, and that well place us on the other side of the grid.
			else if (TileX >= m_Width) TileX -= m_Width; //if we are however are greather than, or equal to the width of the world, then we need to subtract to get to the other side of the grid.
			if (TileY < 0) TileY += m_Height; //We do the same as above for y, but instead we use the height instead of width.
			else if (TileY >= m_Height) TileY -= m_Height;
		}else{ //We don't want to wrap around the world, so if the target tile is outside the grid boundarys, we need to return a null tile.
			if (TileX < 0) return null;
			else if (TileX >= m_Width) return null;
			if (TileY < 0) return null;
			else if (TileY >= m_Height) return null;
		}
		return m_Tiles[TileX + TileY * m_Width]; //now that we've found a target tile, and it is valid, we can return it.
	}
	//This function can crash if xd, or yd is >= width/height, and wrap is set to true.  however we will never have to supply such large value's, so their's no reason to worry about such a thing.
};
Now that we can figure out the tile that is next to another tile, we now want to figure out how each tile is suppose to draw itself. As such, this is why we define calculateSprite(); This function serves no gameplay purpose. It is only for the asthetics of the game. The game will still enforce boundaries even if we didn't draw them.
What about the walls!? It's not really fun to play pac-man and have no idea where the walls are. This is why we need to tell the tile how it's suppose to draw itself.
There's a few things that we need to assume: first we assume that every closed tile has at least one neighbor that is also closed. Why do we have to have a closed neighbor? That's how the original pac-man is built. Second of all, by making this assumption we only need 3 images for creating a good looking grid:

The first one is a solid bar, used for when both the left and right tiles are also closed. The second one is for when the right tile is closed and the left tile is not closed (this is why we need to assume we always have a neighbor). Finally, the third image is for when the left tile is closed and the right tile is open (again we assume we have at least one closed neighbor).
The reason we don't create flipped versions of 2+3 is because we place the images clockwise around the tile. Because we are rotating in a defined direction we don't need the other sides.
Onto writing the function!
public class Game{
	...
	//In flash, we need to embed resources as variables, and create a generic class that is the resource(in this instance we create 3 bitmaps).
	//If you are using another language, think of these as textures, and make sure to only load them once.
	//If you are using flashdevelop, make sure the objects are added to the library correctly, an explanations on how to link resources to the game is outside the scope of this article.
	[Embed(source="../lib/Bar_A.png")] //#1
	private var Bar_ASprite:Class;
	[Embed(source="../lib/Bar_B.png")] //#2
	private var Bar_BSprite:Class;
	[Embed(source="../lib/Bar_C.png")] //#3
	private var Bar_CSprite:Class;

	//to make the code look a little bit more fluent, we define a helper function for translating bitmaps when they are attached to the tiles.
	public function ApplyTranslation(B:Bitmap, Rotation:Number, x:Number, y:Number):Bitmap {
		B.rotation = Rotation; //Rotations are in degrees.
		B.x = x; //apply translations to the bitmap for rendering.
		B.y = y;
		return B; //Return this bitmap, using this function, makes writing one liner's in the calculateSprite easier.
	}

	//This is the heavy duty rendering function:
	public function CalculateSprites():void {
		for (var i:int = 0; i < m_Width * m_Height; i++) {//Loop through all the tiles.
			var T:Tile = m_Tiles[i]; //Create a local variable of the tile, this is purely to write a bit less.
			if ((T.m_Flag&Tile.CLOSED)!=0) { //We check if this tile is closed, if so, then we want to attach some borders to it.
				var LeftTile:Tile  = GetTileNeighbor(T, -1, 0, false); //Let's get the left tile.
				var RightTile:Tile = GetTileNeighbor(T,  1, 0, false); //Right tile
				var TopTile:Tile   = GetTileNeighbor(T,  0,-1, false); //Above tile
				var BtmTile:Tile   = GetTileNeighbor(T,  0, 1, false); //Below tile.

				//We need to know which side's to add bar's to.
				var BarLft:Boolean = (LeftTile  != null && (LeftTile.m_Flag  & Tile.CLOSED) == 0); //Check that the tile is not null, then check that it isn't closed.
				var BarRgt:Boolean = (RightTile != null && (RightTile.m_Flag & Tile.CLOSED) == 0); //" "
				var BarTop:Boolean = (TopTile   != null && (TopTile.m_Flag   & Tile.CLOSED) == 0); //" "
				var BarBtm:Boolean = (BtmTile   != null && (BtmTile.m_Flag   & Tile.CLOSED) == 0); //" "

				//Now we need to select an appropiate bitmap, since we are rendering clockwise.
				var TopBar:Bitmap = BarTop?(BarLft?new Bar_CSprite():(BarRgt?new Bar_BSprite():new Bar_ASprite())):null;
				//If you are not familar with the ? symbol, here's what the above logic comes out to:
				//var TopBar:Bitmap;
				//If(BarTop==true){
				//	if(BarLft==true)      TopBar = new Bar_CSprite();
				//	else if(BarRgt==true) TopBar = new Bar_BSprite();
				// else                   TopBar = new Bar_ASprite();
				//}else                   TopBar = null;
				//So, basically what this boils down to is: if we need to draw a bar on the top, then which one to choose?:
				//if we are also drawing a bar on the left, then we know that the left bar is going to choose to draw Bar #2
				//however, if we are instead drawing a bar on the right, then we know that the bar on the right is going to pick #3
				//and finally, if both left and right are not going to be drawn into, then we know both our neighbors are closed, so we select #1


				var BtmBar:Bitmap = BarBtm?(BarRgt?new Bar_CSprite():(BarLft?new Bar_BSprite():new Bar_ASprite())):null; //Repeat the above logic with the rest of the bitmaps.
				var LftBar:Bitmap = BarLft?(BarBtm?new Bar_CSprite():(BarTop?new Bar_BSprite():new Bar_ASprite())):null;
				var RgtBar:Bitmap = BarRgt?(BarTop?new Bar_CSprite():(BarBtm?new Bar_BSprite():new Bar_ASprite())):null;
				if (TopBar != null) T.m_Sprite.addChild(ApplyTranslation(TopBar,  0.0,   0.0,  0.0)); //If we have a bar to draw, we need to translate it to be placed correctly on the tile, we then add the bitmap to the tile's sprite container.
				if (BtmBar != null) T.m_Sprite.addChild(ApplyTranslation(BtmBar, 180.0, 32.0, 32.0)); //See below for an explanation for why we choose our x and y treanslations.
				if (LftBar != null) T.m_Sprite.addChild(ApplyTranslation(LftBar, 270.0,  0.0, 32.0));
				if (RgtBar != null) T.m_Sprite.addChild(ApplyTranslation(RgtBar,  90.0, 32.0,  0.0));
			}
			T.m_Sprite.x = GetTileX(T); //Now we need to position the tile at the correct position for the screen.
			T.m_Sprite.y = GetTileY(T); //Do the same for the y.
		}
	}
};
Now you are probably asking, why are we doing such weird translation values for different sides of the bar? Here's an image that hopefully explains it better:
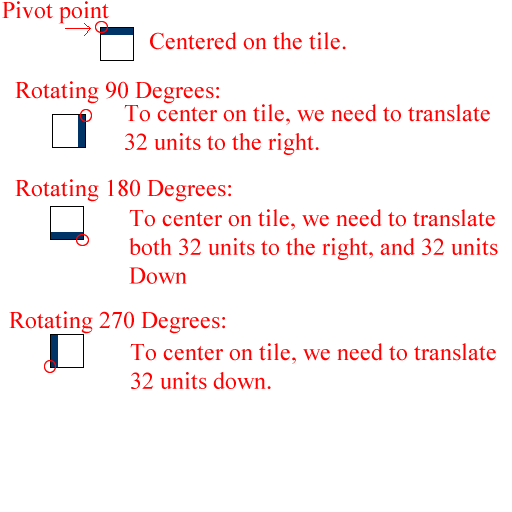
So with that taken care of we need to now setup our Main class to get the entry point for our game, and actually get everything drawing:
package {
	import flash.display.Sprite;

	public class Main extends Sprite {
		public var m_Game:Game = null; //Because we are going to be using callbacks later, we make this a public variable.

		//If you are using another language, this is our entry point/
		public function Main():void {
			m_Game = new Game(this); //Now we create an instance of the game.
		}
	}
};
With that little bit of code, we should now see:

Looks ok, but we need to add a border around the grid. So let's go back to our game constructor:
public class Game{
	...

	public function Game(S:Sprite){
        ...
        //for(var i:int = 0; i < m_Width*m_Height; i++) m_Tiles[i] = new Tile(0, i); //change this line into:
        for(var i:int = 0; i < m_Width*m_Height; i++) m_Tiles[i] = new Tile(((i % m_Width) == 0 || (i % m_Width) == (m_Width - 1) || ((int)(i / m_Width)) == 0 || ((int)(i / m_Width)) == (m_Height - 1))?Tile.CLOSED:0, i);
		//The above code sets the entire border around the map to be closed.
        ...
	}
};
With this change, we should now be looking at:
Now we have a basic grid, and things are beginning to come together. So let's move onto adding the pellets:
public class Game{
	...
	public var m_TotalPellets:int; //We need to track the total number of pellets.
	public var m_EatenPellets:int; //We need to track the number of eaten pellets.
	...
	//We need to embed two new bitmaps, the pellet, and the BigPellet.  the BigPellet is our ghost eating pellet.
	[Embed(source = "../lib/Pellet.png")]
	private var PelletSprite:Class;
	[Embed(source = "../lib/BigPellet.png")]
	private var BigPelletSprite:Class;

	//Add a function for building the pellet's for each tile.
	public function ResetPellets():void {
		//Reset both values to 0.
		m_TotalPellets = 0;
		m_EatenPellets = 0;
		for (var i:int = 0; i < m_Width * m_Height; i++) { //Loop through all the tiles.
			var T:Tile = m_Tiles[i]; //Make a variable to represent the tile.
			if ((T.m_Flag & (Tile.CLOSED|Tile.NOPELLET)) == 0) { //We check that the tile can have a pellet(that their is no NOPELLET flag set), and that it isn't a closed tile.
				//Now we add a pellet image to the tile, we also check if we need to add a big pellet, or a regular pellet.
				if((T.m_Flag&Tile.HASPELLET)==0){
					//Because this function could be called when all the tile's haven't been eaten, we need to check if it's ok to add the sprite onto the tile.
					T.m_Sprite.addChild((T.m_Flag&Tile.HASBIGPELLET)==0?new PelletSprite():new BigPelletSprite());
				}
				m_TotalPellets++; //Incrment the total number of pellets.
				T.m_Flag |= Tile.HASPELLET; //Make the tile so that we will know it has a pellet.
			}
		}
		return;
	}

	public function Game(S:Sprite){
		...
		...CalculateSprites(); //Include after this line:
		ResetPellets();
		...
	}
};
With the above changes, our grid should now look like:
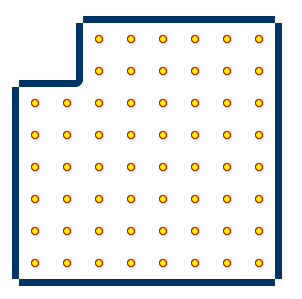
It's looking pretty good, so now let's add a player to our game!.
The Player
So, now that we have our grid, we want to add a player.
The first thing to think about with a player, is that the player should simply be an extension of the ghosts, rather than making a unique class for each.
Let's call this new class Unit
package{
	import flash.display.MovieClip;
	import flash.display.Sprite;

	public class Unit{
		//Define some constants for directions.
		public static const DIR_LEFT:int = 0;
		public static const DIR_UP:int = 1;
		public static const DIR_RIGHT:int = 2;
		public static const DIR_DOWN:int = 3;
		public var m_Tile:Tile; //Get the current tile we are on.
		public var m_Sprite:MovieClip; //The animation movie clipe for the sprite(note that if you are using another language, you will have to provide your own animation system.)
		public var m_Direction:int = DIR_LEFT; //The direction we are facing.

		//Constructor for a unit, we provide the tile it's on, the Game, and the movieclip representing the object.
		public function Unit(T:Tile, Gm:Game, MC:MovieClip){
			m_Tile = T;
			m_Sprite = MC;
			m_Sprite.x = Gm.GetTileX(m_Tile) + Game.TileWidth * 0.5; //We add an offset, because the movieclip is centered at it's orgin, instead of the top left, we need to add half the MC's width to the sprite's position(note that the MC size should be equal to the TileWidth defined in Game.)
			m_Sprite.y = Gm.GetTileY(m_Tile) + Game.TileHeight * 0.5; //Again, set the sprite's position, relative to the parent sprite.
		}


	}
};
Alright now we have the basic outline of the unit, so let's add them to the game class:
public class Game{
	...
	public var m_Units:Array = []; //The array for containing all of our units.
	...
	public function Game(S:Sprite){
		...m_Tiles[22].m_Flag|=Tile.CLOSED;
		m_Units[0] = new Player(m_Tiles[55], this, new Player());
		//we select a tile at 5,5 to place our player, and we select the Player MC.
		//Note that Player is a class inside the Player.swc file, when it's included in the flash library, the class is made available for creating
		//Movieclips, this part can be a bit confusing if translating into a language that doesn't have a library system the way flash works.
		//Essentially you would pass a player animation sprite from w/e you are using for your animation system.
		...
		...for (i = 0; i < m_Width * m_Height; i++) m_Sprite.addChild(m_Tiles[i].m_Sprite); //Add after this line:
		for(i = 0; i < m_Units.length; i++) m_Sprite.addChild(m_Units[i].m_Sprite); //Add all the units to our sprite.
		...
	}

};
With the above changes, we should now see:
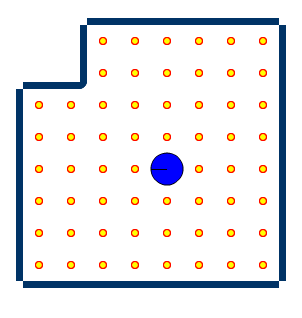
Yipee! Now we have our player, but he's not doing very much.
It's time to get into the nitty gritty of what needs to be done:
public class Game{
	...

	//The Update function, where our entire game logic is handled:
	public function Update():Boolean { //We will return a boolean, later we can use this to determine if the game is over.
		var i:int;
		for (i = 0; i < m_Units.length; i++) m_Units[i].Update(this); //We'll get to this function later, but each unit well control updating itself.
		return false; //Game is not over yet!
	}
};
So now we have an outline of our Update function in Game. Now we need to make a few changes to our main class:
package{
	...
	import flash.events.Event;
	public class Main{
		...
		//Update callback function in flash.
		public function UpdateFunc(E:Event):void{
			m_Game.Update()
			return;
		}
		...
		public function Main():void{
			...m_Game = new Game(this); //Add after this line:
			stage.addEventListener(Event.ENTER_FRAME, UpdateFunc); //Set callback for updating, this function well get called at a rate equal to the number of frames per second the swf is set to play at.
			//Note that if this is being translated to another language, you can alternativly start your main game loop here, just be sure to call UpdateFunc inside your time-step code.
		}
	};
}
We are almost ready to see our little pac-man walking across the screen, but first we need to add an update function to our Unit's.
In order for the unit to go anywhere, we are also going to define a few things:
public class Unit{
	...
	public static const MaxTicks:int = 10; //The number of frames(or times that update will be called) that it will take to move to another tile, I short hand this to calling it tick, instead of frames.  since we assume the game well run at 60 frames(or ticks) per second.  Then that means we move from one tile to another every 1/6th a second.
	public static const MaxFrames:int = 30; //The number of frames that a particular segment of animation length.
	public var m_Tick:int = 0; //The current tick, once we are >= to MaxTicks we will have moved to another tile.

	//Unit Update function!
	public function Update(Gm:Game):void {
		//Figure out which way we are heading:
		var TarX:int = (m_Direction == DIR_LEFT? -1:(m_Direction == DIR_RIGHT?1:0));
		//This code boils out to being:
		//public var TarX = 0;
		//if(m_Direction==DIR_LEFT) TarX = -1;
		//else if(m_Direction==DIR_RIGHT) TarX = 1;
		var TarY:int = (m_Direction == DIR_UP  ? -1:(m_Direction == DIR_DOWN?1:0));
		var TarTile:Tile = Gm.GetTileNeighbor(m_Tile, TarX, TarY, false);//We will deal with wrapping later, for now we get our target tile!
		if (TarTile != null && (TarTile.m_Flag & Tile.CLOSED) == 0) { //Check that the target is a valid file.
			m_Tick++; //Increment our ticks.
			if (m_Tick >= MaxTicks) { //We are on, or exceeding the target ticks.
				m_Tick = 0; //Reset ticks
				m_Tile = TarTile; //Set us on the target tick.
			}
		}else m_Tick = 0; //If the target is null, or is closed, then we reset the ticks.
		var Percent:Number = m_Tick / MaxTicks; //We get a percentage we have moved from the our tile, toward the target.
		var CurrentTileX:Number = Gm.GetTileX(m_Tile); //Get our tile x.
		var CurrentTileY:Number = Gm.GetTileY(m_Tile); //Get our tile y.
		var TargetTileX:Number  = Gm.GetTileX(TarTile); //Get target tile x.
		var TargetTileY:Number  = Gm.GetTileY(TarTile); //Get target tile y.
		m_Sprite.x = CurrentTileX + (TargetTileX - CurrentTileX) * Percent + Game.TileWidth * 0.5; //Move our x position as a percentage of distance between the current tile, and the target tile.
		m_Sprite.y = CurrentTileY + (TargetTileY - CurrentTileY) * Percent + Game.TileHeight * 0.5; //Move our y position as a percentage of distance between the current tile, and the target tile.
		var FirstFrame:int = m_Direction * 30 + 1; //Calculate the first frame.
		var LastFrame:int = (m_Direction + 1) * 30; //Calcuate the last frame in the animation segment.
		//Note that the animation in the Player swf is made in diffrent segments of 30 frames, each segment lines up with the Direction variable. (i.e frames 1-30 are for when the player is facing left, 31-60 up, 61-90 right, 91-120 down)
		if (m_Sprite.currentFrame < FirstFrame || m_Sprite.currentFrame >= LastFrame) { //If our animation frame is outside the segment, set it back to the target segment:
			m_Sprite.gotoAndPlay(FirstFrame); //Let's goto and play our first frame.
		}
		return;
	}
};
So with these changes, you should now see:
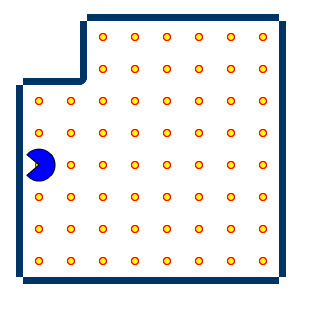
Yea, we are moving...forward.
So let's get it so that we can now move around, and change direction:
public class Main{
	...
	//Setup several key flags, so we can change direction:
	public static const LeftFlag:int  = 1;
	public static const UpFlag:int    = 2;
	public static const RightFlag:int = 4;
	public static const DownFlag:int  = 8;
	public var m_KeyFlag:int = 0; //Key flag, for representing our target direction.

	public function UpdateFunc(E:Event):void{
		...m_Game.Update(); //Add after this line:
		//Set our player's direction, we assume that he is Unit 0.
		if      ((m_KeyFlag & LeftFlag)  != 0) m_Game.m_Units[0].SetDirection(Unit.DIR_LEFT);
		else if ((m_KeyFlag & UpFlag)    != 0) m_Game.m_Units[0].SetDirection(Unit.DIR_UP);
		else if ((m_KeyFlag & RightFlag) != 0) m_Game.m_Units[0].SetDirection(Unit.DIR_RIGHT);
		else if ((m_KeyFlag & DownFlag)  != 0) m_Game.m_Units[0].SetDirection(Unit.DIR_DOWN);

	}

	//SetKey callback:
	public function SetKey(Key:String, Down:Boolean):void {
		//Evaluate if the key is a valid one, and then modify the appropiate flag.
		if (Key == 'a')      m_KeyFlag = Down?(m_KeyFlag | LeftFlag)  : (m_KeyFlag & ~LeftFlag);
		//The above boils down to:
		// if(Down) m_KeyFlag |= LeftFlag;
		// else m_KeyFlag &= ~LeftFlag;

		else if (Key == 'w') m_KeyFlag = Down?(m_KeyFlag | UpFlag)    : (m_KeyFlag & ~UpFlag);
		else if (Key == 'd') m_KeyFlag = Down?(m_KeyFlag | RightFlag) : (m_KeyFlag & ~RightFlag);
		else if (Key == 's') m_KeyFlag = Down?(m_KeyFlag | DownFlag)  : (m_KeyFlag & ~DownFlag);
	}

	//KeyUp callback:
	public function KeyUp(KeyEvent:KeyboardEvent) {
		//We need to set the key appropiate key flag, for when changing directions.
		SetKey(String.fromCharCode(KeyEvent.charCode), false);
		return;
	}
	//KeyDown callback:
	public function KeyDown(KeyEvent:KeyboardEvent) {
		SetKey(String.fromCharCode(KeyEvent.charCode), true);
		return;
	}
	...

	public function Main():void {
		...stage.addEventListener(Event.ENTER_FRAME, UpdateFunc); //add afterL
		//Add Keyboard callbacks
		stage.addEventListener(KeyboardEvent.KEY_UP, KeyUp);
		stage.addEventListener(KeyboardEvent.KEY_DOWN, KeyDown);
	}
}
You might be wondering why we don't change directions right in the keyUp/Down functions, but i'll get to that after we modify the unit class so that the unit can change directions:
public class Unit{
	...
	public var m_TarDirection:int = DIR_LEFT; //The target direction for changing.

	public function Update(Gm:Game):void{
		...m_Tile = TarTile //Add after this line:
		ChangeDirection(Gm); //Change our direction if we can/have to.
		...modify the }else m_Tick = 0; To:
		}else{
			m_Tick = 0;
			ChangeDirection(Gm); //Change our direction.
		}
	}

	//Change the direction if we can.
	public function ChangeDirection(Gm:Game):void {
		if (m_TarDirection == m_Direction) return; //If we are already facing our target direction, then return.
		var TarX:int = (m_TarDirection == DIR_LEFT? -1:(m_TarDirection == DIR_RIGHT?1:0)); //Get the target x distance.
		var TarY:int = (m_TarDirection == DIR_UP? -1:(m_TarDirection == DIR_DOWN?1:0)); //Get the target y distance.
		var TarTile:Tile = Gm.GetTileNeighbor(m_Tile, TarX, TarY, false); //Get the target tile, we'll handle wrapping later.
		if (TarTile != null && (TarTile.m_Flag & Tile.CLOSED) == 0) m_Direction = m_TarDirection; //Valid direction, so let's head that way.
		m_TarDirection = m_Direction; //Reset the target direction.
		return;
	}

	//Set the target direction.
	public function SetDirection(Dir:int):void {
		m_TarDirection = Dir;
		return;
	}
};
With these changes, you should now be able to move around:
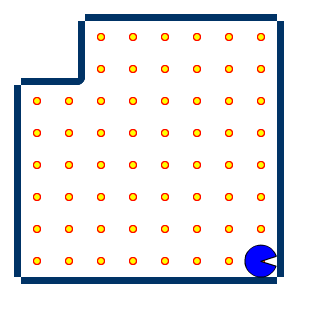
So, why didn't we change the direction in the keyDown/Up callback? this is because we only want to change our direction when our player is at 0 ticks. Otherwise what would happen if it's 9/10th the way to the next tile, and the user changes directions. Suddently their's a radical shift in the players position.
Ok, you might be saying. Then why not only allow changing when say we have moved less than two ticks? Good question. But now that means their are 8/10 ticks where input is meaninless, so instead we just capture the state of the key. We then keep trying to change directions. This creates smooth and responsive input, and doesn't allow for any jittering to occur.
So, now we want to eat those pesky pellets, let's get back in there:
public class Unit{
	...
	public function Update(Gm:Game):void{
		...m_Tile = TarTile; //Add after this line:
		Gm.EatPellet(m_Tile); //Let's eat the pellet on our current tile.
	}
}
Look at that, now we are eating pellets! Whats that? "What's the EatPellet" method? Ok, i suppose we could check it out:
public class Game{
	...
	public function EatPellet(T:Tile):void{
			if ((T.m_Flag & Tile.HASPELLET) != 0) { //Check that we have a pellet.
				T.m_Sprite.removeChildAt(T.m_Sprite.numChildren - 1); //Since the pellet is the last child, then we need to remove it from being drawn.
				T.m_Flag ^= Tile.HASPELLET; //Remove the pellet flag, so we can't eat this tile's pellet.

				m_EatenPellets++; //Increment our eaten pellets.

			}
			return;
	}
};
Finally those pesky pellets are now edible!
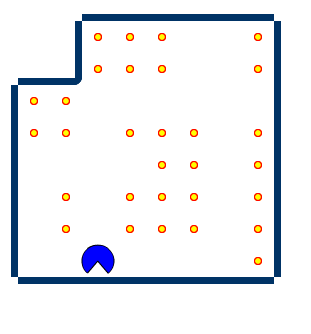
Alright so what happens when we eat all those pellets? we should restart then.
public class Game{
	...
	public static const PlayerSpawnTile:Number = 55; //Constant of where to player the player on spawn.
	public var m_Finished:Boolean; //Used for re-setting the player.

	public function Update():Boolean {
		...for (i = 0; i < m_Units.length; i++) m_Units[i].Update(this); //add after this line:
		if (m_Finished) ResetPlayer();
		return false;
	}

	public function EatPellet(T:Tile):void {
		...m_EatenPellets++; //add after this line
		if (m_EatenPellets == m_TotalPellets) {
			m_Finished = true;
			ResetPellets();
		}
		return;
	}

	//Reset Player function:
	public function ResetPlayer():void {
		for (var i:int = 0; i < m_Units.length; i++) { //Reset units.
			m_Units[i].m_Tile = m_Tiles[PlayerSpawnTile]; //Set tile to player position.
			m_Units[i].m_Tick = 0; //Reset ticks
			m_Units[i].m_Direction = m_Units[i].m_TarDirection = Unit.DIR_LEFT; //Reset direction
		}
		m_Finished = false;  //Reset finished flag.
		return;
	}

	public function Game(Gm:Game){
		...ResetPellets(); //Add after this line
		ResetPlayer(); //Setup the player.
	}
};
So now we can go around, and eat all the pellets, and then get some more pellets to eat when we've eaten all the existing pellets!
Alright now let's make this look like a real pac-man board:
public class Unit{

	//Ranged rectangle tile flag setting, helps with creating the grid alot easier.
	public function SetTileFlagRange(x:int, y:int, w:int, h:int, flag:int):void {
		for (var ix:int = x; ix < x + w; ix++) {
			for (var iy:int = y; iy < y + h; iy++) m_Tiles[ix + iy * m_Width].m_Flag = flag;
		}
		return;
	}

	public function Game(S:Sprite){
		...
		m_Width = 28; //The pac-man board is 28x31 tiles.
		m_Height= 31;
		...Remove the following lines:
		m_Tiles[11].m_Flag|=Tile.CLOSED; //Let's close the tile at 1,1 on the grid, which is Tile = 1+1*10 = 11
		m_Tiles[12].m_Flag|=Tile.CLOSED; //Let's also close the tile next to 1,1 at 2,1.  which is Tile = 2+1*10 = 12;
		m_Tiles[21].m_Flag|=Tile.CLOSED; //Let's close a couple tiles undeaneath the above two tiles, 1,2 and 2,2 which is Tile = 1+2*10 = 21
		m_Tiles[22].m_Flag|=Tile.CLOSED; //Tile = 2*2*10 = 22
		...And add in it's place:
		//Setup the entire grid to look like a pac-man board:
		SetTileFlagRange( 2,  2,  4, 3, Tile.CLOSED);
		SetTileFlagRange( 7,  2,  5, 3, Tile.CLOSED);
		SetTileFlagRange(13,  1,  2, 4, Tile.CLOSED);
		SetTileFlagRange(16,  2,  5, 3, Tile.CLOSED);
		SetTileFlagRange(22,  2,  4, 3, Tile.CLOSED);
		SetTileFlagRange( 2,  6,  4, 2, Tile.CLOSED);
		SetTileFlagRange( 7,  6,  2, 8, Tile.CLOSED);
		SetTileFlagRange( 0,  9,  6, 5, Tile.CLOSED);
		SetTileFlagRange(10,  6,  8, 2, Tile.CLOSED);
		SetTileFlagRange(19,  6,  2, 8, Tile.CLOSED);
		SetTileFlagRange(22,  6,  4, 2, Tile.CLOSED);
		SetTileFlagRange(22,  9 , 6, 5, Tile.CLOSED);
		SetTileFlagRange( 9,  9,  3, 2, Tile.CLOSED);
		SetTileFlagRange(13,  8,  2, 3, Tile.CLOSED);
		SetTileFlagRange(16,  9,  3, 2, Tile.CLOSED);
		SetTileFlagRange(10, 12,  8, 5, Tile.CLOSED);
		SetTileFlagRange(11, 13,  6, 3, Tile.NOPELLET);
		SetTileFlagRange( 0, 14,  6, 1, Tile.NOPELLET);
		SetTileFlagRange(22, 14,  6, 1, Tile.NOPELLET);
		SetTileFlagRange( 0, 15,  6, 5, Tile.CLOSED);
		SetTileFlagRange(22, 15,  6, 5, Tile.CLOSED);
		SetTileFlagRange( 7, 15,  2, 5, Tile.CLOSED);
		SetTileFlagRange(19, 15,  2, 5, Tile.CLOSED);
		SetTileFlagRange(10, 18,  8, 2, Tile.CLOSED);
		SetTileFlagRange( 2, 21,  4, 2, Tile.CLOSED);
		SetTileFlagRange( 7, 21,  5, 2, Tile.CLOSED);
		SetTileFlagRange(13, 19,  2, 4, Tile.CLOSED);
		SetTileFlagRange(16, 21,  5, 2, Tile.CLOSED);
		SetTileFlagRange(22, 21,  4, 2, Tile.CLOSED);
		SetTileFlagRange( 4, 23,  2, 3, Tile.CLOSED);
		SetTileFlagRange(22, 23,  2, 3, Tile.CLOSED);
		SetTileFlagRange( 0, 24,  3, 2, Tile.CLOSED);
		SetTileFlagRange(25, 24,  3, 2, Tile.CLOSED);
		SetTileFlagRange( 2, 27, 10, 2, Tile.CLOSED);
		SetTileFlagRange(16, 27, 10, 2, Tile.CLOSED);
		SetTileFlagRange( 7, 24,  2, 3, Tile.CLOSED);
		SetTileFlagRange(10, 24,  8, 2, Tile.CLOSED);
		SetTileFlagRange(19, 24,  2, 3, Tile.CLOSED);
		SetTileFlagRange(13, 26,  2, 3, Tile.CLOSED);
		SetTileFlagRange( 1,  3,  1, 1, Tile.HASBIGPELLET);
		SetTileFlagRange(26,  3,  1, 1, Tile.HASBIGPELLET);
		SetTileFlagRange( 1, 23,  1, 1, Tile.HASBIGPELLET);
		SetTileFlagRange(26, 23,  1, 1, Tile.HASBIGPELLET);
		...

	}
};
Now we have an entire grid to play with, unfortuantly the scene doesn't try and center the camera on the player, so you can only see so much.
Let's fix that by focusing the camera on the player:
public class Game{

	//We need to pass the stage to the function for the camera.
	public function Update(s:Stage):Boolean { //We will return a boolean, later we can use this to determine if the game is over.
		...for (i = 0; i < m_Units.length; i++) m_Units[i].Update(this);//Add After:

		//Camera controls:
		m_Sprite.x = -m_Units[0].m_Sprite.x + s.stageWidth * 0.5; //because the camera is actually the sprite itself, we are working along the negative x/y axis.
		m_Sprite.y = -m_Units[0].m_Sprite.y + s.stageHeight * 0.5; //set the sprite to our player's position plus half the stages width.
		if (m_Sprite.x > 0.0) m_Sprite.x = 0.0; //Check if the sprite is to far right,
		else if (m_Sprite.x - s.stageWidth < -m_Width * TileWidth) m_Sprite.x = -m_Width * TileWidth + s.stageWidth; //Check that it isn't too far left.
		if (m_Sprite.y > 0.0) m_Sprite.y = 0.0; //Repeat with 'y's.
		else if (m_Sprite.y - s.stageHeight < -m_Height * TileHeight) m_Sprite.y = -m_Height * TileHeight + s.stageHeight;
		...
	}
};
Because we don't control the stage camera, and are instead controling the sprite, we are applying the translations a camera would normally apply to an object. Which is why we work with negative values instead of positive values.
In order for this to work, we need to modify the main class:
public class Game{
	...
	public function UpdateFunc(E:Event):void{
		m_Game.Update(stage);
	}
};
With that, we should now have:
So now that we have a camera following the player around, let's fix where the player spawns:
public class Game{
	...
	public static const PlayerSpawnTile:Number = 658; //Constant of where to player the player on spawn.

};
Now we spawn at the right place! However you may notice that going down the halls that wrap you around the map causes the game to crash.
Let's fix that:
public class Unit{
	...
	public function Update(Gm:Game):void{
		...var TarTile:Tile = Gm.GetTileNeighbor(m_Tile, TarX, TarY, false);	//Modify this line into:
		var TarTile = Gm.GetTileNeighbor(m_Tile, TarX, TarY, true);
		...var TargetTileY:Number  = Gm.GetTileY(TarTile); //Add after this line:
		//If the target position is greater than half the width of the game grid, then we know that we need to offset the target because we are wrapping around the grid.
		if      (TargetTileX < CurrentTileX - Gm.m_Width  * Game.TileWidth  * 0.5) TargetTileX += Gm.m_Width  * Game.TileWidth;
		else if (TargetTileX > CurrentTileX + Gm.m_Width  * Game.TileWidth  * 0.5) TargetTileX -= Gm.m_Width  * Game.TileWidth;
		if      (TargetTileY < CurrentTileY - Gm.m_Height * Game.TileHeight * 0.5) TargetTileY += Gm.m_Height * Game.TileHeight;
		else if (TargetTileY > CurrentTileY + Gm.m_Height * Game.TileHeight * 0.5) TargetTileY -= Gm.m_Height * Game.TileHeight;
	}
	public function ChangeDirection(Gm:Game):void{
		...var TarTile:Tile = Gm.GetTileNeighbor(m_Tile, TarX, TarY, false); //Modify into:
		var TarTile:Tile = Gm.GetTileNeighbor(m_Tile, TarX, TarY, true);	}
		...
	}
}
Alright no more crashs, and now we wrap around the grid without any problems!
So, now we have full player controls, it's time to get to ghosts:
The Computer
Let's start by adding our first ghost:
public class Game{
	...
	public static const GhostSpawnTile:Number = 322;  //Constraint of where to place the ghost on spawn.
	public static const GhostPreSpawnTile:Number = 374; //Constrint of where to place the ghosts before they spawn.
	...
	public function ResetPlayer():void {
		...m_Units[i].m_Tile = m_Tiles[PlayerSpawnTile]; //Change line to:
		m_units[i].m_Tile = m_Tiles[(i==0)?PlayerSpawnTile:GhostPreSpawnTile];
		...
	}

	public function Game(S:Sprite):void{
		...m_Units[0] = new Unit(m_Tiles[PlayerSpawnTile], this, new Player()); //Add Line after:
		m_Units[1] = new Unit(m_Tiles[GhostPreSpawnTile], this, new Ghost_Orange()); //Add a ghost.
	}
So, now we have a ghost sitting in it's little box. Waiting to be spawned, but before we do that we need to add a bit of AI for him to move around the map.
We do this by first adding a boolean to pass to the update function that speceify's if the unit should handle directional changes. With this information, when we land on a new tile, we select a random direction to head.
This isn't the best practice for AI, but for a game like pac-man it give's us a good enough effect.
Also to be noted, we don't want to select the opposite direction we are heading, so we add an additional check when we are checking to head in a new direction that makes sure we don't pick the opposite direction. However we ignore this check when our target tile is blocked.
public class Unit{

	public function Update(Gm:Game, AI:Boolean):void{ //Adding an ai flag to update the unit, and to allow it to make deceisions:
		...m_Tile = TarTile; //Add after this line
		if(AI){ //Check the ai flag.
			m_TarDirection = (int) (Math.random() * 4); //Randomly select a new direction.
			//We don't want to turn around each time we step on another tile, so:
			if ((m_TarDirection == DIR_LEFT && m_Direction == DIR_RIGHT) || (m_TarDirection == DIR_UP && m_Direction == DIR_DOWN) || (m_TarDirection == DIR_RIGHT && m_Direction == DIR_LEFT) || (m_TarDirection == DIR_DOWN && m_Direction == DIR_UP)) m_TarDirection = m_Direction;
		}else Gm.EatPellet(m_Tile); //only eat pellets if we are not an computer player.
		...m_Tick=0 //Add after line:
		//since this logic occurs when we are walking into a wall, it doesn't matter if we want to turn around, or not.
		if (AI) m_TarDirection = (int) (Math.random() * 4); //Randomly selects a new direction.
	}
};
nNow, we need to update the game class's update to support the new AI feature:
public class Game{

	public function Update(s:Stage):Boolean{
		...for (i = 0; i < m_Units.length; i++) m_Units[i].Update(this); //Modify line to:
		for (i = 0; i < m_Units.length; i++) m_Units[i].Update(this, i>0); //Since the first object is the player, when i is greater than 0, it's an ghost.
	}
};
Running the game now, should have a great little ghost running around in his box:
This is great, but let's start making this feel like a real ghost, it's time to get them to spawn:
public class Game{
	public static const GhostSpawnTicks:int = 60 * 5; //60 ticks per second, so every 5 seconds a ghost will spawn if possible.
	...
	public var m_NextGhostTick:int; //When to spawn the ghost
	public var m_Tick:int; //Number of ticks that have gone by.

	public function Update(s:Stage):Boolean{
		...else if (m_Sprite.y - s.stageHeight < -m_Height * TileHeight) m_Sprite.y = -m_Height * TileHeight + s.stageHeight; //Add after this line:
		if (m_Tick >= m_NextGhostTick && m_NextGhostTick < m_Units.length * GhostSpawnTicks) { //Check if the number of ticks is greater then the spawn ticks, and that the number of ticks is less than the number of units times the ghsot spawn constant.
			m_Units[(int)(m_NextGhostTick / GhostSpawnTicks)].m_Tile = m_Tiles[GhostSpawnTile]; //Set the tile for the ghost to spawn on.
			m_NextGhostTick += GhostSpawnTicks; //Increment the ghost ticks.
		}
		m_Tick++; //Increment ticks.
		...
	}

	public function ResetPlayer():void {
		...m_Finished = false;  //add after this line:
		m_Tick = 0; //Reset ticks
		m_NextGhostTick = GhostSpawnTicks; //Reset ghost ticks.
		...
	}
Alright, now the ghost spawns, and runs around the map!
But nothing happens when he gets us, so let's fix this:
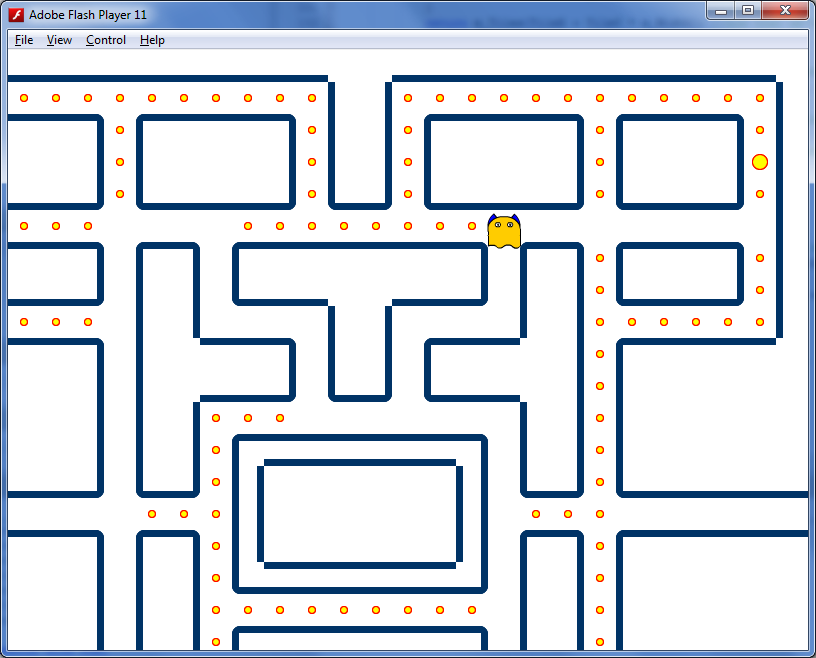
public class Game{
	...
	public static const UnitDiameter:Number = 32.0;
	...

	public function Update(s:Stage):Boolean{
		...for (i = 0; i < m_Units.length; i++) m_Units[i].Update(this, i>0); //add after this line:
		//since we are only checking if the ghosts touch the player, we can start at 1:
		for (i = 1; i < m_Units.length; i++) {
			var DistanceX:Number = (m_Units[i].m_Sprite.x - m_Units[0].m_Sprite.x); //Get the x distance between the player, and the ghost.
			var DistanceY:Number = (m_Units[i].m_Sprite.y - m_Units[0].m_Sprite.y); //Get the y distance between the player, and the ghost.
			if (DistanceX * DistanceX + DistanceY * DistanceY <= UnitDiameter * UnitDiameter) { //Check that the distance squared between the player and the ghost, is less than the squared distance of the radius of the ghost, and the player then we are colliding.  Since both ghost and player have the same radius, we can use the diameter squared.
				m_Units[0].m_State |= Unit.UNIT_DEAD; //Mark the player as dead.
			}
		}
	}

	public function ResetPlayer():void{
		...m_Units[i].m_Direction = m_Units[i].m_TarDirection = Unit.DIR_LEFT; //add after:
		m_Units[i].m_State = 0; //Reset state.
	}
};
And the subsequent changes to the unit class:
public class Unit{
	...
	public static const UNIT_DEAD:int = 1; //Constant for the state where the player is dead.
	...
	public var m_State:int = 0; //The state of the unit.
	...
	public function Update(Gm:Game, AI:Boolean):void {
		...m_Tick++; //Modify into:
		if((m_State&UNIT_DEAD)==) m_Tick++; //So long as the unit is not dead, we can keep moving.
		...ChangeDirection(Gm); //Modify both of these lines into:
		//check to ensure the unit isn't dead.
		if((m_State&UNIT_DEAD)==0) ChangeDirection(Gm); //Change our direction if we can to.
		...var LastFrame:int = (m_Direction + 1) * 30; //Add after this line:
		if ((m_State & UNIT_DEAD) != 0) { //If we are dead, set the first and last frame.
			FirstFrame = 121; //We have a segment of animation between frames 121 and 150.
			LastFrame = 150;
		}
		...if (m_Sprite.currentFrame < FirstFrame || m_Sprite.currentFrame >= LastFrame) //Modify this line into:
		if(m_Sprite.currentFrame < FirstFrame || m_Sprite.currentFrame >= LastFrame){
			if (m_Sprite.currentFrame >= LastFrame && (m_State & UNIT_DEAD) != 0) Gm.m_Finished = true; //If the unit is dead, and we've finished the animation, mark the game as finished.
			m_Sprite.gotoAndPlay(FirstFrame); //Let's goto and play our first frame.
		}
		...
	}
};
And now when we get hit by a ghost, we die!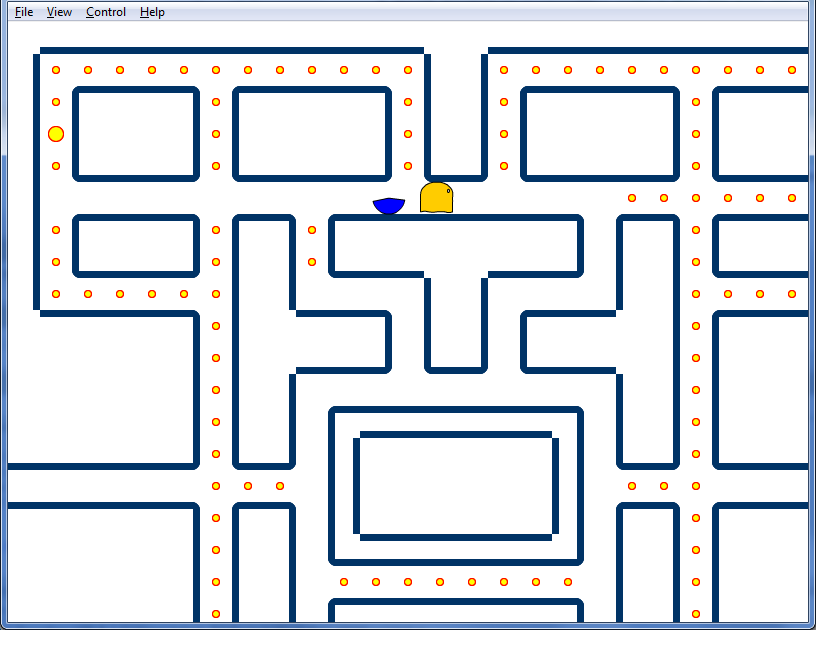
Now we have a good bit of AI. We die when a ghost hits us, now let's make it so the player can kill those nasty ghosts:
public class Game{
	public static const GhostKillTicks:int = 60 * 5; //60 ticks per second, so ghosts are killable for up to 5 seconds.
	...
	public var m_KillTick:int; //Number of ticks until we can reset the ghosts.

	public function Update(s:stage):Boolean{
		...m_Units[0].m_State |= Unit.UNIT_DEAD; //Modify the line into:
		if ((m_Units[i].m_State & Unit.GHOST_BLINK) != 0) m_Units[i].m_State ^= (Unit.GHOST_BLINK | Unit.GHOST_DEAD);
		else if ((m_Units[i].m_State & Unit.GHOST_DEAD) == 0) m_Units[0], m_State |= Unit.UNIT_DEAD;
		...
		...m_Tick++; //Add after this line:
		if (m_KillTick > 0) { //If the ghosts are blinking...
			m_KillTick--;  //Subtract kill ticks...
			if (m_KillTick == 0) { //If kill ticks is equal to 0
				for (i = 1; i < m_Units.length; i++) m_Units[i].m_State &= ~Unit.GHOST_BLINK; //Remove the blink flag from the ghosts.
			}
		}
	}

	public function EatPellet(T:Tile):void {
		...T.m_Flag ^= Tile.HASPELLET; //Add after this line
		if ((T.m_Flag & Tile.HASBIGPELLET) != 0) { //If we've eaten a big pellet, time to turn the ghosts:
			for (var i:int = 1; i < m_Units.length; i++) m_Units[i].m_State |= Unit.GHOST_BLINK;
			m_KillTick = GhostKillTicks;
		}
		...
	}
}
Next we need to modify our Unit class to reflect the above changes:
public class Unit{
	...
	public static const GHOST_DEAD:int = 2; //Constraint for the state, where the ghost is dead.
	public static const GHOST_BLINK:int = 4; //Constraint for the state, where the ghost is blinking.
	...

	public function Update(Gm:Game, AI:Boolean):void{

		...m_Tile = TarTile; //Add after this line:
		if ((m_State & GHOST_DEAD) != 0 && m_Tile == Gm.m_Tiles[Game.GhostSpawnTile]) m_State ^= GHOST_DEAD;

		...if(AI){ //Modify both lines that start here:
		if (AI) {
			//if we are dead, we want to get back to our spawn tile as quickly as possible:
			if ((m_State & GHOST_DEAD) != 0) m_TarDirection = CalculateBestDirection(Game.GhostSpawnTile, m_Tile, Gm, m_Direction);
			else m_TarDirection = (int) (Math.random() * 4); //Randomly select a new direction if we are

		...if ((m_State & UNIT_DEAD) != 0) { //Modify into:
		if ((m_State & GHOST_BLINK) != 0) { //if the ghost is blinking, override frames:
			FirstFrame += 120; //The ghosts have a second set of blinking animation, exactly 120 frames from their normal counterparts
			LastFrame  += 120;
		}else if ((m_State & GHOST_DEAD) != 0) { //if the ghost is dead, then we need to reset it.
			FirstFrame = 241; //The death animation segment.
			LastFrame = 270;
		}else if ((m_State & UNIT_DEAD) != 0) { //If we are dead, set the first and last frame.
	}

	//This function is for determing the heuristic(or value) of a tile toward it's target, we use the manhattan distance(add the x and y distance), to give a value to a tile relative to a target.
	public function CalculateHeuristic(TargetX:int, TargetY:int, Gm:Game, T:Tile):int {

		var CurrentX:int = T.m_Index % Gm.m_Width;       //Get the current x/y
		var CurrentY:int = (int)(T.m_Index / Gm.m_Width);
		return Math.abs(TargetX - CurrentX) + Math.abs(TargetY - CurrentY); //Return the combined distance from the current tile, and target.
	}

	//We want to choose the best direction to getting to a target tile.
	//But we don't want to do any real pathfinding, instead, we come to a comprimise of evalutating each available direction we can choose, and see which one get's us closer to our target.
	//We also try to make sure we don't choose the opposite direction we are heading now.
	public function CalculateBestDirection(TargetTile:int, CurrentTile:Tile, Gm:Game, Direction:int):int {
		var TargetX:int = TargetTile % Gm.m_Width;
		var TargetY:int = (int)(TargetTile / Gm.m_Width); //Caluclate the target's x and y.

		//Let's get all our neightbor tiles.
		var LeftTile:Tile  = Gm.GetTileNeighbor(CurrentTile,-1, 0, true);
		var RightTile:Tile = Gm.GetTileNeighbor(CurrentTile, 1, 0, true);
		var TopTile:Tile   = Gm.GetTileNeighbor(CurrentTile, 0,-1, true);
		var BtmTile:Tile   = Gm.GetTileNeighbor(CurrentTile, 0, 1, true);
		//Check if the tile is valid, then calculate the heuristic toard our destination, if it's invalid, then we set a null value(in this case it's int.MAX_VALUE)
		var LeftH:int   = (LeftTile  != null && (LeftTile.m_Flag  & Tile.CLOSED) == 0) ? CalculateHeuristic(TargetX, TargetY, Gm, LeftTile) :int.MAX_VALUE;
		var RightH:int  = (RightTile != null && (RightTile.m_Flag & Tile.CLOSED) == 0) ? CalculateHeuristic(TargetX, TargetY, Gm, RightTile):int.MAX_VALUE;
		var TopH:int    = (TopTile   != null && (TopTile.m_Flag   & Tile.CLOSED) == 0) ? CalculateHeuristic(TargetX, TargetY, Gm, TopTile)  :int.MAX_VALUE;
		var BtmH:int    = (BtmTile   != null && (BtmTile.m_Flag   & Tile.CLOSED) == 0) ? CalculateHeuristic(TargetX, TargetY, Gm, BtmTile)  :int.MAX_VALUE;

		//Now we select a new direction, and try to not select the direction we came from:
		//We systimatically choose the lowest cost direction, since any invalid tile has the value of int.MAX_VALUE we are able to find out the best direction by always doing a < comparison.
		if (Direction == DIR_LEFT)       return (LeftH  < TopH   ? (LeftH  < BtmH   ? DIR_LEFT   : DIR_DOWN)  : (TopH   < BtmH)   ? DIR_UP    : (BtmH   != int.MAX_VALUE? DIR_DOWN  : DIR_RIGHT));
		else if (Direction == DIR_UP)    return (TopH   < RightH ? (TopH   < LeftH  ? DIR_UP     : DIR_LEFT)  : (RightH < LeftH)  ? DIR_RIGHT : (LeftH  != int.MAX_VALUE? DIR_LEFT  : DIR_DOWN));
		else if (Direction == DIR_RIGHT) return (RightH < BtmH   ? (RightH < TopH   ? DIR_RIGHT  : DIR_UP)    : (BtmH   < TopH)   ? DIR_DOWN  : (TopH   != int.MAX_VALUE? DIR_UP    : DIR_LEFT));
		else                             return (BtmH   < LeftH  ? (BtmH   < RightH ? DIR_DOWN   : DIR_RIGHT) : (LeftH  < RightH) ? DIR_LEFT  : (RightH != int.MAX_VALUE? DIR_RIGHT : DIR_UP));
	}
}
The above code is pretty hefty, however it does a decent job for calcuating a general direction to head when the ghost is dead.
And with that, we get:
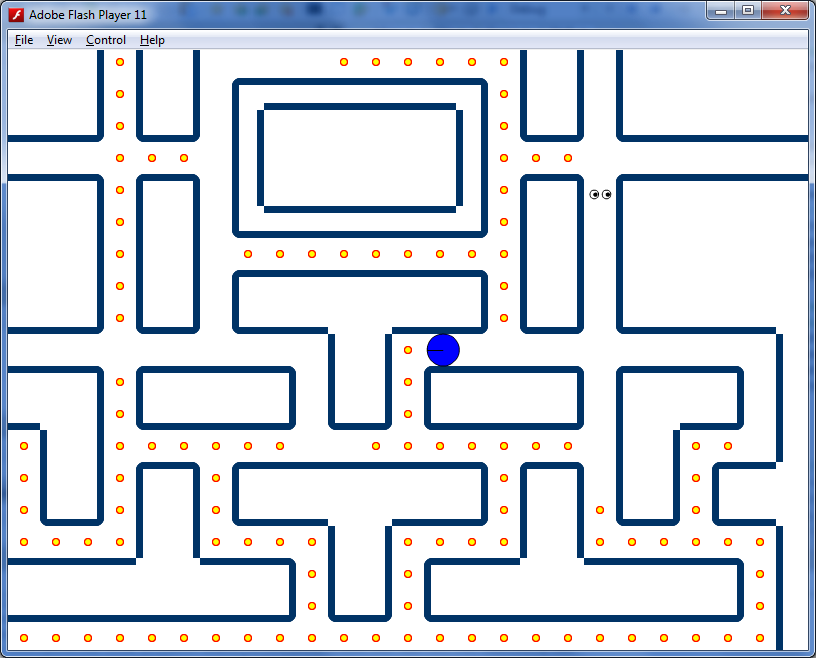
This nearly completes our computer players. Now let's add a life counter, and add the other 3 ghosts:
public class Game{
	...
	public static const InitialLives:int = 3; //The initial lives available for the player.
	...
	public var m_LifeCounter:int; //Lives available.

	public function Update(s:stage):Boolean{
		...else if((m_Units[i].m_State & Unit.GHOST_DEAD)==0) m_Units[0].m_State|=Unit.UNIT_DEAD; //Modify into:
		else if ((m_Units[i].m_State & Unit.GHOST_DEAD) == 0) {
			if ((m_Units[0].m_State & Unit.UNIT_DEAD) == 0) m_LifeCounter--; //Remove life if the player has yet to be considered dead.
			m_Units[0].m_State |= Unit.UNIT_DEAD;
		}
		...if(m_Finished) ResetPlayer(); //Modify into:
		if(m_Finished){
			if (m_LifeCounter == 0) return true; //If no more lives to give, we're dead.
			ResetPlayer();
		}
	}

	//Reset the game.
	public function ResetGame():void {
		ResetPellets(); //Reset Pellets.
		ResetPlayer(); //Reset Player
		m_LifeCounter = InitialLives; //Set life counter.
		return;
	}

	public function Game(s:Sprite):void{
		...m_Units[1] = new Unit(m_Tiles[GhostPreSpawnTile], this, new Ghost_Orange()); //Add after this line:

		m_Units[2] = new Unit(m_Tiles[GhostPreSpawnTile], this, new Ghost_Red());
		m_Units[3] = new Unit(m_Tiles[GhostPreSpawnTile], this, new Ghost_Cyan());
		m_Units[4] = new Unit(m_Tiles[GhostPreSpawnTile], this, new Ghost_Purple());

		...Remove the following:
			ResetPellets(); //Setup pellets!
			ResetPlayer(); //Setup the player.
			...In their place, place:
		ResetGame();
	}
}
This adds lives, and all 4 ghosts.
only one last thing to do:
public class Main{

	public function UpdateFunc(E:Event):void{
		...m_Game.Update(stage); //Modify into:
		if (m_Game.Update(stage)) m_Game.ResetGame();
	}
};
Now if all our lives are exhausted the game auto resets.
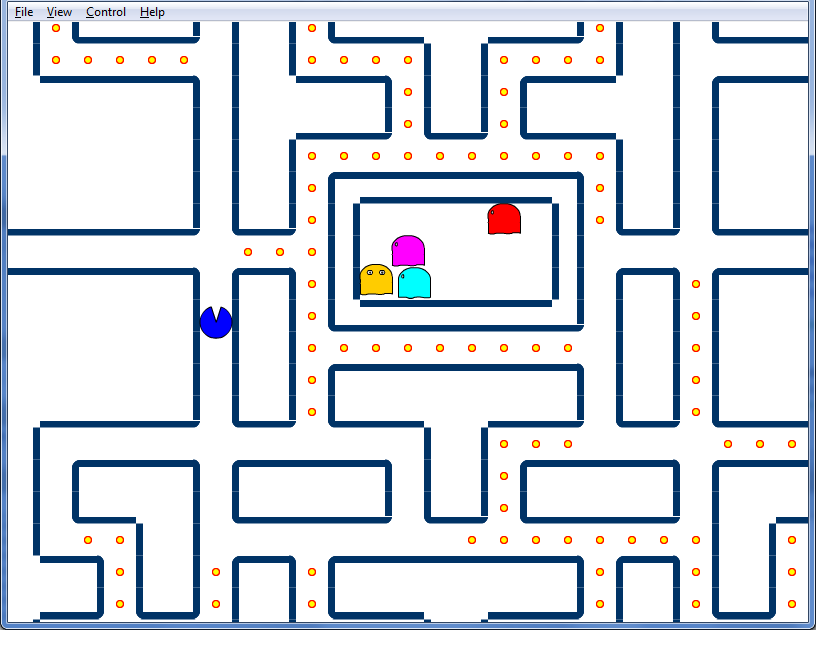
Congratulations, you have just completed the pac-man tutorial. It is up to you to add menus, scoring, and even cherries!
Article Moderation Guidelines
- Is the article generally formatted to match our site standards?
- Is the article both game development related and NOT designed to promote a particular product?
- Does the article use appropriate tags? Tagging is VERY important
- Does the article include a 250x150 pixel image? If not, create one or put a 250x150 pixel white placeholder image in its place. Send a message to either Drew Sikora or Michael Tanczos and we will create the image for you.
Retro Games: How to Make a Tetromino Game - Part 1
Introduction
Who hasn't played that classic game before to the point where they can close their eyes and still see lines of tetrominoes? For the beginning game developer it's a nice challenge project to tackle and introduces some fundamentally important concepts for making games.
Before you get started check out this free representation of Tetris to get an idea of gameplay mechanics we would like to imitate.
The objectives of this article are as follows:
- Utilize a multi-dimensional array to store a game board "map"
- Draw the game screen using data stored in a multi-dimensional array "map"
- React to keyboard input : Allow players to rotate tetrominoes
- Detect collisions with both the side of the game board as well as other pieces
- Detect and remove cleared lines (and possibly update a score table)
Making the Game
The Pieces
There are seven tetrominoes in the game as shown in the diagram below. For some die-hard fans the treatment of these pieces borders on religion. The colors themselves and the way they rotate all have a particular standard that they must follow.
Representing the pieces in game can be done a number of ways. One of the most obvious ways would seem to rely on having seven separate pictures of each of the pieces that we will rotate and draw on screen. However, the blocks are based on one particular square shape which can come in any one of seven colors.
I quick loaded up my favorite paint program and created a small 32 pixel by 32 pixel beveled square that looks like this:
The shapes themselves are built up from some combination of this single block.
| This.. | .. can be represented like this using a multidimensional array |
 |
int[,] block = new int[3, 3] {
    {0, 1, 0},
    {1, 1, 1},
    {0, 0, 0}
};
|
Once you realize that you can store each of the shapes in a multidimensional array all we need to do is figure out a way to get those shapes into our game. Since the shapes themselves never change it's perfectly fine to hard code each of the basic shapes directly.
To do this we can create a list of multidimensional arrays. You'll notice that the arrays themselves can be 2x3, 3x3, and even 4x4. This makes it easy to accomodate each of the tetromino shapes and works well for performing super rotations.
List<int[,]> pieces;

pieces = new List<int[,]>();

/* I Piece */
pieces.Add(new int[4, 4] {
    {0, 0, 0, 0},
    {1, 1, 1, 1},
    {0, 0, 0, 0},
    {0, 0, 0, 0}
});

/* J Piece */
pieces.Add(new int[3, 3] {
    {0, 0, 1},
    {1, 1, 1},
    {0, 0, 0}
});

/* O Piece */
pieces.Add(new int[2, 2] {
    {1, 1},
    {1, 1}
});

/* S Piece */
pieces.Add(new int[3, 3] {
    {0, 1, 1},
    {1, 1, 0},
    {0, 0, 0}
});


/* T Piece */
pieces.Add(new int[3, 3] {
    {0, 1, 0},
    {1, 1, 1},
    {0, 0, 0}
});

/* Z Piece */
pieces.Add(new int[3, 3] {
    {1, 1, 0},
    {0, 1, 1},
    {0, 0, 0}
});
For coloring I opted to create an array of tints that would store the color data for each of the blocks:
        Color[] TetronimoColors = {
                                    Color.Transparent,  /* 0 */
                                    Color.Orange,       /* 1 */
                                    Color.Blue,         /* 2 */
                                    Color.Red,          /* 3 */
                                    Color.LightSkyBlue, /* 4 */
                                    Color.Yellow,       /* 5 */
                                    Color.Magenta,      /* 6 */
                                    Color.LimeGreen     /* 7 */
                                  };
The Game Board (aka Playing Field, Matrix, Grid)
The standard game board is 10 cells tall and 22 cells tall, where the top two cells are obstructed from view by some type of graphical frame. For the sake of simplicity we are going to chop our game down to 22 cells in height.
For part one of this tutorial we can focus on two major components that we need to keep track of. The first is the board itself which contains all the blocks that have already fallen down into a fixed position. The second is the block that is falling that we will want to potentially apply rotations to based off of user input.
Our game board can actually be stored in another multidimensional array. The beauty of storing the board in a multidimensional array is that it will allow us to "play" the game in our own miniaturized representation of what you see on screen. We can then create a small chunk of code to actually draw the game board based off of our behind-the-scenes representation.
const int BoardWidth = 10;  // Board width in blocks
const int BoardHeight = 20; // Board height in blocks
const int BlockSize = 20;   // Block size in pixels

int[,] Board;
Vector2 BoardLocation = Vector2.Zero;

Board = new int[BoardWidth, BoardHeight];  // Initialize the board

// Reset all board grid locations to empty.. technically they are initialized
// to zero but this is for demonstration purposes
for (int y = 0; y < BoardHeight; y++)
    for (int x = 0; x < BoardWidth; x++)
    {
        board[x, y] = 0;
    }
The resulting board would look something like this within our game:
0, 0, 0, 0, 0, 0, 0, 0, 0, 0
0, 0, 0, 0, 0, 0, 0, 0, 0, 0
0, 0, 0, 0, 0, 0, 0, 0, 0, 0
0, 0, 0, 0, 0, 0, 0, 0, 0, 0
0, 0, 0, 0, 0, 0, 0, 0, 0, 0
0, 0, 0, 0, 0, 0, 0, 0, 0, 0
0, 0, 0, 0, 0, 0, 0, 0, 0, 0
0, 0, 0, 0, 0, 0, 0, 0, 0, 0
0, 0, 0, 0, 0, 0, 0, 0, 0, 0
0, 0, 0, 0, 0, 0, 0, 0, 0, 0
0, 0, 0, 0, 0, 0, 0, 0, 0, 0
0, 0, 0, 0, 0, 0, 0, 0, 0, 0
0, 0, 0, 0, 0, 0, 0, 0, 0, 0
0, 0, 0, 0, 0, 0, 0, 0, 0, 0
0, 0, 0, 0, 0, 0, 0, 0, 0, 0
0, 0, 0, 0, 0, 0, 0, 0, 0, 0
0, 0, 0, 0, 0, 0, 0, 0, 0, 0
0, 0, 0, 0, 0, 0, 0, 0, 0, 0
0, 0, 0, 0, 0, 0, 0, 0, 0, 0
0, 0, 0, 0, 0, 0, 0, 0, 0, 0
0, 0, 0, 0, 0, 0, 0, 0, 0, 0
As we begin to fill in static blocks, we will update individual cell locations on the board with the color cells contained within them. After a while we'll start to see a game board that looks like this:
0, 0, 0, 0, 0, 0, 0, 0, 0, 0
0, 0, 0, 0, 0, 0, 0, 0, 0, 0
0, 0, 0, 0, 0, 0, 0, 0, 0, 0
0, 0, 0, 0, 0, 0, 0, 0, 0, 0
0, 0, 0, 0, 0, 0, 0, 0, 0, 0
0, 0, 0, 0, 0, 0, 0, 0, 0, 0
0, 0, 0, 0, 0, 0, 0, 0, 0, 0
0, 0, 0, 0, 0, 0, 0, 0, 0, 0
0, 0, 0, 0, 0, 0, 0, 0, 0, 0
0, 0, 0, 0, 0, 0, 0, 0, 0, 0
0, 0, 0, 0, 0, 0, 0, 0, 0, 0
0, 0, 0, 0, 0, 0, 0, 0, 0, 0
0, 0, 0, 0, 0, 0, 0, 0, 0, 0
0, 0, 0, 0, 0, 0, 0, 0, 0, 0
0, 0, 0, 0, 0, 0, 0, 0, 0, 0
0, 0, 0, 0, 0, 0, 0, 0, 0, 0
0, 0, 0, 0, 0, 0, 0, 0, 0, 0
1, 0, 0, 0, 0, 0, 0, 3, 3, 1
1, 0, 0, 5, 5, 5, 0, 3, 3, 1
1, 0, 3, 3, 5, 4, 4, 0, 2, 1
1, 0, 3, 3, 4, 4, 2, 2, 2, 1
Drawing Our Board
Drawing the board is actually pretty easy. The code below assumes that I have loaded the 32x32 pixel block graphic into a Texture2D structure called spriteSheet.
spriteBatch.Begin();

// Draw the board first
for (int y = 0; y < BoardHeight; y++)
    for (int x = 0; x < BoardWidth; x++)
{
    Color tintColor = TetronimoColors[Board[x, y]];

    // Since for the board itself background colors are transparent, we'll go ahead and give this one
    // a custom color.  This can be omitted if you draw a background image underneath your board
    if (Board[x, y] == 0)
        tintColor = Color.FromNonPremultiplied(50, 50, 50, 50);

    spriteBatch.Draw(spriteSheet,
                     new Rectangle((int)BoardLocation.X + x * BlockSize,
                                   (int)BoardLocation.Y + y * BlockSize,
                                   BlockSize,
                                   BlockSize),
                     new Rectangle(0, 0, 32, 32),
                     tintColor);
}

// ...  SNIP!  Removed code to draw the falling piece

spriteBatch.End();
The Falling Piece
Last, but not least, is the currently falling piece. The currently falling piece (aka Spawned Piece) needs to exist separate from the game board. While the game board represents static / non-moving blocks, the falling piece moves downward at a particular pace, can be rotated, and even dropped quickly in response to keyboard input.
To get started we can use a variable to store a randomly generated piece shape and a second to store it's location:
int[,] SpawnedPiece;
Vector2 SpawnedPieceLocation;
Then, we can create a method to quickly choose a tetromino piece from the pieces list at random and colorize it.
        // Create a new piece
        public void SpawnPiece()
        {
            int colr = rand.Next(0, pieces.Count);  // rand is initialized earlier and has the type "Random"

            SpawnedPiece = (int[,])pieces[colr].Clone();  // Make a copy of the piece

            int dim = SpawnedPiece.GetLength(0); // Get the dimension of the first row

            // Colorize the piece by multiplying it by a scalar representing the color
            // In this case, the index for the pieces List is also the same index used for the tintColors
            // array
            for (int x = 0; x < dim; x++)
                for (int y = 0; y < dim; y++)
                    SpawnedPiece[x, y] *= (colr + 1);

            SpawnedPieceLocation = Vector2.Zero; // Temporary
        }
Once we have a piece spawned we can perform some limited operations on it (rotate left/right, move left/right, and drop quickly). The first thing we need to ensure is that before we can commit to any operation it must be actually possible to perform that operation.
So to make a move we will do the following:
- Accept user input
- Determine a new block orientation and location based off of user input
- Check to see if we can perform the operation
- If yes, commit it
- If no, then do nothing
Shown below are some situations we're going to need to be able to detect and handle appropriately:
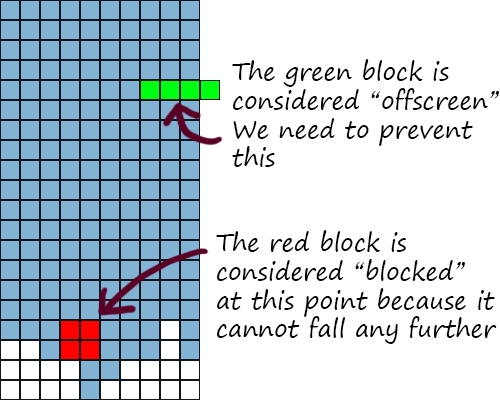
Our game will use a method called "CanPlace" that will check to see if a piece can be located at a particular board position. It can also tell us if the piece is being blocked by something else or if it is presently offscreen (technically off of the board) and out of bounds.
// Defined outside of the current class
public enum PlaceStates
{
    CAN_PLACE,
    BLOCKED,
    OFFSCREEN
}

...

// Checks to see if piece can be placed at location x,y on the board
// Returns PlaceStates.CAN_PLACE if it can exist there, otherwise reports a reason why it cannot
public PlaceStates CanPlace(int[,] board, int[,] piece, int x, int y)
{
    // First we'll need to know the dimensions of the piece
    // Since they are square it is sufficient to just get the dimension of the first row
    int dim = piece.GetLength(0);

    // All pieces are square, so let's use a nested loop to iterate through all the cells of the piece
    for (int px = 0; px < dim; px++)
        for (int py = 0; py < dim; py++)
    {
        // Calculate where on the game board this segment should be placed
        int coordx = x + px;
        int coordy = y + py;

        // Is this space empty?
        if (piece[px, py] != 0)
        {
            // If the board location would be too far to the left or right then
            // we are hitting a wall
            if (coordx < 0 || coordx >= BoardWidth)
                return PlaceStates.OFFSCREEN;

            // If even one segment can't be placed because it is being blocked then
            // we need to return the BLOCKED state
            if (coordy >= BoardHeight || board[coordx, coordy] != 0)
            {
                return PlaceStates.BLOCKED;
            }
        }
    }

    // If we get this far we can place the piece!
    return PlaceStates.CAN_PLACE;

}
When we reach a point where the block piece is "BLOCKED", then it will be necessary to permanently write it to the game board where it will no longer be moveable.
To accomodate this part of the game we are also going to need to be able to check for and remove any lines that are completed. This is typically where we also need to update some type of score counter.
// Check to see if there are any already completed lines on the board, if yes remove them
public void RemoveCompleteLines(int[,] board)
{
    // Start at the bottom of the board and work our way up
    for (int y = BoardHeight - 1; y >= 0; y--)
    {
        // Check to see if the line on row y is complete (non-zero)
        bool isComplete = true;
        for (int x = 0; x < BoardWidth; x++)
        {
            if (board[x, y] == 0)
            {
                isComplete = false;
            }
        }


        if (isComplete)
        {
            // Row y needs to go bye bye
            // Copy row y-1 to row y
            for (int yc = y; yc > 0; yc--)
            {
                for (int x = 0; x < 10; x++)
                {
                    board[x, yc] = board[x, yc - 1];
                }
            }

            // Recheck this row
            y++;

            // Score += 100;
        }
    }
}


// Permanently write piece to the game board
// Note that this method assumes that the piece can actually be placed already and does not recheck
// to make sure the piece can be placed
public void Place(int[,] board, int[,] piece, int x, int y)
{
    int dim = piece.GetLength(0);

    for (int px = 0; px < dim; px++)
        for (int py = 0; py < dim; py++)
    {
        int coordx = x + px;
        int coordy = y + py;

        if (piece[px, py] != 0)
        {
            board[coordx, coordy] = piece[px, py];
        }

    }

    RemoveCompleteLines(board);

}
Lastly, we need a way to rotate a particular piece. The way that this Rotate method works is to perform the actual rotation and give us a new array based off of the rotated block. Since the blocks are all square it is pretty straightforward to swap some of the cell values to perform the rotations.
// Rotate the piece (this style of rotation for Tetris is called a super rotation as it doesn't follow the conventional
// style of piece rotations)
public int[,] Rotate(int[,] piece, bool left)
{
    int dim = piece.GetLength(0);
    int[,] npiece = new int[dim, dim];

    for (int i = 0; i < dim; i++)
        for (int j = 0; j < dim; j++)
    {
        if (left)
            npiece[j, i] = piece[i, dim - 1 - j];
        else
            npiece[j, i] = piece[dim - 1 - i, j];
    }

    return npiece;
}
Some sample rotations:
{1, 1, 0}     {0, 0, 1}     {0, 0, 0}     {0, 1, 0}
{0, 1, 1}     {0, 1, 1}     {1, 1, 0}     {1, 1, 0}
{0, 0, 0}     {0, 1, 0}     {0, 1, 1}     {1, 0, 0}
Let the Blocks Fall!
In this game the blocks move one space down for every given time interval. We're going to need to keep track of how much time has elapsed since the last update.
We will add the following variables to the beginning of your game class:
        int StepTime = 300;  // Time step between updates in ms
        int ElapsedTime = 0;  // Total elapsed time since the last update
        int KeyBoardElapsedTime = 0;  // Total elapsed time since handling the last keypress
From there we just need to add some code in our Update method to adjust the block location based off of time:
        protected override void Update(GameTime gameTime)
        {
            // Allows the game to exit
            if (GamePad.GetState(PlayerIndex.One).Buttons.Back == ButtonState.Pressed)
                this.Exit();

            ElapsedTime += gameTime.ElapsedGameTime.Milliseconds;
            KeyBoardElapsedTime += gameTime.ElapsedGameTime.Milliseconds;

            /* SNIP! Keyboard handling code removed */

            // If the accumulated time over the last couple Update() method calls exceeds our StepTime variable
            if (ElapsedTime > StepTime)
            {
                // Create a new location for this spawned piece to go to on the next update
                Vector2 NewSpawnedPieceLocation = SpawnedPieceLocation + new Vector2(0, 1);

                // Now check to see if we can place the piece at that new location
                PlaceStates ps = CanPlace(Board, SpawnedPiece, (int)NewSpawnedPieceLocation.X, (int)NewSpawnedPieceLocation.Y);
                if (ps != PlaceStates.CAN_PLACE)
                {
                    // We can't move down any further, so place the piece where it is currently
                    Place(Board, SpawnedPiece, (int)SpawnedPieceLocation.X, (int)SpawnedPieceLocation.Y);
                    SpawnPiece();

                    // This is just a check to see if the newly spawned piece is already blocked, in which case the
                    // game is over
                    ps = CanPlace(Board, SpawnedPiece, (int)SpawnedPieceLocation.X, (int)SpawnedPieceLocation.Y);
                    if (ps == PlaceStates.BLOCKED)
                    {
                        // Game over.. normally we would change a game state variable but for this tutorial we're just
                        // going to exit the app
                        this.Exit();
                    }
                }
                else
                {
                    // We can move our piece into the new location, so update the existing piece location
                    SpawnedPieceLocation = NewSpawnedPieceLocation;
                }

                ElapsedTime = 0;
            }

            base.Update(gameTime);
        }
Simple enough? Now let's insert some additional code to deal with user keypresses:
			KeyboardState ks = Keyboard.GetState();

            if (KeyBoardElapsedTime > 200)
            {
                if (ks.IsKeyDown(Keys.Left) || ks.IsKeyDown(Keys.Right))
                {
                    // Create a new location that contains where we WANT to move the piece
                    Vector2 NewSpawnedPieceLocation = SpawnedPieceLocation + new Vector2(ks.IsKeyDown(Keys.Left) ? -1 : 1, 0);

                    // Next, check to see if we can actually place the piece there
                    PlaceStates ps = CanPlace(Board, SpawnedPiece, (int)NewSpawnedPieceLocation.X, (int)NewSpawnedPieceLocation.Y);
                    if (ps == PlaceStates.CAN_PLACE)
                    {
                        SpawnedPieceLocation = NewSpawnedPieceLocation;
                    }

                    KeyBoardElapsedTime = 0;
                }

                if (ks.IsKeyDown(Keys.Up))
                {
                    int[,] newSpawnedPiece = Rotate(SpawnedPiece, true);

                    PlaceStates ps = CanPlace(Board, newSpawnedPiece, (int)SpawnedPieceLocation.X, (int)SpawnedPieceLocation.Y);
                    if (ps == PlaceStates.CAN_PLACE)
                    {
                        SpawnedPiece = newSpawnedPiece;
                    }

                    KeyBoardElapsedTime = 0;
                }


                if (ks.IsKeyDown(Keys.Down))
                {
                    ElapsedTime = StepTime + 1;
                    KeyBoardElapsedTime = 175;
                }
            }
Putting it all Together
Drawing the Board and Falling Piece
spriteBatch.Begin();

// Draw the board first
for (int y = 0; y < BoardHeight; y++)
    for (int x = 0; x < BoardWidth; x++)
{
    Color tintColor = TetronimoColors[Board[x, y]];

    // Since for the board itself background colors are transparent, we'll go ahead and give this one
    // a custom color.  This can be omitted if you draw a background image underneath your board
    if (Board[x, y] == 0)
        tintColor = Color.FromNonPremultiplied(50, 50, 50, 50);

    spriteBatch.Draw(spriteSheet,
                     new Rectangle((int)BoardLocation.X + x * BlockSize,
                                   (int)BoardLocation.Y + y * BlockSize,
                                   BlockSize,
                                   BlockSize),
                     new Rectangle(0, 0, 32, 32),
                     tintColor);
}

            // Next draw the spawned piece
            int dim = SpawnedPiece.GetLength(0);

            for (int y = 0; y < dim; y++)
                for (int x = 0; x < dim; x++)
                {
                    if (SpawnedPiece[x, y] != 0)
                    {
                        Color tintColor = TetronimoColors[SpawnedPiece[x, y]];

                        spriteBatch.Draw(spriteSheet,
                                         new Rectangle((int)BoardLocation.X + ((int)SpawnedPieceLocation.X + x) * BlockSize,
                                                       (int)BoardLocation.Y + ((int)SpawnedPieceLocation.Y + y) * BlockSize,
                                                       BlockSize,
                                                       BlockSize),
                                         new Rectangle(0, 0, 32, 32),
                                         tintColor);
                    }
                }

spriteBatch.End();
The finished product (for now)!
Conclusion
This concludes part 1 of "Retro Games: How to Make a Tetromino Game". If you run the attached game sample you will notice that we only have the basic gameplay for the game working. The purpose of omitting these items was to keep the game relatively compact for part 1. What is missing is some type of score counter, showing of the "on deck" or next piece that will be dropped, and adding any type of special effects for removing lines.
In part 2 we will look to tackle polishing up the game a bit more. I hope you enjoyed this tutorial and if you manage to jump ahead of me and complete a full tetromino game, please post a link to your game in the comments section for this article.
Article Update Log
12 Mar 2013: Initial release
Dominoze PC Post-mortem: Nine Years, One Programmer
The story begins in February 2001 when I got the idea for a puzzle game where you have to knock down a trail of dominoes by manipulating objects along the domino path. I thought the idea was so great, I hardly got any sleep that night! Development began the next day, and ran its course over subsequent evenings and weekends between 0-15 hours per week while I worked a full-time job writing unrelated software.
My development philosophy was this:
- Integrate only third-party libraries that are completely free to use, and do so with as few libraries as possible. I wanted to develop the game on a $0 code budget (except for purchasing Visual Studio and some other development-related tools), and to do as much of the programming as possible because that's what I love to do.
- Work alone to maximize control and flexibility of the project; and to see if I could pull it off as the only developer. This was a largely ego-based decision.
- Don't study other successful games to understand how they worked. I wanted to be as original as possible, and would not tolerate saying "I was inspired by to make my game" or even "I studied to make mine better."
- Don't quit my day job; keep game development casual.
- Develop features on a need-to basis; no need to write out a design document at the beginning.
- Don't worry about marketing. I'll do that when the game is almost done.
- Don't maintain a developer journal, blog, or regularly network with other game developers. I didn't want to go public until I at least had a playable demo or something close to it; and maintaining those things was a distraction from programming.
2001
This year was spent trying and failing to write my own physics engine. I learned quite a bit in the process which helped me out later on when using other physics engines. I also wrote the "glAppGrapher" which is a great debugging tool for when you want your program to render things in a separate window acting as a "graphical server."

The glAppGrapher "graphical server" application
2002-2005
These years were a cycle of tinkering with, shelving and unshelving the Dominoze sandbox puzzle editor and game engine at the continued 0-15 hour/week pace. By October of 2004, after perhaps 3 or 4 attempts from near-scratch, I had written a fragile-but-functional game engine and editor based on the Newton physics engine, FreeGLUT, OpenAL, LuaScript and the CxImage library. That is the same month I also founded Gamieon, Inc. as the front end for Dominoze development. Four years is an awful long time to tinker around in even if it is under 20 hours/week; but time flies when you're having fun!
The Dominoze Editor
2006In 2006 my focus was on developing game content itself at the same pace as before. I still did not know exactly how I wanted the levels to look even for much of that year, but that's not for lack of trying all kinds of ideas. I finally conceded that since I can't come up with an art style myself, I would just fall back on photorealism. Rather than focusing on puzzle design and cranking out dozens of levels which reused the same concepts in different ways, I wanted each level to be as unique as possible and have elaborate backgrounds. At the same time, I wanted 100 levels. There wasn't a story to the game at this time; it just didn't seem important. Since everything was moving so slowly, 2006 was the year I started asking people for help with art and level designs. I started by commissioning one artist and one designer to help me out. The collaboration was simply "Can you please create X for me?" We'd agree on a pricing structure, got the work done, funds exchanged; and that was that. Of course, the art assets created new demands on my engine and editor, so programming continued to stay focused there.
Dominoze Game Play -- Rotating Stairs Before Moving Them
2007-2008
These years saw continued level and engine development as features were added on a "need-to" basis as I came up with new ideas. Why just have turntables when you can have pulleys? Why pulleys and why not gear puzzles? Laser-mirror puzzles? Fans and blimps? Absolutely! There was no plan in place that defined boundaries on the project in terms of time or features. Dominoze was becoming five games in one! My development pace increased to about 10-20 hours/week. Despite bringing more level designers and artists to help me out, my requirements for the level count dwindled to 50 because making just one level was a big undertaking. In addition to "...please create X for me...," I invited everyone who I commissioned to have online chats and e-mail threads for sharing their thoughts on various aspects of the project. I also got the bright idea to start writing my own light mapper to make the levels appear more realistic. A developer could make it their full time job to maintain a light mapper; but hey, I wanted to see if I could pull it off! I wanted Dominoze to look as professionally done as possible, and give the illusion that there were multiple programmers working on it. I also finally came up with a story for the game: It would be about a parrot trying to rescue his friends. In return, the parrot would give you clues on how to solve puzzles.
[url=http://www.gamieon.com/blogimages/dmscreens/1.png]
Dominoze Light Mapped Scene
Some advice for new and aspiring game developers: Coming up with a story for a game six years after its inception is typically something you don't want to do.
2009
This was the most critical year for Dominoze; it was the year I finally said "I'm done tinkering with this project. I want to get the beta out and see if it's viable to even finish." By this point, I was investing all my free time into the project, and work had begun on the trailer. Things came to a head around July when I officially stopped new content development, and put all my energy into finishing the trailer, testing, and cleaning up all the existing content and engine features. Finally, in December of 2009, I released the first 30 level beta on IndieDB.com after a friend recommended the site to me as a launching point. Feedback on the site was scarce although positive. I got only a few bug reports, and addressed them all with subsequent updates while using Trac to maintain my bug lists.
2010
This year was the last year of Dominoze development under my existing code base, and the first year I opened myself up to really networking with other people. In March I went to GDC 2010 and showed Dominoze to a few people. The consensus was that it looked like a nice game, but it would fare much better if I were to simplify it and move it to the mobile market. I also spent some time in the Unity booth learning about their cross-platform game engine and development tools. I was a little disheartened, but nowhere near feeling like my world was destroyed (I explain why later in this article under "Rewards for Dominoze Development"). I decided it was time to finish what I had, and then take a long holiday from Dominoze and figure out what I wanted to do next. By July, I had released all the trailers, the Dominoze editor, and a few bug fixes to the game. As before, I only got a handful of comments; and nobody in the games press seemed really interested in it (though I didn't make a big effort because the game was still technically in beta without a release date).
I then stopped development entirely because:
- It would never reach its real potential if I continued to approach it as a casual hobbyist and not as a committed game developer.
- I'm done maintaining game engines.
- There were easily hundreds of undiscovered bugs that I had no desire to spend hours and days hunting down any more.
- I let the increasing demands of my full time job, combined with game development, turn me into a development machine with a lacking social life. I needed to break out.
- Dominoze is only supported on Microsoft Windows whereas cross-platform games; which I've always wanted to develop anyway, were flourishing.
2011-2013
By 2011 I was comfortable using the Unity engine. I managed to create and play a very simple Dominoze level from scratch with Unity in the total time span of 2 hours. After 9 years.
To further study the prospect of Dominoze in Unity, I developed a small project called the "Gamieon Construction Kit" at http://www.gamieon.com/buildstuff which is a multi-player sandbox where you can add simple building blocks to drive falling marbles into a little box. Your creations are stored online for all to see. As the code was hacked together as quickly as possible and for discovery purposes only, I have no plans to re-use it at this time (and the gallery broke down some time in 2012).
Using the Unity engine, I developed three games in my spare time since 2010: Tiltz, Hyperspace Pinball, and Hamster Chase. As of March 12, 2013, they have nearly 80,000 downloads combined. I think my Unity skills are now ready for Dominoze...and this time it's going to be cross-platform and network-ready (but completely playable from start to end without an internet connection).
Lessons Learned and Affirmed (in no particular order)
- If you want to tinker around and develop a game or an engine at a casual pace, then go knock yourself out. When it just goes on forever, or it stops being fun, or you're tired of seeing other developers accomplish far more in less time, then remember this: You did what you wanted to do, and you got exactly what you asked for. Stop doing it, and reassess your goals if you must.
- When you're developing a puzzle game, all things related to user interaction must always come first. Keep other things like the background artwork simple.
- Don't reinvent any wheels unless you plan to upgrade them into spheres.
- Set limitations on yourself. Decide the project must be done in X months. Decide there will be between Y and Z levels, and don't be afraid to narrow things down along the way.
- Even if you want to do all the work yourself, your chances of a successful release will increase if you set aside time maintaining a news feed and blog for your project early on. More exposure time means more new readers, and more of a chance for big media sources to take notice and write about your game.
- Open yourself to continuous feedback during the entire life cycle of the project.
- Let your game grow in release increments; don't do everything in the first release. Don't throw in every feature but the kitchen sink just because you think a first impression of your game is important.
Facts Sheet
- Development tools: Microsoft Visual Studio, Visual SourceSafe (code repository), Trac (bug tracker), MS Paint, GIMP, Adobe Premiere Elements for video productions, and my old and still functional copy of 3DSMax 3.1 for modeling.
- Video content: Contracted (see Special Thanks section)
- Audio content: Contracted (see Special Thanks section)
- Music: Donated by Mick Rippon!
- Programming language: C/C++
- Foundation libraries: GLUT for the game, Microsoft Foundation Classes for the editor.
- Video engine core: OpenGL
- Audio engine core: OpenAL
- Physics engine core: Newton
- Scripting engine core: LuaScript
- Lines of code for Dominoze-specific libraries and Editor: 216,000 (including code generated from Visual Studio), 49,000 lines of comments*
- Lines of code for the Gamieon-specific engine (designed to be used in other unmanaged projects): 18,800 lines of source code, 5,000 lines of comments*
- Number of dedicated team members: 1
- Number of contracted team members spanning the project's lifetime: 8
Costs of Dominoze Development
- Total monetary costs: ~$10,000 spanning 9 years
- Costs in order of size: Asset purchases, business expenses, hardware, website hosting and development tools.
- Number of development hours: I can't even estimate them. I never kept rigorous track of time, so lets just say A LOT.
Rewards for Dominoze Development
Dominoze was never released as a completed product. It did not make any money. It also didn't come anywhere near the popularity of many Indie games. However, Dominoze is my "ship in a bottle." Looking back, I can now say that I programmed a game, a complex game editor, game engine, and video engine on top of lower level third-party components by myself (operative word is -programmed-; I had a lot of help with art and level design. See credits below.) While I do feel some envy toward Indies who did release acclaimed games; I think I loved programming and pushing myself against my own limits more than I did releasing games. I'll wear Dominoze as a badge of honor for the rest of my life.
The Future of the Dominoze Idea
Taking all the aforementioned lessons in consideration, I would like to take one last shot at Dominoze in 2013 using the Unity Engine. My goal is to create an app for the PC and tablet platforms that lets people create domino sets together real-time, watch as they knock over all the dominoes, and share with everyone online in a global catalog. To do this right, I need to:
- Work with a team that shares my passion for the idea.
- Find other sandbox apps where you just build or create stuff, and study everything about them to learn what to do right and what to avoid.
- Gradually add new features in later releases over time instead of trying to get every great idea in at the beginning.
- Create a plan and set goals and limitations which include a hard release deadline, milestones, a detailed feature list for the release and an idea box for future releases, a budget, and ways to gauge how successful it can be so I know I'll get a return on the investment.
- As much as I love programming, it sure would be nice to at least monetarily break even with all that I put into it.
- Get myself and this project more involved with the development and gaming community in general. I've enjoyed countless quiet evenings of programming freely; but I've had quite my share of them.
What About the Legacy Game and Source Code?
I don't know what I will do with it; I just know that I have no plans to use it onward. Open sourcing it is one option, but I don't want to spend months training people on code where the comments and style are tailored for me and not for other developers. While the engine is designed to be lean and fast, it is too customized for Dominoze, and lacks a great deal of the functionality and ease-of-use that developers demand today. It is also not going to be actively maintained, but at least I can keep it around for reference. I'm willing to take things on a per-case basis if anyone is interested in the source, though.
Final Words
If you don't set a finish line, then you can never win a race. Even running a race will not guarantee victory; so don't postpone your happiness until you achieve it. Finally, don't work hard...work smart.
Special Thanks
Dominoze could not have gotten as far as it did if not for tremendous help with asset development from: Eric Barth, Jeff Gordon, Jordan Pelovitz, Yisroel Goldstein, Hélder Gomes, Russ McMackin, Bryan Taylor, and Jarien Strutts. Special thanks to Mick Rippon for donating his songs to the project! Special thanks to George Toderici for all the advice and web links that helped me with video engine development!
To the Reader
Dominoze PC Beta is still available for download at http://www.dominoze.com if you want to tinker with it. Feel free to drop me a line at c.haag AT gamieon DOT com if you'd like to give feedback or offer help with the project.
Please follow my Dominoze news feed on IndieDB.com if you're interested in watching the new Dominoze project progress. If you have an iPad, Android tablet, or a PC; then I hope you'll enjoy creating your own domino sets once the app is ready!
C++11 Lesson One: Hello World!
Most programming books start with a lecture on the history of programming, how computers work, and why you should learn to program. Out of these three subjects, I’m assuming you already know the answer to the third (“Why you should learn to program”), considering that you’re reading a book about programming. We will go over how computers work, however the only history we will be covering is what will make you a better programmer. So, without further ado, let’s jump right in to the basic history of C++.
You may have heard that C++ is superset of C, and this is partially true. C++ was started by Bjarne Stroustrup more than thirty years ago. It all started with Simula.
Bjarne was doing work on his P.h.d. Thesis, and he had the opportunity to work with the Simula programming language. Simula was the first language to support Object-Oriented Programming. Bjarne thought this method of programming was smart, however Simula was far too slow for practical use.
Thus, Bjarne began work on “C with Classes”. He added Object-Oriented Programming, strong type checking, inlining, and default function arguments (On top of inheritance and all the features of the C language.) As they say, the rest is history.
The most recent update to C++ was C++11. C++11 added many new features to C++, increasing performance and readability of code by a strong factor. Noticeable improvements we’ll see in the second lesson will be the auto variable and the constexpr (Constant Expression).
Now we will go over getting a C++ editor / compiler. First, go to Microsoft's Visual Studio Page, click on the “Download” button located near the bottom of the page, and then scroll down to Visual Studio 2010 Express Products. Expand the Visual C++ 2010 Express tab, select your language, and download.
Visual Studio comes with it’s own installer, so simply run the downloaded file with recommended settings to install Visual Studio.
Now comes the fun part: Our first program. Open Visual Studio and click on the the “File” button in the top-left hand corner. Hover over the “New” button, and click on “New Project”. You will now be greeted with a window containing many different options for types of projects. Select the “Win32 Console Application” option and name your project “Hello World!”.
On the next page to open, click finish without changing anything. You will now be shown the basic code of a project. You should see:
// Hello World!.cpp : Defines the entry point for the console application.

//

#include "stdafx.h"

int _tmain(int argc, _TCHAR* argv[])

{

   return 0;

}
Before we continue, we must change the line which says "int _tmain(int argc, _TCHAR* argv[])" to simply say "int main()". "int main()" is a function. In later tutorials we will learn more about the main function (and what a function is), however now I will simply say that the main function contains the code that our application runs (it is the entry-point for our application).Also, remove the line which says "#include "stdafx.h"". Remember how when we were setting up our project we unclicked the "Precompiled headers" check-box? "#include "stdafx.h"" is our Precompiled Headers file. Since we're using a small project, we don't need Precompiled headers, so we delete the line. (If you don't understand Precompiled headers or why they're important, you can simply ignore it now. They only become important when working on large applications where it can take a long time to compile.)
Your code should now look like:
// Hello World!.cpp : Defines the entry point for the console application.

//

int main()

{

   return 0;

}
Now, type out (don’t copy and paste):
#include <iostream>right after the two lines which start with "//".
Let’s look at what the above code does, character by character:
The # sign is a signal to the preprocessor. The preprocessor runs through your code before actually compiling it and checks for lines which start with the # sign. This sign means the word(s) after it are commands for the preprocessor.
You may be wondering: What is a pre-processor? Well, a pre-processor is like a Video-Game tester. These testers go through before the game is released (compiled) and fix any bugs (They actually just report the bugs, however you get the idea). The pre-processor hunts through your source code before compiling for the # sign, and then executes the command(s) following the # sign. Normally, these commands involve printing out source code.
The above command (#include) tells the preprocessor to include the following file. The filename is located between either a less than and greater than sign (<) or two quotes (“”). We’ll explore the difference between the < and “” signs once we start using more than one file, however for now we will use <.
Including the file means that the preprocessor hunts for the file, and if it finds the file, it will print out everything in the file where you put the #include statement. This means that both the code located inside the included file and your code are compiled.
In this case, we #include <iostream>;. Iostream is part of the standard-library of C++, and it stands for “input-output stream”. Iostream is normally used for input and output to the console. This means we can print out words and data to the console, and get user-input from the console.
Your code should now look like this:
// Hello World!.cpp : Defines the entry point for the console application.

//

#include <iostream>

int main()

{

   return 0;

}
When we included iostream, we were including a part of the standard-library (std). To access commands in the standard-library, we use the scope-resolution operator (::). The lets us access code in namespaces. A namespace is like a package in Java, it groups together code. The scope-resolution operator tells the compiler that the code we're accessing is in a specific namespace.
Now for the last two lines of code we will change in Visual Studio. After the first bracket ({), however before the return 0; line, type in:
std::cout << "Hello World!" << std::endl;

std::cin.get();
The “cout” command is part of the std (standard-library) namespace. It prints to the console what we insert into it. When we included iostream (iostream is used for console input and output), we included the “cout” command.
The scope-resolution operator (::) lets the compiler know that cout is part of the standard-library(std). After cout, we see the left-shift operator (<) This operator inserts the code following it into “cout”. In this case, we insert “Hello World!”. If we are inserting different types of variables or commands into “cout”, we separate them with the left-shift operator (<). In this case, we also want to use endl (Another part of the standard library). Endl and hello world are completely different (Hello World! is a string, endl ends the current line in the console), so we use the left-shift operator (<) to separate them. Endl stands for End Line, and it does exactly that.
At this point, you’re probably wondering why we have semicolons. Semicolons tell the compiler where statements end. This whole program could be on a single line, however we use whitespace (space which contains no code) to make the code easier to read. To have all the code be on a single line, we would simply need to write it all on the same line, separating our commands / statements using semicolons. You put semicolons at the end of your commands / statements, signifying that another command / statement is coming after that semicolon.
Next, we will examine cin.get();. This command tells the console to wait for user input.
Now we can finally run our code. Simply press “F5” on your keyboard (or select “start debugging” from the visual studio debug menu) to run the code. You will probably be met with a message about your code being “out of date”. This is a normal Visual Studio warning, so simply click “yes” to continue running your program. If you get any errors, here is the full code:
// Hello World!.cpp : Defines the entry point for the console application.
//

#include <iostream>

int main()

{

   std::cout << "Hello World!" << std::endl;

   std::cin.get();

   return 0;

}
Cheers :)!
Questions
What does #include <filename> do?
Answer: replace the #include statement with the code located in the filename
What is the preprocessor?
Answer: The preprocessor runs through your code before compiling and readies it for compiling
What does cin.get() do?
Answer: wait for user input
What does cout do?
Answer: Prints to the console
What does the insertion operator do?
Answer: Inserts data into cout
What does endl do?
Answer: End the current line in the console
Coming Next Lesson:
- Variables!
- Main Function!
- Console Input / Output!
Article Change-Log!
- Removed
using namespace std;
command! - Changed _tmain() to main() and explained main()!
- Fixed last source code!
- Clarified Left-Shift Operator!
- Fixed Source Code!
- Clarified the purpose of SemiColons!
- Fixed more Source Code!
- Removed #include "stdafx.h"!
C++11 Lesson Two: Variables!
Starting in this lesson, we will be “getting our hands dirty”. Now, the lessons will be longer and contain more information. We will have whole chapters devoted to interesting projects, and we will discuss new C++11 features. Before we continue, I must say that most of what I’ve said in the previous tutorial is of vital importance. We will be moving forward now, and if you need a reminder about syntax, I suggest that you refer to previous chapters.
First, we will be discussing the “main()” function. This is, quite literally, the “main” part of your C++ application. This function (if you don’t know what a function is, hold on) tells our C++ compiler where to start. The Compiler will look for Main() and execute the code inside. This is why a deep understanding of main is so important.
Open up our previous project (Hello World!) in Visual Studio and look at the code:
// Hello World!.cpp : Defines the entry point for the console application.

//

#include <iostream>

int main()
{

   std::cout << "Hello World!" << std::endl;

   std::cin.get();

   return 0;

}
You may have noticed the “int main()” line before the brackets and our main code. You might also have noticed the “return 0;” line also. Now, we will explain their significance.
This is where the compiler looks for the actual code to run. In this case, we print out “Hello World” and pause the system inside our main function.
As you may already have guessed, main() is a function. “What is a function?”, you may be asking. A function (more precisely, a Method) is a subroutine, or a piece of code within a larger program which performs a specific task. As you’ll see later on, you can have many functions in many different files. Main() is important because the code in main is what the compiler runs. If you didn’t have a main, the compiler would compile all of your code, however it wouldn’t run any of it.
Another interesting piece of code is the “int” before “main()” and our “return 0;” line. These are actually related, so we will discuss them both at the same time.
In C++, int stands for integer. The code “int main()” tells us that the “main()” function returns an integer. The return type (What type of value the function will return) of a function always comes before the name. An example would be:
returnType functionName(function Parameter)
{
 Code!
}
As you can see, we have a return type, a function name (for our main() function, the function name is simply main), and a function parameter. Function parameters are values that are passed to a function. A function can have more than one function parameter, separated by a comma. In our “int main()” function, our return type is int, the name is main, and we take no arguments (thus empty parenthesis).
We also have the code “return 0;” inside our main function. As we’ve already established, the main() function returns an integer. We use the:
return value;
command to tell the function what to return. The function will return the “value” in “return value;”. This means that our main function returns 0, because the return statement of main() is “return 0;”.
Notice how zero is an integer. Functions can only return values that are of the return type specified right before the function name. If you tried to return something which wasn’t an integer (like 3.14, for example), you would get a compiler error.
Now that we understand the basics of functions and the main function, lets talk about Variables. Variables are the building blocks of programming. In their simplest terms, variables are a symbolic name attached to a value (the value can change, thus the term variable). To store values while we’re programming, we use variables.
If you’ve taken algebra, you may remember that there was variables in math also. In math, a variable was a symbol that represents a quality (Normally, the symbol was a letter and the quality was a number). You would have to find out the values of variables in Algebra, however. In programming, you assign variables values and use them.
If you want to declare a variable, you use:
variableType variableName = variableValue;
The variable type is the type of the variable. A type is essentially a certain kind of value or variable. There are eight basic (or primitive) types:
These types are the building blocks of your application. As you can see, each variable takes up a certain number of bits has minimum / maximum values. We will now go over the variables.
bool (stands for boolean): Can be either true or false.
byte: Can contain any number between -127 and 127 (No Decimals).
short: Smaller (Shorter) version of integer (No Decimals).
char: Contains a single character. Can contain a large amount of different characters.
int: The basic Integer. Can contain a very large integer (No Decimals).
long: Largest type of integer. Can contain very small and high values (No Decimals).
float: Can contain very large floating-point numbers (Decimals).
double: Can contain extremely large floating-point numbers (Decimals).
Without further ado, let's see these variables in action. Edit your program so that it contains the following lines of code before our std::cout... statement:
int number = 27;
char firstLetterOfAlphabet = 'a';
Then, change our std::cout statement so that instead of printing out Hello World!, make it print out both number and firstLetterOfAlphabet. We can do this by deleting "Hello World!" and putting the names of the variables in it’s place. You must remember that since the variables are different types, we must separate them using the insertion operator (<). Make sure to keep our endl statement. Our code should now look like:
// Hello World!.cpp : Defines the entry point for the console application.
//

#include <iostream>

int main()
{
   int number = 27;
   char firstLetterOfAlphabet = 'a';

   std::cout << number << firstLetterOfAlphabet << std::endl;
   std::cin.get();
   return 0;
}
If you run our program now, you will see the values of number and firstLetterOfAlphabet printed out into the console right next to each other. These values are variables. Remember to always put the variable type before our name.
You can refer to the variables using their names. These variables are called local variables. This means that they are local to the function main. If you had another function and tried to use the number variable inside that function, you would get an error.
Variables are, well, variable. We can change their values many times. See this for yourself by adding more lines of code which change the value of number or firstLetterOfAlphabet (Or both) multiple times. As you will see, the last value that you assign to them is what is printed out.
It’s important to understand why variables are important: Many times in programming, you’ll be programming a problem which requires storing a value of some type. Variables store this value, and allow us to refer to the value using the variable’s name.
You can assign a variable a value when you create it or after. If we wanted to, we could create our number variable like so:
int number;
number = 27;
This is equivalent to the line:
int number = 27;
Sometimes, you won’t get the value of a variable until late in a program. It is good practice, however, to declare(create) all of your variables at the beginning of your program (this makes it so that other people don’t have to search through your code to find variables). Giving your variables a value is called defining your variables. Make sure to always give your variables a value, even if it’s zero (for numbers) or a space (for characters). Giving a variable a value for the first time using the assignment operator (=) is called initializing the variable. It is good practice to always initialize your variables, because if you try to use them and you haven’t initialized them, you’ll get an Access Violation error (It is considered an access violation to read memory which hasn’t been initialized. This is because both uninitialized memory and all the memory your program uses are the same thing, and it is an error to read memory your program isn’t using.)
You can also create more than one variable of the same type at the same time. Examine the following code:
int number = 30, otherNumber = 56;
This code creates both an integer called number initialized to thirty, and an integer called otherNumber initialized to fifty-six. This allows us to accomplish the creation and initialization of many variables in one line of code. The variables must be the same type, however. We can’t use:
int number = 30, char character = 'a';
because of C++’s type-safety, and for clarity.
Operators
Operators are characters which allow us to perform operations on values. For now, we will go over the basic five operators for numeric (number) variables:
+ adds two numbers - subtracts two numbers * multiplies two numbers / divides two numbers % gives the remainder of two numbers
All of these operators take two operands: One on the left, and one on the right. their form is:
op1 (operator) op2;
Let’s add two numbers and assign the value of their addition to another variable.
First, delete your firstLetterOfAlphabet variable and replace it with another integer variable called otherNumber. The value of this variable can be anything you would like. Then, create another variable called result and set it equal to the sum of number and otherNumber, like so:
number = 27;
otherNumber = 30;
result = number + otherNumber;
Now, replace the printing of number and firstLetterOfAlphabet in our cout statement with the printing of only result. Our code should look like the following:
// Hello World!.cpp : Defines the entry point for the console application.
//

#include <iostream>

int main()
{
   int number = 27;
   int otherNumber = 30;
   int result = number + otherNumber;

   std::cout << result << std::endl;
   std::cin.get();

   return 0;
}
If you ran this code, you would see the number 57 printed to the screen followed by the console asking us to “press any key to continue...”.
Now, let’s go over the difference between a expression and a statement. So far, I’ve been using the term statement and command interchangeably. From now on, I will only use either expression or statement to describe our programs.
An expression is a small piece of code that can be evaluated to produce a result. An example would be 5 + 10. This can be evaluated to produce fifteen, so it is an expression. An expression’s exact definition is a combination of operators and operands.
A statement is different. Statements are complex pieces of code which normally end in a semicolon. They include calling functions (which we will discuss later on) and performing operations. They are the smallest units of execution in our program.
In C++11, we now have auto variables. For these variables, we don't have to specify a type. The compiler determines the type of the variable at compile time. To create an auto variable, simply put "auto" instead of the normal type of your variable. The compiler will find the variables type at compiler time.
auto number = 27;
In the above code, we create an auto variable and assign it to twenty-seven. auto variables must always be defined when they are declared. Because of this, we can't have:
auto number;
number = 17;
Compilers look at line where we declare the variable when determining the type. If we don't assign the variable a value, it is impossible for the compiler to determine the type of the variable!
That is all for this lesson! See you again next time!
Cheers :)!
Questions
What is a variable?
Answer: A symbol attached to a value
Why are variables useful?
Answer: They allow us to store data
What does the multiplication operator look like?
Answer: *
What does it mean to initialize a variable?
Answer: to assign it a value for the first time
How do we print out variables to the console?
Answer: Using cout, separating the variables we would like to print out with the insertion operator
Coming in next tutorial: Console Input and Output!
Changelog:
- Fixed formatting!
- Synchronized Code!
Practical use of Vector Math in Games
Good news: use of trigonometry in graphics is rare and avoided for multitude of reasons. We have other tools which are easier to understand and use. You may recognize our old friend here - a vector.

This article will introduce you to 3D vectors and will walk you through several real-world usage examples. Even though it focuses on 3D, most things explained here also work for 2D.
Article assumes familiarity with algebra and geometry, some programming language, a basic knowledge of OOP.
Vector Math in Games
Concepts
In mathematics, a vector is a construct that represents both a direction as well as a magnitude. In game development it often can be used to describe a change in position, and can be added or subtracted to other vectors. You would usually find a vector object as part of some math or physics library.
They typically contain one or more components such as x, y and z. Vectors can be 1D (contain only x), 2D (contain x, y), 3D (contain x, y, z), even 4D. 4D vectors can be used to describe something else, for example a color with an extra alpha value.
One of the toughest things beginners have difficulty with when it comes to vectors is to understand how something that seemingly looks like a point in space can be used to describe a direction.
Take the 2D vector (3,3). To understand how this represents a direction you need only look at the following graph. We all know that it takes two points to form a line. So what is the second point? The missing point is the origin located at (0,0). If we draw a line from the origin at (0,0) to (3,3) we get the following:
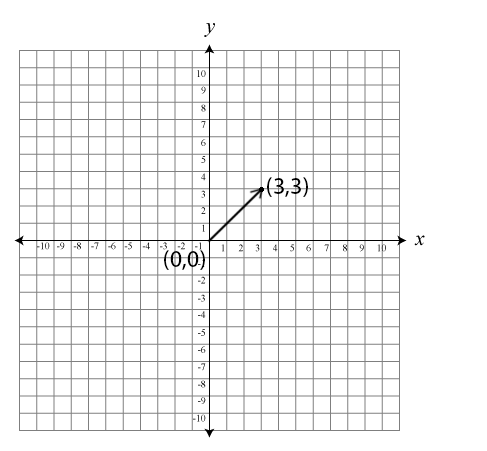
As you can see, the introduction of the origin as the second point gives our vector a direction. But you can also see that the first point (3,3) can be moved (or translated) closer to or farther away from the origin.
The distance from the origin is known as the magnitude and is given by the quadratic equation a^2 + b^2 = c^2. In this case 3^2 + 3^2 = c^2 and c = sqrt(18) ~= 4.24. If we divide each of the components of this vector by 4.24 we can scale the vector back to a point where it has a magnitude of just 1. We will learn in upcoming examples how this process of normalizing the vector can be very useful since this process retains the direction, but gives us an ability to scale the vector up or down quickly with simple multiplication by some numeric (aka scalar) value.
For the upcoming examples, I am going to assume that your math library uses Vector2 for a 2D vector and Vector3 for a 3D vector. There are various differences in naming across libaries and programming languages, for example vector, vector3, Vector3f, vec3, point, point3f and similar. Your math library must have some documentation and examples for them.
Like any other variable, the vector in your code has a meaning which is up to you: it can be a position, direction, velocity.
- Position - a vector represents an offset from your world origin point (0, 0, 0).
- Direction - vector looks very much like an arrow pointing at some direction. That is indeed what it can be used for. For example, if you have a vector that points south, you can make all your units go south.
- A special case of direction vector is a vector of length 1. It is called a normalized vector, or normal for short.
- A velocity vector can describe a movement. In that case, it is a difference in position over specific amount of time.
Remember the Basics - Vector Addition and Subtraction
Vector addition is used to accumulate the difference described by both vectors into the final vector.
For example, if an object moves by A vector, and then by B vector, the result is the same as if it would have moved by C vector.
For subtraction, the second vector is simply inverted and added to the first one.
Example: a Distance Between Objects
If your vectors represent positions of objects A and B, then B - A will be a difference vector between positions. The result would represent a direction and a distance A must travel to get to B.
For example, to get a distance vector to that tree you need to subtract your position from the tree position.
I am using pseudo-code to keep the code clean. Three numbers in parentheses (x, y, z) represent a vector.
tree_position = (10, 10, 0)
my_position = (3, 3, 0)
# distance and direction you would need to move
# to get exactly where the tree is
vector_to_tree = tree_position - my_position
Example: Velocity
Besides a position vector, object may have a velocity vector.
For example, the velocity vector for a cannon ball may describe the distance it is going to move over the next second.
When first fired, cannon ball may have these properties:
position = (0, 10, 10) # position: 10 units in Y and Z direction
velocity = (500, 0, 0) # initial movement is 500 units in X direction over the next second
Every second, you would update cannon position based on the velocity:
position += velocity # add velocity to position and update position
Concept: Simulation
Wait! We do not want to update object once per second. In fact, we want to do it as often as possible.
But we can not expect the time between updates to be fixed. So we use a delta time, which is the time since the last update.
Since our delta time represents a fraction of the time passed, we can use it to get only that fraction of our velocity for the next position update.
position += velocity * delta
This is a very basic simulation. To make one, we model how our objects behave in our world (cannon ball has constant velocity forever). Then we load initial game state (cannon ball starts with initial velocity and position).
The final piece where everything comes together is an update loop, which is executed regularly We use the delta time (time interval) since the previous update, and update every simulated object to be where it should on the rules we defined (update cannon ball position based on its velocity).
Example: Gravity, Air Resistance and Wind
Our cannon ball is quite boring: it will move to the same direction and at the same speed forever. We need it to react to the world around. For example, let there be gravity for it to fall, air resistance for it to slow down, and the wind just for kicks.
What the gravity actually means in a game? Well, it has a side effect of increasing velocity of objects to one direction: down. So in case our Y axis is up, our gravity vector would be:
# increase velocity of every object -2 down per second
gravity_vector = (0, -2, 0)
So, before every update, we can modify our velocity:
velocity += gravity_vector * delta # apply gravity effect
position += velocity * delta # update position
Let's just say our air is thick. So thick it slows down cannon balls by half every second.
velocity += gravity_vector * delta # apply gravity effect
velocity *= 0.5 * delta # apply 0.5 slowdown per second

position += velocity * delta # update position
Velocity had the force because of the cannon ball being the cannon ball. Kinetic energy.
However, there might be another constant force to change the movement of cannon ball: like the wind.
# modify kinetic energy / velocity
velocity += gravity_vector * delta # apply gravity effect
velocity *= 0.5 * delta # apply 0.5 slowdown per second

# add all forces
final_change_per_second = velocity + wind_force_per_second

# update position
position += final_change_per_second * delta
The main point of this example is to demonstrate how easy it is to create quite complex behavior using a simple vector math.
Concept: Direction
Often you will not need a distance from A to B, just the direction for A to face the B. A distance vector B - A can represent the direction, but what if you need to move "just a bit" towards B, at the exact speed you like?
In such case vector length should be irrelevant If we reduce a direction vector to the length of 1, we can use it for this, and other purposes. We call this reduction the normalization and the resulting vector the normal vector.
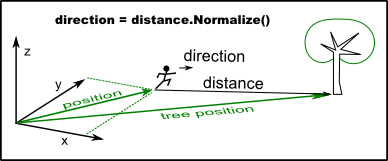
So, a normal vector always should be the length of 1, otherwise it is not a normal vector.
A normal vector represents an angle without any actual "angles" required as a possible change in position. If we multiply the vector by a scalar number, we get the direction vector that has the same length as the scalar.
There should be a "normalize" function in your math library to get a normal vector from any other vector.
So we can get a movement by exactly the 3 units towards B.
final_change = (B - A).normalize() * 3
Concept: Surface Plane
A normal vector can also be used to describe a direction a surface plane is facing. You can imagine the plane as an infinite slice of the world in half at a particular point P. Rotation of this slice is defined by the normal vector N.
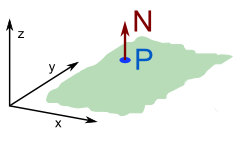
To rotate this slice/plane, you would change its normal vector.
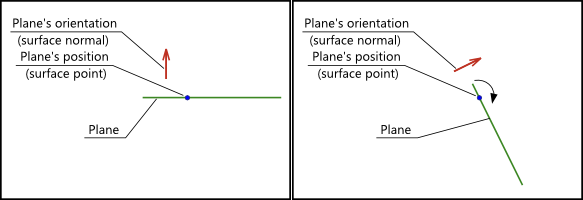
Concept: Dot Product
A dot product is an operation on two vectors, which returns a number. You can think of this number as a way to compare the two vectors.
Usually written as:
result = A dot B
This comparison is particularly useful between two normal vectors, because it represents a difference in rotation between them.
- If dot product is 1, normals face the same direction.
- If dot product is 0, normals are perpendicular.
- If dot product is -1, normals face opposite directions.
Here are the normal values in the illustration:
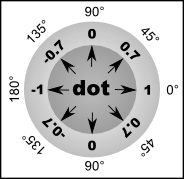
Note that change from 1 to 0 and from 0 to -1 is not linear, but follows a cosine curve. So, to get an angle from a dot product, you need to calculate arc-cosine of it:
angle = acos(A dot B)
Example: Light
Suppose we are writing a light shader and we need to calculate the brightness of a pixel at a particular surface point. We have:
- A normal vector which represent the direction of surface at this point.
- Position of the light.
- Position of this surface point.
We can get the distance vector from our point to the light:
distance_vec = light_pos - point_pos
As well as the direction of the light for this particular point as a normal vector:
light_direction = distance_vec.normalize()
Then, using our knowledge about angle and dot product relationship, we can use dot product of point-to-light normal to calculate the brightness of the point. In simplest case it will be exactly equal the dot product!
brightness = surface_normal dot light_direction
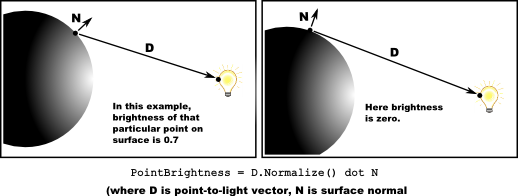
Believe it or not, this is the bare bones of a simple light shader. An actual fragment shader in OpenGL would look like this (do not worry if you have no knowledge of the shaders: this is just an example to demonstrate the practical application of dot product):
varying vec3 surface_normal;
varying vec3 vertex_to_light_vector;

void main(void)
{
vec4 diffuse_color = vec3(1.0, 1.0, 1.0); // the color of surface - white
float diffuse_term = dot(surface_normal, normalize(vertex_to_light_vector));
gl_FragColor = diffuse_color * diffuse_term;
}
Note that the way "dot" and "normalize" functions are used is the only difference from previous examples.
Example: Distance from a point to a plane
To calculate the shortest distance from some point to a plane, first get distance vector to any point of that plane, do not normalize it, and multiply it with plane's normal vector.
distance_to_a_plane = (point - plane_point) dot plane_normal;
Example: Is a point on a plane?
If it's distance to a plane is 0, yes.
Example: Is a vector parallel to a plane?
If this vector is perpendicular to plane's surface normal, then yes.
We already know that two vectors are perpendicular when their dot product is 0.
So vector is parallel to the plane when vector dot plane_normal == 0
Example: Line intersection with a plane
Let's say our line starts at P1 and ends at P2. A point on plane surface SP and surface normal is SN.
If we make an imaginary plane run through the first line point P1, the solution boils down to calculating which point (P2 or SP) is both closer to P1 and more parallel to SN. This value for can be calculated by using a dot product.
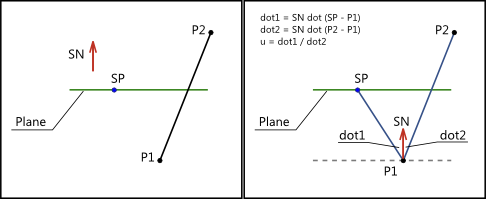
dot1 = SN dot (SP - P1)
dot2 = SN dot (P2 - P1)
You can calculate "how much" it intersects the plane by comparing (dividing) these two values.
u = (SN dot (SP - P1)) / (SN dot (P2 - P1))
- if u == 0, line is parallel the plane.
- if u <= 1 and u > 0, line intersects the plane.
- if u > 1, no intersection.
You can calculate the exact intersection point by multiplying line vector to u:
intersection point = (P2 - P1) * u
Concept: Cross Product
A cross product is also an operation on two vectors. The result is a third vector, which is perpendicular to the first two, and it's length is an average of the both lengths.
Note that for cross product, the order of arguments matters. If you switch order, the result will be a vector of the same length, but facing the opposite direction.
Example: Collision
Let's say an object moves into a wall at an angle. But wall is friction-less and object should slide along its surface instead of stopping. How to calculate its new position for that?
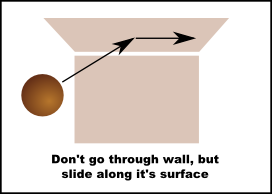
First of all, we have a vector which represents the distance the object should have moved if there were no wall. We are going to call it a "change". Then, we are going to assume object is touching the wall. And we will also need the normal vector of this surface.
We will use the cross product to get a new vector which is perpendicular to the change and the normal:
temp_vector = change cross plane_normal
Then, the final direction is perpendicular to this new vector and the same normal:
new_direction = temp_vector cross plane_normal
That's it:
new_direction = (change cross plane_normal) cross plane_normal
Now what?
With this article, I have tried to bridge the gap between the theory and the real practical application of it in game development. However, it means that I had to skip a lot of things in between.
But I hope the picture is a bit clearer. If anything, this walk-through may serve as a quick overview of the way Vector Math is used in Games.
More in-depth reading
- Vector Math - Addition, subtraction, negation, normalization.
- Better Explained Dot Product - Follows similar style of explaining dot product by examples
- Dot Product and Cross Product - More in-depth explanation of dot and cross products
- What is a game loop? - Short explanation of the game loop
- More in-depth look at the different update loop types
Pre-Visualization Is Important!
Many a beginner on gamedev.net (including me) has trouble with their software in the beginning. I had no idea how to plan for projects or what was even included in projects. I would look for posts about how to plan out projects. Generally when these questions get ask the seasoned developers on here (Also known as people who have worked on many finished projects) answer with responses like:
I have a really iterative design
I don't really pre-visualize, I try to sort out more details at implementation
Now, that's not to say these developers are in the wrong at all. For a beginner however, these terms can be very daunting and confusing. For me, I thought I shouldn't really pre-visualize at all and that everything would sort itself out eventually (Boy how wrong was I). In this article I plan to explain to you how I pre-visualize my projects, how much you should really be pre-visualizing, and why it's important. So let's jump right in with the third one: Why Pre-Visualizing Important?
Pre-Visualizing allows you to plan how your classes interact. Imagine this: In many projects, your Collision and Physics interact, and almost all of your classes have to access a singular Map for the level you're on. How they will interact and how the map will be handled must be thought out so that the code you write at the beginning will be prepared for how the other classes use the Map. This must be sorted out in pre-visualization because you write certain code (classes) at different times, which means if you don't think about this you'll end up re-writing enormous amounts of code.
Pre-Visualization also defines project scope. Knowing what you plan to accomplish and what accomplishing that includes helps with development (For one thing, you will be able to gauge your progress and define what needs to be done next). When making a Side-Scroller, understanding the scope of the enemies A.I. is important so you'll know the work involved. If you make simple A.I., you can compensate with adding bows to a Side-Scroller that was originally only going to have swords. Now that I've made that analogy however, let us move on to another important topic involving why pre-visualizing is important: Understanding the Mechanics of your game.
This ties into project scope. The mechanics are part of project scope because the more complex the mechanics the more time it will take to implement them. Imagine this: Having a Bow involves a lot more coding (Handling projectiles shot, their collision, how fast they move, animation for them, etc.). So at project scope, you define if you'll have a bow or if you'll only have swords. This lets you only plan for swords. The first part of planning should always be defining your scope.
Now on to the second part: How much you should be pre-visualizing. My general rule is figuring out your hierarchy and how your classes will interact, however I leave out the actual coding details. I know how to code, and a large part of my actual software-design is figuring out how to solve problems or thinking about the best way to solve a problem. Figuring out what those problems are and how you'll solve them is pre-visualization. Actually planning out my code, what my functions will pass in, etc. shouldn't be defined in pre-visualization (Except for small, single-task programs like converting one form of a linear equation to another form.). Solving these problems before you start coding make sure that all the code you right already had that problem in mind (So when a problem turns up or when you are implementing something, you don't have to scrap existing code).
Some problems are bound to be encountered while coding, and trying to write down and fix every minute detail of your program is an example of bad pre-visualization. You can't anticipate everything, however anticipating what you can (AKA the bigger problems and ideas) will help exponentially.
Now, what you've all been waiting for: How do I pre-visualize? It's simple really. I get a notebook, write down the name of my project. I define the scope, the mechanics, and then take one or two pages in the notebook I label "Classes". I figure out the basic classes and write down their responsibility (Defining responsibility make sure you understand what all of your classes are actually supposed to be doing). Then, I take maybe a page for each class or important mechanic and think about it hard. I think about how it'll handle it's responsibilities and how it will interact with other classes. The key word here is interaction. Interaction is a huge part of software design (Especially video game software design.). This allows me to anticipate the basic structure of my code and the problems I'll run into. Then for a day or two I'll read over what I have and reflect. After I do this, I take my journal to the computer and start coding. This whole process is one to two weeks.
The main point of this article was to stress how important pre-visualization is to beginners. Now, it might just be tic-tac-toe, however still get in the habit of pre-visualizing. It'll pay off in the long run.
If you enjoyed this article, please post down below. If you have any recommendation about how you plan or any corrections, feel free to share them with everyone. Cheers :)!
Designing a Robust Input Handling System for Games
For the purposes of this article, we'll focus on the platform-independent side of things. Getting input from the underlying hardware/OS is up to you; for Windows, Raw Input is pretty much the de facto standard; XInput might be useful if you want joystick/controller support. For other platforms, research and select the API or library of your choice.
Got a way to get pure input data? Good. Let's take a look at the overall input system architecture.
Designing a Robust Input Handling System
We have a few goals here which should make this system (or ones based on it) applicable for pretty much any game, from a simple 2D platformer to an RTS to a 3D shooter:
- Performance is important; input lag is a bad thing.
- It should be easy to have new systems tap into the input stream.
- The system must be very flexible and capable of handling a wide variety of game situations.
- Configurability (input mapping) is essential for modern games.
We will divide the system into three layers:
- Raw input gathering from the OS/etc.
- Input mapping and dispatch to the correct high-level handlers
- High level handler code
Contexts
The central concept of this system is the input context. A context defines what inputs are available for the player at a given time. For instance, you may have a different context for when a game menu is open versus when the game is actually being played; or different modes might require different contexts. Think of games like Final Fantasy where you have a clear division between moving around the game world and combat, or the Battlefield series where you get a different set of controls when flying a helicopter versus when running around on the ground.
Contexts consist of three different types of input:
- Actions
- States
- Ranges
An action is a single-time thing, like casting a spell or opening a door; generally if the player just holds the button down, the action should only happen once, generally when the button is first pressed, or when it is finally released. "Key repeat" should not affect actions.
States are similar, but designed for continuous activities, like running or shooting. A state is a simple binary flag: either the state is on, or it's off. When the state is active, the corresponding game action is performed; when it is not active, the action is not performed. Simple as that. Other good examples of states include things like scrolling through menus.
Finally, a range is an input that can have a number value associated with it. For simplicity, we will assume that ranges can have any value; however, it is common to define them in normalized spans, e.g. 0 to 1, or -1 to 1. We'll see more about the specifics of range values later. Ranges are most useful for dealing with analog input, such as joysticks, analog controller thumbsticks, and mice.
Input Mapping
The next feature we'll look at is input mapping. Simply put, this is the process of going from a raw input datum to an action, state, or range. In terms of implementation, input mapping is very simple: each context defines an input map. For many games, this map can be as straightforward as a C++ map object (aka a dictionary or table in other languages). The goal is simply to take an identified type of hardware input and convert it to the final type of input.
One twist here is that we might need to handle things like key-repeat, joysticks, and so on. It is especially important to have a mapping layer that can handle ranges intelligently, if we need normalized range values in the high-level game logic (and I strongly recommend using normalized values anywhere possible). So an input mapper is really a set of code that can convert raw input IDs to high-level context-dependent IDs, and optionally do some normalization for range values.
Remember that we need to handle the situation where different contexts provide different available actions; this means that each context needs to have its own input map. There is a one-to-one relationship between contexts and input maps, so it makes sense to implement them as a single class or group of functions.
Dispatching
There are two basic options for dispatching input: callbacks, and polling. In the callback method, every time some input occurs, we call special functions which handle that input. In the polling method, code is responsible for asking the input management system each frame for what inputs are occurring, and then reacting accordingly.
For this system, we will favor a callback-based approach. In some situations it may make more sense to use polling, but if you're writing game code for those scenarios, chances are you don't need any advice on how to build your input system [img=http://public.gamedev.net/public/style_emoticons/default/wink.gif]
The basic design looks like this:
- Every frame, raw input is obtained from the OS/hardware
- The currently active contexts are evaluated, and input mapping is performed
- Once a list of actions, states, and ranges is obtained, we package this up into a special data structure and invoke the appropriate callbacks
I recommend implementing this as a simple ordered list: each context in the list is given the raw input for the frame. If the context can validly map that raw input to an action, state, or range, it does so; otherwise, it passes on to the next context in the list. This can be done effectively using something like a Chain of Responsibility pattern. This allows us to prioritize certain contexts to make sure they always get first crack at mapping input, in case the same raw input might be valid in multiple active contexts. Generally, the more specific the context, the higher priority it should carry.
The other half of this scenario is the callback system. Again there are several ways to approach this, but in my experience, the most powerful and flexible method is to simply register a set of general callbacks that are given input every frame (or whenever input is available). Again, a chain of responsibility works well here: certain callbacks might want first crack at handling the mapped input. This is again useful for special situations like debug modes or chat windows.
Have the input mapper wrap up all of its mapped inputs into a simple data structure: one list of valid actions, one list of valid states, and one list of valid ranges and their current values. Then pass this data on to each callback in turn. If a callback handles a piece of input, it should generally remove it from the data structure so that further callbacks don't issue duplicate commands. (For instance, suppose the M key is handled by two registered callbacks; if both callbacks respond to the key, then two things will happen every time the player presses the M key! Oops! So if the first callback to handle the key "eats" it from the list, then we don't have to worry, and we can use a simple priority system to make sure that the most sensible callback gets dibs on the input.)
High Level Handling
Once the input is available, we simply need to act on it. For actions and states, this is just a matter of having our callbacks investigate the data list and take action appropriately. Ranges are similar but slightly more complex in that we have to turn the input value into something useful. For things like joysticks, this is easy: use a normalized -1 to 1 value and just multiply that by your sensitivity factor, and poof, you have a mapped range of input. (Try using a logistical S-curve or other interpolator for better results than just multiplication.) For mice, you can use the value to tell you how far to move the cursor/camera, again possibly by using a scaling factor for sensitivity purposes.
The specifics of this third layer are really up to your game's design and your imagination.
Putting Everything Together
So, let's recap the basic flow of data through the system:
- The first layer gathers raw input data from the hardware, and optionally normalizes ranged inputs
- The second layer examines what game contexts are active, and maps the raw inputs into high-level actions, states, and ranges. These are then passed on to a series of callbacks
- The third layer receives the callbacks and processes the input in priority order, performing game activity as needed
A Word on Data Driven Designs
So far I've been vague as to how all this is actually coded. One option is certainly to hard-code everything: in context A, key Q corresponds to action 7, and so on. A far better option is to make everything data driven. In this approach, we write code once that can be used to handle any context and any input mapping scheme, and then feed it data from a simple file to tell it what contexts exist, and how the mappings work.
The basic layout I typically use looks something like this:
- rawinputconstants.h (a code file) specifies a series of ID codes, usually in an enumeration, corresponding to each raw input (from hardware) that we might handle. These are divided up into "buttons" and "axes." Buttons can map to states or actions, and axes always map to ranges.
- inputconstants.h (a code file) specifies another set of ID codes, this time defining each action, state, and range available in the game.
- contexts.xml (a data file) specifies each context in the game, and provides a list of what inputs are valid in each individual context.
- inputmap.xml (a data file) carries one section per context. Each context section lists out what raw input IDs are mapped to what high-level action/state/range IDs. This file also holds sensitivity configurations for ranged inputs.
- inputranges.xml (a data file) lists each range ID, its raw value range (say, -100 to 100), and how to map this onto a normalized internal value range (such as -1 to 1).
- A code class called RangeConversions loads inputranges.xml and handles converting a raw value to a mapped value.
- A code class called InputContext encapsulates all of the functionality of mapping a single context worth of inputs from raw to high-level IDs, including ranges. Sensitivity configurations are applied here. This class basically just exists to act on the data from inputmap.xml.
- A code class called InputMapper encapsulates the process of holding a list of valid (active) InputContexts. Input is passed into this class from the first-layer code, and out into the third-layer code.
- A code class (usually a POD struct in C++ versions of the system) called MappedInput holds a list of all the input mapped in the current frame, as covered above.
- Each frame (or whenever input is available), the first layer of input code takes all of the available input and packs it into an InputMapper object. Once this is finished, it calls InputMapper.Dispatch() and the InputMapper then calls InputContext.MapInput() for each active context and input. Once the final list of mapped input is compiled into a MappedInput object, the MappedInput is passed into each registered callback, and the high-level game code gets a chance to react to the input.
And there you have it! Complete, end-to-end input handling. The system is fast, easily extended to handle new game functionality, easily configurable, and simple to use.
Go forth and code some games!
If you'd like to see an example of how this works in action, check out the Input Mapping Demo at my Google Code repository.
Your First Step to Game Development Starts Here
Introduction
This article attempts to answer one of the most asked questions on GameDev.net. "I am a beginner. What game should I make?" If you are a beginner at game development, you should definitely read this article.
Your First Step to Game Development Starts Here
You've learned a language. Skills are at the ready. Now it's time to finally create that game! After years of playing games and discussing graphics, design, and mechanics, the time to put the game that has been dreamt about on the big screen is now. That Final Fantasy 7 remake is the first game that needs to be made. The idea of making it an online multiplayer is also a priority. Why? It would make the game better of course. Plus, everyone wants that feature anyway. Now the googling begins. What engine was it made from? What graphics does it need? Did it use DirectX or OpenGL or even Unity? Every new question produces two more questions. It gets to the point that the tasks and goal can be overwhelming. But with ambition the goal can be met! Right? Unfortunately as many beginners come to find out, the complexity of a game can tamper ambition and in some cases completely put out the flame. However, this article will help you prevent that and also build up your game programming skills.
But first let's address some issues that a vast majority of beginners run into.
Many beginners ask what language they should be using. The answer is this: any language. Yes, that's right: C, C++, D, Java, Python, Lua, Scheme, or F#. And that's the short list. The language is just a tool. Using one language or the other does not matter. Don't worry about what the professionals are using. As a beginner, the only priority and goal is having the tools to create and complete the game. The second priority is to improve your code and skill. We'll get into that a bit later. Remember there is no "which language is better?" or "which language is best?". The only question anyone with experience will ask is: "How much experience do you have with the language?". At this stage in the game development journey, familiarity and skill with whatever language you are using is more important than the language itself. This is an universal truth.
With your language of choice in hand, now is the time to choose how you will make the game. The choice normally is among a game development library, game engine, or a game maker. Which should you choose? If you are prototyping or are not a programmer, then a game maker would probably be the best choice. However game makers (ex: Game Maker, RPG Maker, ENIGMA) are able to create games (which I list later on) similar to the games of the 8-bit and 16-bit era. Game makers do some of the heavy lifting for you (ex: loading/handling image formats, input handling, integrating physics) and allow you to focus on the game itself. Most, if not all, game makers have an language specific to it to handle more advanced techniques and situations. The language more often than not is similar to C/C++/Javascript. Game engines such as Unreal, Crysis, and Unity handle all manner of games (ex: 2D, 3D, offline, online) and therefore are far more complex and in some cases complete overkill for the type of games a beginner should be making. Game engines should be used when you as a game developer have a several games under your belt and fully understand the mechanics of making a game. For most beginner game developers, especially those who are programmers, choosing a game development library is a good choice. It puts those programming skills to the test and allows discovery of more things about the language. Like the language, the library doesn't matter. Whether it's SDL, SFML, PyGame (for Python only), or Allegro, the library is just another tool to create and complete the game. Game dev libraries have more or less the same features. So whichever you pick will be fine to get the job done.
Finally after gathering our tools: language and game dev library or game maker software, we are ready to answer the most important question of all. "What game should I make?" For this question, the answer has to be approachable, doable, and for the most part understood. This is why the game that should be made should be 2D. Everyone understands 2D games. 2D games can be fancy but at its core they are basic with very few "moving parts".
Believe it or not, the previous question has a definitive answer. And that answer is Pong. Now you may wonder, "why?". Well, Pong is one of the simplest games known. The graphics are simple and the mechanics are simple. There's no guesswork on how Pong should work. Therefore it's the best candidate for the first game to be made. Each new game that is presented in this article is meant to show something new and/or build upon what the last game taught you. The skills that are learned from each game become cumulative and not specific to just one game. So each game is a step up in terms of difficulty, but nothing a little brainpower and some brute force can't solve.
Now I'll list some well-known games that will definitely help your game development skills and allow you to have actual complete games under your belt. I'll quickly point out some things that will be learned for each game. These games are:
- Pong = Simple: input, physics, collision detection, sound; scoring
- Worm = Placement of random powerups, handling of screen boundaries, worm data structure
- Breakout = Lessons of pong, powerups, maps (brick arrangements)
- Missile Command = targeting; simple enemy ai, movement, and sound
- Space Invaders = simple movement for player and enemy, very similar to breakout with the exception that the enemy constantly moves downward, simple sound
- Asteroids = asteroids (enemies) and player can move in all directions, asteroids appear and move randomly, simple sound
- Tetris = block design, clearing the lines, scoring, simple animation
- Pac Man = simple animation, input, collision detection, maps (level design), ai
- Ikari Warriors = top down view, enemy ai, powerups, scoring, collision detection, maps (level design), input, sound, boss ai
- Super Mario Bros = lessons of Ikari Warriors (except with side-view instead of top-down view), acceleration, jumping, platforms
The list shows games in terms of difficulty from least to greatest as far as programming them goes. There are games that others may suggest but these 10 games will definitely round out what you need to know in 2D game development. If you can make and complete these games, then games like Sonic, Metroid, or even Zelda become that much easier. Those games are just variations or extensions of what you have already learned.
Before I end this article, I would like to say something about completing the games. As I said above, your primary goal is making and completing the game. However, your secondary, and arguably just as important, goal is to refine your game. It's safe to say that 99% of programmers do not code Pong perfectly. Most likely your first or even second go around with Pong or Worm will not be a software architecture masterpiece. And it's not supposed to be. However, to improve your code and therefore your skill, you'll have to submit code for a code review. As all will attest to, this is a good thing TM. Allowing others to proofread your code will give you insights on better structure, better practices, and dangerous code that may work now, but may crash in the near or far future. Being introduced to good advice early in your game dev journey will save you from sudden and unnecessary meetings between your head and the keyboard. As you complete one game and move on to the next, do not kick that completed game to the corner. Go back (sooner rather than later) and refactor and improve the code. Doing so is proof that you understand the advice that others are giving you and shows that your skills have indeed become better. So in short, the process of making a game should be: create > complete > code review > refactor. Again, once you submit your code for review go on to the next game on the list, but remember to go back and improve that code after you get some feedback.
If you've made to the end of this article, you now have a path to start your game development journey. This article is meant to be a guide and not a be-all, end-all to game development. Hopefully the advice given here helps others start to become better game developers.
Article Update Log
19 Mar 2013: Initial release
DirectX 11 C++ Game Camera
Introduction
So why do we need camera anyway? Camera is the window, through which the player look into 3D world. Usually it is placed at the eyes position of player's avatar in game. By controlling the camera movement you can create awesome feelings.
When you construct your 3D scene (every point in this space have three coordinates – x, y, z), you have to present it on the screen somehow. However, monitor screen is a flat surface made up of pixels and thus have 2D coordinate system, not 3D. The camera abstraction class contains various transformation matrices inside itself and aims to address this contradiction. Additionally you can use this class when rendering scene from the light point of view to create shadow mapping or specify player’s behavior or to achieve other similar effects. It is extremely useful in rendering.
Basics
Firstly, let us discuss the concept of transformation matrices. We will need them for converting object points’ coordinates into camera-relative coordinates. If you know the basics, feel free to skip this part of the article and move right to implementation part.Take a look at the following picture:
As you can see, the exact same vector v can be defined by using different coordinate systems. In each of those systems, this vector will have its own coordinates, relative to the origin of system. How do we get vector coordinates relative to frame B, if we know its coordinates in frame A? Well, we can use transformation matrix, corresponding to coordinate system change:
[x', y', z', w'] = [x, y, z, w] * View
w component of the sequence in square brackets signals if we want to convert coordinates of the vector or coordinates of the point. If w is equal to zero - it is vector, otherwise it is a point. This component is very important, because unlike vector, points rely on exact position in space, thus, we need to consider coordinate system’s origin transformation as well. It is well illustrated on the following picture:
The view transformation matrix for our illustration looks like this:

Note that for vector (it means w component is equal to zero) Q is not needed, since multiplication by zero w component will discard it anyway. The matrix above helps us to change coordinate system from world to camera-relative.
Next, we have to project resulted camera-relative point coordinates onto 2D plane. The result M matrix will be:
M = View * Projection
Thus final equation will be:
[x', y', z', w'] = [x, y, z, w] * View * Projection
Let us discuss how to construct projection matrix.
There are different types of projection matrices exist. One is called orthogonal matrix and other is called perspective matrix.
Orthogonal matrix serves for projecting 3D point into 2D without saving 3D illusion. This type of projection is often used for drawing UI sprites or text – those objects usually should not be resized regardless of their distance from camera. The following illustration roughly shows how orthogonal projection looks like:
View frustum is a spatial volume limited by 4 planes (top, left, bottom and right) and other two planes, called near clip plane and far clip plane. All objects inside this frustum will be projected right onto the screen plane. Near and far clip planes are needed for preventing the rendering of too far or too close objects to the player. None of scene objects beyond far clip plane or closer to the camera than near clip plane will be presented on projection window. This greatly increases performance and avoid the waste of video card resources.
However, as we mentioned before, the picture produced by orthogonal projection is not realistic. Two objects with the same size with different distance from the camera will have absolutely the same size on the projection window. So what about realistic perspective projection?
Let us talk about the nature of human vision to understand concepts behind perspective projection. The human eyes see objects in a distance as if those objects would be smaller than those placed closer to the eye would. In 3D, it is called perspective. Just look through the window and you can see that buildings outside it look smaller than the window itself – this is perspective effect. Artists usually use this effect to create 3D illusion on the paper. This is one of the simple but effective techniques contributing to the scene realism.
Another interesting feature of our vision is that it is limited by view angle – we cannot see everything around us at the same time. So how can we simulate our eyes behavior in game, taking everything we have discussed before into consideration?
Here comes the concept of perspective view frustum. The view frustum is a space volume, visible by our eyes, which we want to project onto the screen. The screen comes as a rough approximation of human viewing mechanism, which usually composed out of two images, received by two human eyes. Here is illustration of perspective view frustum:
Here is how we project objects onto the screen plane (recall that it is our screen window) depending on their distance from the camera:
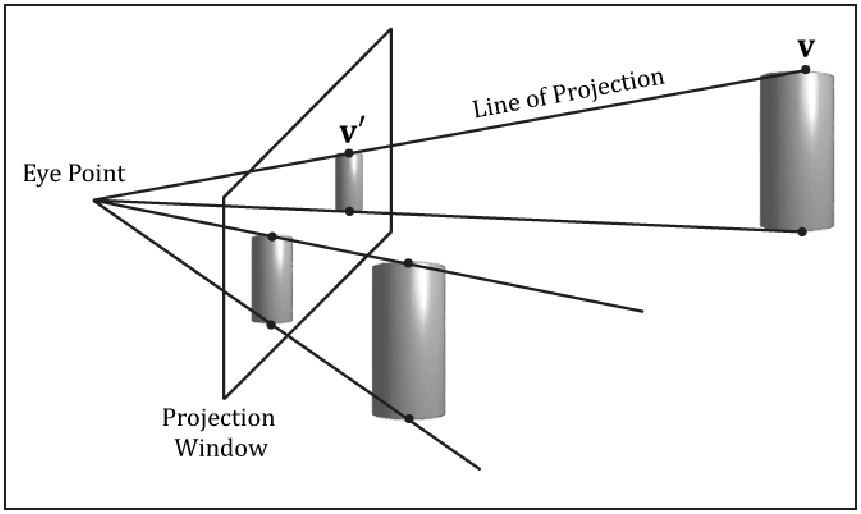
Each 3D point will have a new coordinates (x', y', z', w') after applying transformation matrix M. If you divide x' and y' coordinates by w' you will get normalized device coordinates in range [-1; 1], which is then mapped by shaders and viewport right onto the screen. Remained z' coordinate serves for depth information, which helps to recognize the order in which primitives are drawn into the screen.
Implementation
Luckily for us, DirectX has a big number of built-in functions for managing view and projection matrices without extensive complex math involved on our side. DirectX uses left-handed coordinate system: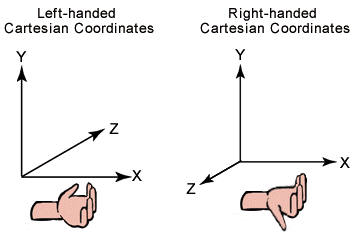
Thus our most involved functions will be:
XMMatrixLookAtLH(XMVECTOR position, XMVECTOR target, XMVECTOR up_direction)
XMMatrixPerspectiveFovLH(float radians, float ratio, float near_plane, float far_plane)
XMMatrixOrthographicLH(float view_width, float view_height, float near_plane, far_plane)
All of input parameters for those functions can be easily obtained from picture 3, so let us briefly define them:
- position – camera position coordinates in world coordinate system;
- target – camera’s focus target position. Note that this point must lie on the line of look at target vector in picture 3;
- up_direction – camera coordinate system up vector. Usually this is (0, 1, 0), but if we want our camera to be free, we have to track this vector changes by our own;
- radians – the angle between view frustum’s upper plane and bottom plane in radians, projection angle;
- ratio – this is a result of division between projection’s width and height. Usually this is the same as screen_width/screen_height;
- near_plane, far_plane – those parameters define the distance of corresponding clip planes from camera position measured along look-at-target axis;
- view_width, view_height – the width and height of orthogonal frustum.
So now we know everything we need to write our own camera implementation. I will use C++ language, since this one is my favorite and the one widely used in DirectX games. This code will use DirectXMath library included in latest DirectX 11 Windows 8 SDK.
Why do we need a separate class for our camera anyway? Well, we can directly specify all transformation matrices right in our code. But soon or later we would want to make our look at the scene more dynamic – e.g. change its position according to keyboard or mouse input. So the process of managing matrices recreation will become a nightmare. Here comes our class, which will have a very human-friendly interfaces to control camera movement.
Let us define the functionality of this class first. It will contain camera view matrix, orthogonal and perspective projection matrices and provide interface for accessing those matrices. In addition, there will be a method, which will allow us to resize of our camera's view frustum. This is needed when we want to resize our application window or if we want to render more objects into texture etc. Moreover, our camera will have an ability to change its position, moving along specified axis, changing the target itself and of course rotating the camera around itself.
At instantiation time, we create a camera at (0, 0, -1) point coordinates, target (0, 0, 0) and up vector looking along y-axis. We will store those values in our class along with view and projection matrices and their parameters. Note that we will store the end-point of up-vector, not the vector itself. After camera object instantiation, class-consumer must call InitProjMatrix() or InitOrthoMatrix() methods or both. Those methods will construct initial projection matrices for our camera view frustum, so we can acess them later from camera-class users.
Here is the code for our camera-control class, but don't worry, we will discuss it below:
//GCamera.h
#pragma once
#include "GUtility.h"

namespace Game
{
////////////////////////////////////////////////////////
// Stores View and Projection matrices used by shaders
// to translate 3D world into 2D screen surface
// Camera can be moved and rotated. Also, user can change
// camera's target and position
////////////////////////////////////////////////////////
class GCamera
{
public:
	// Constructs default camera looking at 0,0,0
	// placed at 0,0,-1 with up vector 0,1,0 (note that mUp is NOT a vector - it's vector's end)
    GCamera(void);
	// Create camera, based on another one
	GCamera(const GCamera& camera);
	// Copy all camera's parameters
    GCamera& operator=(const GCamera& camera);
    ~GCamera(void) {}

private:
	// Initialize camera's View matrix from mPosition, mTarget and mUp coordinates
	void initViewMatrix();

public:
	// Initialize camera's perspective Projection matrix
	void InitProjMatrix(const float angle, const float client_width, const float client_height,
		const float nearest, const float farthest);
	// Initialize camera's orthogonal projection
	void InitOrthoMatrix(const float client_width, const float client_height,
		const float near_plane, const float far_plane);

	// Resize matrices when window size changes
	void OnResize(uint32_t new_width, uint32_t new_height);

	///////////////////////////////////////////////
	/*** View matrix transformation interfaces ***/
	///////////////////////////////////////////////

	// Move camera
	void Move(XMFLOAT3 direction);
	// Rotate camera around `axis` by `degrees`. Camera's position is a
	// pivot point of rotation, so it doesn't change
	void Rotate(XMFLOAT3 axis, float degrees);
	// Set camera position coordinates
    void Position(XMFLOAT3& new_position);
	// Get camera position coordinates
	const XMFLOAT3& Position() const { return mPosition; }
	// Change camera target position
	void Target(XMFLOAT3 new_target);
	// Get camera's target position coordinates
	const XMFLOAT3& Target() const { return mTarget; }
	// Get camera's up vector
	const XMFLOAT3 Up() { return GMathVF(GMathFV(mUp) - GMathFV(mPosition)); }
	// Get camera's look at target vector
	const XMFLOAT3 LookAtTarget() { return GMathVF(GMathFV(mTarget) - GMathFV(mPosition)); }
	// Returns transposed camera's View matrix
    const XMFLOAT4X4 View() { return GMathMF(XMMatrixTranspose(GMathFM(mView))); }

	/////////////////////////////////////////////////////
	/*** Projection matrix transformation interfaces ***/
	/////////////////////////////////////////////////////

	// Set view frustum's angle
	void Angle(float angle);
	// Get view frustum's angle
	const float& Angle() const { return mAngle; }

	// Set nearest culling plane distance from view frustum's projection plane
	void NearestPlane(float nearest);
	// Set farthest culling plane distance from view frustum's projection plane
	void FarthestPlane(float farthest);

	// Returns transposed camera's Projection matrix
	const XMFLOAT4X4 Proj() { return GMathMF(XMMatrixTranspose(GMathFM(mProj))); }
	// Returns transposed orthogonal camera matrix
	const XMFLOAT4X4 Ortho() { return GMathMF(XMMatrixTranspose(GMathFM(mOrtho))); }

private:
    /*** Camera parameters ***/
    XMFLOAT3 mPosition;		// Camera's coordinates
    XMFLOAT3 mTarget;		// View target's coordinates
    XMFLOAT3 mUp;			// Camera's up vector end coordinates

	/*** Projection parameters ***/
	float mAngle;			// Angle of view frustum
	float mClientWidth;		// Window's width
	float mClientHeight;	// Window's height
	float mNearest;			// Nearest view frustum plane
	float mFarthest;		// Farthest view frustum plane

    XMFLOAT4X4  mView;		// View matrix
	XMFLOAT4X4	mProj;		// Projection matrix
	XMFLOAT4X4	mOrtho;		// Ortho matrix for drawing without tranformation
};

} // namespace Game
//GCamera.cpp
#include "GCamera.h"

namespace Game
{

GCamera::GCamera(void)
{
    mPosition		= XMFLOAT3(0.0f, 0.0f, -1.0f);
    mTarget			= XMFLOAT3(0.0f, 0.0f, 0.0f);
    mUp				= GMathVF(GMathFV(mPosition) + GMathFV(XMFLOAT3(0, 1, 0)));
	this->initViewMatrix();

	mAngle			= 0.0f;
	mClientWidth	= 0.0f;
	mClientHeight	= 0.0f;
	mNearest		= 0.0f;
	mFarthest		= 0.0f;

	XMStoreFloat4x4(&mView, XMMatrixIdentity());
	XMStoreFloat4x4(&mProj, XMMatrixIdentity());
	XMStoreFloat4x4(&mOrtho, XMMatrixIdentity());
}

GCamera::GCamera(const GCamera& camera)
{
	*this = camera;
}

GCamera& GCamera::operator=(const GCamera& camera)
{
    mPosition		= camera.mPosition;
    mTarget			= camera.mTarget;
    mUp				= camera.mUp;

	mAngle			= camera.mAngle;
	mClientWidth	= camera.mClientWidth;
	mClientHeight	= camera.mClientHeight;
	mNearest		= camera.mNearest;
	mFarthest		= camera.mFarthest;

    mView			= camera.mView;
	mProj			= camera.mProj;
	mOrtho			= camera.mOrtho;
    return *this;
}

void GCamera::initViewMatrix()
{
	XMStoreFloat4x4(&mView, XMMatrixLookAtLH(XMLoadFloat3(&mPosition), XMLoadFloat3(&mTarget),
		XMLoadFloat3(&this->Up())));
}

void GCamera::InitProjMatrix(const float angle, const float client_width, const float client_height,
								const float near_plane, const float far_plane)
{
	mAngle = angle;
	mClientWidth = client_width;
	mClientHeight = client_height;
	mNearest = near_plane;
	mFarthest = far_plane;
	XMStoreFloat4x4(&mProj, XMMatrixPerspectiveFovLH(angle, client_width/client_height,
		near_plane, far_plane));
}

void GCamera::Move(XMFLOAT3 direction)
{
	mPosition = GMathVF(XMVector3Transform(GMathFV(mPosition),
		XMMatrixTranslation(direction.x, direction.y, direction.z)));
	mTarget = GMathVF(XMVector3Transform(GMathFV(mTarget),
		XMMatrixTranslation(direction.x, direction.y, direction.z)));
	mUp = GMathVF(XMVector3Transform(GMathFV(mUp),
		XMMatrixTranslation(direction.x, direction.y, direction.z)));

	this->initViewMatrix();
}

void GCamera::Rotate(XMFLOAT3 axis, float degrees)
{
	if (XMVector3Equal(GMathFV(axis), XMVectorZero()) ||
		degrees == 0.0f)
		return;

	// rotate vectors
	XMFLOAT3 look_at_target = GMathVF(GMathFV(mTarget) - GMathFV(mPosition));
	XMFLOAT3 look_at_up = GMathVF(GMathFV(mUp) - GMathFV(mPosition));
	look_at_target = GMathVF(XMVector3Transform(GMathFV(look_at_target),
		XMMatrixRotationAxis(GMathFV(axis), XMConvertToRadians(degrees))));
	look_at_up = GMathVF(XMVector3Transform(GMathFV(look_at_up),
		XMMatrixRotationAxis(GMathFV(axis), XMConvertToRadians(degrees))));

	// restore vectors's end points mTarget and mUp from new rotated vectors
	mTarget = GMathVF(GMathFV(mPosition) + GMathFV(look_at_target));
	mUp = GMathVF(GMathFV(mPosition) + GMathFV(look_at_up));

	this->initViewMatrix();
}

void GCamera::Target(XMFLOAT3 new_target)
{
	if (XMVector3Equal(GMathFV(new_target), GMathFV(mPosition)) ||
		XMVector3Equal(GMathFV(new_target), GMathFV(mTarget)))
		return;

	XMFLOAT3 old_look_at_target = GMathVF(GMathFV(mTarget) - GMathFV(mPosition));
	XMFLOAT3 new_look_at_target = GMathVF(GMathFV(new_target) - GMathFV(mPosition));
	float angle = XMConvertToDegrees(XMVectorGetX(
		XMVector3AngleBetweenNormals(XMVector3Normalize(GMathFV(old_look_at_target)),
		XMVector3Normalize(GMathFV(new_look_at_target)))));
	if (angle != 0.0f && angle != 360.0f && angle != 180.0f)
	{
		XMVECTOR axis = XMVector3Cross(GMathFV(old_look_at_target), GMathFV(new_look_at_target));
		Rotate(GMathVF(axis), angle);
	}
	mTarget = new_target;
	this->initViewMatrix();
}

// Set camera position
void GCamera::Position(XMFLOAT3& new_position)
{
	XMFLOAT3 move_vector = GMathVF(GMathFV(new_position) - GMathFV(mPosition));
	XMFLOAT3 target = mTarget;
	this->Move(move_vector);
	this->Target(target);
}

void GCamera::Angle(float angle)
{
	mAngle = angle;
	InitProjMatrix(mAngle, mClientWidth, mClientHeight, mNearest, mFarthest);
}

void GCamera::NearestPlane(float nearest)
{
	mNearest = nearest;
	OnResize(mClientWidth, mClientHeight);
}

void GCamera::FarthestPlane(float farthest)
{
	mFarthest = farthest;
	OnResize(mClientWidth, mClientHeight);
}

void GCamera::InitOrthoMatrix(const float clientWidth, const float clientHeight,
		const float nearZ, const float fartherZ)
{
	XMStoreFloat4x4(&mOrtho, XMMatrixOrthographicLH(clientWidth, clientHeight, 0.0f, fartherZ));
}

void GCamera::OnResize(uint32_t new_width, uint32_t new_height)
{
	mClientWidth = new_width;
	mClientHeight = new_height;
	InitProjMatrix(mAngle, static_cast<float>(new_width), static_cast<float>(new_height), mNearest, mFarthest);
	InitOrthoMatrix(static_cast<float>(new_width), static_cast<float>(new_height), 0.0f, mFarthest);
}

}
// GUtility.h
#pragma once
#include <windows.h>

#include <d3d11.h>
#include <directxmath.h>
#include <iostream>

using namespace DirectX;

inline XMVECTOR GMathFV(XMFLOAT3& val)
{
	return XMLoadFloat3(&val);
}

inline XMFLOAT3 GMathVF(XMVECTOR& vec)
{
	XMFLOAT3 val;
	XMStoreFloat3(&val, vec);
	return val;
}
First of all, let me briefly explain what is DirectXMath, so this code will become more clear for those who don’t know anything about it yet. DirectXMath is a set of wrappers for SSE operations over SIMD-compatible processor registers. They offer parallel processing of operations over matrices and vertices such as multiplication, division and so on. So theoretically, they give us a good speedup, if used right. It means you have to do as many operations as you can over loaded into SIMD-compatible processor registers data while it is still here. Obviously, the code above is not actually utilize this feature. I just used this library and not D3DX one because the latter is deprecated in Windows 8. You can disable this behavior in Visual Studio project settings so you will not get any parallel advantages.
Additionally, DirectXMath have a number of new types. They can be divided into storage data types and SIMD data types. The majority of operations are implemented for SIMD data types – so called worker data types. So, when you want to call them, you have to load data from storage type into SIMD type, process it and store it back. Storage classes are XMFLOAT2, XMFLOAT3, XMFLOAT4, XMINT2 and other similar for vectors, XMFLOAT3X3, XMFLOAT4X4 and similar for matrices. Vectorized data types are XMVECTOR and XMMATRIX – those will be your main workers.
You can read up a lot more about DirectXMath library here.
Therefore, we store camera position, target and up coordinates in XMFLOAT3 type. Matrices are stored within XMFLOAT4X4 data type. For operations over data, we load it into SIMD-types and process it.
Let us look at the code and explain some unclear moments. First of all, we have a constructor which initializes our camera view matrix with previously specified requirements for its default position, target and up coordinates. Constructor calls initViewMatrix() private class method, which is responsible for view matrix production from given inner position, target and up class properties.
Next, we have to construct our projection matrices outside of the class, on demand. InitProjMatrix() and InitOrthoMatrix() public methods are responsible for that. If you call any of those methods, they will store their input parameters inside the class private properties and produce corresponding matrix, which will be stored inside the class as well. As you can see, near plane for orthogonal matrix is always 0.0f – that’s because we don’t have to clip any UI geometry for which this matrix will be used. Also it is highly possible that Z buffer will be turned off when rendering UI, so depth information doesn’t really matter. You can change this behavior, if you are planning to clip some of the objects used in combination with orthogonal matrix in the future.
In order to handle screen resizing we provide OnResize() method, which will simply recreate our projection matrices with new parameters.
Take a special look at matrices accessors. As you can clearly see, they call XMMatrixTranspose before returning property value. That is because XMMATRIX stores its data in row-major order, but shader programs use column-major order. Since shaders are the common consumers for our matrices, we integrate matrix-transpose functionality right into accessor. You can change it, but do not forget about this behavior.
Now it is time to discuss move, rotate and change camera/target position functionality.
The movement is a very simple. Take a look at Move(XMFLOAT3) method. It changes position, target and up-end point coordinates of camera by adding input vector to the current ones. Thus, camera vectors will not change, hence camera will keep looking along the same direction and will not rotate anywhere. This effect can be illustrated if you keep looking ahead while jumping up or strafing left, right; moving back or forward.
Rotation. Rotation is the most interesting among other camera features. Along with camera rotation around specific angle, rotation will allow us to implement the change of camera position or camera’s target position in future without unneeded complexity. We will rotate our camera around axis, provided as function input, which must be in camera-bound 3D space. Also do not forget that angle in left-handed system is measured clockwise when looking from the end of the vector to its origin. This is very important.
The algorithm for camera rotation is following:
- We calculate two vectors – look-at-target vector and up vector.
- Construct the rotation matrix from passed into function axis and angle by calling XMMatrixRotationAxis(axis, angle).
- Modify both vectors by this matrix by calling XMMatrixTransform(vector, transform_matrix).
- Restore the coordinates of target and up end points and recreate camera view matrix. Camera position does not change in rotation.
So now we can take a look at camera target change function. Basically, we calculate two vectors – old look-at-target vector and new look-at-target vector. Next, we find an angle between those vectors and their cross product:
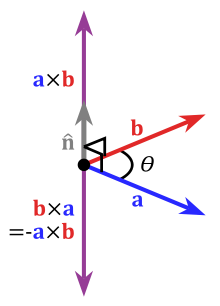
Since our system is left-handed, a x b(RH) is equal to b x a(LH). This cross-product vector will be an axis for our camera rotation. When we have an angle and axis, we can use Rotate(axis, angle), implemented earlier.
Almost the same algorithm goes for changing camera position, but we can cheat here by using previously implemented target changing method. Move our camera into new position, and then set the camera’s target to the old one.
There are so-called aircraft principal axes – pitch, roll and yaw:
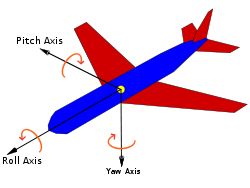
Those are usually used in space-ship battle games, where you have free movements. By means of our camera class, implemented above, we can easily model this behavior:
GCamera camera;
// camera initialization
camera.Rotate(XMFLOAT3(0.0f, 0.0f, 1.0f), 90.0f); // roll by 90 degrees clockwise
// ...
camera.Rotate(XMFLOAT3(1.0f, 0.0f, 0.0f), 90.0f); // pitch by 90 degrees clockwise
// ...
camera.Rotate(XMFLOAT3(0.0f, -1.0f, 0.0f), 90.0f); // yaw by 90 degrees clockwise
Here is a complete code of our result:
https://code.google.com/p/camera-class/source/browse/#svn%2Ftrunk
Good luck and make some entertaining games! =)


