We continue our gamedev series about the adventures of Pyatigor! (Yes, this is how we decided to name our protagonist.) In this article, we'll explain how to create environment FX and other details which make the game world more diverse and dynamic.
By running the game or just viewing the screenshot above, you can see new elements in the scene. Let's take a look at them one by one:
For the heat haze material, a solid encircling geometry in the form of a cylinder (1) was created around the islands. As a result, all objects behind this geometry will be distorted when viewing from the center.
For the smoking material, geometry around the islands was created as well, but with spaces (2).
Lava flaming geometry (3) is situated in places where other objects make contact with lava.
This effect is based on the refraction effect coupled with UV animation of a normal map. Let's take a look at the material.
The normal map (1) is at the heart of this material and is used with different scaling twice. Thanks to a Time Blend4Web-specific node, which is being added to one of the UV channels (2), this texture glides through the material creating an illusion of rising heated air.
The normal map is passed to a Refraction node (3), which is yet another Blend4Web-specific node. Also, a mask is generated (4) to be passed into this Refraction node in order to specify in which places distortions will be observed, and in which places it will not.
The Levels Of Quality nodes (5) situated before the final color and alpha cause this material to disappear at low quality settings, where the refraction effect is not available.
The above picture shows how it works. On the left the original red sphere is shown ("clean"), then the mask is pictured ("mask"), more to the right the normal map is shown ("normal") which glides through the UV. This will result in visible distortions ("refraction") of the sphere when observing it through the material.
The material for smoking effect is made similar to the heat haze.
It is based on the tile texture resembling smoke (1), which is passed to the alpha channel of the material. It moves along the UV coordinates under the influence of the Time node (2) and is combined with the vertex color with a different scale (3 and 4). This vertex color fades the material out on the edges of the geometry.
In the above picture you can see how it works. In this case, black color corresponds to fully transparent areas.
Lava flames are located near bunches of stones. Their geometry is constructed of groups of spreaded polygons, which are painted with a black and white vertex color mask, darker to the top.
Again, this material uses the same UV animation principle. Moreover, it uses the same tile smoke texture (1). With a Time node it is being shifted through the UV in three different directions (2). The resulting color obtained from this shifting is combined with the vertex color, and then all this is used to generate the alpha mask (3). In addition, this texture is mixed a bit differently, painted with fire-like colors (4) and passed into the diffuse channel of the output.
In order to add further details, I have also added small stones floating in lava.
While the source .blend file only keeps five different stones, I managed to make seven variations by adding or excluding different stones from the groups. For optimization purposes, I re-used the island material for these stones.
If you launch the game, you may notice that these stones are slightly rocking. This effect was achieved using procedural vertex animation, namely Wind Bending, which is normally used for grass, bushes and so on. This animation can be enabled for objects under the Blend4Web panel.
In this particular case I only needed to tweak two parameters: Angle for max object inclination and Frequency, which is how fast the bending will happen.
If you stare at the sky, you may notice that it is now much more diverse because of smoking. I did that with dynamically updated material.
Once again, I re-used the smoke texture (1) and made it shifting with a Time node (2). The important distinction from the above mentioned materials is that the texture is moving not through the UV coordinates but through global coordinates. The only thing left was to paint this texture with the right colors (3). It is also worth noting the Levels Of Quality node which switches the material to a primitive two-color gradient at the low quality mode.
Now the scene looks much more lively and detailed. However, the most interesting things are still ahead: I mean the gameplay elements for the player to interact with and for which this small virtual space was created. But about that you'll find in one of the following articles, don't miss it!
Launch the game!
The source files will be included in the upcoming release of the free Blend4Web SDK.
Image may be NSFW.
Clik here to view.
Environment FX
By running the game or just viewing the screenshot above, you can see new elements in the scene. Let's take a look at them one by one:
- heat haze, that is optical distortion due to differences in air temperature,
- smoking near the perimeter of the level,
- lava flaming,
- small rocks floating in lava,
- smoking in the sky.
Image may be NSFW.
Clik here to view.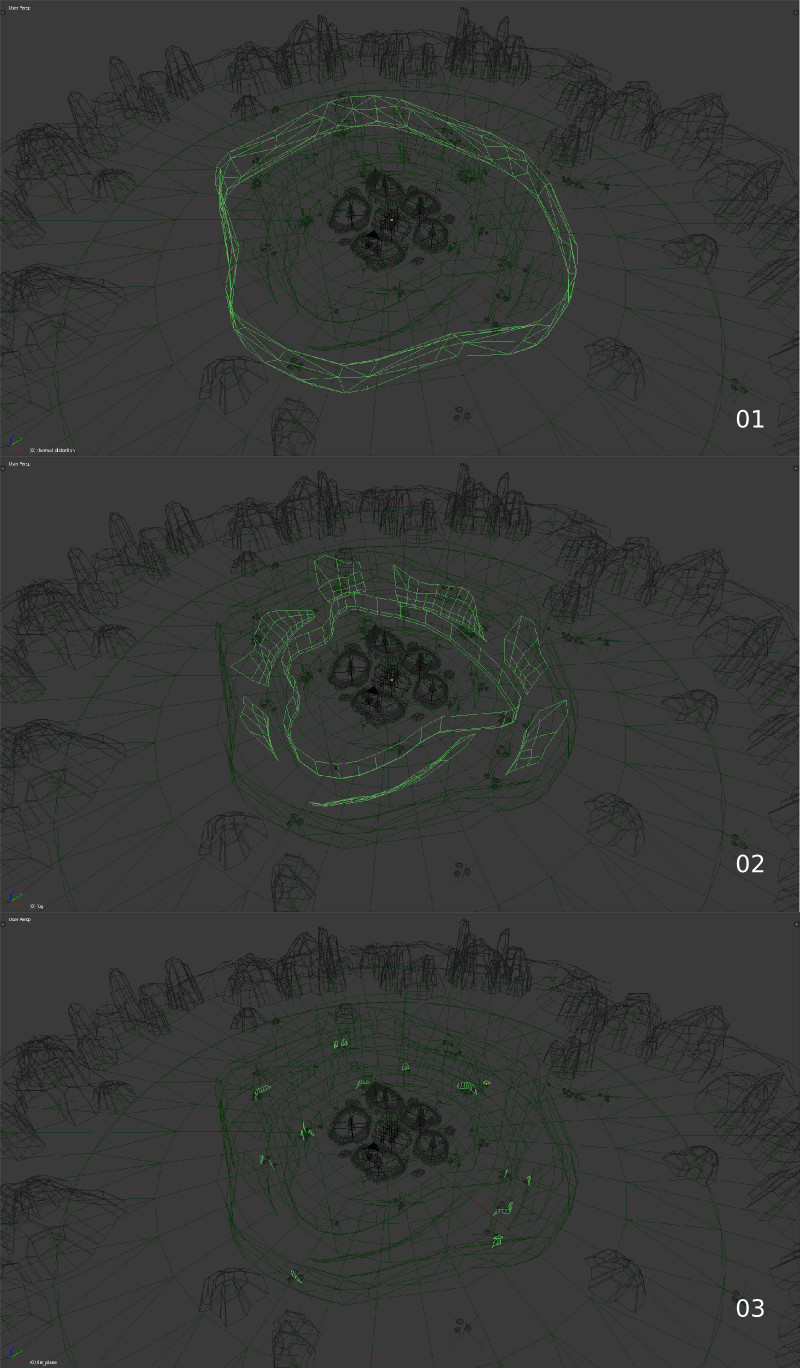
For the heat haze material, a solid encircling geometry in the form of a cylinder (1) was created around the islands. As a result, all objects behind this geometry will be distorted when viewing from the center.
For the smoking material, geometry around the islands was created as well, but with spaces (2).
Lava flaming geometry (3) is situated in places where other objects make contact with lava.
Heat Haze
This effect is based on the refraction effect coupled with UV animation of a normal map. Let's take a look at the material.
Image may be NSFW.
Clik here to view.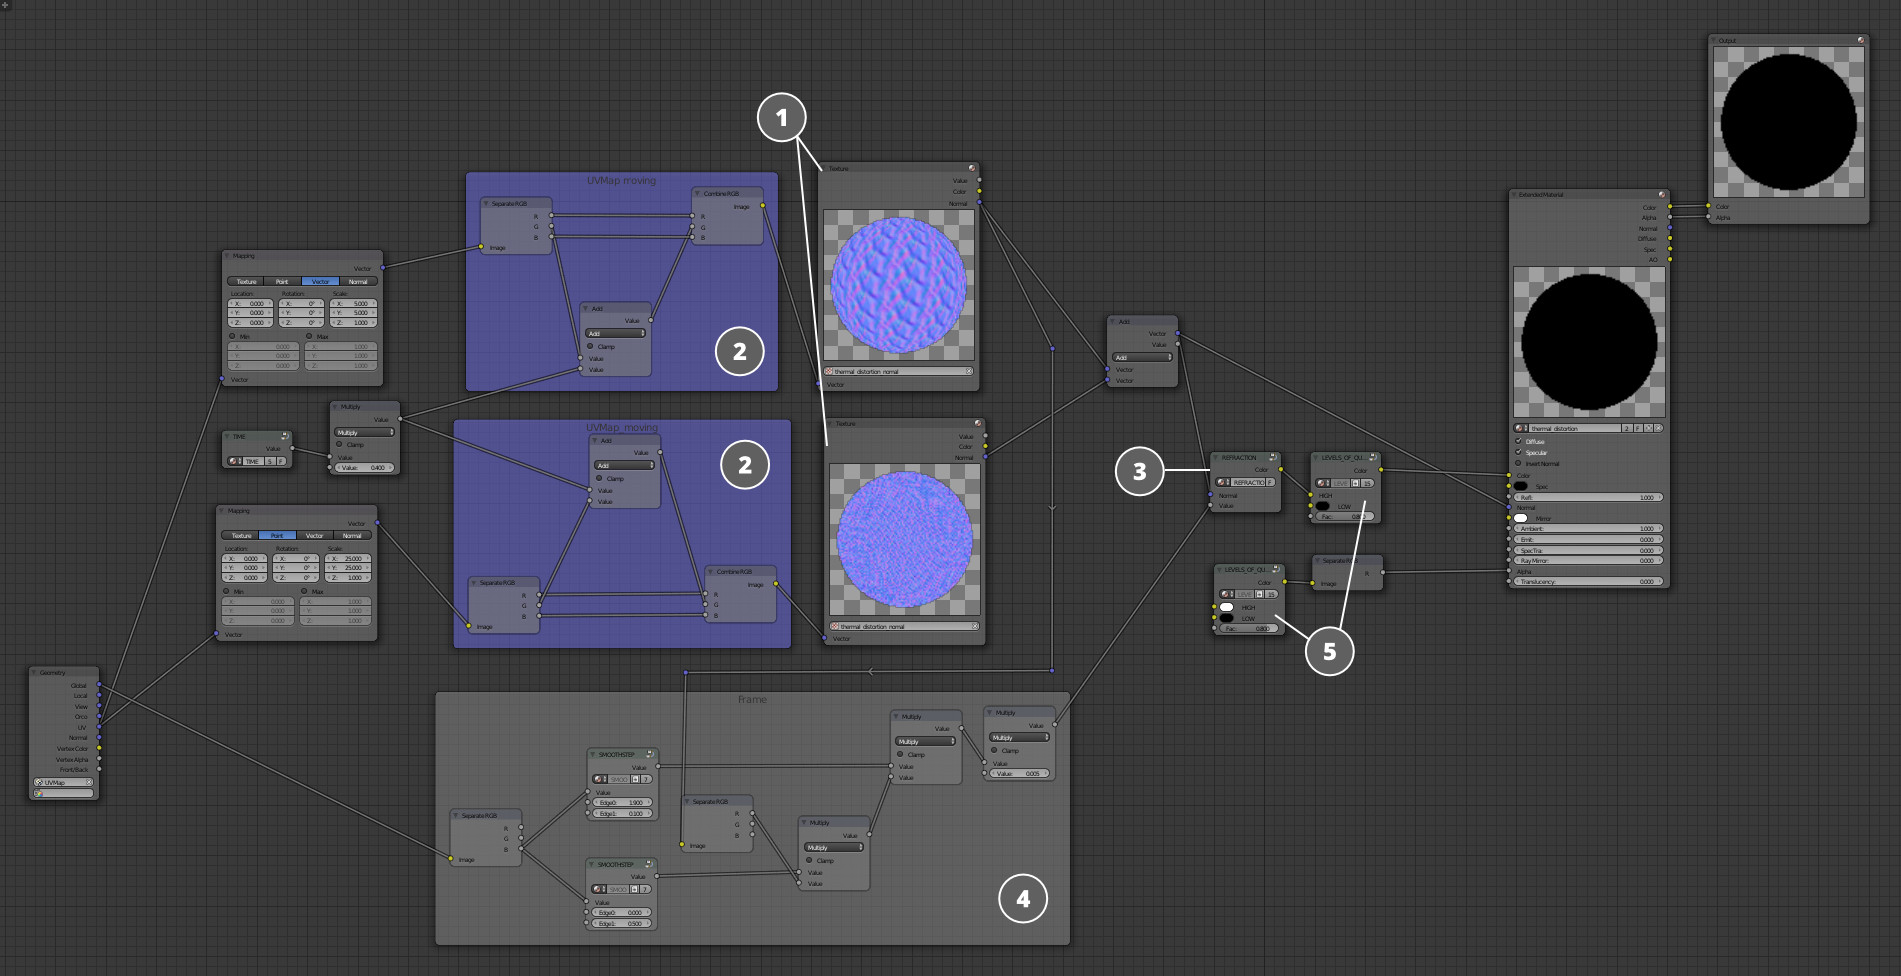
The normal map (1) is at the heart of this material and is used with different scaling twice. Thanks to a Time Blend4Web-specific node, which is being added to one of the UV channels (2), this texture glides through the material creating an illusion of rising heated air.
The normal map is passed to a Refraction node (3), which is yet another Blend4Web-specific node. Also, a mask is generated (4) to be passed into this Refraction node in order to specify in which places distortions will be observed, and in which places it will not.
The Levels Of Quality nodes (5) situated before the final color and alpha cause this material to disappear at low quality settings, where the refraction effect is not available.
Image may be NSFW.
Clik here to view.
The above picture shows how it works. On the left the original red sphere is shown ("clean"), then the mask is pictured ("mask"), more to the right the normal map is shown ("normal") which glides through the UV. This will result in visible distortions ("refraction") of the sphere when observing it through the material.
Smoking Material
The material for smoking effect is made similar to the heat haze.
Image may be NSFW.
Clik here to view.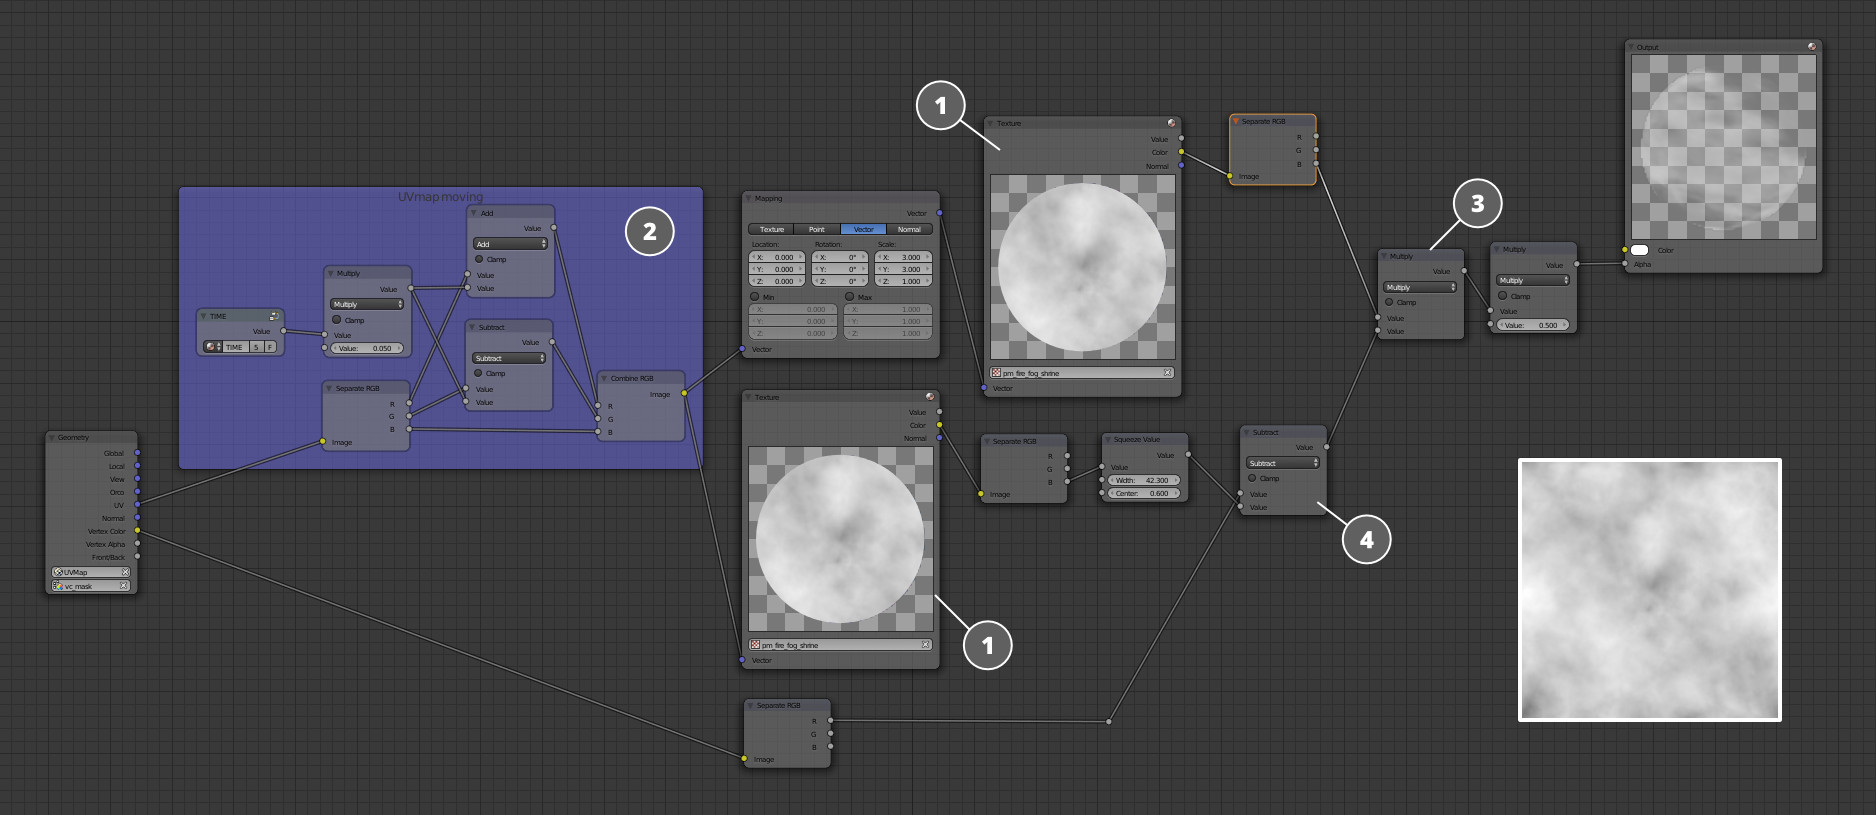
It is based on the tile texture resembling smoke (1), which is passed to the alpha channel of the material. It moves along the UV coordinates under the influence of the Time node (2) and is combined with the vertex color with a different scale (3 and 4). This vertex color fades the material out on the edges of the geometry.
Image may be NSFW.
Clik here to view.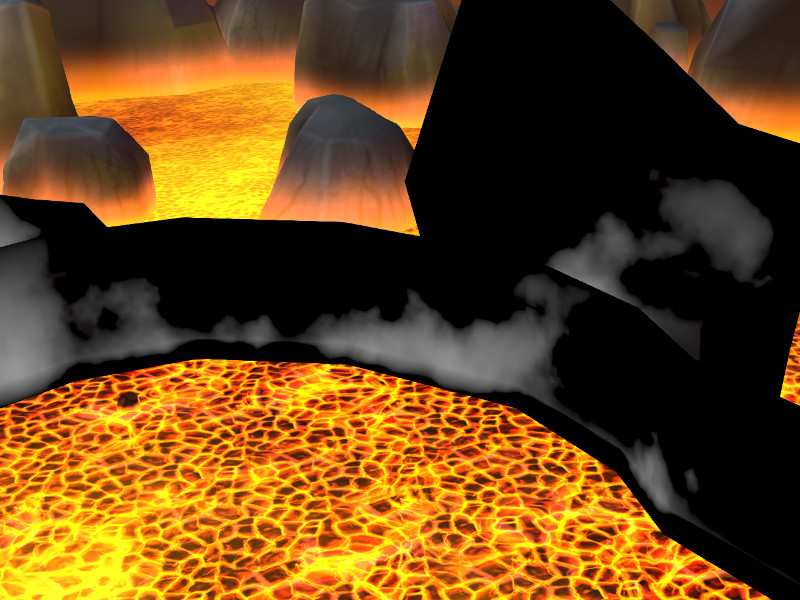
In the above picture you can see how it works. In this case, black color corresponds to fully transparent areas.
Lava Flaming
Image may be NSFW.
Clik here to view.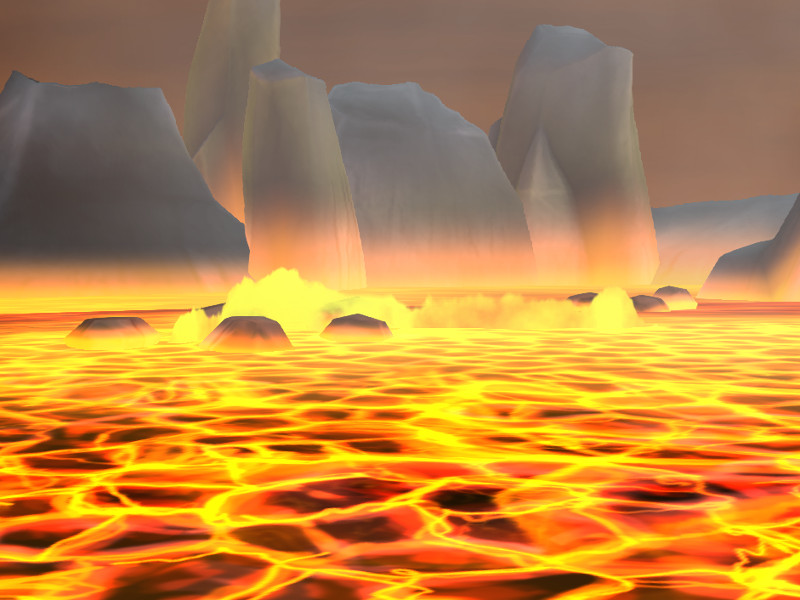
Lava flames are located near bunches of stones. Their geometry is constructed of groups of spreaded polygons, which are painted with a black and white vertex color mask, darker to the top.
Image may be NSFW.
Clik here to view.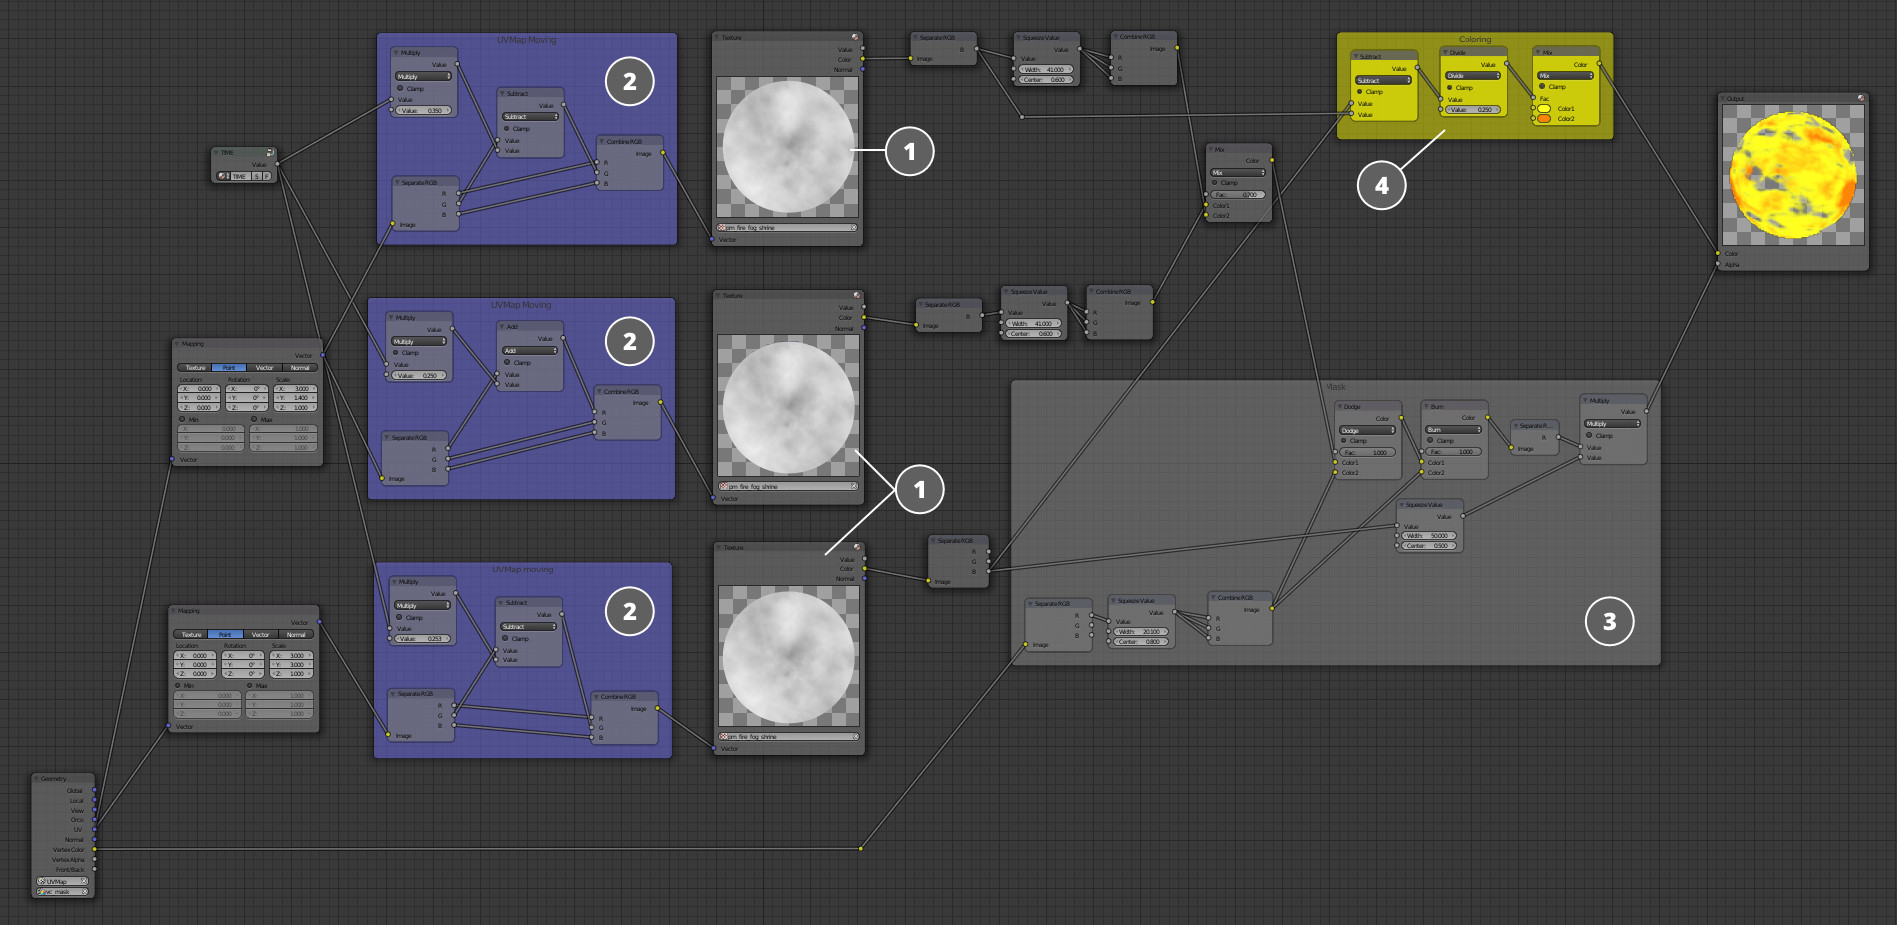
Again, this material uses the same UV animation principle. Moreover, it uses the same tile smoke texture (1). With a Time node it is being shifted through the UV in three different directions (2). The resulting color obtained from this shifting is combined with the vertex color, and then all this is used to generate the alpha mask (3). In addition, this texture is mixed a bit differently, painted with fire-like colors (4) and passed into the diffuse channel of the output.
Floating Stones
In order to add further details, I have also added small stones floating in lava.
Image may be NSFW.
Clik here to view.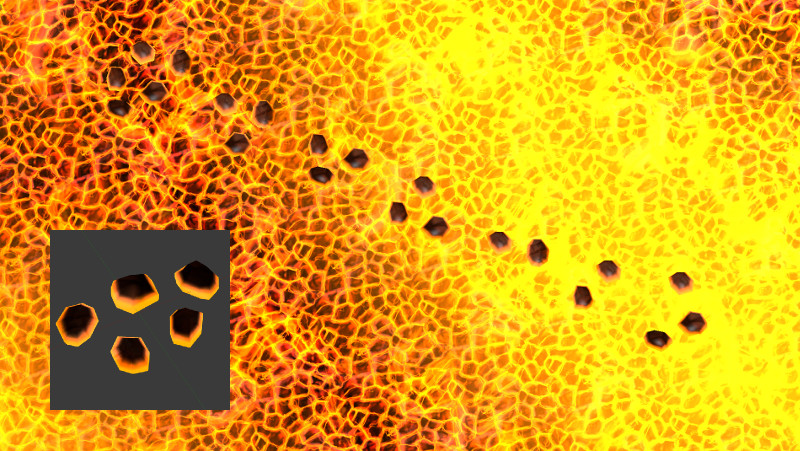
While the source .blend file only keeps five different stones, I managed to make seven variations by adding or excluding different stones from the groups. For optimization purposes, I re-used the island material for these stones.
If you launch the game, you may notice that these stones are slightly rocking. This effect was achieved using procedural vertex animation, namely Wind Bending, which is normally used for grass, bushes and so on. This animation can be enabled for objects under the Blend4Web panel.
Image may be NSFW.
Clik here to view.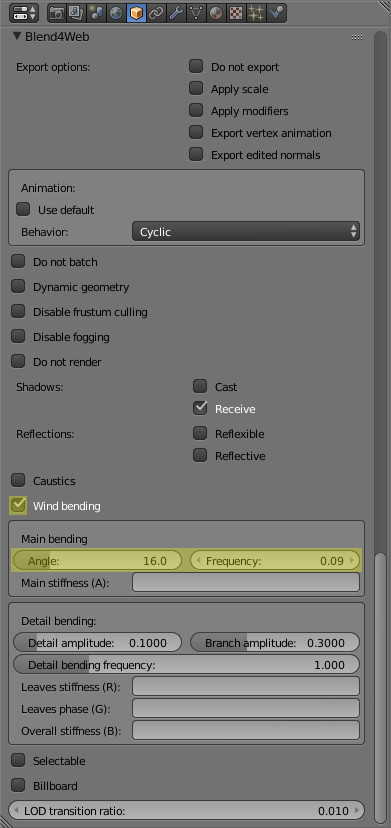
In this particular case I only needed to tweak two parameters: Angle for max object inclination and Frequency, which is how fast the bending will happen.
Smoking in the Sky
Image may be NSFW.
Clik here to view.
If you stare at the sky, you may notice that it is now much more diverse because of smoking. I did that with dynamically updated material.
Image may be NSFW.
Clik here to view.
Once again, I re-used the smoke texture (1) and made it shifting with a Time node (2). The important distinction from the above mentioned materials is that the texture is moving not through the UV coordinates but through global coordinates. The only thing left was to paint this texture with the right colors (3). It is also worth noting the Levels Of Quality node which switches the material to a primitive two-color gradient at the low quality mode.
Image may be NSFW.
Clik here to view.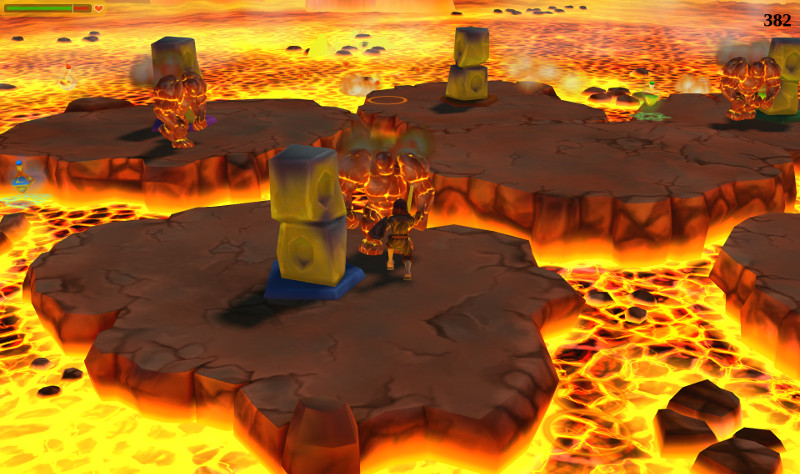
Now the scene looks much more lively and detailed. However, the most interesting things are still ahead: I mean the gameplay elements for the player to interact with and for which this small virtual space was created. But about that you'll find in one of the following articles, don't miss it!
Launch the game!
The source files will be included in the upcoming release of the free Blend4Web SDK.