Quantcast
Channel: GameDev.net
Viewing all 17825 articles
Browse latest View live

Design Tradeoffs For Customized Script Interpreters

$
0
0
A person can always use a common off-the-shelf scripting language, such as Lua or Python or Squirrel or JavaScript or similar, but sometimes there may be reason for a person to implement their own scripting language or interpreter (either for practical reasons, or maybe as a learning experience, or doing it for fun).

Writing a compiler or interpreter can also be an interesting experience.

But, what sort of interprerer for what sort of language? While there may be many possible choices in the design process, not all choices may necessarily carry equal weight.

There may also be a range of relative complexity and performance, all based on what a person wants to do.

For example, anywhere from a simple interpreter directly parsing and executing lines of code line-by-line, to producing highly optimized machine-code with performance on par with that of traditional static compilers.

A person may also realize that for their uses, they never need to go much beyond a parser and directly executing the syntax tree, and this may well be a good option as well.

General Design Tradeoffs


There may be a number of tradeoffs in the design of both a scripting language and the underlying interpreter. I will attempt to address a few of them here.

Syntax


There are many directions a person can go with syntax.

Often, this ends up boiling down to one of several major alternatives:
  • Traditional C-family style syntax
  • Usually a specialized and often minimalistic syntax
  • Pretty much everything else...
C style syntax has the advantage of being at this point nearly ubiquitus and reasonably readily understood by most experienced programmers. There is no confusion, say, over what control-flow constructs exist when, for example, they can just pull out a generic "for()" or "while()" loop, and call it done. "How do I exit this loop early? 'break;' Yeah, I knew that..."

This can help to avoid much of the learning curve of a language, so a programmer new to the language can spend less time reading documentation, and get more directly to writing code.

However, some people regard this style of syntax to be cumbersome or awkward.

And, clearly, there are common cases which may need to exist in a language which aren't suitably addressed in the existing available languages (after all, the person is probably implementing their own custom language for some reason...). Likewise, language design may be in a way a chance to express ideas or preferences which may not be readily available in many other languages, and there is not much saying a person necessarily has to do everything exactly like every other common language.

However, for nearly everything which is commonly done, there may be a good reason for this, and sometimes it may be worthwhile to try to understand why things are as they often are, and how they may be improved upon, rather than simply make them different for sake of being different (Does being different really make it better?).

Another common alternative to C-style syntax is a trend towards minimalism, which usually seeks to find some minimal set of syntactic constructions in which to express the language. This is sometimes then equated with simplicity in the general sense, like because the syntax is minimal, it is necessarily also simple, both in concept and implementation. This is, however, very often not the case.

A parser for a C-like syntax is not necessarily that much more complicated than, say, for a Lisp-like syntax, and at the level of the compiler itself, these differences may in-fact become largely insignificant, making the choice of syntax more of an aesthetic tradeoff than a functional one.

A drawback is that very often these sorts of minimalist syntax designs will be very one-off, and may be very opaque for someone not already familiar with the language. While a counter claim can be made about the opaqueness of the traditional C style syntax, it does have an advantage: Pretty much everyone with much of any real programming experience is likely to have already seen something similar already.

Sometimes, they may also introduce other issues, such as there being no obvious or good way to format it, or introduce dependencies on the use of specific editors or similar to make it usable, which aren't generally a good thing.

However, a more subtle lesson may lurk in this matter:
Often, these minimal syntax designs are much more orthogonal than the traditional C style syntax. It is like asking the question: "Why are braces optional around a statement for an 'if()' block, but not around a function body?" Likewise, the whole matter of the difference between statements or expressions, or the need for an explicit return statement. Or, for example, why there may be a hard line between executable code and declarative data (Can we also work with the syntax as part of an expression?).

A person could instead, for example, see it another way: Statements and Expressions are one and the same, merely differing in context, and with statements potentially also having a return-value in the same way as expressions.

Other relevant questions may be, for example, why can't types or identifiers also be used as values, ... But, these are more a matter of semantics than of syntax.

Sometimes, we can't have everything, and it may be a tradeoff along the lines of what is more useful. For example, is it more useful to be able to easily and clearly express commonly used constructions, or to be able to work with executable code as if it were data?

Objects, Anyone?


Class/Instance Object Systems are pretty much the standard solution to the matter of objects, but these are not the only solution. For example, a language may use prototype objects instead, or possibly an engine-specific 'entity' type as the primary, or sole, type of compound object.

Within class/instance, there is the tradeoff of single inheritance + interfaces, or the implementation of a multiple inheritance model. Single Inheritance has the advantage of being simpler to implement (since every child class simply appends its contents onto the parent class), and is "generally good enough" for comon situations. Interfaces and Default Methods can also address many of the limitations of single inheritance.

Multiple Inheritance adds some possibilities, but also a lot of potential complexities, and a few "ugly issues" regarding things like language semantics. For example, what happens when a child class derives from two parents which both derive from a common parent? What happens if both parents provide an implementation of a given method? ...

Prototype Objects are another possiblilty, where every object is essentially an unstructured bag of fields and methods, which may be modified freely. Instead of class inheritance, we may instead use delegation, where each object may in turn link to other objects which implement other fields and behaviors.

Another option is also using class/instance, but making the ability to dynamically add fields or delegate to other objects be available as optional features.

Static vs Dynamic Types


Static types allow superior performance, but may place limits the kinds of things which may be readily done, and by itself may require going through contortions in order to build dynamic data structures (How do you effectively build a structure which may hold several types of item if the language only ever allows a single type of item for each variable?).

Dynamic Types are easier initially, and can be optimized via type-inference, but a VM using type-inference is typically more complex than one using a simplistic static type system. By themselves dynamic types may introduce the problem of needing to endlessly check types at runtime (reducing performance), and may hinder the ability of the compiler to effectively detect or warn about "obvious" programming errors.

While it may seem like dynamic typing eliminates the need for dealing with type issues, more often it simply shifts them from being a compile-time problem to being a run-time problem, and may in effect more serve to obscure the nature of holes or deficiencies in the type system resulting in possible problematic edge case behaviors. For a behavior to work, it either needs to exist statically (within the compiler itself) or dynamically (within the runtime).

A more reasonable tradeoff may be having both, with both statically typed values, and also a 'variant' type or similar, which may implement dynamically typed semantics. A drawback of doing this is that the implementor may need to deal with some of the issues of both static and dynamic type-systems in order to make something like this work correctly. It may also require essentially implementing alternate versions of many of the same operations (such as both an operation for adding two intergers as statically-typed values, and for adding two integers as variant values).

There are differences in how to best represent these type-systems as well. For example, in a VM such as the JVM, each static type is represented via a "signature", which is an ASCII representation of the type. Each primitive type may then be assigned a sequence of one or more characters, and complex types may be identified via a character-sequence followed by a qualified name for the resource.

for example (partly derived from the IA64 ABI's C++ name mangling scheme):
  • 'a': signed char / byte (8-bit)
  • 'b': bool (8-bit, packed 1-bit)
  • 'c': char (8-bit)
  • 'h': unsigned char / byte (8-bit)
  • 's': short (16-bit)
  • 't': unsigned short (16-bit)
  • 'w': char (16 bit)
  • 'i': int (32-bit)
  • 'j': unsigned int (32-bit)
  • 'x': long long / int64
  • 'y': unsigned long long / uint64
  • 'n': int128 (128-bit)
  • 'o': unsigned int128 (128-bit)
  • 'f': float (32-bit)
  • 'd': double (64-bit)
  • 'g': float128 (128-bit)
  • 'v': void
  • ...
Then, we might run out of single lower-case letters, and start using letters like A/B/C/D/G or similar as prefixes to define additional types.

Likewise, we could define complex types like:
  • Uqname; Named extension type.
  • Xqname; Struct or Value-Class.
  • Lqname; Normal Class.
  • Ptype Pointer to type.
  • Rtype Reference to type.
  • Qtype Unsized array to type.
  • Asize;type Sized array of type.
  • ...
A question would then be, what about function signatures? One nifty idea is putting the argument types in parenthesis, and a type as a suffix, for example:

void foo(int x, float y); would have a signature (if)v, and void (*foo)(int x, float y) as P(if)v.

A related idea is doing similar for modifier flags and attributes, which can be more flexible and extensible than the use of a fixed-size flags field, and potentially more convenient than representing things like this using explicit data structures. Granted, it may be necessary to generally unpack into flags and data-structures prior to use.

For dynamic or variant types, it may be instead more useful to include the type in the value itself. One common way to do this is via tags.

For example, one idea here would be to use 64 bit values, and then use the high order 4 bits as a tag, for example:
  • 0, Pointer (Positive)
  • 1, Integer (Positive, Fixnum)
  • 2, Integer (Positive, Fixnum)
  • 3, Double (Positive, Flonum)
  • 4, Double (Positive, Flonum)
  • 5, -
  • 6, -
  • 7, Subdived Tag Space.
  • 8, Flonum2 (Double >>> 4)
  • 9, -
  • 10, -
  • 11, Double (Negative, Flonum)
  • 12, Double (Negative, Flonum)
  • 13, Integer (Negative, Fixnum)
  • 14, Integer (Negative, Fixnum)
  • 15, Pointer (Negative)
In this scheme, it can be noted that pointers are very easy to convert (all valid pointer values, say, on x86 or x86-64, are also valid references of the pointer type). Most of the common Double range also maps exactly with no loss of precision (apart from very large/small values, which lose 4 bits).

This also allows integer values of up to 62 bits.

Note:  
This will still require use of another mechanism for identifying the type of on-heap objects.


One possible strategy here is to point to the data-payload of the object, but store the object-type header directly preceding this data (if using a custom MM/GC, this may be equivalent to the GC's memory-object header). If we know we are dealing with a pointer to the start of an objects' payload, this allows potentially quickly retrieving the type from the header.

For Example:
    ((((ObjectHeader *)ptr)-1)->typeID)

In cases where we already know the type, we can ignore it, and quickly get at the payload data with little extra effort. In cases where we don't know for certain that we are looking at an object pointer, careful implementation can allow reasonably fast heap lookups.

Another popular tag strategy is to put the tag bits in the low-order bits of a pointer, and instead mandate that any object pointers be aligned (say, to 4 or 8 bytes). However, this limits the ability to have pointers to unaligned data (such as pointing at characters in a string table), but makes some sense on 32-bit targets.

Another tagging strategy is also to make use of the fact that on current typical OS's for 32-bit targets, the high 1GB of address space is inaccessible. This part of the address space could then be instead used for encoding integer and floating point values, with the minor drawback of limiting them to 28 bits. The advantage here, however, is that this doesn't mandate pointer alignment.

However, it may also make sense to just "bite the bullet" and always use 64-bit references for variant-type values (including on 32-bit x86), primarily due to its ability to hold the full range of 32-bit integers, full precision floats and nearly full precision doubles, and only rarely needing to box long values. A person may well find that the increased cost of wasted space for pointers is more than offset by the space savings of not having to box things like doubles.

Stack vs Registers


Stacks are simpler to generate code for, but are slightly less efficient for an interpreter, and may effectively require more work to deal with efficiently generating code for a straightforward JIT.

However, it isn't particularly difficult to convert stack-machine into register-machine code as-needed, and a simple interpreter or JIT for a stack machine isn't particularly complicated. This leads to the possibility of using a stack-machine as the high-level IL, and using a register machine as an intermediate stage (or for actual execution).

It is also possible to directly generate code for a register machine model.

In such an interpreter, registers may or may not be the same things as function arguments and local variables. In the latter case, the registers may just be temporary variables within the local environment (In contrast to having the registers in their own space and, for example, using load and store operations to move values between registers and local variables). Some of this may get a little more complicated if lexical variables are introduced.

In a stack machine, each operation will typically work on the values in the item(s) on the stack, and putting any results back onto the stack, whereas in a register machine they will instead generally work by taking the source and destination operands directly with the opcode.

For example: ADD_I may, in a stack machine, may transform '2, 3' on the stack into '5'.
In a register machine, ADD_I may instead be given arguments, as in:
ADD_I R3, R1, R2

Which adds the contents of R1 and R2 and stores the results in R3.

Another minor difference may be dealing with item types. In a stack machine, at least in concept, the stack needs to be able to hold any type of value in a stack item, whereas for registers, it only needs to be possible for the registers to hold the values of the type that they hold.

Another tradeoff may be the level of abstraction for various operations, for example, do we access a struct or object's fields via direct pointer operations in the IR, or do we instead do something like having operations to load/store these fields, and leave it up to the operation to figure out details such as the offset of the field within the object.

An advantage of having dedicated operations is that it can avoid specializing on object layouts too early in the process, potentially allowing object layout to change without necessarily having to go and change the compiler code for accessing the object (it may instead just know the name and type-signature of the field). More so, providing an explicit operation may actually be faster.

Lexical Scope and Closures


Sometimes we may want lexical scope and closures in a language. In this case, we need not only to refer to the current scope, but also to the captured enclosing scope.

One option here is simply to make locals and arguments simply be part of the lexical environment, using a similar representation regardless of whether or not anything is captured, possibly using a single index value to refer both to the current scope and also to any parent scopes. However, this makes more of a mess of using the local environment for registers.

Another option is to use a 2D index, which is omitted for local variables and arguments:

LXLOAD_I R0, 1, 5  //Lexical Load Level 1 Index 5 into R0

This makes lexical scoping the special case, and may provide fast/simple access to locals.

Another alternative is to instead make registers be their own thing, and use explicit variable LOAD/STORE operations.

LLOAD_I R0, A5  //local load Arg5 into R0

However, this introduces additional operations and may potentially reduce performance.

Another question may be regarding whether or not captured variables should themselves be special, or if closures will simply capture the entire parent binding frame (Simple, but may waste memory and prevent destruction of non-captured bindings).

One option here is to make captured locals special, using LXLOAD/LXSTORE, for these bindings, in contrast to other non-captured bindings.

Typically, we may also need an explicit operation to capture the current environment in the creation of a closure, potentially clean-up the environent in the non-capture case, and it may also make sense to be able to have more efficient handling in the cases of lambdas which do not capture bindings, and maybe also those which can be determined not to exceed the lifetime of the parent scope.

While() we're at it


Assuming we go beyond simply executing ASTs or similar, another question may be how to best handle execution.

A typical answer is we compile to bytecode. But, bytecode isn't the end of the story, since we will probably need to execute it somehow.

A common and simple answer here is the use of a "while()" loop and a big "switch()" statement. Then we will decode each operation in every iteration of the loop.

rs=0; ip=ctx->ip;
while(!rs)
{
    op=*ip++;
    switch(op)
    {
    ...
    case OP_ADD_I:
        c=*ip++; a=*ip++; b=*ip++;
        ctx->regs[c].i=ctx->regs[a].i+ctx->regs[b].i;
        break;
    ...
    }
}

While this works pretty well, there may be potentially faster options.

For example:
Each instruction is a small struct containing a function pointer (to the instruction-specific logic), maybe some data, and the function pointer returns the next instruction.

Then, we can have an inner interpreter loop something like:

void Ctx_Run(Context *ctx)
{
    cur=ctx->op;
    while(cur)
        { cur=cur->fcn(ctx, cur); }
}

With opcode functions something like:

Opcode *Op_AddI(Context *ctx, Opcode *op)
{
    ctx->regs[op->c].i=ctx->regs[op->a].i+ctx->regs[op->b].i;
    return op->next;
}

And, may observe potentially faster raw execution speeds than when using a while loop and a switch.

We can potentially use a while loop and switch to build these instruction chains from the input bytecode, treating these chains primarily as an intermediate structure.

Taken a little further, a person may make another observation:
In the vast majority of cases, the operation may simply, naively, and always, return the following instruction.

A speedup here can be gained by recognizing these cases, and instead grouping the instructions into "traces", which operate in a loop like the above (each trace then returns the next trace).

The trace itself may then contain an unrolled version of the above loop:

Trace *Tr_ExecuteBasic5(Context *ctx, Trace *tr)
{
    Opcode *op;
    op=tr->op;
    op=op->fcn(ctx, op);
    op=op->fcn(ctx, op);
    op=op->fcn(ctx, op);
    op=op->fcn(ctx, op);
    op=op->fcn(ctx, op);
    return tr->next;
}

Getting The JITters


The next step, in the quest for high execution speeds, may be going and writing a JIT. This can range from fairly simple to much more complex.

A simple strategy is basically to produce "call threaded code", which basically just mean that the "traces" above are simply spit out as a chain of call instructions or similar wrapped in a function call/return sequence. This allows getting a little closer to the execution speeds of native code, without significantly increasing complexity.

The next step up from this is to directly handle certain instruction sequences, like instead of emitting a call to 'AddI', directly emitting the machine-code sequence for adding the integers and storing off the results. Then lots of other common operations can be given similar treatment, while maybe still relying on the interpreter for handling more complex operations.

Beyond this, a person might start getting into things like register allocation and peephole optimization, ... But, something like this is getting a bit more advanced (There be dragons here...).

There are various ways to handle emitting the machine-code sequences, ranging from direct options, like directly emitting byte sequences into a buffer, to slightly more glossing over it (say, using an ASCII "command notation" mixing hex values possibly with shorthand notation for generating other sequences of bytes), to something like using an assembler.

Interesting Points


I have done a lot of this before, in some cases having good experiences, in other cases having much pain and spending time working on things to have them turn out to be useless, or having things fall apart or turn out badly with little ability to make it better, but in some ways, this is just life sometimes.

For example, my first real code generator also became very ambitious, with me trying to write essentially a full featured code generator like one used in a "real" compiler. This however didn't turn out well, and ultimately I was unable to fully debug the thing, and it has since been dropped from the project.

However, with a much simpler JIT, I can get speeds not that much drastically slower than native C, and sometimes this is good enough. Do we really need to try to compete performance-wise with optimized C compiler output? Not necessarily.

Conclusion


Whether or not a person actually goes and does something like this is up to them, it can be a fun or interesting experience, or can potentially literally end up eating years of a person's life, this much is up to them...

Not every project or language needs a complex interpreter with a JIT and so on, and sometimes something simpler, like directly parsing or executing commands, or simply parsing and executing a syntax tree, may well turn out to be sufficient for the task at hand.

Article Update Log


2013-04-04: Writing article

Hackathon: iOS game in 7 days

$
0
0
In this article I would like to share with you the story of creating our company’s first iOS game at a hackathon event, using a wonderful 2d graphics engine Cocos2d. It covers some technical problems, we’ve bumped into, while developing the game, as well as the process of creating the actual gameplay. The resulting app can be found here.

Attached Image: image06.gif

How We Did It


It was about 6 o’clock in the morning in Munich, when we met with my colleagues Anton and Valentine to work on an idea for an inside-company hackathon, which has kind of turned into a monthly event at Empatika. None of us had had an experience with any serious game development, but we thought it would be kind of cool to develop a game, since we were all tied up in the regular app projects for so long and wanted to try something new and exciting.

The initial idea we chose was a pie slicer game, where you had a nice round piece of pie, which you had to vigorously cut into small pieces in a limited amount of time. The pieces were to be me moved with the power of some kind of physics engine, so it all wouldn’t look too boring. After some research and poking around, we found out, that we would be most productive with cocos2d (since Anton I are both iOS-Devs) and box2d (since it’s free and plays nicely with cocos2d), and if we would limit ourselves only to the iOS platform.

The core for the project was found in the nice tutorial by Allen Tan, so we didn’t have to go all hardcore on the implementation of cutting and triangulation algorithms. The tutorial relies on the PRKit library, which allows drawing of a convex textured polygon and extends its PRFilledPolygon class in order to provide some additional functionality like synching with the box2d’s physical body. We decided to borrow this extended class to build our implementation on top of it.

In spite of the hardest part already being written for us, the first complications came soon. After the inital project setup and a couple of test runs we found out about the famous 8 vertices per body limitation of box2d. In order to use the example code and the provided libraries, the pie had to be a polygon, because box2d doesn’t allow a shape to be a segment of a circle (which we would get after cutting the initial shape into multiple pieces). So since the pie had to be at least relatively round and cuttable at the same time, we had to compose it from an array of 8-verticed shapes. It created some minor texturing problems, since the initial tutorial only went in detail about the implementation of such for the whole bodies. However, after some fiddling, we managed to overcome this difficulty by feeding the PRFilledPolygon an array of vertices, composing the outer body edge.

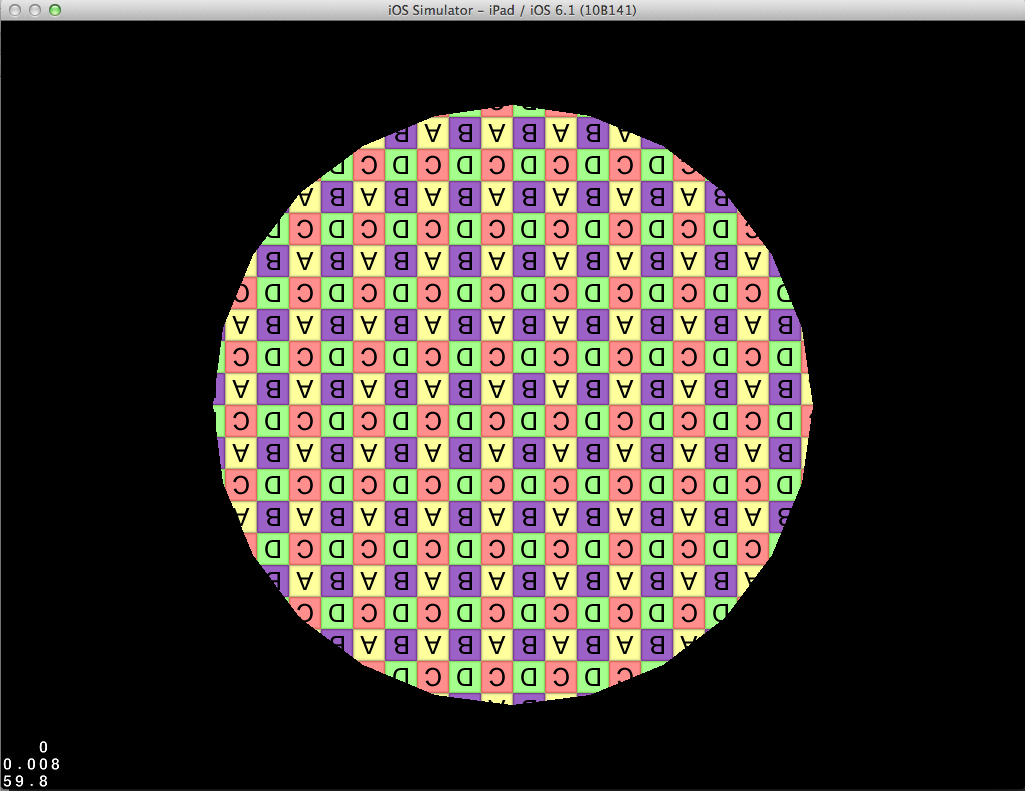
Everything seemed to be fine and dandy so far – our pie was floating in 0 gravity in the unpromising blackness of the iPad screen:

Attached Image: image03.png

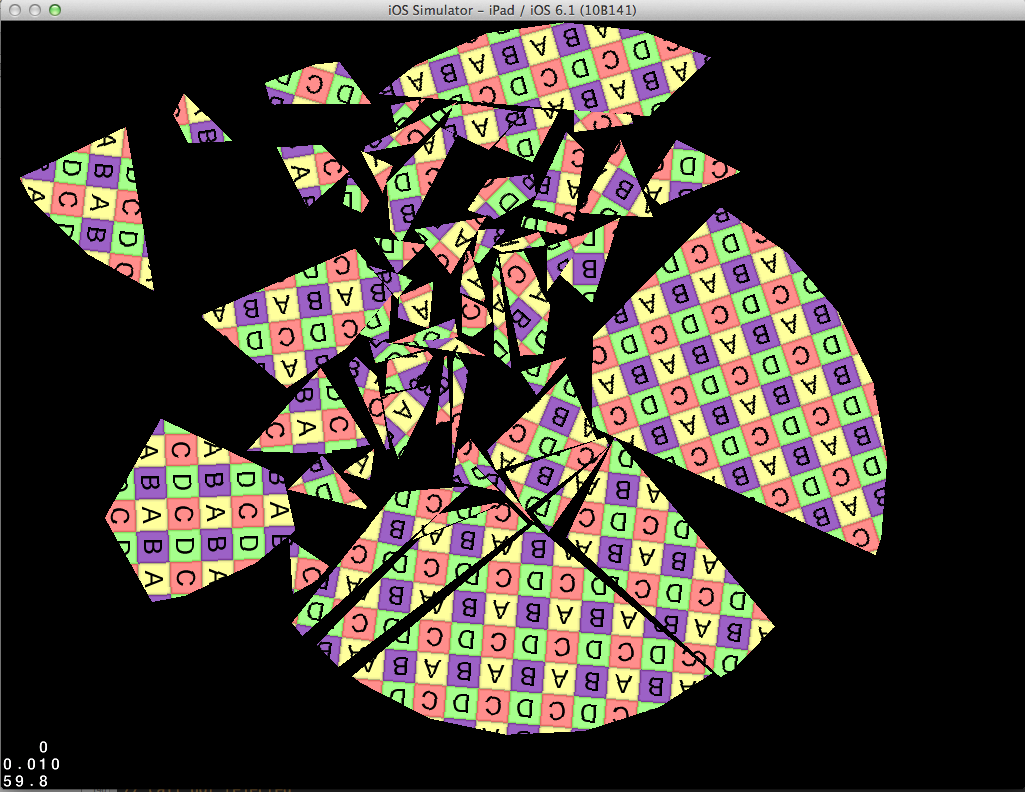
However the initial cutting algorithm for sprites had to be modified to support the bodies composed from multiple shapes. After some thinking we decided to overcome this difficulty by simply increasing the 8-vertices per shape limit of the box2d. So we bumped up that number to 24 vertices (which would be definitely too crazy for any relatively serious project). The profiling showed, that in our use case it didn’t make a huge difference, whether the pieces were composed of 8 or 24 vertices. However there was another problem: when the amount of small-cut pieces was close to 200, the FPS dropped to about 10 frames, and made it pretty much impossible to play the game. Part of that was calculation of the collisions (about 20% of the processor time) and another part was drawing and animating all the mini-pieces, bumping into each other after each cut.

The decision came quickly. As soon as a piece turned small enough, we turned off the collisions calculation for it. The game was still pretty slow, which pushed us to slightly change the gameplay: the small pieces were to be removed from the screen and added to the payer’s “jar”. The size of the cleared area determined the performance of the player. Some degree of linear and angular damping were also applied to the pieces, so they wouldn’t fly around the screen in a crazy manner:

Attached Image: image08.png

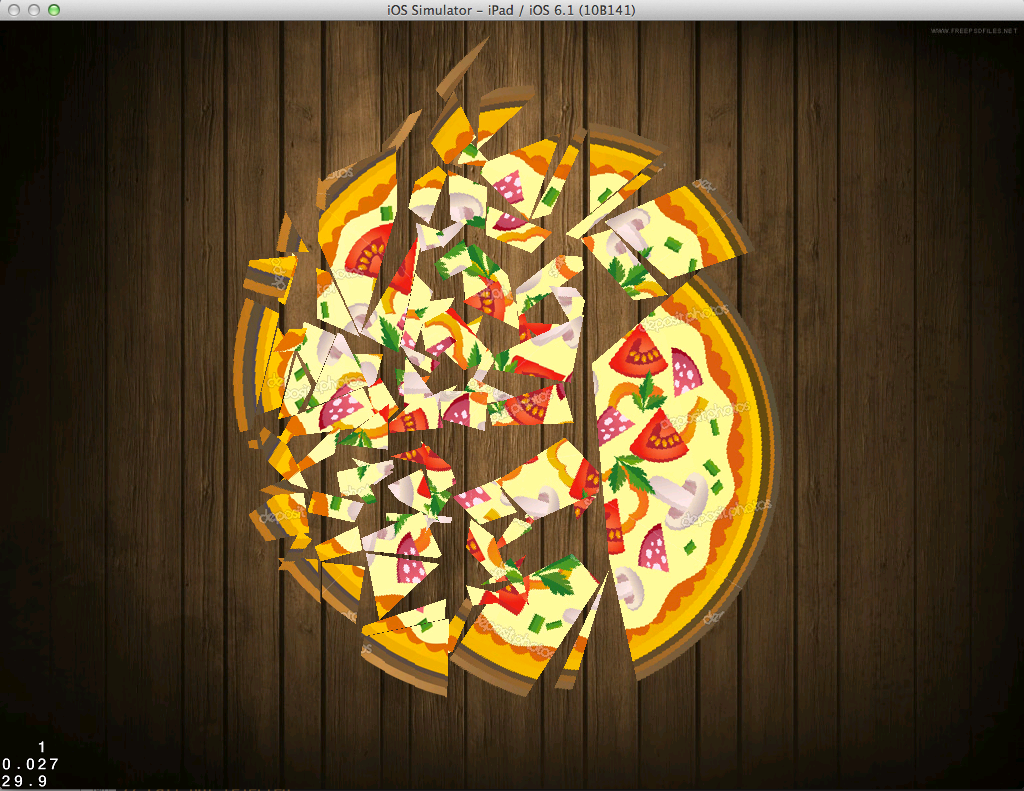
By this time Valentine had drawn a nice-looking pie picture. It looked awesome but seemed to realistic for such an oversimplified cutting process. So we decided to change it to a simply drawn pizza (the credit for the textures goes to their original rights owners):

Attached Image: image10.png

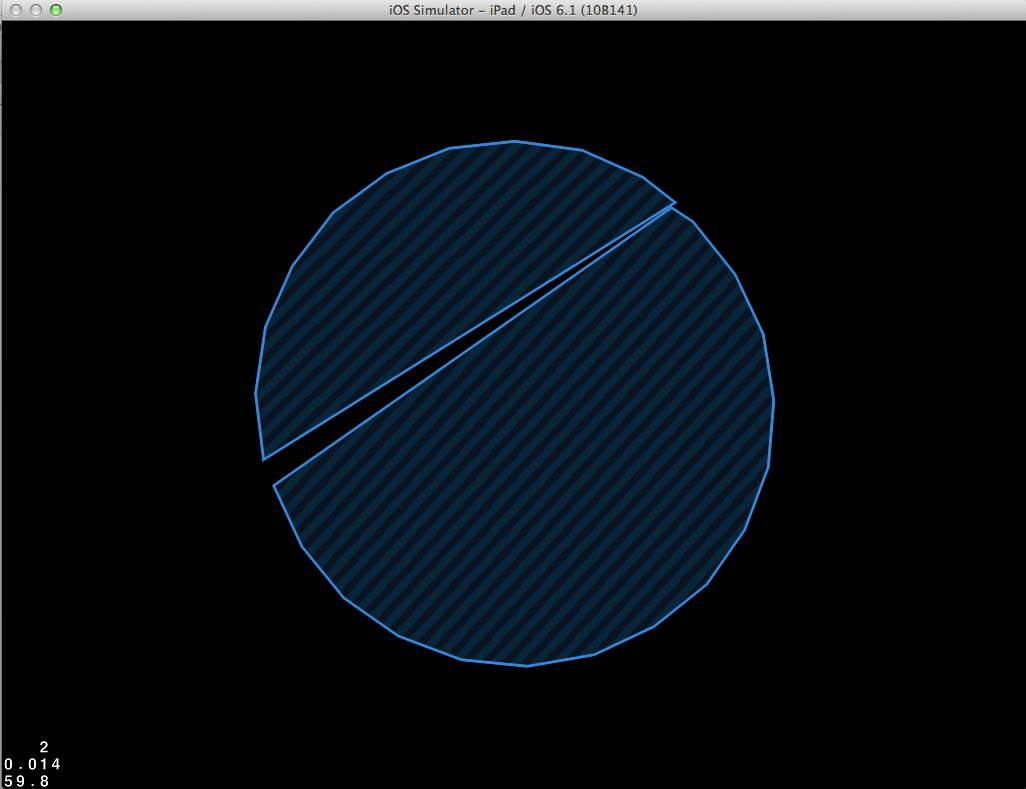
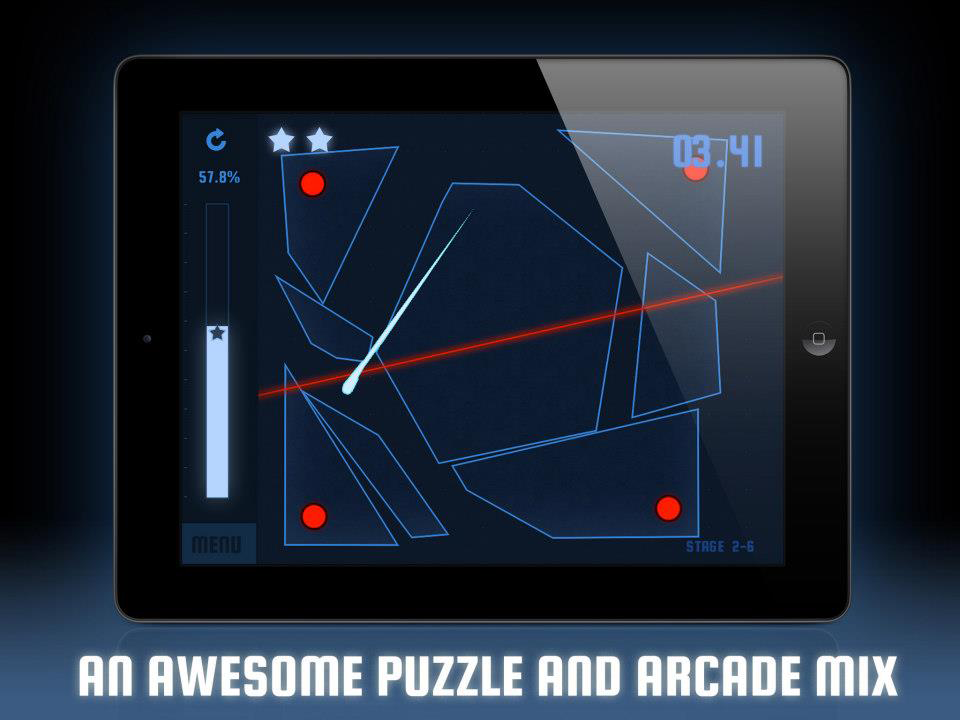
However it also felt too unnatural, and at this point it was clear that the design had to be changed to something not as realistic as a pie or a pizza. Cutting of simple geometrical primitives seemed like the way to go. Since the redesign was easy and played nicely with the chosen technology (PRFilledPolygon basically allowed to do exactly that), we implemented it pretty quickly. Every cut polygon was also stroked, which was done by adding a CCDrawNode to each slice and feeding it an array of vertices, shaping the outer body of the polygon. It turned out to be pretty slow, but still faster and nicer-looking than using the standard ccDraw methods:

Attached Image: image07.png

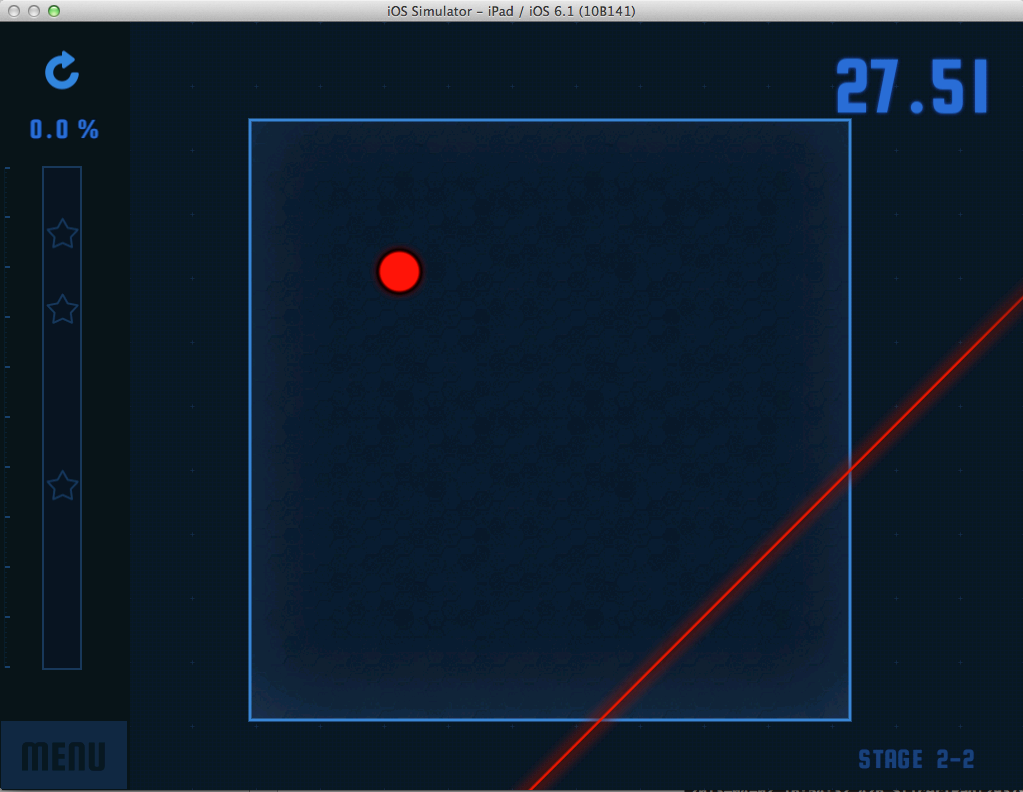
The game started to take the right direction, but the gameplay wasn’t quite there yet. It definitely lacked some challenge. And what makes a better challenge than some obstacles and enemies? So we introduced a simple enemy – a red dot, that would interfere with cutting of the primitive. Good, but it could be better. How about some moving lasers? Done. The implementation was simple and only involved calculation of the point-line distance to the user’s touch point.

Attached Image: image02.png

With the game design and enemies down, we wrote a world-based level system. All the levels were stored in separate .plist files and described the shape, texturing rules, enemies positions, level duration and some other parameters. The game-objects tree was populated from the .plists using the standard Objective-C KVC. For example:

//......
- (void)setValue:(id)value forKey:(NSString *)key{

   if([key isEqualToString:@"position"] && [value isKindOfClass:[NSString class]]){
       CGPoint pos = CGPointFromString(value);
       self.position = pos;
   }
   else if([key isEqualToString:@"laserConditions"]){
       NSMutableArray *conditions = [NSMutableArray array];
       for(NSDictionary *conditionDescription in value){
           LaserObstacleCondition *condition = [[LaserObstacleCondition alloc] init];
           [condition  setValuesForKeysWithDictionary:conditionDescription];
           [conditions addObject:condition];
       }
       [super setValue:conditions forKey:key];
   }
   else{
       [super setValue:value forKey:key];
   }
}
//......

//Afterawrds the values got set with the dictionary, read from the plist file:
[self setValuesForKeysWithDictionary: dictionary];

To represent the world-level system, we used the standard CCMenu with some additions to it: CCMenu+Layout (lets you layout the items in a grid with a proper padding) and CCMenuAdvanced (has a scroll addition to it). So Valentine got busy with the level design, and Anton and I took off to write some effects.

For the visual effects part we gladly borrowed CCBlade, which animates the user’s touches, and powered it with some cool Star Wars-like sounds. The other effect we did, was disappearing of the small pieces. Cutting them without any interface feedback was too boring, so we decided to make them fade out with a small plus sign over them.

The fade out part involved adopting the CCLayerRGBA protocol by the PRfilledPolygon. To do that we changed the default shader programm to kCCShader_PositionTexture_uColor:

-(id) initWithPoints:(NSArray *)polygonPoints andTexture:(CCTexture2D *)fillTexture usingTriangulator:(id<PRTriangulator>)polygonTriangulator{
if( (self=[super init])) {
       //Changing the default shader program to kCCShader_PositionTexture_uColor
       self.shaderProgram = [[CCShaderCache sharedShaderCache] programForKey:kCCShader_PositionTexture_uColor];
}
return self;
}

and passed the color uniform to it:

//first we configure the color in the color setter:
colors[4] = {_displayedColor.r/255.,
             _displayedColor.b/255.,
             _displayedColor.g/255.,
             _displayedOpacity/255.};

//then we pass this color as a uniform to the shader program, where 
colorLocation = glGetUniformLocation( _shaderProgram.program, "u_color")

-(void) draw {
   //...
[_shaderProgram setUniformLocation:colorLocation with4fv:colors count:1];
   //...
}

It looked kind of nice, but with the stroke and the other effects the FPS dropped pretty low, especially when cutting through a bulk of pieces, which involved a lot of animations. A quick googling didn’t really give us anything, and we decided to move on by simply increasing the minimum area of the piece, that could be still present on the screen. It allowed a smaller amount of pieces to be simultaneously drawn and animated, which boosted the FPS. The fade out effect was also removed, and all the plus sign sprites were moved into a batch node (which was dumb of us not to use in the first place):
Attached Image: image05.png

The sound effects were done by writing a small convenience wrapper around the Simple audio engine. While implementing it, we bumped into the format problem: the .wav files we used, had to be converted into 8 or 16 bit PCM. In the other case they either wouldn’t be played at all or played with some noticeable cracking sound.

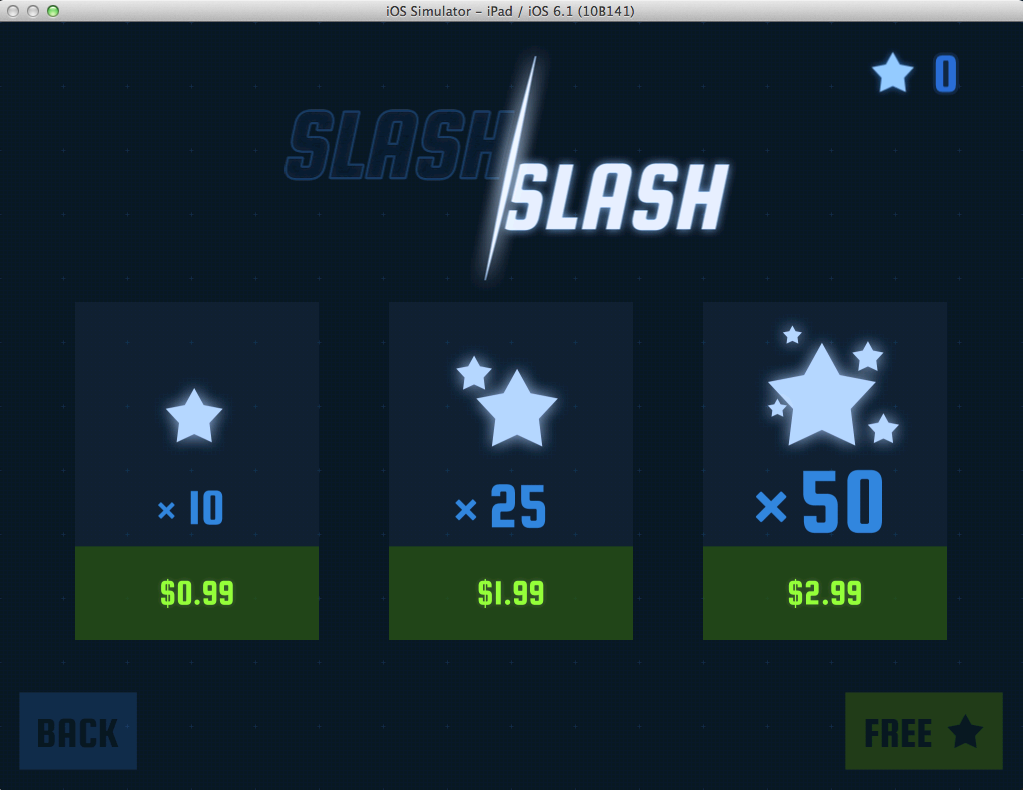
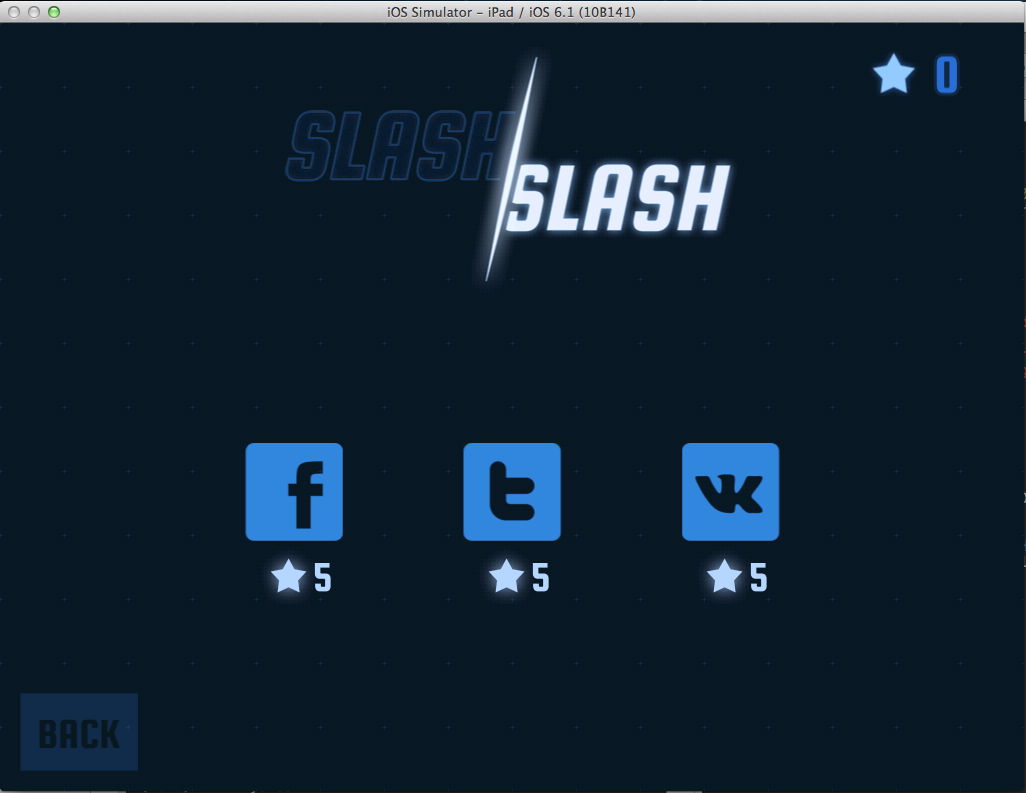
After all of that done we finally implemented the shop, where a user could buy stars if he/she hadn’t earned enough of them, while pacing through the game worlds, or share a picture in one of the social networks to get the stars for free:
Attached Image: image01.png
Attached Image: image04.png

At this point the competition’s time pressure was starting to get high and it was time to release the game to the public. Frantically fixing some late-found bugs, we uploaded the binary to the app store in the hopes of it passing its first review.

Once again, the resulting app can be found here

Cross Platform Test Driven Development Environment Using CMake (Part 4)

$
0
0
In part 3 of the series, we finished up with the last target type and then added the desired unit testing library with a simple example of usage. The initial work was all about getting simple things to build and how to cover all the targets properly. It is time to get into some further bits of CMake and possible uses within your codebase. Solving some common coding problems, integrating better with IDE’s and cleaning up the CMake files themselves is what will be covered in this last part focused on CMake.

Parts 1 2 3 4

The final completed (within reason) environment: Attached File  WithSIMDAndiOS.zip   1.94MB   5 downloads


Being More Specific


One of the key things which I did in prior work was to use the simple generic detection variables in places where we needed to know something about the target. For instance, I used ‘APPLE’ to fix some of the early problems on OSX. What if you need to setup flags for a specific OS though? For instance, perhaps you have a network layer which has variations based on the target OS and specific versions of the OS? In a network system, you might have variations such as kqueue for BSD and derivatives (such as OSX), epoll for Linux and event ports for Windows. Additionally you may need to fall back to less scalable solutions based on the OS version, for instance if you use event cancellation in Windows event ports there are difficulties.  You need to choose some other solution on Windows XP and prior versions due to bugs in the implementation. The need for more fine grained detection of platform/target OS is required to give the code more to work with when making such choices.

Much of the detection can be performed at compile time with the preprocessor. But is this good enough? First you have to figure out how to detect the compiler being run which can be difficult since finding preprocessor definitions is not always easy. This is even more complicated than it seems though due to compilers trying to be compatible with other compilers and impersonating them. For Windows compilers you may need to query if it defines ‘_MSVC’ and then check that it is not an imposter such as Intel Compiler or Vector C etc. Once the compiler is detected, what about the target version of the OS? The OS information is not often passed into the compiler and checking defines in various headers won't very often help. What we need is a more reasonable method of dealing with the detections, thankfully CMake supplies this for us.

Compiler Detection


CMake performs the specific detections we are looking for, in fact the generic ones we have used so far are derived from the detailed detections it has performed. In order to get the real compiler you can avoid the preprocessor difficulties by using the CMake defined variables: CMAKE_C_COMPILER_ID or CMAKE_CXX_COMPILER_ID. These two variables contain a string which corresponds to a specific compiler, even if that compiler were trying to impersonate another. In order to make detection more specific, you may use the following within a listfile:

IF( "${CMAKE_CXX_COMPILER_ID}" STREQUAL "MSVC" )
    SET( COMPILER_MSVC ON )
ELSEIF( "${CMAKE_CXX_COMPILER_ID}" STREQUAL "Intel" )
    SET( COMPILER_INTEL ON )
ELSEIF( "${CMAKE_CXX_COMPILER_ID}" STREQUAL "GNU" )
    SET( COMPILER_GNU ON )
ELSEIF( "${CMAKE_CXX_COMPILER_ID}" STREQUAL "Clang" )
    SET( COMPILER_CLANG ON )
ELSE()
    SET( COMPILER_UNKNOWN ON )
ENDIF()

With this script the specific compiler is identified correctly, impersonators are differentiated and if the user attempts to use an unknown compiler, say Vector C, then ‘COMPILER_UNKNOWN’ would be set. Before the user even bothers to compile, the CMake step could tell them that their setup is not supported. The user could decide to add the support, complain to the maintainer or of course give up.

OS Detection


Much like the compiler, there are variables to query information about the OS. There is only one variable in general “CMAKE_SYSTEM” which contains the full name and version information of the OS the build is being run on. The variable is helpfully broken into two parts by CMake so you can access the name and the version separately with: CMAKE_SYSTEM_NAME and CMAKE_SYSTEM_VERSION. Using the same pattern of code found in identifying the compiler, you can write detection for the specific OS names: Linux, FreeBSD, Windows and others. Also, dealing with OS versions is simple except we have to rely on CMake’s integer comparison abilities. Basically though, if you wanted to know if the Window’s version is higher than XP, you could use the following line:

IF( ${CMAKE_SYSTEM_VERSION} VERSION_MORE 5.1 )
    SET( OS_VERSION_NOT_XP ON )
ELSE()

CMake supplies a specialized comparison function which deals with version numbers such as ‘2.8.4.20130112’. This function performs the comparison by breaking the individual portions of the version string and doing the comparison on each piece separately.

CMake Generated Configuration Files


With all the new detection code, we need a better way to communicate the results to the codebase. Up until now 'ADD_DEFINITIONS' was good enough since we only required a couple definitions added to the code while compiling, with all the detection made possible by CMake though, we need a bulk transfer method. In order to supply bulk information to the codebase easily, CMake supplies a command which works somewhat like the Unix Sed command. It reads in a source file, searches for key text and replaces it with other text, then writes out a modified file to a given destination. The 'CONFIGURE_FILE' command is a rather poorly documented command which happens to supply a very nice and integrated solution of communicating with the codebase. While it only supplies two styles of replacement it is more than enough for nearly any type of configuration information you may desire.

It is simple to state that the command looks for ‘#cmakedefine’ and any text in the form of ‘@xxx@’ or ‘${xxx}’ but explaining what it does is far easier with a bit of example:

In a CMakeLists.txt file:

SET( THIS_IS_ON ON )
SET( THIS_IS_OFF OFF )

SET( TEST1 CameFromTest1 )
SET( TEST2 CameFromTest2 )

CONFIGURE_FILE( SourceFile.txt ResultFile.txt )

In SourceFile.txt:

#cmakedefine THIS_IS_ON
#cmakedefine THIS_IS_OFF

#define Test1Text "@CameFromTest1@"
#define Test2Text "${CameFromTest2}"

CMake will generate the following ‘ResultFile.txt’:

#define THIS_IS_ON
/* #define THIS_IS_OFF */

#define Test1Text "CameFromTest1"
#define Test2Text "CameFromTest2"

So, what is happening here is that as the command processes the input it looks up variables in the CMake environment to determine how the text replacement is made. In the first and second lines the ‘#cmakedefine’ is detected, CMake reads the variable name and looks it up. In the first case the variable is defined as a boolean true (‘ON’) and CMake outputs an normal preprocessor ‘#define’ with the variable name. (No value is included as you can see, just “defined”.) The second case is of course false (‘OFF’) and as such CMake outputs the definition as C style commented out. In the next two lines, the detected text is simply replaced with the contents of the CMake variable of the same name. Given these two styles of replacement, you can do just about anything you could ever require.

Take a look at the file 'Config.hpp.in' within the new build environment for a more complete example. The output is put in 'Libraries/Core/Include/Core/Config.hpp' when you generate the build environment so you can see an example of real usage.

Xcode Specialized Attributes


While we managed to fix the compilation process on Xcode, it was not as complete and proper as intended. Unfortunately I forgot to include the Xcode specific variables which notify it of the intended changes, so the IDE would sometimes override the settings in annoying ways. Xcode has a number of special purpose settings not found in some of the other IDE’s due to the specialized cross compilation mode it supports for iOS. In order to fix this, just add the following. The specific attributes are beyond the intended scope here but unless APPLE or CMake changes things, these should work just fine for our purposes of finishing off Xcode support properly. Also note that we look at the 'CMAKE_GENERATOR' variable and detect Xcode specifically instead of using the generic detections.

IF( CMAKE_GENERATOR STREQUAL Xcode )
    SET( CMAKE_XCODE_ATTRIBUTE_CLANG_CXX_LANGUAGE_STANDARD "c++11" )
    SET( CMAKE_XCODE_ATTRIBUTE_CLANG_CXX_LIBRARY "libc++" )
ENDIF()

GUI Options Revisited


In the third part of the series we added a single option which allowed disabling the unit tests. Options are pretty simple in the general case but eventually you will want to take more discreet control over certain things. In the future you may want to override target OS's instead of using the currently detected OS, you may want to setup CPU specific options etc. For example, we'll be adding SIMD code generation options and considering multiple CPU targets in the process.

The big deal with the options is that we want to display them in the CMake GUI but also remove options which don’t make sense. For instance, I wish to provide eventual support for multiple levels of Intel SSE and the option to target ARM Neon for iDevices and potentially native level Android. Of course, when compiling on ARM CPU's, enabling Intel SSE at any level makes no sense and of course the other way around for ARM Neon generation. We need a method of making the SSE and ARM mutually exclusive options. CMake does not directly support options being dependent on other options but thankfully, since this is a fairly common requirement, there is a macro with the functionality we desire already implemented. The macro we are looking for is called CMAKE_DEPENDENT_OPTION and it supplies what we desire in a fairly comprehensive, though potentially confusing, manner. As this is a helper, we need to tell CMake to load the file with the macro definition for this item. In the listfiles somewhere before you attempt to use the macro, add the following:

INCLUDE( CMakeDependentOption )

Because this file is supplied by CMake, you don’t need to tell CMake where to find it, and it will simply load as desired. It adds the macro with the following call signature:

CMAKE_DEPENDENT_OPTION( <option name="name">
	<string description="description">
    <default on/off="on/off">
    <predicate>
    <on/off if="if" predicate="predicate" is="is" false="false">
)

The first three arguments are the same as the OPTION command, while the next two options are what determine if the option will be shown or not and what value it will take when hidden. So, an example using the intended SSE options:

OPTION( INTEL_SSE "Enable SSE on Intel CPU" ON )
CMAKE_DEPENDENT_OPTION( INTEL_SSE_2 "Enable SSE 2 instructions." OFF "INTEL_SSE" OFF )

So, in the CMake GUI, SSE will be shown and enabled by default. SSE 2 will be shown in a disabled state by default. If you turn off SSE 1 and regenerate, the SSE 2 option will disappear and be set to off. A nice benefit though, if you had set SSE2 to on and then later re-enable SSE1, it would remember the last setting. Note that the predicate in this case is quoted, this is not required for the simple case here but if you want “INTEL_SSE AND Other” the quotes tell CMake to process the entire boolean evaluation as the argument instead of passing the pieces as individuals. Given this new tool, you can see how it will allow us to select cross compilation targets such as iPhone or Android and show only valid options for those targets. The new environment shows how to write a fairly complete version of options using this new ability to prevent incorrect or contradictory options from being shown. (NOTE: CMake GUI does not update the options until you regenerate. So, in order to enable SSE 4 or AVX, you have to enable the next higher version of SSE, regenerate to get the next one to show up, repeat.)

Reorganizing And Cleaning


Eventually, as you add more abilities and target support, your listfiles will become unmanageable, this is quite easy to fix. The first thing to do is add a new directory at the base of the project, we will call it “CMake” as a nice original name. We will be moving the individual portions of CMake code into files under the new sub-directory in order to organize related tasks and get them out of the root listfile.

Reorganization


The first thing to do is decide on a naming convention. For our purposes we will simply follow the other items in the project and use upper case camel case name. The files we create will have the extension ‘.cmake’ which is a fairly common convention. With those decisions out of the way, we’ll start cleaning things up. Create a file under the new directory named “Setup.cmake”. The ‘INCLUDE’ for the dependent options is a general thing we will be using, so move that to the setup file and replace it in the main file with "INCLUDE( CMake/Setup.cmake )". In the future, certain other includes will be needed and we'll add to this file as we go.

After we get done adding all the SIMD options and cross compilation targets, the list of options is a pretty large chunk of code along with all the compiler management sections. So, those are good sections to move into other files. Move all the options for your build over to ‘CMake/Options.cmake’ and add an include to the new file in the root listfile. (After the PROJECT command or required variables and GUI changes won’t be available.) If you keep doing this for other sections, you will eventually end up with a listfile which is nothing more than a ‘PROJECT’ command and a bunch of inclusions or added directories. In the supplied environment, you can see the cleaned up listfile's and where the different sections were moved.

IDE Integration: Target Organization


Once your codebase progresses, it is common to end up with 20 or more individual targets in the IDE's. Left as a flat list, finding things in the IDE can become difficult and annoying. It is time to clean that up by grouping things together and reorganizing the project. The abilities used here have no effect on actual building and are purely intended for the IDE's. The first thing we will do is move all the unit test targets into a grouping called "Tests".

CMake does not supply a specific command to create groupings within the project but it does support the concept. What we need is to use the CMake properties system to tell it where to place various items. Properties in general can be used for many things but as there are a lot of them, we only cover one specifically here. The specific property is attached to the targets we generate, for instance the '_TestMath' target is what we will use as an example. Add the following to the listfile which contains the unit test, within the 'IF( BUILD_UNITTESTS )' section and after we define the target:

SET_PROPERTY( TARGET _TestMath PROPERTY FOLDER Tests )

Now when you regenerate the project Xcode, Visual Studio and the other IDE's will create a non-target folder called "Tests" and place this unit test target within the folder. As you move forward and add more unit tests, they will all be organized under this new folder.

IDE Integration: Header/Source Organization


CMake also allows organization of individual files within the targets using the 'SOURCE_GROUP' command. If for instance you wished to put all headers from the math library under the group "Math Includes", you could add the following to your math listfile:

SOURCE_GROUP( "Math Includes" FILES ${INCLUDE_FILES} )

Eventually as the math library fleshes out you might want to subdivide various headers into nicely named embedded folders. Let's say I have a group of files which deal with intersections of various types and I want them under "Math Includes/Intersection" within the IDE. You can use the following

SOURCE_GROUP( "Math Includes&#092;&#092;Intersection" FILES ${INTERSECTION_INCLUDE_FILES} )

Note:  
The ampersand items are supposed to be the backslash character: '\'.  The article posting process keeps replacing them with the HTML representations.


Using this command, you can organize files within IDE's in a nice manner which makes navigating your code easier.

Cross Compilation


Cross compilation is not a difficult concept but can be a little confusing to get setup. We will be walking through the addition of an iOS target option to the project. The first thing to do is ‘know you target’ which is fairly simple in this case, an ARM processor and on later units the option to use ARM Neon (SIMD) instructions to speed things up. Since Intel SSE is not supported, we need to make sure targeting ARM disables all SSE settings and enables the ARM Neon instruction set as an option. If you followed along and understood the dependent argument discussion this is fairly easy.

We start by adding an option for the new target: 'TARGET_IOS’ which displays the new target. There is a problem though, this command is only going to be valid when generating Xcode projects or Unix Makefiles when running on OS X. To Keep things simple, we only support iOS under Xcode and leave the makefile generation of iOS up to the reader as an exercise at this point. The following will limit this option to Xcode generators only:

IF( CMAKE_GENERATOR STREQUAL Xcode )
OPTION( TARGET_IOS "Target iOS" OFF )
ENDIF()

Next we need to hide the SSE options if iOS is targeted, so change the SIMD_SSE option into a dependent as follows:

CMAKE_DEPENDENT_OPTION( SIMD_SSE "Enable SSE" ON "NOT TARGET_IOS" OFF )

Now if you regenerate on an OS X machine, you get the new target type listed in the CMake GUI and if you enable it then regenerate the SSE options would disappear.

At this point, we simply need to tell CMake to output a project which is specifically designed to build iOS applications. Hopefully the usage of CMake in a general manner has become second nature and as such, we don’t need to go over details of how to change compiler flags. There are only a couple steps to getting this to work, the first part just informs CMake of the changed target and then dealing with some of the target features:

SET( CMAKE_CROSSCOMPILING TRUE )
SET( CMAKE_SYSTEM_NAME "Darwin" )
SET( CMAKE_SYSTEM_PROCESSOR "arm" )

The required lines are fairly self documenting and tell CMake that we have a custom (not this system) target in mind, which OS and CPU to target. Things get a bit more complicated in the remaining items because they are all OS X/Xcode specific and not as self documenting. We need to change the SDK being used to compile from the OS X SDK’s to the iOS SDK’s, change target cpu’s and bit sizes and then tell Xcode to change it’s behavior to be iOS specific. Additionally, since iOS doesn’t support console targets, we have to disable the unit tests since they would fail to compile. Adding the following:

SET( SDK_VERSION "6.1" )
SET( SDK_LOCATION "/Applications/Xcode.app/Contents/Developer/Platforms/iPhoneOS.platform/Developer" )
SET( ACTIVE_SDK "${SDK_LOCATION}/SDKs/iPhonOS${SDK_VERSION}.sdk" )
SET( CMAKE_OSX_SYSROOT "${ACTIVE_SDK}" )

SET( CMAKE_OSX_ARCHITECTURES "${ARCHS_STANDARD_32_BIT)" )
SET( CMAKE_XCODE_EFFECTIVE_PLATFORMS "-iphoneos;-iphonesimulator" )

SET( BUILD_UNIT_TESTS OFF )

So, the first section of code changes the SDK to an iPhone SDK, 6.1 in this case. The code is written such that you could target older SDK’s but new submissions to the App Store require the latest SDK. The second section tells Xcode to target the iPhone, the specifics are beyond the intended scope here, though this will provide a working environment now and likely in the future unless Apple decides to move things around again. And finally, we disable the console commands for unit tests since iOS has no concept of a console application.

At this point, if you enable TARGET_IOS and regenerate, load the result into Xcode and you will see the iPhone/Simulator targets and be able to compile. (NOTE: This does not provide the App Signing certificate, if installed the certificate correctly, that should happen automatically, but idevice target will not build until you get the certificate setup correctly.)

Conclusion


While not as detailed as prior parts of this series, the information covered fleshes out the knowledge required to create a multi-platform and cross compilation capable CMake build environment. Further articles will transition to using this environment and extending it further but other than small things, will not be covering further detail of CMake. As a practical guide, the presented material supplemented with some Google searching (GameDev.net and StackOverflow being a very common source of answers), should give you all the tools required to move forward compiling on nearly any target.

Managing Decoupling

$
0
0
The only way of staying sane while writing a large complex software system is to regard it as a collection of smaller, simpler systems. And this is only possible if the systems are properly decoupled.

Ideally, each system should be completely isolated. The effect system should be the only system manipulating effects and it shouldn’t do anything else. It should have its own update() call just for updating effects. No other system should care how the effects are stored in memory or what parts of the update happen on the CPU, SPU or GPU. A new programmer wanting to understand the system should only have to look at the files in the effect_system directory. It should be possible to optimize, rewrite or drop the entire system without affecting any other code.

Of course, complete isolation is not possible. If anything interesting is going to happen, different systems will at some point have to talk to one another, whether we like it or not.

The main challenge in keeping an engine “healthy” is to keep the systems as decoupled as possible while still allowing the necessary interactions to take place. If a system is properly decoupled, adding features is simple. Want a wind effect in your particle system? Just write it. It’s just code. It shouldn’t take more than a day. But if you are working in a tightly coupled project, such seemingly simple changes can stretch out into nightmarish day-long debugging marathons.

If you ever get the feeling that you would prefer to test an idea out in a simple toy project rather than in “the real engine”, that’s a clear sign that you have too much coupling.

Sometimes, engines start out decoupled, but then as deadlines approach and features are requested that don’t fit the well-designed APIs, programmers get tempted to open back doors between systems and introduce couplings that shouldn’t really be there. Slowly, through this “coupling creep” the quality of the code deteriorates and the engine becomes less and less pleasant to work with.

Still, programmers cannot lock themselves in their ivory towers. “That feature doesn’t fit my API,” is never an acceptable answer to give a budding artist. Instead, we need to find ways of handling the challenges of coupling without destroying our engines. Here are four quick ideas to begin with:

1. Be wary of “frameworks”.


By a “framework” I mean any kind of system that requires all your other code to conform to a specific world view. For example, a scripting system that requires you to add a specific set of macro tags to all your class declarations.

Other common culprits are:
  •     Root classes that every object must inherit from
  •     RTTI/reflection systems
  •     Serialization systems
  •     Reference counting systems

Such global systems introduce a coupling across the entire engine. They rudely enforce certain design choices on all subsystems, design choices which might not be appropriate for them. Sometimes the consequences are serious. A badly thought out reference system may prevent subsystems from multithreading. A less than stellar serialization system can make linear loading impossible.

Often, the motivation given for such global systems is that they increase maintainability. With a global serialization system, we just have to make changes at a single place. So refactoring is much easier, it is claimed.

But in practice, the reverse is often true. After a while, the global system has infested so much of the code base that making any significant change to it is virtually impossible. There are just too many things that would have to be changed, all at the same time.

You would be much better off if each system just defined its own save() and load() functions.

2. Use high level systems to mediate between low level systems.


Instead of directly coupling low level systems, use a high level system to shuffle data between them. For example, handling footstep sounds might involve the animation system, the sound system and the material system. But none of these systems should know about the others.

So instead of directly coupling them, let the gameplay system handle their interactions. Since the gameplay system knows about all three systems, it can poll the animation system for events defined in the animation data, sample the ground material from the material system and then ask the sound system to play the appropriate sound.

Make sure that you have a clear separation between this messy gameplay layer, that can poke around in all other systems, and your clean engine code that is isolated and decoupled. Otherwise there is always a risk that the mess propagates downwards and infects your clean systems.

In the BitSquid Tech we put the messy stuff either in Lua or in Flow (our visual scripting tool, similar to Unreal’s Kismet). The language barrier acts as a firewall, preventing the spread of the messiness.

3. Duplicating code is sometimes OK!


Avoiding duplicated code is one of the fundamentals of software design. Entities should not be needlessly multiplied. But there are instances when you are better off breaking this rule.

I’m not advocating copy-paste-programming or writing complicated algorithms twice. I’m saying that sometimes people can get a little overzealous with their code reuse. Code sharing has a price that is not always recognized, in that it increases system coupling. Sometimes a little judiciously applied code duplication can be a better solution.

An typical example is the String class (or std::string if you are thusly inclined). In some projects you see the String class used almost everywhere. If something is a string, it should use the String class, the reasoning seems to be. But many systems that handle strings do not need all the features that you find in your typical String class: locales, find_first_of(), etc. They are fine with just a const char *, strcmp() and maybe one custom written (potentially duplicated) three-line function. So why not use that, the code will be much simpler and easier to move to SPUs.

Another culprit is FixedArray<int,5> a. Sure, if you write int a[5] instead you will have to duplicate the code for bounds checking if you want that. But your code can be understood and compiled without fixed_array.h and template instantiation.

And if you have any method that takes a const Vector<t> &v as argument you should probably take const T *begin, const T *end instead. Now you don’t need the vector.h header, and the caller is not forced to use a particular Vector class for storage.

A final example: I just wrote a patching tool that manipulates our bundles (aka pak-files). That tool duplicates the code for parsing the bundle headers, which is already in the engine. Why? Well, the tool is written in C# and the engine in C++, but in this case that is kind of beside the point. The point is that sharing that code would have been a significant effort.

First, it would have had to be broken out into a separate library, together with the related parts of the engine. Then, since the tool requires some functionality that the engine doesn’t (to parse bundles with foreign endianness) I would have to add a special function for the tool, and probably a #define TOOL_COMPILE since I don’t want that function in the regular builds. This means I need a special build configuration for the tool. And the engine code would forever be dirtied with the TOOL_COMPILE flag. And I wouldn’t be able to rearrange the engine code as I wanted in the future, since that might break the tool compile.

In contrast, rewriting the code for parsing the headers was only 10 minutes of work. It just reads a vector of string hashes. It’s not rocket science. Sure, if I ever decide to change the bundle format, I might have to spend another 10 minutes rewriting that code. I think I can live with that.

Writing code is not the problem. The messy, complicated couplings that prevent you from writing code is the problem.

4. Use IDs to refer to external objects.


At some point one of your systems will have to refer to objects belonging to another system. For example, the gameplay layer may have to move an effect around or change its parameters.

I find that the most decoupled way of doing that is by using an ID. Let’s consider the alternatives.

Effect *, shared_ptr<Effect>

A direct pointer is no good, because it will become invalid if the target object is deleted and the effect system should have full control over when and how its objects are deleted. A standard shared_ptr won’t work for the same reason, it puts the life time of Effect objects out of the control of the effect system.

Weak_ptr<Effect>, handle<Effect>

By this I mean some kind of reference-counted, indirect pointer to the object. This is better, but still too strongly coupled for my taste. The indirect pointer will be accessed both by the external system (for dereferencing and changing the reference count) and by the effect system (for deleting the Effect object or moving it in memory). This has the potential for creating threading problems.

Also, this construct kind of implies that external systems can dereference and use the Effect whenever they want to. Perhaps the effect system only allows that when its update() loop is not running and want to assert() that. Or perhaps the effect system doesn’t want to allow direct access to its objects at all, but instead double buffer all changes.

So, in order to allow the effect system to freely reorganize its data and processing in any way it likes, I use IDs to identify objects externally. The IDs are just an integers uniquely identifying an object, that the user can throw away when she is done with them. They don’t have to be “released” like a weak_ptr, which removes a point of interaction between the systems. It also means that the IDs are PODs. We can copy and move them freely in memory, juggle them in Lua and DMA them back-and-forth to our heart’s content. All of this would be a lot more complicated if we had to keep reference counts.

In the system we need a fast way of mapping IDs back to objects. Note that the following is not a fast way!

std::map<unsigned, Object *>

But there are a number of possibilities. The simplest is to just use a fixed size array with object pointers:

Object *lookup[MAX_OBJECTS];

If your system has a maximum of 4096 objects, use 12 bits from the key to store an index into this array and the remaining 20 bits as a unique identifier (i.e., to detect the case when the original object has been deleted and a new object has been created at the same index). If you need lots of objects, you can go to a 64 bit ID.


This has also been reprinted with permission from The Bitsquid blog.

C++: Custom memory allocation

$
0
0

Note:  
This article was published prematurely and is still undergoing work. Some additional sections need to be added to complete the article. This message will be removed when the article is complete. The editorial staff apologizes for the mix up!


Fast memory allocations along with memory leak detection can have a big impact on games performance.

C++ provides two well known functions to allocate dynamic (heap) memory (malloc and new), these functions are usually very slow because they're general purpose functions and generally require a context-switch from user mode into kernel mode. These functions also do not provide any kind of memory leak detection system natively.

Using custom allocators we can have well defined usage patterns and optimize the allocation process accordingly.

Base Allocator


Every allocator in this articles series will be derived from the class Allocator that declares 2 virtual functions (allocate and deallocate) that must be defined by each allocator.

Allocator.h
class Allocator
{
public:
    Allocator()
    {
        _UsedMemory     = 0;
        _NumAllocations = 0;
    }

    ~Allocator()
    {
        //Check memory leaks
        ASSERT(_NumAllocations == 0 && _UsedMemory == 0);
    }

    virtual void* allocate(size_t size, size_t alignment) = 0;

    virtual void deallocate(void* p) = 0;

    //Helper functions
    template <class T> T* allocateNew()
    {
        return new (allocate(sizeof(T), __alignof(T))) T;
    }

    template <class T> T* allocateNew(const T& t)
    {
        return new (allocate(sizeof(T), __alignof(T))) T(t);
    }

    template<class T> T* allocateArray(uint maxNumObjects)
    {
        if(maxNumObjects == 0)
            return NULL;

        return new (allocate(sizeof(T)*maxNumObjects, __alignof(T))) T [maxNumObjects];
    }

    template<class T> void deallocateDelete(T* pObject)
    {
        if (pObject != NULL)
        {
            pObject->~T();
            deallocate(pObject);
        }
    }

    u32 getUsedMemory() const
    {
        return _UsedMemory;
    }

    u32 getNumAllocations() const
    {
        return _NumAllocations;
    }

protected:
    u32        _UsedMemory;
    u32        _NumAllocations;
};

Memory leak detection (1)


In the code above you can see an assert in the destructor, this is a simple and easy way to check if you forgot to deallocate any memory, that won't cause any overhead or take any extra memory.

This simple method won't tell which allocation you forgot to deallocate but it will pin point in which allocator the leak occured so you can find the leak faster (especially if you use Proxy Allocators like I suggest later in this article).

Aligned Allocations


Processors access memory in word-sized blocks, so when a processor tries to access memory in an unaligned address it might have to access more word-sized memory blocks than would be needed if the memory was aligned and perform masking/shifting to get the required data in the register.

Example:
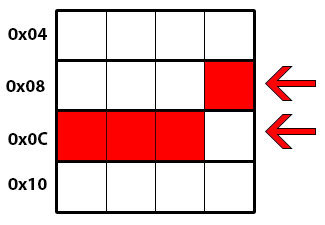
A processor accesses memory in 4-byte words (it can only directly access the words starting at (0x00, 0x04, 0x08, 0x0C,...).

If it needs to access data (4 bytes) stored at the address 0x0B it will have to read two word-sized blocks (the address 0x08 and the address 0x0C) because the data crosses the boundary from one of the blocks to the other:

Attached Image: alignment.jpg

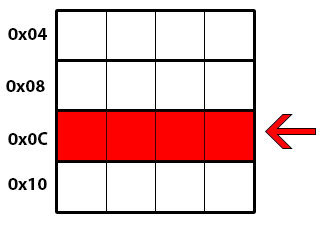
If the data was stored in an aligned address like 0x0C the processor could read it in a single memory access:

Attached Image: alignment2.jpg

Aligned data definition


Primitive data is said to be aligned if the memory address where it is stored is a multiple of the size of the primitive.

A data aggregate is said to be aligned if each primitive element in the aggregate is aligned.

Implementation


To n-byte align a memory address x we need to mask off the log2(n) least significant bits from x.

Simply masking off bits will return the first n-byte aligned address before x, so in order to find the first after x we just need to add alignment-1 to x and mask that address.

void* nextAlignedAddress(void* pAddress, u8 alignment)
{
	return (void*)( (uptr)pAddress + (alignment-1) ) & ~(alignment-1);
}

Sometimes it can be useful (like we'll see later) to calculate by how many bytes you need to adjust the address to align it.

u8 adjustment(void* pAddress, u8 alignment)
{
    u8 adjustment =  alignment - ( (uptr)pAddress & (alignment-1) );
    
    if(adjustment == alignment)
        return 0; //already aligned
    
    return adjustment;
}

Note:  The alignment must be a power of 2!


Linear Allocator


A Linear Allocator is the simplest and fastest type of allocator. Pointers to the start of the allocator, to the first free address and the total size of the allocator are maintained.

Allocations


New allocations simply move the pointer to the first free address forward.

Deallocations


Individual deallocations cannot be made in linear allocators, instead use clear() to completely clear the memory used by the allocator.

Implementation


LinearAllocator.h
#ifndef LINEARALLOCATOR_H
#define LINEARALLOCATOR_H

/////////////////////////////////////////////////////////////////////////////////////////////
///////////////// Tiago Costa, 2013              
/////////////////////////////////////////////////////////////////////////////////////////////

#include "Allocator.h"

#include <new>

class LinearAllocator : public Allocator
{
    public:
    LinearAllocator(u32 size, void* pStart);
    ~LinearAllocator();
    
    void* allocate(u32 size, u8 alignment);
    
    void deallocate(void* p);
    
    void clear();
    
    private:
    LinearAllocator(const LinearAllocator&) {}; //Prevent copies because it might cause errors
    LinearAllocator& operator=(const LinearAllocator&) {};
    
    void* _pInitialPosition;
    
    void* _pCurrentPosition;
    
    u32   _Size;
};

#endif

LinearAllocator.cpp
#include "LinearAllocator.h"

LinearAllocator::LinearAllocator(u32 size, void* pStart) : Allocator()
{
	ASSERT(size > 0);

	_pInitialPosition = pStart;

	_Size             = size;

	_pCurrentPosition = pStart;

	clear();
}

LinearAllocator::~LinearAllocator()
{
	_pInitialPosition   = nullptr;
	_pCurrentPosition   = nullptr;

	_Size               = 0;
}

void* LinearAllocator::allocate(u32 size, u8 alignment)
{
	ASSERT(size != 0);

	u8 adjustment =  alignment - ( (uptr)_pCurrentPosition & (alignment-1) );
    
    if(adjustment == alignment)
        return 0; //already aligned

	if(_UsedMemory + adjustment + size > _Size)
		return nullptr;

	uptr alignedAddress = (uptr)_pCurrentPosition + adjustment;

	_pCurrentPosition = (void*)(alignedAddress + size);

	_UsedMemory += size + adjustment;
	_NumAllocations++;

	return (void*)alignedAddress;
}

void LinearAllocator::deallocate(void* p)
{
	ASSERT( false && "Use clear() instead" );
}

void LinearAllocator::clear()
{
	_NumAllocations     = 0;
	_UsedMemory         = 0;

	_pCurrentPosition   = _pInitialPosition;
}

Stack Allocator


A Stack Allocator, like the name says, works like a stack. Along with the stack size, three pointers are maintained:
  • Pointer to the start of the stack.
  • Pointer to the top of the stack.
  • Pointer to the last allocation made. (This is optional in release builds)

Allocations


New allocations move the pointer up by the requested number of bytes plus the adjustment needed to align the address and store the allocation header.

The allocation header provides the following information:
  • Adjustment used in this allocation
  • Pointer to the previous allocation.

Deallocations


Note:  Memory must be deallocated in inverse order it was allocated! So if you allocate object A and then object B you must free object B memory before you can free object A memory.


To deallocate memory the allocator checks if the address to the memory that you want to deallocate corresponds to the address of the last allocation made.

If so the allocator accesses the allocation header so it also frees the memory used to align the allocation and store the allocation header, and it replaces the pointer to the last allocation made with the one in the allocation header.

Implementation


StackAllocator.h
#ifndef STACKALLOCATOR_H
#define STACKALLOCATOR_H

/////////////////////////////////////////////////////////////////////////////////////////////
///////////////// Tiago Costa, 2013              
/////////////////////////////////////////////////////////////////////////////////////////////

#include "Allocator.h"

#include <new>

class StackAllocator : public Allocator
{
    public:
    StackAllocator(u32 size, void* pStart);
    ~StackAllocator();
    
    void* allocate(u32 size, u8 alignment);
    
    void deallocate(void* p);
    
    void clear();
    
    private:
    StackAllocator(const StackAllocator&) {}; //Prevent copies because it might cause errors
    StackAllocator& operator=(const StackAllocator&) {};
    
    struct AllocationHeader
    {
        #if _DEBUG
            void* pPrevAddress;
        #endif
            u8 adjustment;
    };
    
    void* _pInitialPosition;
    
    void* _pPrevPosition;
    void* _pCurrentPosition;
    
    u32   _Size;
};

#endif

StackAllocator.cpp
#include "StackAllocator.h"

StackAllocator::StackAllocator(u32 size, void* pStart) : Allocator()
{
	ASSERT(size > 0);

	_pInitialPosition = pStart;

	_Size             = size;

	_pPrevPosition    = pStart;
	_pCurrentPosition = pStart;

	clear();
}

StackAllocator::~StackAllocator()
{
	_pInitialPosition   = nullptr;
	_pPrevPosition      = nullptr;
	_pCurrentPosition   = nullptr;

	_Size               = 0;
}

void* StackAllocator::allocate(u32 size, u8 alignment)
{
	ASSERT(size != 0);

	u32 adjustment = alignment - ( (uptr)_pCurrentPosition & (alignment-1) );

	//Increase adjustment so we can store the Allocation Header
	u32 neededSpace = sizeof(AllocationHeader);

	if(adjustment < neededSpace)
	{
		neededSpace -= adjustment;

		adjustment += alignment * (neededSpace / alignment);

		if(neededSpace % alignment > 0)
			adjustment += alignment;
	}

	if(_UsedMemory + adjustment + size > _Size)
		return nullptr;

	uptr alignedAddress = (uptr)_pCurrentPosition + adjustment;

	//Add Allocation Header
	AllocationHeader* pHeader = (AllocationHeader*) alignedAddress-sizeof(AllocationHeader);

	pHeader->adjustment   = adjustment;

	#if _DEBUG
	pHeader->pPrevAddress = _pPrevPosition;

	_pPrevPosition    = (void*)alignedAddress;
	#endif

	_pCurrentPosition = (void*)(alignedAddress + size);

	_UsedMemory += size + adjustment;
	_NumAllocations++;

	return (void*)alignedAddress;
}

void StackAllocator::deallocate(void* p)
{
	ASSERT( p == _pPrevPosition );

	AllocationHeader* pHeader = (AllocationHeader*) (uptr)p - sizeof(AllocationHeader);

	_pCurrentPosition = (void*)( (uptr)p - pHeader->adjustment );

	#if _DEBUG
	_pPrevPosition = pHeader->pPrevAddress;
	#endif
}

void StackAllocator::clear()
{
	_NumAllocations     = 0;
	_UsedMemory         = 0;

	_pPrevPosition      = nullptr;
	_pCurrentPosition   = _pInitialPosition;
}

Note:  Storing the last previous allocations in a list-like fashion and checking it before deallocations is not mandatory so it can be disabled in release builds. It's just helpful to prevent memory from being overwritten causing bugs.


Proxy Allocator


A Proxy Allocator is a special kind of allocator. It is just used to help with memory leak and subsystem memory usage tracking.

It will simply redirect all allocations/deallocations to the allocator passed as argument in the constructor while keeping track of how many allocations it made and how much memory it is "using".

Example:
Two subsystems use the same allocator A.
If you want to show in the debugging user interface how much memory each subsystem is using, you create a proxy allocator, that redirects all allocations/deallocations to A, in each subsystem and track their memory usage.

It will also help in memory leak tracking because the assert in the proxy allocator destructor of the subsystem that is leaking memory will fail.

Implementation


ProxyAllocator.h
#ifndef PROXYALLOCATOR_H
#define PROXYALLOCATOR_H

/////////////////////////////////////////////////////////////////////////////////////////////
///////////////// Tiago Costa, 2013              
/////////////////////////////////////////////////////////////////////////////////////////////

#include "Allocator.h"

#include <new>

namespace Aqua
{
	class ProxyAllocator : public Allocator
	{
	public:
		ProxyAllocator(Allocator* pAllocator);
		~ProxyAllocator();

		void* allocate(size_t size, size_t alignment);
		
		void deallocate(void* p);

	private:
		ProxyAllocator(const ProxyAllocator&) {}; //Prevent copies because it might cause errors
		ProxyAllocator& operator=(const ProxyAllocator&) {};

		Allocator* _pAllocator;
	};
};

#endif

ProxyAllocator.cpp
#include "ProxyAllocator.h"
#include "Debug.h"

using namespace Aqua;

ProxyAllocator::ProxyAllocator(Allocator* pAllocator) : Allocator()
{
	ASSERT(pAllocator != NULL);

	_pAllocator = pAllocator;
	_UsedMemory = 0;
	_NumAllocations = 0;
}

ProxyAllocator::~ProxyAllocator()
{
	_pAllocator = nullptr;
}

void* ProxyAllocator::allocate(size_t size, size_t alignment)
{
	ASSERT(_pAllocator != NULL);

	_NumAllocations++;

	u32 mem = _pAllocator->getUsedMemory();

	void* p = _pAllocator->allocate(size, alignment);

	_UsedMemory += _pAllocator->getUsedMemory() - mem;

	return p;
}
		
void ProxyAllocator::deallocate(void* p)
{
	ASSERT(_pAllocator != NULL);

	_NumAllocations--;

	u32 mem = _pAllocator->getUsedMemory();

	_pAllocator->deallocate(p);

	_UsedMemory -= mem - _pAllocator->getUsedMemory();
}

Allocator Managment


A large block of memory should be allocated when the program starts using malloc (and this should be the only malloc made) this large block of memory is managed by a global allocator (for example a stack allocator).

Each subsytem should then allocate the block of memory it needs to work from the global allocator, and create allocators that will manage that memory.

Example:
int ResourceManager::init(Allocator* pGlobalAllocator)
{
    void* pMem = pGlobalAllocator.allocate(RESOURCE_MANAGER_MEMORY_SIZE, 1);
    
    pResourcePoolAllocator = new (pMem) PoolAllocator(memorySize-sizeof(PoolAllocator), (char*)_pMemory+sizeof(PoolAllocator));
    
    //...
}

Tips & Tricks

  • Depending on the type of allocator, keep the number of individual allocations to a minimum to reduce the memory wasted by allocation headers.
  • Prefer using allocateArray() to individual allocations when it makes sense. Most allocators will use extra memory in each allocation to store allocation headers and arrays will only need single header.

Performance Comparasion


To test the performance of each allocator compared to malloc I wrote a program that measures how long it takes to make 20000 allocations (you can download the program in the end of the article), the tests where made in release mode and the results are averages of 3 runs.

Malloc vs Linear Allocator


AllocatorTime (s)
Malloc1
Linear0.5

Malloc vs Stack Allocator


AllocatorTime (s)
Malloc1
Stack0.5

Malloc vs FreeList Allocator


AllocatorTime (s)
Malloc1
FreeList0.5

Malloc vs Pool Allocator


AllocatorTime (s)
Malloc1
Pool0.5

Conclusion


There isn't a single best allocator - it's important to think about how the memory will be allocated/accessed/deallocated and choose the right allocator for each situation.

Reference


http://bitsquid.blogspot.pt/2010/09/custom-memory-allocation-in-c.html
Game Engine Architecture, Jason Gregory 2009


Article Update Log


06 April 2013: Initial release

Intersection Math & Algorithms - Learn to Derive

$
0
0
One of the most important group of algorithms inside game engines are intersection algorithms. Even though there are plenty of sites showing code for intersection algorithms, there are only a few describing the math backround behind this, and algorithm derivation. To understand this article you need to know just a bit about linear algebra.

Primitive description


Let's start with a mathematical description of primitives we're going to intersect. For this article I've used just ray (line), plane, sphere, axis-aligned bounding box and triangle ... these should be enough for a basic game engine.
    

Ray


This is the simplest (and very useful) primitive you can think about. Let us define it with two 4-component numbers, point (further referred as origin) and direction. Mathematically the definition is:

eq.latex?%20%5Cboldsymbol%7Bx%7D=%5Cbold

Where:
  • x represents any point on a line
  • o represents some exact specified point on line (e.g. origin)
  • d represents direction vector of line
  • t is parameter within some specified range
The range specifies whether our line is infinite in both directions (+d and -d), whether it's just in a single direction, or whether it's finite.

Writing a ray object in some programming language is straight-forward of course, you should end up with something like this:

class Ray
{
public:
    float4 origin;
    float4 direction;
	
    <<constructor>>
	
    <<methods>>
};

Constructor and methods are straight-forward (and should be also inline for performance reasons).

Plane


Another basic primitive. There are more ways to define a plane, but we will derive one that is well known and used. What is a plane? It's a point set that contains every such point in space, that when we create vector from that point to our known point on a plane, that vector has to be perpendicular to plane normal. And we know that perpendicular vectors are those whose dot product is equal to zero. So:

eq.latex?%20%5Cvec%7B%5Cboldsymbol%7Bn%7

Where:
  • n is unit vector in the plane normal direction
  • x is every point on the plane
  • p is our specified point on the plane
Expanding this yields:

eq.latex?%20n_%7Bx%7D%5Ccdot(x-p_%7Bx%7D
eq.latex?%20n_%7Bx%7D%5Ccdot%20x%20+%20n

Substitute:

eq.latex?%20-(n_%7Bx%7D%5Ccdot%20p_%7Bx%
eq.latex?%20n_%7Bx%7D=a
eq.latex?%20n_%7By%7D=b
eq.latex?%20n_%7Bz%7D=c

And we get something very familiar:

eq.latex?%20a%20%5Ccdot%20x%20+%20b%20%5

Which is a plane equation (so we proved that the definition we use is actually a plane). Definition in programming language could be like this:

class Plane
{
public:
    float4 point;
    float4 normal;

    <<constructor>>
	
    <<methods>>
};

A very simple definition. Let's jump ahead.

Sphere


Yet another basic primitive, that is widely used. The definition is surface containing all points in distance from sphere's center less-or-equal to sphere's radius. We will define it using an analytic equation:

eq.latex?%20(x%20-%20p_%7Bx%7D)%5E2%20+%

Where:
  • x, y and z are coordinates of point in sphere
  • p represents sphere's center
  • r represents sphere's radius
A sphere class is again very trivial:

class Sphere
{
public:
    float4 center;
    float radius;
    
    <<constructor>>
    
    <<methods>>
};

So much for sphere; simple, yet very useful primitive.

Axis-aligned Box


From here on I'll call this one just AABB (which stands for Axis-Aligned Bounding Box). Definition is very simple, as we work in Cartesian coordinate system, we have perpendicular axes X, Y and Z - AABB is defined as volume between minimum and maximum point in this system, the sides are made by planes orthogonal to planes formed by all 3 combinations of 2 base axis (XY, XZ and YZ). Mathematically we can define it as:

eq.latex?%20%5Cbold%7Bmin_%7Bp%7D%7D%20%

Where:
  • min_p stands for AABB minimum point
  • max_p stands for AABB maximum point
  • x represents points inside AABB
In programming language it can look like:

class AABB
{
public:
    float4 min_p;
    float4 max_p;
    
    <<constructor>>
    
    <<methods>>
};

Let's jump ahead to last object we're going to use.

Triangle


The first and only primitive in this article that is going to be defined by more than 2 values, yet very important. Most of the game worlds are described by triangles, most of the simulation use objects described as triangles, and every more (or less) complex 3D object can be decomposed into triangles. They're awesome; as opposed to other boring N-gons, triangles are never concave!

Let's define triangle with 3 points, then any point on triangle can be described as:

eq.latex?%20%5Cbold%7Bx%7D%20=%20%5Cbold

With conditions:

eq.latex?%20%5Calpha+%5Cbeta+%5Cgamma=1,

Where:
  • x is every point in triangle
  • A, B, C are points defining triangle
  • a, ß, ? are so called barycentric coordinates (e.g. parameters in the equation above)
A triangle inside of a program could be defined as:

class Triangle
{
public:
    float4 p[3];
    
    <<constructor>>
        
    <<methods>>
};

Intersections


So now that we have defined some of the basic primitives, it's time to derive intersection equation and also intersection algorithms between the primitives. As I want to keep the article short (and I don't want to storm you with zillion of equations and exhausting equation solving), I will just show you 4 derivations - Ray-Plane (analytic derivation), Ray-Sphere (geometric derivation), Ray-AABB (tricky derivation) and Ray-Triangle (more complex analytic derivation). You should get an idea of how the intersection equation can be derived and in the end you should be able to derive the rest of them on your own.

Ray-Plane intersection


I will derive Ray-Plane intersection analytically, as this is one of the most simple approaches to the derivation. When we want to derive some intersection algorithm analytically, we should write equations of those 2 objects right away, so (I intentionally used commonly known plane equation, instead of our definition):

eq.latex?%20%5Cboldsymbol%7Bx%7D=%5Cbold
eq.latex?%20a%20%5Ccdot%20x%20+%20b%20%5

Now we're looking for a point that lies on both, the ray and the plane - so we're looking for x. So we first write the first equation in scalar form:

eq.latex?%20x=o_%7Bx%7D+t%5Ccdot%20d_%7B
eq.latex?%20y=o_%7By%7D+t%5Ccdot%20d_%7B
eq.latex?%20z=o_%7Bz%7D+t%5Ccdot%20d_%7B

Let's substitute these 3 to plane equation:

eq.latex?%20a%20%5Ccdot%20(o_%7Bx%7D+t%5
eq.latex?%20a%20%5Ccdot%20o_%7Bx%7D+%20a
eq.latex?%20a%20%5Ccdot%20t%20%5Ccdot%20
eq.latex?%20t%20%5Ccdot%20(a%20%5Ccdot%2
eq.latex?%20t%20=%20-%7Ba%20%5Ccdot%20o_

It's time to reverse substitution we did when "deriving" plane equation, e.g.:

eq.latex?%20-(n_%7Bx%7D%5Ccdot%20p_%7Bx%
eq.latex?%20n_%7Bx%7D=a
eq.latex?%20n_%7By%7D=b
eq.latex?%20n_%7Bz%7D=c

eq.latex?%20t%20=%20-%7B%7Bn_%7Bx%7D%20%

And transformed to vector form we get:

eq.latex?%20t%20=%20%7B-%7B%7B%5Cvec%7B%

But we can optimize this a little bit:

eq.latex?%20t%20=%20%7B-%7B%7B%5Cvec%7B%

Voila, that's what we have been looking for! So basically we need just subtraction, 2 dot products and 1 division. In program this can look like (assuming we want to intersect planes in front of ray origin in direction of ray):

bool IntrRayPlane(const Ray* r, const Plane* p, float* t)
{
    float denom = dot(p->normal, r->direction);
    
    // Test whether ray and plane aren't parallel
    if(fabsf(dotND) < EPSILON)
        return false;
    
    *t = -(dot(p->normal, r->origin - p->point) / denom);
    return ((*t) > 0.0f);
}

Almost as simple as the equation. Let's jump ahead, time for spheres!

Ray-Sphere intersection


I could perform analytic derivation like in the Ray-Plane intersection derivation, although Ray-Sphere intersection is just one of the cases that can be easily derived using geometry. Let's start with an image:

gallery_102163_282_11168.jpg

We're now looking for 2 distances:

eq.latex?%20t_%7B0%7D%20=%20%7C%5Cbold%7
eq.latex?%20t_%7B1%7D%20=%20%7C%5Cbold%7

Finding C-O is quite straightforward, it's just simple:

eq.latex?%20%5Cbold%7BL%7D=%5Cbold%7Bp%7

Another thing we need to find is distance along the ray to point X, but as we know ray direction, it's just simple projection of L.

eq.latex?%20t_x%20=%20%5Cbold%7BL%7D%5Cc

Right now we should look again at the image, we can see 3 important right angle triangle, one formed by {d, OX and OC}, another one {d, r, PX} and last one {d, r, P'X}. We need to know distance PX (respectively P'X, they're equal). So let's use Pythagorean theorem twice:

eq.latex?%20d%5E2%20=%20%5Cbold%7BL%7D%5
eq.latex?%20t_%7BPX%7D=%5Csqrt%7Br%5E2-d

And our 2 hit distances are:

eq.latex?%20t_%7B0%7D%20=%20t_%7Bx%7D%20
eq.latex?%20t_%7B1%7D%20=%20t_%7Bx%7D%20

Time for the code (searching just nearest hit):

bool IntrRaySphere(const Ray* r, const Sphere* s, float* t)
{
    float rad2 = s->radius * s->radius;
    float4 L = s->center - r->origin;
    
    float tPX = dot(L, r->direction);
    if(tPX < 0.0)
        return false;
    
    float dsq = dot(L, L) - tPX * tPX;
    if(dsq > rad2)
        return false;
    
    float thit = sqrt(rad2 - dsq);
    *t = tPX - thit;
    if(*t < 0.0f)
        *t = tPX + thit;
    
    return ((*t) < 0.0f);
}    

Just a side note. Analytic derivation in this case is also very trivial, you will end up with quadratic equation, where determinant is negative in case of no hit, zero in case of single point hit (e.g. tangent line), and positive in case of secant.

Let's jump ahead to boxes!

Ray-AABB intersection


Another important one, although a bit tricky. Let's start with an image again:

gallery_102163_282_5470.png

You can see, that box in 2D is formed by 2 slabs, horizontal and vertical. 3D is analogous to this, but of course it's formed by 3 slabs. For each slab we want to find minimum distance and maximum distance, e.g.:

eq.latex?%20%5Cbold%7Bt_%7Bmin%7D%7D%20=

Where a and b represents minimum (respectively maximum) point of our AABB. What we get is the minimum and maximum distance to each slab. Now we have to correctly order the distances along the ray direction, this is quite simple:

eq.latex?%20%5Cbold%7Bt_%7Bnear%7D%7D%20
eq.latex?%20%5Cbold%7Bt_%7Bfar%7D%7D%20=

Where min/max is defined as:

eq.latex?%20min%28%5Cbold%7Ba%7D,%20%5Cb
eq.latex?%20max%28%5Cbold%7Ba%7D,%20%5Cb

Entry/exit point is then defined as maximum of near distances (see the image), thus:

eq.latex?%20enter%20=%20hmax%28%5Cbold%7
eq.latex?%20enter%20=%20hmin%28%5Cbold%7

Where hmax/hmin function is horizontal minimum/maximum, defined as:

eq.latex?%20hmin%28%5Cbold%7Ba%7D%29%20=
eq.latex?%20hmax%28%5Cbold%7Ba%7D%29%20=

Of course a hit only occurs when the exit point is larger than zero, and the exit point is further than the entry point (if it isn't, we missed the AABB). Time to code:

bool IntrRayAABB(const Ray* r, const AABB* b, float* enter, float* exit)
{
    float4 tmin = (b->minimum - r->origin) / r->direction;
    float4 tmax = (b->maximum - r->origin) / r->direction;
    
    float4 tnear = f4min(tmin, tmax);
    float4 tfar = f4min(tmin, tmax);
    
    *enter = max(max(tnear.x, 0.0f), max(tnear.y, tnear.z));
    *exit = min(tfar.x, min(tfar.y, tfar.z));
    
    return (*exit > 0.0f && *enter < *exit);
}

It can be a little more optimized, although I'll leave that to reader as an exercise.

Ray-Triangle intersection


I'd like to say, there is like a dozen of ways to intersect a ray with a triangle. Lots of them don't even use a triangle defined by 3 points, and re-define it in better suited way. I'll show you how to derive plain good old Barycentric test with one huge advantage, you don't have to precompute a triangle in any way, just use the standard definition with 3 points.

Let's start with equations we already have:

eq.latex?%20%5Cboldsymbol%7Bx%7D=%5Cbold
eq.latex?%20%5Cbold%7Bx%7D%20=%20%5Cbold

The triangle equation actually is equal to this:

eq.latex?%20%5Cbold%7Bx%7D%20=%20%5Cbold

And let's arrange it like this:

eq.latex?%20%5Cbold%7Bx%7D%20=%20%5Cbold

Substituting line equation for x yields:

eq.latex?%20%5Cbold%7Bo%7D%20+%20t%20%5C
eq.latex?%20-t%20%5Ccdot%20%5Cvec%7B%5Cb

Those are 3 equations with 3 unknown variables. Instead of thinking about some more clever way, let's solve it in brute force manner with Cramer's rule. First let's re-arrange it to better form:

eq.latex?%20%5Cbegin%7Bpmatrix%7D-%7B%5C

For clarity let's substitute e1 for B-A, e2 for C-A and p for o-A.

eq.latex?%20%5Cbegin%7Bpmatrix%7D-%7B%5C

Now it's time to apply Cramer's rule, e.g.:

eq.latex?%20%5Cbegin%7Bpmatrix%7Dt%5C%5C

But matrix determinant can be written as scalar triple product, so:

eq.latex?%20%5Cbegin%7Bpmatrix%7Dt%5C%5C

I know this might look scary right now, but it really is simple. For those that understand code easier than math I also add code:

bool IntrRayTriangle( const Ray* r, const Triangle* t, float* thit, float* u, float* v)
{
    float4 e1 = t->v[1] - t->v[0];
    float4 e2 = t->v[2] - t->v[0];
    
    float4 pvec = cross(r->direction, e2);
    
    float det = dot(e1, pvec);
    if(det > -EPSILON && det < EPSILON)
        return false;
    
    float inv_det = 1.0f / det;
    
    float4 tvec = r->origin - t->v[0];
    *u = dot(tvec, pvec) * inv_det;
    if(*u < 0.0f || *u > 1.0f)
        return false;
    
    float4 qvec = cross(tvec, e1);
    *v = dot(r->direction, qvec) * inv_det;
    if(*v < 0.0f || *u + *v > 1.0f)
        return false;
    
    *thit = dot(e2, qvec) * inv_det;
    
    return (*thit > 0.0f);
}

Conclusion


Intersection algorithms, as I've said, are core algorithms for practically every game engine! And not just game engines, ray-tracers, physics simulators, collision detection libraries, even some AI simulations use them, etc. If you made it here, then I have to say thanks for reading my article, and I hope you've learned something new.

9 Apr 2013: Initial release

Game Development with Win32 and DirectX 11 - Part 00: Setup

$
0
0
Writing a complete game from scratch can be difficult, even for a seasoned programmer. In this tutorial series, I'll walk you through the development process of a full-fledged game written from the ground up. It may sound easy, but it has a pretty steep learning curve. If at any point thoughout this series you have trouble or are unable to figure out how to get something to work properly, feel free to PM me and I'll get back to you ASAP (please do a web-search of your question first though).

Prerequisites


Now, some of you might be wondering why we are using Win32 rather than a cross-platform wrapper like SDL or GLFW. Well, since we'll be using Microsoft DirectX to handle everything from our graphics to our sound, there's really no need for a cross-platform solution. Using Win32 may not be as easy as SDL or GLFW, but it will allow for a much more customizable user experience.

Before we get started though, we need to make sure you have all the prerequisites required for this tutorial series.

Note:  
These are not the only prerequisites you will need. As the series progresses, we'll be adding more dependencies.


Experience


The first and most important prerequisite for this tutorial is C++ experience. This tutorial is not intended for C++ newcomers. I recommend you have knowledge of, and experience working with all or most of the following C++ concepts:
  • Using and writing operator methods
  • Dynamic memory management
  • Using and writing namespace, classes, and structures
  • Using friendship, inheritance, and polymorphism
  • Templates
  • Exceptions
  • Type casting
  • C++11 changes
If you believe you do not fully understand one or more of the topics listed above, I recommend you 1) Bookmark this page so you can come back to it later, and 2) Research and learn about the topic(s) in which you believe (or know) you are lacking in. In order to keep the lessons quick and to-the-point, I will refrain from explaining and teaching about C++ related topics (unless it is extremely rare and I have no expectation that you would know about it without having used it before).

I also recommend you have some experience actually writing programs in C++ using some of the topics listed above (it's one thing to read about a concept and another to put it into practice).

Software


Knowledge and experience aren't the only things needed for this tutorial series. You'll need the help of a few software packages to get the most out of this tutorial series. Though it is possible to substitute most of the packages listed below with other packages (possibly open-source), I will not explain how to do so as this tutorial series is designed to be used with the packages below.

Microsoft Windows

Obviously this is the most important piece of software you'll need. Without a complete, working Windows environment, you would have nowhere to compile or test your code. I recommend that you do not install Windows through a virtual machine as this will severely increase compiling time and keep you from being able to properly test your project. For this tutorial series I will be using Windows 7 Professional 64-bit. This tutorial is not tailored for use with any other Windows version (e.g. Vista or 8), although I don't see any reason why it wouldn't work with Windows 8 (though I currently am unable to test it). I also recommend using a 64-bit install of Windows as it will allow you the ability to use more than 4GB of RAM, allowing for more available memory (if you have more than 4GB).

Note:  
Microsoft Windows XP and prior do not support DirectX 11.


Microsoft Visual Studio 2010

Now, we'll need a compiler. I've opted for Visual Studio rather than open-source equivalents because I have a lot of experience with it. Now, if you want to download Visual Studio, you can go to the Visual Studio download page and grab Visual C++ Express 2010. I will be using Visual Studio 2010 Professional, but this turorial series is designed for use with Express. If you will be using Visual Studio 2012, you will need to change your Platform Toolset setting for the project (please find a tutorial on how to do so).

Microsoft DirectX SDK

Without the DirectX SDK, you would have no way of using any of the DirectX modules. You will need to pick up the latest one (June 2010) from the download page. After installation, it should create a folder in your Program Files (or Program Files (x86) on 64-bit Windows) called Microsoft DirectX SDK (June 2010). In here is pretty much everything you need to get working with any of the DirectX modules. Please note that for graphics, we will be using Direct3D 11. The June 2010 SDK is currently the only SDK version that supports Direct3D 11 and thus using a prior one will not allow you to complete this tutorial series properly.

Note:  
In Microsoft Windows 8 and above, you will need to download the Windows SDK rather than the file above (the DirectX SDK comes packaged with the Windows SDK).


Lesson Tasks


Please perform the following actions to prepare yourself for the next tutorial:

  1. Install all of the software packages described above (or your chosen equivalent).

Coming Up...


In the next tutorial, we'll get the Visual Studio project set up and make sure all the dependencies are in order.

Bit Fields

$
0
0
During a discussion on GameDev recently, I suggested someone use a bit field as a method to avoid having to deal with various masking and shift operations in a manual and potentially buggy manner.  The suggestion was taken and then a snippet of the code was given; everything looked correct at first glance but in fact it was incorrect.  In the process of updating my suggestion for the specific usage, I did a bit of Googling for something simple, only to find that the usage of bit fields and solid information on behavior is severely lacking.  I hope to centralize some of the information and also give some examples of bit fields beyond the trivial examples I found in my searches.

What Is A Bit Field


The general definition of a bit field is the ability to access and manipulate multiple logical neighboring bits in memory in a clean and concise manner.  While technically correct this leaves a lot to be desired and also does not supply a very good reason to ever use a bit field in order to simplify your code.  Additionally, the C and C++ standards leave some wiggle room in the definitions so there is a small amount of per compiler information to be learned when using bit fields.  The standard was left loose due to the fact that a primary usage of bit fields in C was to map between the language and underlying hardware control registers.  This is beyond the scope here but in order for compilers to map to specific hardware, sometimes the rules of how bits were laid out needed to be tweaked from platform to platform.  It is the same reason that an ‘int’ in C/C++ does not specify that it is 32 or 64 bits in length explicitly; int can be tweaked to the best fit for the CPU and architecture.

In order to avoid any bad assumptions, we are going to base all examples and explanations on the idea that the target platform is an Intel x86 instruction set CPU and the compiler is set up accordingly.  So, given that clarification, our first example is the following:

struct BitField
{
  unsigned short  Count : 8;
  unsigned short  Offset : 7;
  unsigned short  Inverted : 1;
};

What this example is doing is defining specific bits within the fundamental unsigned short to be presented to the programmer as named fields which can be accessed or modified.  The ‘Count’ field is specified as being 8 bits wide and as such has a valid range of 0-255.  The ‘Offset’ is 7 bits wide and of course ‘Inverted’ is 1 bit.  Using the bit field is as simple as accessing members of a structure in a normal fashion:

BitField a;
a.Count = 12;
a.Offset = 31;
a.Inverted = 0;

Nothing particularly surprising, so what good does specifying this as a bit field do?  For one thing, in this case: “sizeof( a )==2”.  We have packed all three of the fields into a single unsigned short, so it is compressed.  The same structure without the bit field specifications would be “sizeof( a )==6”, quite a savings.  The benefit to the programmer is that because we know the limits of intended data, we can pack the data into a smaller space; this is often used in network transmissions, file storage and other areas where you want to minimize the size of data.

Bit Field Overflow


The example so far packs into a single unsigned short because the number of bits used in total is 16, which happens to match the number of bits within the fundamental type we specified: unsigned short.  So, what happens when the specification bit count is more than 16?  Let’s change the example to be:

struct BitField
{
  unsigned short  Count : 8;
  unsigned short  Offset : 7;
  unsigned short  Origin : 2;
};

Now the count of bits says we have 17.  There are two primary side effects of this change, the first being that “sizeof( BitField )!=2”, it is instead now “sizeof( BitField )==4”.  The compiler has added another unsigned short to the structure in order to contain all the bits we specified, so there are now 15 bits which are unused in this structure.  The second side effect is that the ‘Origin’ field which replaced ‘Inverted’ is no longer where you may expect it in the binary data.  Instead of splitting the 2 bits, both bits are placed in the new element added to the structure.  This means that in the first 16 bit value the high bit is no longer used and that there are actually only 14 unused bits in the newly added element.

Given that the compiler avoids splitting fields over the fundamental type boundaries, what happens if you tried the following?

struct BitField
{
  unsigned short  WhatsThis : 17;
};

The compiler will likely give you a warning, if not an error, on the ‘: 17’ portion saying that the specified bit count exceeds the size of the underlying type.  Normally this means that the field will end up being only 16 bits long and you are not getting the 17th bit allocated.  So, if you attempt to use the entire 17 bits the top bit will be truncated.

Mixing Types In a Bit Field


What happens when you try to specify the type of single bit fields as a ‘bool’ in C++:

struct BitField
{
  int          FirstField : 8;
  bool         SecondField : 1;
  int          ThirdField : 8;
  int          FourthField : 8;
};

You will be in for an unpleasant surprise with this definition as the behavior in this case is compiler specific.  The C++ standard supplies no rules to standardize the behavior here and as such we have an example of Visual Studio and GCC/Clang differences.  I could find no documentation about Visual Studio's behavior here and can only write the observed result and the guessed rules which cause it.  The size of this bit field is actually 12, Visual Studio seems to close the first int, open a bool type for the single bit then open another int for the last two fields.  On the other hand, both GCC and Clang seem to be just fine with packing the bool into the int type and the size of the bit field remains 4 bytes.

Another variation of this, with a different result, could be the following:

struct BitField
{
  int          FirstField : 8;
  unsigned int SecondField : 8;
  int          ThirdField : 8;
  int          FourthField : 8;
};

If you report the size of this structure, you will get 4 bytes again on the three compilers.  Visual Studio does not seem to care if the type is signed or unsigned in this case, it only cares that the fundamental type sizeof is the same.

To be safe, it is suggested not to mix the fundamental types or at least do some serious testing to guarantee the compiler behavior.  This is not a compiler bug, the C++ standard does not specify anything of use in clarifying the behavior here, so it is open to interpretation.

The Allowed Fundamental Types


A primary item which my searches failed to show initially was which fundamental types were allowed, most results just showed “unsigned” in examples.  When the results were more specific, most of the documentation you find refers to the C99 standard which specifies that the fundamental types can be one of: _Byte, signed int and unsigned int.  But what about the C++ standards?  This actually took a little digging but the answer is that C++ greatly expanded the allowed types to be: any integral type or enumeration type.  So, in C++, fundamental types such as ‘long long’ (64 bit integer on x86) can be used as the type.

The enumeration type is a bit beyond the intended scope but enumerations are considered to be a signed integer type unless you use C++11 class typing on the enumeration.  How the compiler interprets mixing the enumeration into the bit field is implementation defined and as such you need to test your compiler behavior.

By these definitions the prior examples, in C99, would have been flagged as warnings or errors due to the use of unsigned short.  Though, most compilers did support this and other variations.

Bit Field Binary Representation


Mapping the bit fields to their binary representations is a compiler specific item, so this section may need to be researched for your compiler.  On most modern compilers though (MSVC, GNU and Clang targeting x86/x64 code as examples), the general rule is that the fields take bits from the fundamental type in the order you specify starting with the first field taking the lowest bits and continuing up till ending the bit field or moving to the next fundamental type.  So, for instance, our original example will have the following binary representation:

struct BitField
{
  unsigned short  Count : 8;
  unsigned short  Offset : 7;
  unsigned short  Inverted : 1;
};

Attached Image: BitField.jpg

Fine Grained Bit Field Control


Packing bits tightly is only one of the abilities of a bit field.  Additionally, you can insert padding and also control at what points a new fundamental type is allocated.  We’ll use an example of mapping a hypothetical binary image format header to a bit field for easier manipulation and access.  We’ll start with a textual description of the intentionally horrible image format header chunk:

Image Format:
Byte 0-1: Magic identifier: 0xf321
Byte 2: Version of format.  Valid formats 0-5.
Byte 3: low nibble specifies x origin, high nibble specifies y origin.  0=top or left, 1=bottom or right.
Byte 4-7: Width of image.  (Little endian.)
Byte 8-11: Height of image.  (Little endian.)

Using bit fields we can define this as a structure which can be binary loaded and saved on a little endian CPU.  The largest fundamental type described here is a 32 bit integer, so we want to end up with the width and height fields being represented as full integer values.  Yet, at the same time we want to keep the bit counts we specify for the fields appropriate to the data ranges specified in the format.  For instance, we know the valid formats are 0-5 so the first byte only has 3 bits of range involved.  A naive method of mapping the description to a bit field would be to insert padding manually as follows:

struct Header
{
  int  Magic    : 16;
  int  Version  : 3;
  int  pad0     : 5;     // Padding to next byte.
  int  YOrigin  : 1;
  int  pad1     : 3;     // Padding to next nibble. 
  int  XOrigin  : 1;
  int  Width    : 32;    // Will be in the next 'int' automatically since it won't fit in the prior one.
  int  Height   : 32;    // Next int again.
};

Personally, I don’t like the unused ‘pad’ fields in my code, much less in an auto complete list if your editor supports such things.  Additionally, I’d rather be explicit in expecting width to be in the next int as intended.  So, we use unnamed fields in the definition to help out here:

struct Header
{
  int  Magic    : 16;
  int  Version  : 3;
  int           : 5;     // Padding to next byte.
  int  YOrigin  : 1;
  int           : 3;     // Padding to next nibble. 
  int  XOrigin  : 1;
  int           : 0;     // Explicitly tell the compiler to allocate a new integer.
  int  Width    : 32;    // Will be in the next 'int' automatically since it won't fit in the prior one.
  int  Height   : 32;    // Next int again.
};

This does exactly the same thing but now you don’t have to pepper the structure with ‘padx’ field names unless you have a specific purpose, in which case you could probably use a better name than ‘pad’.  Say for instance, you expect to eventually allow more than 8 type versions and thus end up using some of the 5 padding bits.  You could name the pad: “VersionReserved”.  The name makes sense as it is reserved specifically for extension of the version field.  But, assuming you don’t care about the bits for the time being, the unnamed field does the same job and doesn’t dirty up auto completions and such.

What exactly is the unnamed ‘0’ field though, 0 bits, huh?  This is a special standards required behavior which tells the compiler to immediately allocate a new fundamental type for the next field to begin filling.  While it is already implied that the 32 bit field will have to be placed in a new int since it won’t fit otherwise, this is an explicit hint for readability in this case.

Real World Examples


So all the description is fine, but at this point you may be asking yourself, why would I ever bother with this?  There are several cases where a bit field can be extremely valuable, either in simplification or in clearing up messy programming.  I’ll give two examples in the following which could be used in today’s coding requirements.

Working With 16 Bit Colors


Working with 16 bit colors can often cause a fair amount of headaches.  You pass the color around as an uint16_t (unsigned short) but then need to manipulate the r, g and b components individually.  Accessing the components individually involves masking out the relevant portions of the value and then shifting them into place for further work.  So, for instance your color is probably packed as 5:6:5 such that there are 5 r and b bits and 6 g bits.  Accessing the b bits is simple: “int b = color & 0x1f;”.  Accessing r and g involve shifts, so for instance, to get the g you could use: “int g = (color>>5) & 0x3f;”.  Replacing items in the colors is more complicated due to having to mask out the original value prior to inserting the new bits.  Doing such accesses, even with helpers or macros is often error-prone so, in steps the bit field:

typedef uint16_t   ColorRGB565_t;
union ColorRGB565
{
  ColorRGB565_t  Composite;
  struct
  {
    ColorRGB565_t  B : 5;
    ColorRGB565_t  G : 6;
    ColorRGB565_t  R : 5;
  };
};

So the compiler does all the masking and shifting for you and makes the type a bit cleaner to use.  Better yet, by using the bit field you are giving the compiler more opportunity to perform optimizations for you.  Perhaps in a function where you extract the G twice, if you use shifts and masking yourself or a helper function, the compiler may not be able to recognize that they are both doing the same thing and eliminate one of the extractions.  With the bit field, it is much more likely that the compiler will notice the duplication and remove it.  But, considerably better, is that all the shifting and masking is handled by the compiler without hassles for the programmer.

Working With IEEE 754 Floating Points


Eventually, all programmers should probably understand the floating point format.  But much as in the 16 bit color example, extracting and manipulating the bits in a float is both error-prone and often confusing.  So, it is the bit field definition to the rescue once again:

typedef uint32_t   FloatBinaryRep_t;
union FloatBinaryRep
{
  float     Value;
  struct
  {
    FloatBinaryRep_t   Mantissa  : 23;
    FloatBinaryRep_t   Exponent  : 8;
    FloatBinaryRep_t   Sign      : 1;
  };
};

Note:  
By strict aliasing rules, the given union is actually undefined by the C++ standard.  Thankfully both MSVC and GNU specifically state that this is valid and as such you can use this style of aliasing.  On a compiler without the guarantee it would be required to memcpy the data from the float into the bit field representation.


Using this union allows you to write simplified code for several things.  Duplicating some items in the standard libraries for instance, you could detect nan’s using the following code:

bool IsNan( float f )
{
  FloatBinaryRep_t  fbr;
  fbr.Value = f;

  if( fbr.Exponent=0xFF && fbr.Mantissa!=0 )
      return true;
  return false;
}

More important uses are beyond the scope of this article but an example would be implementing a tolerant equivalence check which scales with the magnitudes of the inputs.  This is an important feature since the standard tolerance used by many programs is something like “abs( a-b ) > tolerance” which has to be specifically coded for the input data.  If your values range from 1-100 the tolerances are likely in the ‘0.0001f’ range, but if your values are 0-1, the tolerance may need to be more like ‘0.00000001f’ to be useful.  A more flexible tolerance is one which understands the binary representation and works as a percentage of difference instead of the fixed range used in the simple delta comparisons.

Conclusion


Hopefully you have a better understanding of bit fields, their possible uses and of course the idiosyncrasies of their implementations.  Bringing all of the information into one place, with examples beyond the trivial, was the primary goal.  Hopefully this short article will be a reasonable reference for people in the future.

Article Update Log

16 April 2013:  Rewrite of mixing types.  Tracked down a recent C++ standard, this is completely compiler specific and my testbed did not flag the problem due to a bug in my testbed.
15 April 2013:  First pass clarification of binary representation.
13 April 2013:  Initial release.

Why Kickstarters Fail and How to Avoid It

$
0
0
As an introduction let me just say I've been working as a liaison between Nintendo and indie developers for the past few months and have succeeded in bringing over around 15-20 new indie games to Wii U and 3DS. I've emailed back and forth developers who were running Kickstarters and through this I started to get some insight as to why many promising Kickstarter campaigns fail. They may seem like simple common sense (and they are) but they still seem to be overlooked too often.

I wrote this so hopefully I can provide some insight to indie developers who may be starting a Kickstarter campaign in the near future. I hope it helps.

Why Kickstarters Fail


I’ve had the opportunity of observing a fair few video game Kickstarter campaigns over the past few weeks from a close proximity. Some succeeded, others didn’t. Being in touch with many of the campaign starters has given me a bit of insight into why some Kickstarters fail and others succeed. It’s too often that you see a really great concept fail to build any kind of steam in their funding. Extremely talented developers will be baffled when they see their projects never make it past lift-off. And yet others seem to glide towards their funding target with the simplest of ease.

It’s not magic or voodoo. Having a really good idea just doesn’t cut it on Kickstarter. There are some clear-cut factors that should be taken into account from the start. Of course, it’s never completely in one’s hands and there are many outside factors that you just can’t control. But before anyone starts a Kickstarter campaign I’d advise them to sit down with their development team and figure out how they will avoid these 3 pitfalls.

1. Understand the Difference Between the "Developer-Publisher" Partnership and the "Developer-Community" Partnership


Very often developers think that all a Kickstarter means is that you work hard on a Kickstarter page and then if you succeed, you walk off with your money and create your game. But that isn't true. The entire model of the relationship between you and your partner is different. Just like publishers get to have a say in the development of the game, the gamers also want to have a say. If you are to convince them to help you fund this project, you have to make sure they see clearly that this a relationship that includes them as an equal partner.

Now, everyone knows one part of the relationship: you give the fans gifts according to how much they back you. But that's not where it ends.

First of all, you should create a section that talks about you and your team. The fans want be part of this relationship and that means they want to get to know you. So, show a picture of yourself or your team and talk a little bit about what you guys like and what appeals to you. Make yourselves seem human. When you have an interview with a publisher you want to show how professional you are.  But your Kickstarter page is your interview with the fans. When you meet with gamers, you want to show them how you understand their mindset and how you're a gamer just like them with specific things that appeal to you. Only, you happen to be a gamer with incredible expertise and experience in the development side of gaming. So show both of those. Show them your gamer side but also your expertise.

Attached Image: onipunks.jpg
Onipunks had a big section to describe their team for their Kickstarter

Secondly, you should find a way to include the fans in the development process. Meaning, there should be certain decisions where you provide a poll and let the community decide where to go and what to do. This is YOUR community now and they want to feel like you're including them throughout the development. This sense of partnership makes the gamers excited to back your project. So, on the original Kickstarter page tell them where you have already planned for them to be involved.

Third: provide lots of updates. Nothing spells doom to your prospective community more than a campaign-leader who stops providing updates. You must treat your backers like your own personal fanbase and the more you interact with your community, the more others will be willing to join along. That means that even after the game is funded, you can't stop with the updates. You don't have to update every day, but there should be some sense of momentum.

Lastly, appeal to a specific community wherever it's applicable. Go find forums or sites that already talk directly to this community and find a way to create a rapport. Sometimes you find yourself appealing to very broad audiences and see very little success, but if you strike a chord with a more niche community they can sometimes provide you with more support than the broader audiences. Don't wait until the last few days of your campaign to capitalize on this. Plan ahead and strike the iron will it's hot.

2. The Project Isn’t Far Enough Along


Attached Image: Kickstarter-Concept-Art.jpg

One of the biggest attitudes you have to have when making a Kickstarter campaign is: don’t expect to be like Double Fine. Double Fine succeeded in their Double Fine Adventure Kickstarter campaign because they were Double Fine. All Tim Schafer had to do was say he wanted to make another point-and-click adventure game and fans were already gathering in throngs to throw money at his feet. There didn’t have to be anything that remotely resembled a real game prepared for the campaign. But that is the exception to the rule. Only developers or franchises that have incredible persuasion among fans (usually due to nostalgia) can rely on that. Everyone else needs to have incredible content ready to show off.

Kickstarters are always found somewhere along a certain chronological line in the development process:

A) There are those who launch a Kickstarter with nothing but an idea or a “pitch” to the fans. The entire game is still an abstract idea and they must convince the backers that it’s a good one that deserves backing.

Pros and Cons: The advantage of this approach is that you will have the backing from the get-go and won’t have to cover any initial costs on your own if your target is high enough. The disadvantage is that there is a high risk of failing because no one believes in your project until there is something to see. (Of course, if your company is famous or has made many games in the past, then everything is different.)

B) Others wait until they have concept art prepared which will give their backers a mental image of the abstract game idea they had. These pieces of art are often all there is for backers to see for many weeks on end.

Pros and Cons: Again, this is similar to the previous stage, but only a bit more fleshed out. The problem here is that too many campaigns start this way. They assume they will find backers with just concept art. While it’s always possible to succeed, it’s a really crippling way to begin your campaign.

C) Some campaigns begin with a prototype video of their game. Their team has already begun to flesh out the game concept with their game engine. The video they show off is usually very early on in the development and can often be crude or very undeveloped. There aren’t many scenes of the game to demonstrate in the video yet. This too is meant to give backers a very early mental image of what the game will eventually look like.

Pros and Cons: This is where the majority of Kickstarter campaigns begin, and I find it to be flawed. Showing fans a crude idea of your game is a good way to put your worst foot forward. You want your first impressions to be really good. Too often developers hope fans will take a leap of faith forward in their mind and envision what the game will look like three months from now. They want the fans to see the vision that the developers have of the final product. But most often, they won’t. Some fans will buy into that vision, but many others will superficially walk away. They have to be sold on the game video, and there isn’t enough to sell them on it. The advantage of this approach is that the developers only have to fork over the cash for the initial stages of the project. The rest of the time they can ride home free on the support of their backers.

D) Then there are those teams that have advanced the game enough in development that their initial video is able to give a very good representation of the final vision. With a little more time and effort they would probably even be able to turn it into a demo for their fans to try. Some Kickstarters even decide to begin their campaign with a playable demo.

Pros and Cons: In my opinion, this is the place to begin your Kickstarter campaign if you want to ensure your success. My rule of thumb is: don’t start a Kickstarter campaign unless you’d be ready to let fans try a demo of your game already at this point. You might not have the time or money to actually work on releasing a demo, but the point is that if you’re still too embarrassed with your early prototype to let fans play a demo of your game then do you really think that a prototype video is going to sell them on it? Fans don’t have to actually play it to see how crude and premature the project is. If you feel confident enough in your project to allow fans to get a closer look then you can also feel confident that fans will be willing to buy into your vision.

E) Finally, there are campaigns that begin with a game that is mostly functional and could probably be released as is. But the developers want the funding to turn the game into something really special and fully realize their vision.

Pros and Cons: Sometimes these projects actually fail because the fans feel like you’re taking advantage of them. You already paid your way through most of the development and now you’re just using them in the last stretch. Fans want to feel like they were a part of the development process. They want to make decisions through polls and have a say. They want to come along for the ride with the weekly or monthly updates. Of course, many nearly-complete projects do succeed on Kickstarter but upon occasion you see those that fail.

Note:  So, in summary: don’t start a Kickstarter campaign unless you’d be ready to let fans try a demo of your game already at this point.


3. The Target Is Too High


This rule is simple. Sometime you see two very similar projects and one succeeds on Kickstarter and the other doesn’t. The difference? One aimed for $5,000 and the other aimed for $10,000. Or one aims for $10,000 and the other for $50,000. They both could end up raising $45,000 but the second one loses it all when they don’t reach their target by the end of the campaign.

Attached Image: Light-by-Moores-Cloud-Failed-Kickstarter-Campaign.png

I know this is easier said than done because at the end of the day, those numbers are real. The teams sits down and crunches numbers. They know that the project won’t get done without this kind of money. But the question they have to ask themselves is, what will happen if we fail the Kickstarter? Did we succeed in getting the money we needed because we set a high-enough price?

It’s better to aim a bit lower than what you hope for but make the target one that is easy to reach. There is no set formula for doing this because every game is different. So, you should take a look at recent Kickstarters that seem somewhat comparable to your own and make a proper estimation of what you can target and still succeed.

And remember: Kickstarter campaigns that succeed, almost always get funded considerably above their target. I just took the last 12 video game Kickstarter campaigns to get funded and calculated their average funding. The average between them was to reach 256% of their target funded. So, whether your success will end up being 110% of your target or 400% of your target, you should find a way to include that in your target plans. Drop your initial target by a little bit and assume that if you succeed you will get a that extra bit added on to the final funding.

4. Lack of PR


Attached Image: marketing-PR.png

Oh boy. This is the golden rule in my opinion. This is where I have seen first-hand the majority of Kickstarters fail. Kickstarters are so often run by brilliant individuals: game developers. And that means that their expertise is in coding and expert game design. What they usually haven’t had much experience in is dealing with PR. Usually, the previous companies they worked for had PR representatives or out-sourced their PR responsibilities to a specific PR firm (the majority of big publishers outsource their PR to a firm and most smaller developers hire a few individuals internally to handle PR.)

Working on two video game websites means that a large part of my day is working in PR/marketing. Whether it’s paying attention to how one build’s awareness of their brand on the internet, how to increase exposure, or what makes something go viral, these all have been my bread and butter for the past year and a half. So, when I noticed the lack of exposure in many Kickstarter campaigns it wasn’t hard for me to realize why many of the most promising ones were failing.

Again, we return to Double Fine. Don’t expect to be like Double Fine. Tim Schafer has instant virality potential. He said, “Adventure!” and the internet said, “KaBOOM!” Don’t expect your campaign to go viral like that unless you are well-known in the gaming world. If you’re like everyone else, you’re going to have to launch a PR campaign to get anyone to notice your project.

Basically, you’re going to attempt to get as many gaming websites to talk about your campaign. This will help spread your message to millions of gamers instead of a few hundred that like to stalk Kickstarter’s website. The way to do this is to email those websites. The way not to do this is to send a press report to their email. Take it from me: most gaming websites get more press releases in their email than they can handle and unless you are one of the more significant stories, your press release will probably end up in their trash bin.

Instead of sending a press release, send an email that seems personal. It should sound like you’re talking directly to the editor and informing them about your project. There has to be some kind of hook. Something that draws them to your campaign. The editor will only want to report on your game if he can make some kind of headline that draws attention. He/she is looking how they will benefit from running this story. So, feed them that line and reel ‘em in. Tell them what makes your game special. And assume they will only read one paragraph of your email. For the really big sites offer them more. Maybe an interview or an exclusive set of screenshots.

So, what sites should you email? As many as you can (and us, of course: ninten.enthusiast@gmail.com.) But, these are the ones that report on Kickstarters, so they are more likely to publish your story:

A) Kickstarters are practically the life blood of these sites and they will almost definitely spread the word to the Kickstarter community:
  • indiegames.com
  • Jayisgames
  • Rockpapershotgun
  • TIGSource
  • Indiegamemag
  • DIYgamer
If you want to really go thoroughly through all the decently-sized indie sites that would talk about your game this is a great list: http://www.pixelprospector.com/the-big-list-of-indie-game-sites/

B) These sites are massive but they are the ones that also report on Kickstarter campaigns pretty often. As long as a Kickstarter looks promising or has an interesting twist or innovation, they’re willing to report on it:
  • Venturebeat/Gamesbeat
  • Gamesradar
  • Kotaku
  • Joystiq
  • Gameinformer
  • Shacknews
  • Eurogamer
  • Destructoid
  • Escapist Magazine
  • VG247
  • Videogamer.com
  • Gamezone.com
  • PC Gamer
  • Gamasutra
  • Polygon
C) Finally, there are a ton of Youtube channels that cover indie games and Kickstarters. Youtube channels are a very powerful source of exposure on the internet. You can contact these “indie”-coverage Youtube channels on this list via your youtube channel: http://youtubers.pixelprospector.com/

Don’t give up after a week if you don’t see the campaign succeeding. Keep on doing relentless PR or look for another angle to get the engines started.

Reprinted with permission from NintendoEnthusiast.com and Menashe Kestenbaum at
http://nintendoenthusiast.com/15245/kickstarter-feature-part-1-why-kickstarters-fail-and-how-to-avoid-it/

Managing Decoupling Part 2: Polling, Callbacks and Events

$
0
0
In my last post, I talked a bit about the importance of decoupling and how one of the fundamental challenges in system design is to keep systems decoupled while still allowing the necessary interactions to take place.

This time I will look at one specific such challenge: when a low level system needs to notify a high level system that something has happened. For example, the animation system may want to notify the gameplay system that the character’s foot has touched the ground, so that a footstep sound can be played.

Note:  
The reverse is not a problem. The high level system knows about the low level system and can call it directly. But the low level system shouldn’t know or care about the high level system.


There are three common techniques for handling such notifications: polling, callbacks and events.

Polling


A polling system calls some function every frame to check if the event it is interested in has occurred. Has the file been downloaded yet? What about now? Are we there yet?

Polling is often considered “ugly” or “inefficient”. And indeed, in the desktop world, polling is very impolite, since it means busy-waiting and tying up 100 % of the CPU in doing nothing.

But in game development the situation is completely different. We are already doing a ton of stuff every 33 ms (or half a ton of stuff every 17 ms). As long as we don’t poll a huge amount of objects, polling won’t have any impact on the framerate.

And code that uses polling is often easier to write and ends up better designed than code that uses callbacks or events. For example, it is much easier to just check if the A key is pressed inside the character controller, than to write a callback that gets notified if A is pressed and somehow forward that information to the character controller.

So, in my opinion, you should actually prefer to use polling whenever possible (i.e., when you don’t have to monitor a huge number of objects).

Some areas where polling work well are: file downloads, server browsing, game saving, controller input, etc.

An area less suited for polling is physics collisions, since there are N*N possible collisions that you would have to poll for. (You could argue that rather than polling for a collision between two specific objects, you could poll for a collision between any two objects. My reply would be that in that case you are no longer strictly polling, you are in fact using a rudimentary effect system.)

Callbacks


In a callback solution, the low level system stores a list of high level functions to call when certain events occur.

An important question when it comes to callbacks is if the callback should be called immediately when the event occurs, or if it should be queued up and scheduled for execution later in the frame.

I much prefer the latter approach. If you do callbacks immediately you not only trash your instruction and data caches. You also prevent multithreading (unless you use locks everywhere to prevent the callbacks from stepping on each other). And you open yourself up to the nasty bug where a callback through a chain of events ends up destroying the very objects you are looping over.

It is much better to queue up all callbacks and only execute them when the high level system asks for it (with an execute_callbacks() call). That way you always know when the callbacks occur. Side effects can be minimized and the code flow is clearer. Also, with this approach there is no problem with generating callbacks on the SPU and merging the queue with other callback queues later.

The only thing you need to worry about with delayed callbacks is that the objects that the callback refers to might have been destroyed between the time when the callback was generated and the time when it was actually called. But this is neatly handled by using the ID reference system that I talked about in the previous post. Using that technique, the callback can always determine if the objects still exist.

Note that the callback system outlined here has some similarities with the polling system — in that the callbacks only happen when we explicitly poll for them.

It is not self-evident how to represent a callback in C++. You might be tempted to use a member function pointer. Don’t. The casting and typing rules make it near impossible to use them for any kind of generic callback mechanism. Also, don’t use an “observer pattern”, where the callback must be some object that inherits from an AnimationEventObserver class and overrides handle_animation_event(). That just leads to tons of typing and unnecessary heap allocation.

There is an interesting article about fast and efficient C++ delegates at http://www.codeproject.com/KB/cpp/FastDelegate.aspx. It looks solid, but personally I’m not comfortable with making something that requires so many platform specific tricks one of the core mechanisms of my engine.

So instead I use regular C function pointers for callbacks. This means that if I want to call a member function, I have to make a little static function that calls the member function. That is a bit annoying, but better than the alternatives.

(Isn’t it interesting that when you try to design a clean and flexible C++ API it often ends up as pure C.)

When you use C callbacks you typically also want to pass some data to them. The typical approach in the C world is to use a void * to “user data” that is passed to the callback function. I actually prefer a slightly different approach. Since I sometimes want to pass more data than a single void * I use something like this:

struct Callback16
{
  void (*f)(void);
  char data[12];
};

There aren’t a huge amount of callbacks, so using 16 bytes instead of 8 to store them doesn’t matter. You could go to Callback32 if you want the option to store even more data.

When calling the callback, I cast the function pointer to the appropriate type and pass a pointer to its data as the first parameter.

typedef void (*AnimationEventCallback)(void *, unsigned);
AnimationEventCallback f = (AnimationEventCallback)callback.f;
f(callback.data, event_id);

I’m not worried about casting the function pointer back and forth between a generic type and a specific one or about casting the data in and out of a raw buffer. Type safety is nice, but there is an awful lot of power in juggling blocks of raw memory. And you don’t have to worry that much about someone casting the data to the wrong type, because doing so will 99% of the time cause a huge spectacular crash, and the error will be fixed immediately.

Events


Event systems are in many ways similar to callback systems. The only difference is that instead of storing a direct pointer to a callback function, they store an event enum. The high level system that polls the events decides what action to take for each enum.

In my opinion, callbacks work better when you want to listen to specific notifications: “Tell me when this sound has finished playing.” Events work better when you process them in bulk: “Check all collision notifications to see if the forces involved are strong enough to break the objects.” But much of it is a matter of taste.

For storing the event queues (or callback queues) I just use a raw buffer (Vector orchar[FIXED_SIZE]) where I concatenate all events and their data:

[event_1_enum] [event_1_data] [event_2_enum] [event_2_data] âæ

The high level system just steps through this buffer, processing each event in turn. Note that event queues like this are easy to move, copy, merge and transfer between cores. (Again, the power of raw data buffers.)

In this design there is only a single high level system that polls the events of a particular low level system. It understands what all the events mean, what data they use and knows how to act on them. The sole purpose of the event system (it is not even much of a “system”, just a stream of data) is to pass notifications from the low level to the high.

This is in my opinion exactly what an event system should be. It should not be a magic global switchboard that dispatches events from all over the code to whoever wants to listen to them. Because that would be horrid!


Reprinted with permission from The Bitsquid blog.

The Infinite Game

$
0
0

Designing for longevity... how?


Making a game last long is a challenge. Making it last forever isn't any easier either.


How to achieve infinite gameplay? How to extend the game's content without bloating it? How to keep the game interesting and fresh, regardless of time spent on it? How would you keep making consistent profits of an infinite game in the long run?


How to do all this, but as to not compromise the game's integrity or resort to cheap tricks and gimmicks? How to create a true, solid infinite game that will be a success, both as a fun game and a great business model?


All of this is possible.


This article will guide you, explaining the major parts that are required for an infinite game to work and how to go about them, in terms of the overall idea and design.


Word of warning


3u8gm.jpg


Infinite games are not trivial to make.


But before we continue, I must warn you that infinite games are some of the most challenging and demanding projects to undertake.


They must be approached with a very strong vision of what the game is supposed be like. This means two things:


  • The design phase must be thorough. A robust framework is required from the very beginning to ensure consistency with all systems and content within the game. As such, the waterfall development model is the default way to build an infinite game.
  • Infinite games are not suitable for experimentation. To build a robust framework required by a proper infinite game, you need to define it as clearly as possible.

All of the above means that the design and preproduction phases can be very lengthy and that once you've established it, it's set in stone and making significant changes can severely compromise the integrity of the entire project.


If you're making an infinite game, you're in it for the long haul. You need to know exactly what you want this game to be. Prepare to spend plenty of time crafting the overall design before getting into production.


What is an infinite game?


29cqwde.jpg


It is a game with enough depth, fun gameplay and its content is constantly growing - either by the developer, the community, or both - to keep you genuinely entertained forever.


These games are often more than just games, they're best described as alternative realities or virtual worlds. An infinite game is what could be considered as the ultimate-type of game, a super game.


As you might expect from something that simulates an entire universe of its own, a game like this is not a simple one and it does not solely focus on a particular gimmick, as that would limit its design in terms of gameplay possibilities that would inhibit it from being a - you know - infinite game.


In a similar way, while it can have a backstory or perhaps some predefined history, the infinite game can not limit itself with a finite scripted storyline, meaning it does not have a clearly defined end as a whole. Only an overarching storyline can be present that defines the world it is now and what will and has happened in it.


In a very loose sense, an infinite game works very similar to how real life does.


2yyed0w.jpg


Persistent and living world that is interesting simply to be in.


The universe is persistent and goes on, you are born into it, go about doing daily tasks, interact with the environment, things happen around you all the time and you take on whatever major or minor challenge the world will throw at you once a while.


These challenges could be anything from a grocery shopping trip to an adventure to the Alps.


In a similar sense, thats how an infinite game works. You, the player are put in a living, breathing and persistent universe, you hang out, do fun activities and go on adventures based on a personal quest or as a reaction to some event in the universe.


Now meanwhile the universe is infinite, the adventures and events mentioned above are finite and standalone. Each adventure has a clear beginning, progress and an end, similar to what you've come to enjoy in scripted singleplayer games and movies. Memorable experiences.


34sfhav.jpg


Beginning of the next epic adventure.


So, with an infinite game, it acts like an infinite generator of adventures for you to take on.


While all that happens, the universe is persistent and the things you do in the past can leave a mark in the future. There also remains a sense of consistency with the existing content and the new, meaning whatever you add to the game as new content will work perfectly well with the existing elements, multiplying the possibilities of gameplay instantly.


In a sense, all the content you create as a developer for the game will remain infinite just like the rest of the game does. In other words, the work you put into this game and its content is not a throwaway job. Any work you do will live on forever, literally.


Compared to an infinite game, creating a scripted storyline while trying to shoe-horn the player into someone or something they're not - unless the purpose of the project is to specifically teach or tell a certain story - is quite counter-intuitive, especially if the original goal of the game was to give you an experience of doing something or being somewhere only to have it end up so limited and short-lived.


The requirements of an infinite game


1zobx1l.jpg
Infinite games are modular. They are made out of certain components.


To create a game of this caliber, there are a couple critical components that are required and a few optional ones that make an infinite game a possibility and work properly.


Disclaimer: there is no such thing as one game to rule them all. A single video game cannot be all at once and give you all experiences at once. Impossible.


2r1zkok.jpg


Every video game is different, you can't have everything at once.


Every video game can focus only on delivering one certain universe with a set of certain rules and the content associated with it may not be compatible with another system.


No matter what, every project will be different and some components of an infinite game may not even fit into the experience its supposed to deliver. An infinite game is only a type of a game.


For example, some games can only work as a multiplayer experience, while others work only as a singleplayer game. You can't always have both for every experience you're trying to present.


With that said, not every game can be infinite either. If the game has a limited design in terms of what you can do in it, focuses on a specific scripted story or a gimmick, then obviously you can't make an infinite game out of that.


An infinite game is not suitable for experimentation or prototyping either. You are welcome to try, but the key thing that makes an infinite game work is a robust framework and a strong vision of how the universe is defined and what features it includes.


As such, any dramatic changes to the core can easily destroy the whole project, so iterative and agile development methods will most likely explode in your face if you try this.


However, with that said, some aspects of an infinite game can be used for finite games to increase its replayability value, but do note that it will not make them a true infinite game.


I will now go over the major components that are the requirement for infinite games.


Infinite overarching goal fueled by finite adventures and events


2evyh75.jpg


...and it never ends.


In scripted story games, you have a meaning that you pursue when you play them. Discovery, progression of story, exploration or some big challenge you need to defeat.


These are finite meanings. They end once you find out what you went off to discover, defeat what you had to defeat and so on.


For an infinite game, for its universe, you need to establish a passive, overarching story. I say "story" very loosely here. Story also means purpose, meaning and reason why you play the game.


2cmq6c4.jpg


Environmental sustainability is a good example of an infinite goal. Nurture and protect your world from harm, while improving yourself and your technology.


By a passive, infinite overarching goal, I mean a huge on-going event that the player lives by in the universe.


This can be something like "the world is ravaged by an alien corruption, survive and get rid of it, one planet at a time" in a game where you travel from one planet to another, defeating a hostile alien infestation by what ever means possible.


Another example is "build a civilization, keep improving it while living within it", a minecraft-like game where you claim a piece of land, build up a civilization with cities and towns, maintain them, enhance them and then have fun doing activities that your city enables you to do, either solo or with friends.


Basically, these goals are never ending and can be pretty simple as "live and experience the world around you". However, this is only half of the system.


The other half is that the universe generates events, either actively by say, erupting a volcano near your city or passive events like "your refrigerator is empty, time for a grocery store trip".


Active events are something that happen either by an accident caused by the player or on purpose. Or it can be something that happens out of players control, like how we get earthquakes in real-life. They just happen.


Passive events are something that happen because of the mechanics of the player character that occasionally require him or her to react to them somehow, or not at all, with varying consequences.


Both active and passive events often occur by themselves naturally and players have the power to create and dissolve them by actively doing something that would change them. Sometimes an event may also predictable and the player can act upon it even before the event has happened and alter it or stop it from ever happening.


The events can be both negative and positive in what they hold, but above all, they need to follow the rules of the universe and remain consistent with them, meaning that any event that happens, has a reason to do so. To make this work, you'll need the strong framework I talked about a while back to handle this meta aspect of the game that causes events.


Now, these events, both passive and active, can set the player on an adventure with the same level of meaning like a scripted storyline can, except with the added bonus of the player being able to be themselves in the adventure and also have complete freedom to react to the adventure in any way he or she desires.


Through these events, you can experience definitive moments in the infinite game that are memorable and have clear beginning, progression and ending.


To take the example of the volcano erupting in the city, you begin the adventure of waking up in your house only to find out its half-submerged in lava and you need to escape it and save anyone you can on the way.


url39.jpg


Escape from the burning city.


In theory, this adventure would lead from one event to another by first escaping the danger, then helping others to do the same, then finding a way to stop further destruction to the city, then rebuilding it and improving upon future possible disasters by more clever construction.


And there you go, you got a real adventure with all the twists and excitement you get in a scripted storyline and the whole experience can last you just as long, except you get to play in the same universe after the story has ended too, with the adventure leaving a mark on the world for you to remember in the future as you go on new adventures within the city.


That's how it works. An infinite game is a generator for finite adventures in a persistent universe. The whole concept is more or less just like how real life operates.


Multiplayer


2lswlxj.jpg


Humans are unpredictable, social, smart and live beings. Put two or more humans to do something together and soon you'll have drama and hilarity fueled by whatever activity they're doing.


Playing a game with friends or even a stranger will make every game session feel new in some way either through the ingame behaviour of players that can be anything from stupid, smart to outright chaotic or just through simple communication by text or voice - even just talking to a human being can be exciting.


However, in order to harness the value of multiplayer, which is one of the biggest sources for infinite replayability, the game needs to support it correctly. In addition, the game also holds the responsibility of encouraging behaviour within players.


There are two main types of multiplayer; competitive and cooperative.


Competitive design pits humans against each other with the goal to come out on top at the cost of someone else losing.


Cooperative is about working together, either passively or actively. The goal is to achieve a result that everyone strives for, but don't necessarily need to be forced to do it together.


Now, I'm going to say something rather controversial here, despite how popular and deep-rooted it is today within our traditions and culture in society. I hope you will at least think for a moment before recoiling with anger.


I do not recommend competitive multiplayer.


I will not go into the specifics here, as this topic requires an entire article of its own. However, in the meantime I highly recommend reading the following article to get some food for thought on why I just said that.


The main point is, if you want a better community of players that are more friendly, helpful and forward thinking, you hold the responsibility to encourage and mold that behaviour within them. Unfortunately, competitive game design is not going to help you with that.


In any case, multiplayer presents lots of interesting possibilities that wouldn't be possible or likely to happen in a singleplayer scenario.


However, it's not a simple thing to implement because integrating multiplayer into the game's design entails both risks and opportunities that need to be managed properly.


You need to realize and accept the fact that your game can directly affect the player's behaviour and can actually encourage certain traits to emerge that can also carry over to the real world in a subtle way.


Make a competitive game about proving your superiority over others, you will instill hate and elitism among your player community. Cause and effect.


Likewise, make a game about encouraging others to improve through constructive feedback in a cooperative game design, you'd get a civilized community. You reap what you sow.


If you're thinking this is absurd and unlikely, keep in mind that video games are a number one activity a lot of people spend many hours upon every day. It's a major part of life for some.


Like it or not, but you are influenced by what you do and what environment you're in, so be mindful of that when you design a game with multiplayer


Procedural generation


2l54ba.jpg


Automating content instantiation and randomizing it.


It is possible to program a computer to create content automatically and along with that, it can also randomize this content in various aspects.


Your game can have a system that will add a factor of randomness by either creating random new instances of pre-defined objects or combining assets in a random way to create completely new content, which in turn can make each time you play it feel different, fresh and unpredictable.

This is called procedural generation and it has many uses, but you need to be aware of where to use it and how. There are certain things that you would definitely not want to randomize, as it can either ruin the consistency of the universe - which is very important to maintain at all times - or simply leave you with uncanny results.


Now, when I say content, I don't mean artwork and sounds. Those are called assets. Content is the objects and things that are built out of assets, like maps, items and characters.


Artwork and sound is also possible to create procedurally, but at best it's only suitable for generic organic type assets.


54ug7c.jpg


Good fit for procedural generation: creating a forest by scattering individual trees.


Some examples include seamless textures of organic surfaces like grass, clouds, sand, rocky terrain, sky, space backgrounds and similar constantly repeating patterns. You can also procedurally generate generic nature objects, that can be anything from trees, bushes, rocks, asteroids and space nebulas.


For sound, something like ambient soundtracks is also a good a fit.


As for more defined assets, like technology, specific characters or other non-generic and non-repeating artwork, sounds and objects, procedural generation is not that suitable. Those are best done by hand, either by the developer or the users.


Ultimately the universe of an infinite game is a very generic setting, devoid of any specific instances of any technology or characters in its initial state, to which the developer and the players contribute to create the more unique parts of the game.


The logic behind this is inspired from real life where say, a human arrives to a plot where he intends to live and builds a house in his own image, thus adding that personal touch to the world.


Basically, procedural generation is best used for either creating generic, repeating assets or combining assets like modules to procedurally create content, like new stages, maps, worlds. It can also be used to create mutations of characters and technology systems by interchangably swapping modules with similar ones.


An example of this is letting a game generate variations of a space fighter by changing its weapon loadouts, the cargo its carrying and the condition it is in. Using that, you can create unique NPC encounters by procedurally assembling ships using random parts, loot and condition.


Bad places to use procedural generation is to create new, specific technologies or specific named characters from scratch. In essence, the worst place to use it is for creating something completely new, instead of assembling something randomly from existing parts.


A good way to picture the appropriate use of procedural generation is a city. You can generate a city with procedural generation by placing buildings and roads, but cannot procedurally generate the individual buildings and systems that make it up. Those are a task for the human to craft.


Until a computer can be as smart as a human, giving it the task of making something creative from scratch is a bad idea. For any new specific unique-type content, a human touch is irreplacable.


Personal expression


ve6hbt.jpg


Also known as the ability to express yourself, your creativity or your skill.


In a game that allows the player to be free and what he or she wants - which is a very major part to making an infinite game work - you can expect emergent moments to happen where the player goes out of his or her way to do something unique, be it impressive or silly.


Personal expression can be achieved in many ways.


First and foremost, do not attempt to control or force the player. Just let them be and do what they want. Instead of guiding them intently to make them do something or behave in a certain way, inspire them to do so on their own. Set an example and leave it at that.


Secondly, the game's mechanics need to be flexible and open. The key is unpredictable elements. Things like physics, multiplayer interaction, free movement and endless possibilities of item and character combinations.


To explain the last one, take a rocket launcher for an example, the fired rocket explodes and causes things to get destroyed and knocked back. A powerful weapon. Then, a craftly player turns it around by taking the rocket launcher, jumping and launch at his feet to be propelled by the explosion to reach higher places or to travel faster. That's what I meant by endless possibilities of item and character combinations.


Basically, the point is that the game has the capability to allow for chaos to occur and unique moments to happen. As in, the game is not predictable to every detail every time you play it.


I don't mean that by having everything rigged to a random number generator, no.


I mean the game relies on systems like physics, where even the most basic things like movement can be interesting, because while you can predict how physics work on a general level, you cannot predict every small detail of it.


The result is that even something simple like walking based on physics can go horribly wrong - in a good, memorable way.


23j4itx.jpg


Even something simple as running can be fun.


Third, customization. Naming a character, changing the colors to suit your preferences, wearing specific clothes and accessories to allow you to define yourself and be unique is a big way to bring personal expression to a game.


This allows the player to bring out his or her creativity and bring something unique to the game just by being him or her self. In a sense, you even can consider a human player as new content in a multiplayer game. Customization options reinforce that.


And finally, the ability to leave a mark in the game's world is another method of personal expression, even if you're only partially involved and regardless of the scale of how significant the event was.


Having the ability to do something that persists in the future in some way gives you a sense of meaning and purpose in playing the game, because that something you just did or participated in actually changed the world, even if it was just a tiny thing.


What counts is that something the player did actually persisted in the game's universe.


Leaving a mark can be a lot of things. Building something, destroying something, changing something... anything that gives the player to personally have an effect on the universe around him.


In some cases, the mark doesn't even have to be permanent or long lasting, because the main idea is that the mark recieved recognition of some kind. Either by the game itself by reacting to the player's actions or by other players in a multiplayer game in a way that felt meaningful to the player who did it.


By meaningful, I mean the player felt that he exists in the world and was noticed or that his actions had an effect on the world, no matter how small.


Social features


o7ot2e.jpg


Social features are about sharing and communication systems. This partly ties in with the above topic of personal expression too.


With the ability to express yourself and the emergent nature of gameplay, some very memorable, amusing or otherwise interesting moments are bound to happen, which are something worth sharing and talking about with you friends.


Seeing and hearing about these awesome moments is often great entertainment in itself too. With something like an infinite game, you could produce loads of content like video entertainment virtually forever.


As such, social features are about helping the player to save and share these moments in the most flexible and easy way possible.


These include subtle things like custom cinematic camera control, turning off the overlay interface (no health bar visible) for a more cinematic effect, ability to cheat for better control over the behaviour of the environment, so that monsters dont kill you while you're filming a particular scene or have the ability to spawn specific monsters for a certain shot.


Then if you really want to get fancy, add the ability to control time with options to slow, stop and speed up time. Then if you want to go completely overkill, have a full blown video recording software and a screenshot database to view your screenshots with basic editing functions like cropping and the ability to choose which file to save as.


To top it off, make it easy to optimize and distribute your video content and images to share with your friends and the world. And let's not forget a tutorial library that teaches the user how to create content and also encourage good quality by setting an example and establishing standards.


Anyway, the other part of social features is communication. This divides into offline communication which happen outside the game on a forum, message board or a chatroom and then there is online communications that happen inside the game.


Offline communications are a place for more serious discussions about the game with topics about figuring out the game, tech support, lore, sharing moments, original fan content, suggestions and bug reports.


These discussions have the benefit of being permanent once posted, which means you can come back to the same thread tomorrow and it will still be there to continue the discussion or find information.


Now, don't be fooled here to think that offline communications are not part of the game. They are in a very major way. It's common to hang out in a forum to talk about this and that with like-minded people about something you love.


It's a place where the community for your game is formed. It can help out new users with any issues they might have with the game in a dedicated environment focused on the game itself. It's also a neat place to learn something new about the game or to share something others may find interesting, like tips and tricks.


All of this can be very much considered a critical part of an infinite game's longevity, especially if it relies heavily on multiplayer. Even if it's a singleplayer infinite game, a forum or similar offline communications system is essential to a game's success.


As for online communications that happen within the game itself, these are the opposite of offline communications. They are often short, but most importantly, temporary. Any discussions you will have with anyone ingame will be lost, so all those topics mentioned in offline communications are not suitable in a throwaway environment like this.


Ingame communications have many instances of topics player may talk about. It's good to know about them, to allow better design decisions.


Simple ingame chatter is the first, where players talk to each other about what is happening ingame as they play, whether to ask for help, inform others, talk about goals and strategy at hand, do greetings, taunt someone or just exclaim something.


Then the chat can be used for general quick chat, where players may engage in short conversations, not necessarily involving the game or anything relevant to it, but just talk about something at random.


Some players may make friends this way or share something, so to facilitate that, it's nice to have copy/paste functionality in the text chat console ingame in order to easily share links and usernames when people become friends or want to share something.


Depending on the game, the chat system could use a way to send private messages when a player wants to say something to another player privately.


Also if the game involves a player-rich multiplayer, with more than 20 players at once, you may want to implement group chat functionality, for players to send messages only to a select group of players, so that the chat channel will not get flooded to the point that it becomes unreadable when more than 20 people try to talk at the same time over on one channel.


New content and modding


Back in the procedural generation section I talked about how despite its applications, it cannot replace the human creative mind and touch to create new specific assets and other new content.


Since we're talking about an infinite game, one of the key pillars for a true infinite game is infinite growth. That means constant production of new content, preferably forever.


With that in mind, there are two ways for new, unique non-generic content to be introduced to a game.


Number one: The developer creates DLC and expansions as long as they can. Now, as you might imagine, this cannot be ultimately infinite. Either the developer might pick up new projects to work on, run out of ideas or just quit whatever other reason you can think of.


Number two: The players themselves make new content for the game. This is also know as modding, which has been an extremely big and popular activity within the player community for as long as video games have been around.


For the case of modding, anyone can become a modder given the resources and guidance, which manifests in a comprehensive library of tutorials, complete documentation and user-friendly tools to make modding easy and fun.


If you're thinking quality is an issue when it comes to player-generated content and modding, don't worry, it's only a matter of setting up standards for new content, setting an example and also having all the aid described above.


In more cases than one, modders can produce content in much larger volumes, more frequently and even with higher quality than the developer ever could.


Since modding is something anyone can pick up and do, there are infinite amounts of modders that can come in and try their hand at making new content. This is the ultimate source of infinite new content.


Obviously it's not simple and requires effort to allow for your game to support an infinite modding community.


First of all, the game needs a very robust framework to support modding and have the process of creating new content as streamlined as possible.


The created content itself needs to follow standards upon creation to keep the game's universe consistent at all times. This prevents both the developer and the modders from adding unbalanced or unfitting content into the game.


Next, like mentioned above, complete documentation, comprehensive tutorials and powerful, yet accessible tools for content creation are essential. These are critical to a content creation system if you want high quality works to come from modders.


Finally, there needs to be a place to upload new content and browse it. The specifics are different for every game, but a place to share, find and talk about mods is required.


Business model and profits


qyttae.jpg


Infinite game means infinite profits, right?


Yes. It's something rather new and better, compared to the current business models that often unfortunately degrades the game experience through limitations or other dubious means just for the sake of making profit.


This ties in very heavily to modding as a matter of fact. Basically the point is to make modding be an official part of the game by allowing players to create content, sell it on your portal on your terms and you get royalties for every purchase.


Valve is already doing this to a limited extent with Team Fortress 2 items and have been looking to expand this even further as Gabe Newell talked about it in his keynote speech at the 2013 D.I.C.E. SUMMIT. They are rapidly catching up to this.


Since mods and modders are virtually infinite, you can generate perpetual revenue by providing a platform for people to create their mods on and recieving a percentage of every sale made.


Otherwise, monetizing an infinite game is the same as any regular project, depending its style and requirements.


For a singleplayer game, a basic one-time purchase to get and play the game. Then you can have official expansion packs and DLC be sold seperately, even through the very mods shop portal discussed earlier.


For multiplayer games that require constant maintenance, if it's absolutely necessary, you can have subscription fees, but do not attempt to implement a cash shop or any other system that sells power or limits the game.


Free2Play might have sounded like a neat concept initially, but it has a very ugly side to it that compromises the gameplay and consistency of the game's universe. The mods shop portal is a much more friendly and functional alternative.


Once the modder royalties really kick in, you could even make the game completely free, allowing people with no income to play the game and create content for you.


For some people, the mods shop portal might as well become their primary source of income by creating content for the game and selling it through you. With that, you're pretty much creating jobs for people that manage by themselves.


Aside from that, modders themselves will find their task far more rewarding when they can actually earn money off it. However, be sure to include the option for modders to release their works for free for those that wish to do so. Don't impose limits.


General hints about developing an infinite game


Aside from the above major components that make an infinite game function, here I'll talk about some general things to keep in mind while designing an infinite game.


Design every aspect, every UI, every system with infinite expansion in mind


It's simple really. Here's a basic example of making a design decision that sets up your game for infinite options, as opposed to the more limited, specific design.


qo9edx.jpg


Design decision that encourages infinite design.


Basically it's about avoiding to impose explicit limits to any system you implement into the game.


The above example shows this by having a menu element that accounts for virtually infinite options, as opposed to the limited version that drives you into a corner in terms of its flexibility.


The same logic can be applied to everything else. Here's another example how a health bar can be made more flexible:


2yvto1u.jpg


The point is to not limit the possibilities, but enable them for infinite expansion.


Design the universe from ground up


2mg5obr.jpg


Start from the basics and move up from there.


When designing the content of the game, the world, its rules and everything that makes up the universe, design from bottom to up. This is about creating things in a logical order, since the higher you go, the more dependencies there are to the things below.


When it comes to content, begin with the rules of the universe like physics and nature. When you have that defined, you can then create worlds and environments, based on those rules.


Next, you move on to objects and items that appear in these worlds. After that, you can define characters and technologies based on everything else you've designed so far.


Finally and lastly, you design the story, taking into account the rules of the universe, the world, items and characters you've designed.


By designing your game from basics up like that, you will ensure consistency within the game and make it more immersive thanks to that. It will also encourage standardization of content, which makes any new content that follows the rules you've establish always fit the game.


Keep the content modular


Modularity is the key to an infinite game. Focus on making content by making generic objects that are combined together to create something unique. In terms of gameplay, it's much more flexible and allows for better customization.


qsmtti.jpg


Modularity. Generic pieces that can be combined together to create something unique.


Modularity is about pieces of generic content and assets that are interconnectable and combinable, allowing the creation of more functional game content that makes more sense and is consistent.


If you're familiar with the toy building blocks LEGO, then that's the very definition of modularity.


Do not control the player, let them be free


2ezlmr6.jpg


Freedom to be yourself and do anything.


Never assume direct control by forcefully robbing the player's ability to control their character for the sake of showing a cutscene or anything similar. This only kills immersion and disconnects the player from their avatar, ruining the fun.


Don't impose artificial limits on anything. Let the game balance itself out by simply making sense and staying consistent.


Try to refrain from creating specific instances like scripted missions, named characters and unique individual items and linear campaigns.


This is a task for the players and procedural generation to create automatically, usually by taking a generic object and assigning value to it based on its emotional value.


This is something that happens by itself when a player comes accross an item and generates an emotional bond with it for some specific reason.


Don't over complicate it


I've heard people say that an infinite game is impossible because you'd need to create the goddamn Matrix and simulate every piece of it to every detail. This is simply not true, don't over complicate it.


You have to keep in mind that computers, althought much more powerful than a few years ago, are still quite limited in terms of processing power and memory.


You also have to take into account that human beings can only handle so much complexity before they get confused, so with those two pointers, you won't ever need Matrix-level complexity to begin with.


The point is, the design is only as complicated as you make it out to be. Keep it streamlined and simplified, but robust and flexible. Be smart.


For a video game, only include the elements that matter for the games universe to stay consistent and the gameplay to function properly and make sense. Anything else: just exclude it, it's not necessary.


Non-infinite games can also benefit from this article


I also want to mention that non-infinite games can greatly benefit from the above components and these hints, which can increase their replayability value and be generally more enjoyable to play.


With that said, even if you are working on a project with a more limited scope, consider the above hints and components, which ever are potentially compatible with your design to enhance your game with the elements of an infinite game, even partially.


In conclusion


This article has been rather massive, but to tell you the truth, this is only the big picture. I've compressed as much as information as I could before this turns into a gigantic novel.


While this article explains all the major parts of an infinite game and what is needed for it to work, there are so many individual details for every part I've talked about that can make or break an infinite game.


Not to mention these details will differ for each individual game project, so if you find yourself making an infinite game and feel unsure about how to design specific parts in it, I'm offering a consulting service to help out with that.


rcg_logo2.png


www.reactorcoregames.com


Shameless self-promotion aside, I will make more articles about these details, because infinite games are worth making and I want to see more of them.


In any case, hopefully this article has inspired you in some way or at least has given you food for thought that games can indeed be infinite if made properly.

Why I'll Never Work on First-Person Shooters Again

$
0
0
Microsoft has a term they like to throw around: a Career-Limiting Move (CLM). Refuse to take point on a major project from your manager? You’ve just committed a CLM. Accidentally send that witty, opinionated email to a wide audience that includes your Group Manager? CLM. Stand up and throw an iPad at Steve Ballmer at the annual Company Meeting? CLM!

Just maybe, what I’m about to say is a Career-Limiting Move of its own. Maybe it’s a convenient, portable, travel-sized way of ensuring I never get a job again in the industry I love, the industry I threw away every other opportunity (including the chance at a respectable four-year degree) to join, the industry that represents the fastest growing revenue segment of every digital platform ever developed - but screw it, I’ve been in the business a full, stormy, self-doubting decade and the world can hear me loud and clear:

I will never work on a first-person shooter game, ever again. Period.

Sacrilege


Drunken ramblings!
Prosletyzing from a youthful cad with visions of superiority!
Mass hysteria (it’s going around this season, you know)!

Action games of all stripes make up about 20% of worldwide sales - run n’ gun games made up 3 of the top 10 grossing games of 2011. Over 20M copies sold of Call of Duty: MW3. 10M for Battlefield 3. Those two games alone made up $1.5 billion at retail in 2011. Even if the publisher only nets $20 per copy, and a wild pessimistic guess at $100M for production costs (2x what it cost to make MW2) MW3 alone pulled in $350M in pure profit on that one title in launch year alone.

The amount of cash up for grabs in the business of Shooting People in the Face is simply staggering.

I understand. It’s not just the money. There’s a magnetic, almost shamanic aura that pervades our favorite shoot-em-up games. We’ll wait in line at 2AM to buy the new consoles that feel like they were built for these games. We’ll eagerly plunk down hundreds of dollars for deluxe editions with extra digital uniforms, special guns, or plastic tchotkes that bring the game closer to an idyllic reflection of ourselves - truly, our own lives, own hopes and dreams are wound up in these experiences - the fact that thirty million other people believe and contribute to this shared vision only adds to the intoxication we feel.

Perhaps as an expression of just how embedded I’ve found myself in this world over the last decade, six of the eight professional titles I’ve contributed to are first-person shooter games. I wish the percentages were different, but money follows money. Corporations and people both are caught in the whirlwind. Even when I toiled away in my education at Digipen at the turn of the millennium, I had half-drawn designs of shooter games; building them represented then the absolute apex of my career. If I could get the money, I thought, this would be my dream.

I'm not alone in this new world, fuller than ever of nascent game developers, would-be professionals, clawing at the walls to make a name, a life, a career full of shipped titles and rabid fans screaming for more. First-person shooter development packs and helper classes are among the most popular - and highest priced - items in the Unity Asset Store.

I’m not here to say there’s no room for innovation in this space, especially from its fans and enthusiasts. For a great understanding of how non-developer involvement has grown and changed in the space, see the excellent post from Rock Paper Shotgun - A People's History of the FPS.

The problem here is that money isn’t an acceptable stand-in for ethical behavior. Just as legality doesn’t equal morality (seriously, it doesn't, spread the word), so too does profit fail to imply ethical superiority. Great, we’re all making these games. Should we? Did we ever ask?

I had an experience that forced my hand - I haven’t stopped asking since.

Introducing Superdad


It was a blustery pre-winter at Studio Q. (Call it whatever you want, I’m holding onto at least some plausible deniability here.) Another day, another paycheck, another generic shooter project for the ten-foot experience on a high-def console.

I spent a lot of time building communication channels among engineering, art, and design, disciplines that have often stormy relationships with one another. Putting coalitions together to fix the most critical issues and build up new game features was my self-selected job at the company; playing peacemaker comes naturally when you grow up in a divorced household.

The wide reach meant opportunities to survey dozens of my fellow game developers informally, and ten years in the business hit me all at once. I found many who were excited to work on anything at all. Glad to be in the industry. Maybe I’m supposed to be one of those still, if I know what’s good for me. Many who knew no better or no different. And still others who wished, who hoped against hope we’d make something different one day.

And there were those who were resigned to the mechanism of the industry - who knew that they’d work on whatever was profitable, and that meant, at least for the forseeable future, a lifetime of making shooter games. And they’d worked out their own coping mechanisms.

The man I remember most, Superdad, was an engineer with a young daughter. Like many of us in the business he had to work long hours, during many of the weekends where he’d spend time with his little girl. To try to please both sides, he brought his daughter, probably only 5 or 6 years old, into work and had her play with her toys in his office while he did his coding. He had no choice, really - this industry works people overlong and threatens them with excommunication if they complain, knowing full well that enthusiastic young talent will gladly come fill in at a lower wage.

Superdad was one of the old guard. A bandolier of shipped titles slung across his chest, he had survived layoffs, buyouts, new console launches, mobile versions of games; all manner of weather sprayed across the decks of the sailing ship Development. And he’d had enough time, consideration, and that true engineer thoroughness to come up with a unique solution to a problem that faced him every other weekend: explaining to his young daughter what it was he did for a living.

It was inevitable. His daughter would look up at the screen during a debugging session, see bad guys jumping to and fro from cover points, sneaking through the bush, guns trained dead-on at the eye-point of the player, and she’d be curious. She’d say “Daddy? What are those men doing?”

It’d be a lot harder to explain if the guns were firing, bullets were flying, blood was spurting from flayed carotids and torn femorals - but they weren’t. Not a shot. No gunpowder, no blood.

Superdad had programmed in a hardware switch that stanched all gunfire, instantly. He smiled, and with a gentle voice, he leaned over to his daughter and explained:

“They’re just playing hide and seek, honey.”

Curtain Down


I’ll admit it: I’m terrified of children.

My fictional maybe-ones that I may or may not have some day, and the children of my friends and colleagues. I don’t know how I’d have the courage to do what it took to protect my child from the visible, media-ready horrors we know plague us as humanity every second - and the more insidious, invisible ones like my industry friends experience every day: the fact that deep down inside, we love to shoot people on these giant screens and watch them fall into the dirt.

That fear may have something to do with why I feel an overwhelming sense of awe in remembering Superdad's actions. The man is a hero to me, plain and simple. Caught only a worker in the great industrial revolution of digital violence, the Great Blood Gold Rush, he did what he had to in order to feed his family while protecting the delicate hope and optimism of his child, to give her a chance to see the world as it might better be seen, than as it is.

It’s not his response to the situation that I take issue with. It’s that there’s even a situation like this that he feels compelled to respond to - that’s the shame, the ugliness of it.

And this drama - this tightrope walk between building virtual violence while fashioning a safe space for the next generation - was forced to live in the same building that received countless letters, forum posts, YouTube videos, and more from angry gamers that threatened us - and our families - if we didn’t deliver them the bloodthirsty experience they wanted, the one they demanded. The pressure in these pipes does not let up, not from any source. Experience it, and you can begin to see why executives feel they have no choice but to ride these rapids to the hazard of all.

It’s entirely reasonable to tell me that the story is the same whereever you go. Whenever you’re addressing a crowd of millions, you might say, you’ll get hate mail. You’ll accumulate moral debt. You’ll get a crisis of conscience. Just a cost of doing business.

Well, sorry; that’s a cheap escape hatch, and I’m not using it anymore.

If I blame anyone for Superdad’s situation - it’s not him, it’s all of us. What we buy, what we line up for, what we clamor for in great digital mobs drives our next generation of production, fuels the generators and oils the wheels of capital that drive our next wave of industry.

The sad truth for me is that I am just as drawn to shooters as I’ve ever been. It’s unlikely that I’ll ever shake the response I’ve developed to the bursts of adrenaline, the short-circuited route to endorphins triggered by lining up a 32x32 pixel crosshair over a collection of triangles, now acid-etched into my brain as if it were its own printed board of chips and gold-coated bus lines.

But I am drawing the one line I can draw, starting now, for a few good reasons.

First, for the other Superdads out there, I want to be able to look them honestly in the face, not to give them some bullshit line about the fascinating duplicity of mankind, and say that I’m honestly working to try to make the world that their children will inhabit a better one.

Second, my new company, 4gency, built after plenty of time in an industry I couldn’t change, now has the opportunity to pick and choose the games it builds, and the ethical stances those games exhibit. If there’s any time along the singular diode path of my life to take a stand for something, anything, this is it.

So I’ll say it again:
I will never work on a first-person shooter game, ever again. Period.
Not with my company. Not with any company.

I’ve been inspired by a variety of titles, including those in the much-hated “casual” space. I don’t think there’s a need for more Cowclicker 3000’s, but as a glimmer of hope, a shining did-you-know: strategy games made up 28% of the PC game market - the highest grossing genre for that platform. Of course you did; that fact alone does not a lifetime of riches make - but I see more, and better, ahead of us.

There’s an amazing amount of innovation just waiting under the surface for us to tackle - and yes, perhaps violence will be some part of it; we are no simple beings. But we as a self-aware species of gamer - and game developer - can evolve to a more varied diet as a start; a one-course feast of blood and shell casings can perhaps sing its last with this generation and never return, a relic, discarded as the cyanide trappings of our adolescent industry and its hopefully brief era of strip mining for the social soul.

We are ready to do better, and I'm prepared to do my part. No more first-person shooters will come from me.

I've said it. Have I destroyed my career?

Am I just minutes away from receiving the famed “you’ll never work in this town again” email from the Gaming Illuminati?

Have I invited a hundred million gamers to tell me I’m going to hell for not capitulating to their demands for a life filled with entertainment that leads with the gun and leaves all else to ruin?

Maybe.
Fire away.

I’ve got a company to run.


Reprinted from Charles N. Cox Dot Com

Writing Game Music

$
0
0
Although often overlooked, music is fundamentally important to the quality of a game. It is tied with the game's image and recognition. The themes of Mario and Zelda, for example, are instantly recognizable and as much a part of the game as the characters themselves. Yet the importance of music is not limited to big budget games. Even the tiny, simplest internet game seems lacking if it doesn’t have at least a basic theme playing in the background. In this article, I'm going to talk about how to get started with creating the music for your game.

This article is designed for those who have little or no experience reading music, or perhaps those who learned once but need a review. I have hobbyists in mind here, from small game programmers who want to enhance their independent projects to romantics who just want to express themselves through music. Although I’m going to use piano and guitar examples at some points, actually learning how to play the instruments is not the focus here (although it can greatly help in your understanding and, if that’s your goal, this can certainly get you started. Ladies love a good pianist).

Dive in!

Note:  
This article was originally published to GameDev.net back in 2000 as a 4-part series. It was revised and combined by the original author into a single article in 2008 and published in the book Design and Content Creation: A GameDev.net Collection, which is one of 4 books collecting both popular GameDev.net articls and new original content in print format.


Basic Music Theory


Notes


Music, in the classical sense, is at first nothing more than a collection of notes. The note is the atom of a musical piece. These notes each have a different pitch (frequency) and are held for a certain amount of time. So, in theory, that's basically what you're reading when you look at a sheet of music: what pitch to play the notes at, how long to hold them, and at what volume.

As you can see, there are different kinds of notes:


Attached Image: BasicDesign_WritingMusicFig01_Licato.jpg


There are also sixty-fourth notes, but we don't need to get into that. (Can you guess what one looks like?) Okay, just by looking at what kind of note it is, you will be able to tell how long each note is held. In a 4/4 Time Signature (more on those later) the whole note is held for four beats. The half note is held for two beats. The quarter note is held for one beat, the eighth note is held for 1/2 beat, the sixteenth note is held for 1/4 beat, and the thirty-second note is held for 1/8 beat.

See how the eighth note and everything below that have flags? Whenever you have two or more notes with flags that are next to each other, you can combine their flags together. Let's say you had two eighth notes, one sixteenth note, two thirty-second notes, and one eighth note, in that order. It would look something like this:


Attached Image: BasicDesign_WritingMusicFig02_Licato.jpg


Now, say you want to hold a note for three beats. The half note is held for two beats, and the quarter note is held for one beat, but there's nothing for three beats, it seems. Fear not my people, there is a way. Two ways, actually. You can either use a tie, which is a curved line that connects the two notes, or simply place a dot right after a half note:


Attached Image: BasicDesign_WritingMusicFig03_Licato.jpg


The tie has to connect two of the same pitched notes together. You can't have a tie drawn between an A and a B, for example, because in that case the curved line denotes something else. (It actually represents something called legato.) The dot to the right of the note means “multiply the duration of this note by 1.5.”

Now those lazy dots are a big time saver, and I'm a big fan of them. Keep in note that it's also possible to place two dots after a note, one dot to the right of the first one. This would basically multiply the length of the note by 1.75, so you take half the value of the original note, there's the value of the first dot. Then you take half the value of the dot, and there's your second dot. Add that all together, whaddaya get?

Even with a tie, there still is a combination you can't make...what if you want a note to hold for 1/3 beat?!?!? No, don't panic yet, there's still a way. Just change the note into a triplet. To change a note into a triplet, simply write a "3" above or below the note or the group of notes. When a note becomes a triplet, it becomes 2/3 of its original value. For example, if you make a half note into a triplet, that triplet becomes worth 4/3 beats. (A half note is originally worth 2 beats, so 2 multiplied by 2/3 is 4/3.)

The most commonly used triplet is the eighth note triplet. Three eighth note triplets equal one beat. These are three eighth note triplets:


Attached Image: BasicDesign_WritingMusicFig04_Licato.jpg


Or, you could have put three different 3's, one over each note. It's easier to put it over the group, though. The three notes, added together, have the same duration as a single quarter note. There's a problem to watch out for, though. Say you want to put one 3 over a group of notes to make them triplets. It only works when the group of notes are connected by their flags. Once again, here's a picture for you for an example:


Attached Image: BasicDesign_WritingMusicFig05_Licato.jpg


From that I'm sure you can infer what a 5 or a 7 over a set of notes means. I recommend staying away from them though, unless you're trying to put John Williams out of business.

Rests


Well of course, you can't play notes forever! Whenever you see a rest, it's the opposite of a note, it tells you not to play. So then, rests have beats. Here are some kinds of rests:


Attached Image: BasicDesign_WritingMusicFig06_Licato.jpg


Just like the notes, in a 4/4 time signature the whole rest is worth four beats, half rest is two beats, quarter rest is one beat, eighth rest is 1/2 beat, sixteenth rest is 1/4 beat, and thirty-second rest is 1/8 beat.

So once again, when you see a rest, just don't play for that amount of time. If you see a whole note and then a quarter rest and then a quarter note, it means play for four beats, rest one beat, then play for another beat. Soon you'll learn how to find out the pitch of the note to play, but for now let's ignore that.

For rests, most of the same rules apply as with notes. You can't use ties on rests, but you can put dots to the right of rests, and you can make them into triplets. (why would you want to tie two rests together anyway? A quarter rest tied to another quarter rest means the same as if those two weren't tied. Think about it.)

We're done with notes and rests! The atoms are in place. Now let's go to the staff.

Measures, the Staff and Clefs


The staff (plural is staves) is what all music is put on. It consists of five horizontal lines. The staff is split up into sections called measures. The vertical lines that separate measures are called measure bars. Here's a staff split up into three measures:


Attached Image: BasicDesign_WritingMusicFig07_Licato.jpg


That's nothing so far, but oh well. Now, notes are put on this staff, and depending on which note or space of the staff the note is put on, is the pitch of the note.

Every different pitch has a letter name. The different letter names go from A-G, A being the lowest, and then they start all over. So the order of note pitches goes A, B, C, D, E, F, G, A, B, C, etc. Each line and space on the staff represents a pitch. Which line represents which pitch depends on what clef the staff has. Here are the two most common clefs:


Attached Image: BasicDesign_WritingMusicFig08_Licato.jpg


Take about a day to memorize these. There are ways to remember them, such as from down up, on the treble clef, the spaces are "egbdf,” or "Every Good Boy Does Fine". The spaces, from bottom to top, spell FACE. With the bass clef, from down to up, the spaces spell out "Great Big Dogs Frighten Animals", and the spaces spell "All Cows Eat Grass." There can be thousands of ways to remember them, or you can make up your own. On the staff, the higher up you go, the higher the pitch.

What if you want a note that's not within reach of the clef? What if you want to reach an A pitch that's higher than the treble clef? Enter the leger line. A leger line (ledger for some) is a short line that acts as a sort of extension for the staff. Here's a picture of a few staffs with leger lines.


Attached Image: BasicDesign_WritingMusicFig09_Licato.jpg


Can you tell what notes these are? Let's take a look at the first note. Okay, the first line on the bottom of the staff is an E, and since that note is two pitches below the E, it must be a C. (The space between the leger line and the "E" counts as a note, too. That space is a D.) In order, those notes are: C, B, C, G, A, and G.

The first note on that picture is a special C. It's not like the other C's, it's a special note known as "Middle C", which we’ll learn more on later. On the Bass clef, the middle C is one leger line above the staff.  

Accidentals


Okay, take a deep breath and let's move on. There are some pitches in between some of the pitches we described above, like one in between C and D. To notate those, you either sharp or flat a note. Making a note sharp moves it up, and making it flat moves it down. A sharp looks like a number sign ( # ) and a flat looks like a lower-case letter b. When actually drawing the note, the sign goes before the note, but when writing the actual letter (like in this text) it goes after. So A# (A sharp) is the note in between A and B. It can also be called Bb (B flat). A note that has been sharped or flatted (or is that "sharpened" and "flattened"?) is called an Accidental.

So, that in mind, here are all the notes in an octave, in order from lowest to highest:

A  A#/Bb  B  C  C#/Db  D  D#/Eb  E  F  F#/Gb  G  G#/Ab  A

As you can see, some letters don't have a sharp or flat note in between them. So then what happens when you sharp or flat those notes? Nothing different happens, it still moves up. So if you wrote the note B#, it would be the same as writing C, as they are exactly the same pitch. If you wrote the note Fb, it would be the same pitch as E. Moving up or down one position on that scale above is called moving up or down one half step. A half step above D is D#. A half step below F is E.

On a piano, each key represents a note. The C closest to the center of the piano is the middle C. To tell which key is which on the piano, look at the black keys. The black keys are the sharps and flats. The pattern of black keys and no black keys goes, black key, black key, no black key, black key, black key, black key, no black key, and starts all over. So look at the piano, and you'll see the pattern: two black keys, no black key, and then three black keys. The white key to the right of the two black keys is a C. So here's a piano with the notes written on it:


Attached Image: BasicDesign_WritingMusicFig10_Licato.jpg


And for you guitarophiles:


Attached Image: BasicDesign_WritingMusicFig11_Licato.jpg


The base pitches of each string, the notes that play when you pick a string with no frets held down, are E, B, G, D, A and E. Each fret is a half step up or down from the fret next to it. Really, try it.

Whenever you make a note sharp or flat, all instances of that same note stay sharp or flat until the end of the measure. So if you take an A flat, and then you write an A after that in the same measure, that second A will also be flat by default. However, if you write an A in the next measure, it won't be flat by default, it'll be A.

If you don't want a note to be affected by a note before it, then use the natural sign, which looks like a L and an upside down L put together. Here's some music with sharps, flats, and naturals:


Attached Image: BasicDesign_WritingMusicFig12_Licato.jpg


So that sign to the left of the third note is a natural sign. That means, in order, these notes are: E, Eb, E, D#, E, B, D, C, A. (Try to play it - it's the first few notes of Beethoven's "Fur Elise!")

Time Signatures


Actually, time signatures aren't that hard. It is just two numbers at the beginning of each song that tells you about the measures and notes. You've probably seen them, one number on top of the other. Here's a time signature:


Attached Image: BasicDesign_WritingMusicFig13_Licato.jpg


The top number shows how much beats are allowed in each measure. So in this case, only four beats total are allowed in each measure. The bottom number, is what kind of note receives a beat, or you could say it's how many beats the whole note gets. It's usually at four. If you change it, all values change. For example, if the bottom number is changed to 8, then the eighth note gets one beat. All values we memorized earlier are multiplied by two: The whole note is worth eight beats, the quarter note is worth two beats, the half rest is worth four beats, et cetera. I suggest that you start off writing only fours in the bottom number, as you get better at music, you can try experimenting with different values. (By the way, the time signature 4/4 is the most commonly used one, it's also called "common time.")

And that's it! To make sure you've got it, here's a short piece of music. Get to a piano and try to play this song, it should sound familiar.


Attached Image: BasicDesign_WritingMusicFig14_Licato.jpg


See the notes that have one on top of the other? That means for that beat, you play both of those notes at the same time. Three or more notes played at the same time are called a chord, which is fundamentally important to advanced music composition.

Great! Now you know the simple stuff.

Volume Levels


There are basically two different kinds of music levels: Piano, and Forte. Piano means soft, and Forte means loud. Yes, Piano is also what we call the instrument you can play, but try not to confuse the two. You see... (harp plays and we travel back in time)

When the piano was invented, it was a revolutionary keyboard where you could control the volume just by pressing soft or pressing hard. Since it could be both soft (piano) and loud (forte), it was called the pianoforte. Eventually it was shortened to piano.

Okay, that's the story. Back in modern times, all you have to do is remember these four things and you'll be fine:

Piano – Soft
Forte – Loud
Mezzo – Medium
Issi – A word that pretty much means "very." The more "issi"s there are, the more "very"s there are. The last “issi” ends in “mo.” (That sounds quite simple-ississimo, right?)

Okay, Forte means loud. So then what does fortissimo mean? It means "very loud." Then, what does fortississimo mean? Very very loud. Get it now? Same thing applies to piano, pianissimo, pianississimo, etc.

Regarding the word mezzo: Loosely translated, it means medium. So if I order you to play a song at the volume level "mezzo-forte", think "medium-loud." That's the volume level in between mezzo-piano (medium soft) and forte. So then here's a basic succession of volume levels, from softest to loudest:

Pianississimo
Pianissimo
Piano
Mezzo-Piano
Mezzo-Forte
Forte
Fortissimo
Fortississimo

Of course, you can create more volume level descriptions than that, like fortississississississimo, but these are practically more than you'll need.

It's hard to describe exactly how loud the volume levels are since you're just reading an article; I can't yell at you in writing. (OR CAN I...?) For the purpose of computer-generated music, we can let the software worry about that.

The volume level "piano" is represented by the letter p. Pianissimo is represented by pp. So that means pianississimo is represented by ppp, etc. The volume level "forte" is represented by an F. The word "mezzo" is represented by an m. So if you wanted to write the volume mezzo-forte, you would write MF. Here's a sample picture:


Attached Image: BasicDesign_WritingMusicFig15_Licato.jpg


Let's take a look. The first measure is at the volume level "piano". The second measure is changed to "mezzo forte", and then the last measure all of a sudden becomes loud at the level "fortississimo", sometimes called "triple forte" by lazy people like me.

The Crescendo, Decrescendo, and other tricks


In the picture above, measure one is played piano. (Not the instrument, the volume level.) All four notes in each staff are played at the same volume level. Then, all of a sudden, when you reach the second measure, it becomes louder, at the volume level mezzo forte. Very abrupt. What if you want to make it a gradual change? For example, instead of having piano the first measure, mf the second measure, and fff the third measure, what if you just wanted it to start at piano, and gradually change to fff until the third measure? Then you use a crescendo. A crescendo sort of looks like a "less than" sign in math. ( < ) The only difference is that it is a lot wider. Here is the same picture as above, except this time there is a crescendo:


Attached Image: BasicDesign_WritingMusicFig16_Licato.jpg


So now you see that instead of playing each measure at a certain level, this one sounds better. You start at piano, and with every note, you get louder. You gradually get louder, until you reach triple forte in the beginning of the last measure.

The opposite can also be done. You can gradually get softer, by drawing a decrescendo:


Attached Image: BasicDesign_WritingMusicFig17_Licato.jpg


In this example, you start loud, at fff. You gradually get softer, until you play at piano at the last measure.

What if you want to play one note exceptionally loud and then after that, return to the normal volume level? Use an accent. This looks like a "greater than" sign. (>). However, don't confuse an accent with a decrescendo. Just remember, if it stretches over two or more notes, it's a decrescendo; if it is above or below only one note, it's an accent.


Attached Image: BasicDesign_WritingMusicFig18_Licato.jpg


This beat specifically can be useful in action songs. To listen to it play twice, open MIDI4-1.mid included in the downloadable file.

Intermediate Level Music Theory


Whoa....you just read "intermediate level music theory." But don't be intimidated. We've already dealt with the basics of how to read and write notes. Now that you can read and write, let's put some words together. Maybe even some sentences! Sweet!

Scales


No, not those things on fish, I’m talking about a musical scale. (lol? No? Tough crowd.) Let’s talk about major scales first. Recall the Middle C. It’s the C that’s one leger line below a treble clef staff, or one leger line above a bass clef staff. On a piano, it’s the C that’s closest to the center of the piano. Now, put your musically talented fingers on the middle C. Now, play that note, and play every single white note until you get to the next C up. When you finish, you should have played eight notes. From middle C to the next C, that was an entire octave. (abbreviated as "8va".) Just FYI, each note is twice the frequency of the note one octave below. So if you played middle C and somehow multiplied its frequency by two, you would be playing the next C up.

Anyway, when you played those eight white keys, you just played the C Major Scale. The notes, played in that order, should have sounded natural and aesthetically pleasing. Each note was the right pitch above the one before it, and all those pitch changes together created what we call the major scale. A major scale is eight notes, expanding over one octave. If you try to play all the white keys from one G to the next G up, you’ll notice that the second to last note (the F) sounds weird. Now, try it again, but when you play F, instead of playing F, play F#.

Ahh you say, that fixed it, and now it sounds natural. Anyway, now try playing all the white keys from one A to the next. The weirdness is back! And worse! To understand why, you need to understand what an interval is.
Once again, the succession of notes is:

A  A#/Bb  B  C  C#/Db  D  D#/Eb  E  F  F#/Gb  G  G#/Ab  A

If you start on one of these notes and move one to the left or right, that would be moving one half-step. So if I moved from C#/Db to D, that would be regarded as moving one half-step. If I moved from C to B, or from B to C, or from E to Eb, or from D# to E, each one of those would be regarded as a half step. Okay, you get the picture. So what if I moved two to the right or left? You guessed it - it would be moving a whole step. So from F to G is one half step, from A to B is a half step, from C to Bb is one half step, et cetera. These are called intervals. So the interval between F and G, for example, is a whole step. The interval between B and C is a half step. The interval between B and D is a one and a half step, or 1 1/2 step.

The pattern of intervals, or formula for a major scale is:

whole, whole, half, whole, whole, whole, half

Or (1, 1, 1/2, 1, 1, 1, 1/2). Using this formula, you can create a major scale starting from any note. Take a look at your piano and let’s play the C scale again. Start on C. According to the formula, the next note would be one whole step up. The next key would be a whole step up. The next key would be a half step up. So if you play the entire scale, you would see that you are playing each white key for the C major scale. Any other scale has at least one black key in it. Now try it with the A major scale. Using the formula above, you will find that the A major scale is:

A, B, C#, D, E, F#, G#, A

And once you’ve recovered, we can continue. Let’s look at some scales just to make sure we all understand.


Attached Image: BasicDesign_WritingMusicFig19_Licato.jpg


Measure one shows us the C scale, measure two shows us the D scale, and measure three kindly demonstrates for us the Bb scale. Practice by playing the B major scale, the C# major scale and the E scale.

We’re movin’ on now!

The Key Signature


Why do they call sharps and flats accidentals? Because they weren’t included in the key signature! I guess only a musician would laugh at that. No...they wouldn’t either. Remember how accidentals only last for one measure? Key Signatures are a bunch of sharps or flats that are in front of the time signature that make those notes flat or sharp for the entire song, or until a new key signature is made. Let’s look at the D scale with and without a key signature:


Attached Image: BasicDesign_WritingMusicFig20_Licato.jpg


On the second staff in that picture, we see that with that key signature, we don’t have to add any accidentals in order to play the D major scale. So we say that this song is in the key of D.

Now remember, an accidental only lasts for one measure, a key signature lasts forever, until a new signature is written. So say that you write a song in the key of D. Then let’s say that in one measure, you want it to play F natural instead of F sharp. So you put a natural sign in front of an F. In the next measure, if a note is put in the F space, what note is played? The answer: F sharp! You see, a natural sign is just another accidental, and once the measure is over, the accidental no longer exists.

Here are the keys and the sharps or flats of four key signatures:

Key of C: No sharps or flats

Key of C#: F#, C#, G#, D#, A#, E#, B#

Key of Db: Bb, Eb, Ab, Db, Gb

Key of D: F#, C#

It’s weird. C# and Db are the same note, but still they are treated as if they were two different keys! I hope you see why this is so. No key signature can have both sharps and flats, it's either one or the other (or none). If you call it C#, then that means that sharps are to be used. So the key must be represented in sharps. If you call it Db, then that means there are flats in the signature, because you can’t play a song in the key of Db and then expect for there to be sharps in the key signature. Does it matter a lot? Not really. The C# major scale hits exactly the same notes as the Db major scale, it's simply written differently.

Anyway, I would make a list of all the sharps and flats of every single key, but I’m eager to go on to chords. Besides, you should be able to figure it out by now, it’s good practice! Now let’s just learn minor keys and then we can move on to harmonizations and chords.

Minor Keys


Okay, you already know how to play major keys. Now let’s go on to minor keys. Remember the formula for a major key? (1, 1, 1/2, 1, 1, 1, 1/2) Here’s the formula for a harmonic minor key:

1, 1/2, 1, 1, 1/2, 1 1/2, 1/2

That second-to-last interval is a one and a half step.

Now play the C harmonic minor key. Sounds weird, doesn’t it?

Listen to MIDI3-1.mid in the downloadable file - it just plays the C minor scale going up, and then down.

Some of you might be thinking, "are there key signatures for minor keys?" Well, yes and no. Let me explain.

Every major key has a relative minor key. This minor key is the one that’s three half steps below it. So the relative minor key of C major is A minor. (Since the note A is three half steps below C.) The relative minor key of Eb major is C minor, etc.

The relative minor key of any key has the same key signature as its relative major. So then if you wanted to write a song in C minor, you would make the key signature the same as the key of Eb major. (Eb major has three flats: Bb, Eb, and Ab.)

There is one kind of minor key which is the most commonly used, and that is the harmonic minor key. I’ve made reference to this before, but haven’t really explained what this was. Let’s say we wanted to write a song in the key of G minor. Since G minor’s relative major key is Bb major, we would make the key signature the Bb major key signature. (Two flats: Bb, and Eb.) When we play the scale going up, we use the formula for a harmonic minor key, which I’ve given above. But wait, the second-to-last note before the last G is not an F, like the key signature says. Instead, it’s an F sharp! And that’s the partially confusing part. When playing a song in a harmonic minor key, whenever you play the second-to-last note of that key, (in the G scale that key is F.) it is raised one half step.

Unfortunately, we can’t include that fact in the key signature. It would be easier if we would just add an F# to the key signature, but we can’t. (some of you might be thinking, why not put a Gb? Well, that wouldn’t solve our problem, because that would change the note G, and what we want to change here is the note F.)

Just to make sure we’re all clear, here are some pictures of minor scales:


Attached Image: BasicDesign_WritingMusicFig21_Licato.jpg


Those keys are, in order: C minor, A minor, E minor, and A# minor. By the way, that little thingie by the second to last note in the A# minor scale is called a double sharp; it raises a note an entire whole step. Similarly, a double flat lowers a note a whole step. A double flat looks like two flat signs next to each other, or a double-b.

The I, IV, and V7 patterns


Make sure all of the previous sections soak into your brain and stay there permanently, because we’re moving fast here. Okay, before we move on, you must know that a chord is three or more notes played at the same time. Specifically three notes played at once is a triad, and two played at once is a dyad.

Each major key has three primary chords. These are three triads that sound beautiful and are absolutely essential to harmonics (try not to confuse harmonics with harmonica...). The first primary chord is the I chord. This is the first note of the scale, the third note, and the fifth note. So the I chord for the C scale consists of the notes C, E, and G played at the same time. Go ahead, try it. Play those three notes at the same time. Don’t it just sound heavenly?

The IV chord consists of the first note, the fourth note, and the sixth note played at the same time. For the C scale, those notes would be C, F, and A. Finally, the V7 chord consists of the fourth note, the fifth note, and (pay attention to this one now.) the note one note below the first note. So for the C scale, those notes would be B(the one below the first note, not the one before the last note), F, and G. Got it? Now you can make up your own happy song with these chords. Go ahead, try it. Try playing the chords in this order:

I, IV, V7, I

The same basic rules apply to minor keys. So for the C minor key, the I triad would be C, Eb, and G. The IV triad would be C, F, and Ab. Finally, the V7 triad would be B(B natural, the one below the first note.), F, and G.

Patterns and broken chords


This part might as well be called “Advanced Music Theory.” Instead I present you with a watered down version of chords and harmony, by describing it the way I originally learned it. Now, each note on the scale has at least one chord that it "harmonizes" with. A chord harmonizes with a note if that note is in the chord. So notes that match with the I chord in the C scale are C, E, and G, because those are the notes that make up the chord. Try it. Sit on a piano, and with your right hand, play either one of the notes I mentioned, and with your left hand, at the same time, but one octave lower, play a I chord in the C scale. Sounds beautiful, eh? Now try playing the same thing, but with the right hand, play one of the notes that are not part of the scale, like D, or F. It gives you a completely different sound. Not bad, keep in mind, just a different type of harmony than the one I'm trying to describe here.

Now, like I said earlier, each note has at least one chord it matches with. So let’s stick with the C scale again. Let’s look at the note C, first. What chords have the note C in them? The I chord, and the IV chord. (The I chord is C, E, and G, and the IV chord is C, F, and A.) Now let’s look at the note A. Unlike the note C, the note A has only one chord that harmonizes with it, and that is the IV chord. (Actually, there are lots of more chords that fit in with these notes, but you don’t know all of the chords yet.) Go ahead, try it. Sit at the piano, and explore. By the way, you might think that the note D in the C major scale has no chord that it harmonizes with. For now, just play the V7 chord with that note.

Now here’s a song that consists of two different instruments playing at the same time. The one on the top is playing the melody, and the one on the bottom is playing the harmony. It is also MIDI3-2.mid, which you can find in the downloadable file. Here’s what the music looks like:


Attached Image: BasicDesign_WritingMusicFig22_Licato.jpg


Now, I must say, what if you decide to do it differently? For example, in the second measure, instead of having four quarter note chords on the bottom staff, we could put one half note IV chord and then one V7 half note chord after that.

But wait, if we do that, then the second note on the second measure of the top staff wouldn’t match chords with the harmony chord that is playing at that time! Does that matter? No. You can match chords if you want, don't if you don't want to. Sometimes the mismatched chords create a sound that you actually want. They can be used to create a feeling of tension that will be relieved when the harmonic chord is played, for example. In the beginning, just stick with basic chords until you get familiar with them. Fancy tricks come later.

Okay. The rhythm in the song above was one where the harmony plays quarter notes, straight. Let's change that. To do that, let’s write some broken chords. These are chords which have been broken up and played as separate notes. For example, instead of playing one dotted quarter note I triad in the key of C, I could play C, E, and G separately, each one of them eighth notes. Here’s the song above again. Except this time, the bottom staff (the harmony) has been changed into a bunch of broken chords.


Attached Image: BasicDesign_WritingMusicFig23_Licato.jpg


And if you want to listen to it, just listen to MIDI3-3.mid.

Now try looking at all the broken chords and finding out which chords those are. Extra credit!

So far, you’ve only learned two patterns. There are many different patterns you can use, you can even make up your own. Here is the theme we’ve been playing above, but with three different patterns.


Attached Image: BasicDesign_WritingMusicFig24_Licato.jpg


My, I do believe that’s the biggest picture I’ve used so far.

If you’re lazy and want me to do everything for you, then have a listen to MIDI3-4.mid. This file plays the three rhythms you see above.

Let’s look at those three. The first one I usually use when the song is played fast, when I need a fast, exciting song. (Like a battle song, a chasing scene, etc.) The second rhythm, I usually use when I want to make “town music.” In an RPG setting, if you enter a town, that music tends to match the background, creating a peaceful, predictable feeling. If the time signature is 3/4 and you use a rhythm like that, it would sound like a kind of waltz or dance. The third could be used for a main theme, perhaps the intro screen of a game. I’ve usually used that pattern when I’ve had a theme with a drum set playing in the background, as that beat provides a catchy, repetitive feeling.

To tell you the truth, you'll probably end up using none of these. The best thing for you to do now is to listen to the sort of themes you want to emulate. Download some classic movie themes like from Indiana Jones, Star Wars, or the Christopher Reeve Superman movies. (All written by the same person, by the way.) After a while you'll develop a style you can use.

Composition and Theme Development


The Basic Theme


Stop. Before even touching this section, keep in mind that it assumes an intuitive understanding and familiarity with the previous one. Very important! If you feel you're ready, then now I’m going to talk about how to write a basic theme and then how to change it into a song.

When you want to write a song, rarely does the opportunity come when you have an entire song, completed, in your head. (with all instruments, notes, etc.) So what I do is, write down the basic theme of a song first. The file MIDI2-1.mid plays this theme. To get an idea of how simplified it is, let’s look at the notes:


Attached Image: BasicDesign_WritingMusicFig25_Licato.jpg


Man, that’s basic. The basic-ness of it is so basic, that it basically is basic. No chords, nothing. The next step, after you have decided the theme, is to change it to match the setting you need. Okay, let’s say that I wanted to change this into a fast, exciting battle song. I would first add a snare drum to play in the background, because that makes it seem like a battle. Then, I would make the theme play a lot faster. Finally, I would add other instruments to harmonize it and add to the effect I want. Check out MIDI2-2.mid - this file is the basic theme, changed into a more exciting, faster song.

Now, let’s say you wanted to change it into a sad, slow song instead. Well, you can do that too. Take a listenin’ to the file MIDI2-3.mid. This is the basic theme we came up with above, except changed into a sadder song. Of course, this isn’t a complete song, but it should give you an idea.

Now go wild. Listen to techno songs and try to write your theme with a techno beat. Add bass guitar parts and make the main theme play with an electronic guitar and turn it into heavy metal.

Opening a song - How to introduce the theme


Take a look at any song over three minutes. Notice anything? It doesn't take musical training to realize that many songs consist of one or more themes, repeated over and over and in different ways. This is why I suggested you write the theme first. Once you've got the theme, then you should get started on the beginning. (Some people, including myself, write a beginning first and just wait until a theme comes to them. It doesn't really matter, different people do different things. Once again, I want to stress how writing music is almost absolute freedom, unless the type of music you can write is restricted by the people you are writing the music for.) Here are some types of introductions, described as abstractly as possible:

  1. Building up: This type of beginning is one where you start with something simple, say a drum solo, and then slowly the background to the theme comes in, and then more background, and then eventually the theme itself comes in. Sometimes the background (the music that would be playing in the background while the theme would be playing) is just playing by itself, then comes the bass and/or drums, then comes the main theme. MIDI4-1.mid is an example of one of those songs. The main theme comes in, played usually by different instruments from those that were used in the introduction. That way it more clearly distinguishes itself.
  2. Introducing an alternate theme: Here, you start with a different theme and slowly introduce the other theme. For example, you play another theme, and then play a part of the theme, and then play the other theme, and then play the main theme, and then the other theme, and then again, and each time you play the main theme you play it louder and place more emphasis on the main theme and less on the alternate theme. Eventually the alternate theme stops and you play the main theme all the time. These intros are usually pretty long.
  3. No playing around: In here, you don't do any stuff in the beginning; instead you just play the theme, with all of the background and everything, starting from the beginning. This isn't really an intro, but for some themes, it works better than any of the others. This is what you will probably use if there is no ending to your song; if it will repeat over and over. Often this is done in fanfares and other formal themes. Think military marches or graduations.
  4. Teasing: When the theme is already one that is familiar to most of the listeners, it helps to use a combination of introduction styles (1) and (2). For example: Build up an introduction, then play some notes that are similar to the theme. Similar enough so that they can remind the listener of the main theme, but distorted enough so that it's not satisfying. Then perhaps, play another theme, and tease with another distortion of the theme. Then build up, get loud and play the actual theme in full force, without distortion. This works great with long introduction screens, where the main theme finally plays when the game's hero appears or the start screen shows.

If you study all of these types of beginnings, you'll realize that they all serve the same purpose. This is the heart of the two purposes of the beginning of the song, to introduce a theme and to create the setting. A jungle-setting song might open up with some jungle-sounding drums. A serene, depressing theme might start off with some piano or violin.

The middle - Making people love the theme


Uh...yeah, that's basically what the middle of the song does. This is the "meat" of the song, the fish in the sushi, the dog in the corn......dog.

The middle of the theme (middle being defined as any part of the song that is not the beginning or end, obviously) must make the people love the theme. Here you must really think about what the purpose of this particular piece of music is. Will it be a theme that will loop for a long time? Is it meant to be somewhat of an orchestral piece, which builds up to a climactic, epic ending?

Looping: Very common for game music. When using themes in a loop that's going to play for quite a while, it's general practice to make the majority of the song very subtle. I'm thinking of an overworld theme in a RPG, or the music in a puzzle game. Music that's over-the-top and very crowded, with a hundred instruments playing at once and the main theme played at full force may be cool for an in-game cinema sequence, but people will get sick of it pretty quickly if it has to loop.

Using Dual Themes: In this way, you just use the theme, play it in the beginning, and then play a different theme. Eventually you play the next theme and then you play the original theme again, and then go back to the other theme. Each time you do this, you make each theme sound better by adding more background to it. Each time you change from one theme to another theme, you have to make sure to make the transition smoother and smoother each time. To make the audience have a feel for the theme, play one of the themes as background to another of the themes once in a while. Listen to "Dual of the Fates" from the Star Wars: Episode I soundtrack. That has three different themes, you should practice by identifying them.

I can't stress enough, that these lists are not an exhaustive set. The best way to learn different styles and develop your own is by listening to hours and hours of great music and spending ten times that actually writing music!

The Ending


There isn't much use to studying song endings when it comes to game music. Most songs for games don't have endings, because they loop. But if you want to make a song that you would be able to put on a soundtrack, you're going to want to end it, usually in one of two ways: climactic ending, or a fade out to nothing.

As my High School band teacher said, "when the audience hears a song for the first time, the only parts they remember are the beginning and the end." So given the choice, I prefer a spectacular ending. The secret here, in this case, is in the buildup to the ending

Variations


Often, composers take a good song, and write a variation on it. Sometimes the variation on the song sounds very similar to the song, because the composer wants the listener to recognize what it is a variation of. We usually refer to these as covers, I'm sure you're familiar with a few. Sometimes, the composer makes it sound so different that it is and can be considered a completely different song.

And that my friends, is what you can do. When you just can’t get your creativity to work, just write a variation on a song. Be warned, however: make sure it sounds different! If your variation is very similar to the song it is a variation of, and you make money off of the song, you could get sued by the original composers! A good general test is to have someone else listen to it, and see if they can guess what the original song was that this is a variation of. If they can't, good!

Now here’s a sample. You all know the song "Mary had a little lamb", right? Here’s a variation I threw together, by adding some broken chords and messing with the main theme. It’s MIDI3-5.mid.

That’s a sample of a variation. From that variation, I could actually just take that and make it into a song that I could call my own. It's using another theme as a jumping off point. Variations can be particularly useful when writing different themes for the same project. A variation of the main theme for the love theme, or for the boss battles, provides variety in the music of the game while still providing a familiar feeling that's consistent throughout.

Expanding Your Creativity


Now that you know how to write down the basic music, you can sit at the piano or guitar, and keep a piece of paper with pre-drawn staves with you, so whenever you come up with a song, you can find out the notes by playing it on the piano and then writing it down. You have to remember this one thing: No matter how stupid it sounds, write it down. Creativity is like that. If you do something creative, it usually sounds different, because it IS different. That’s what you want. You don’t want to get sued by somebody else because you made money off a song that was already copyrighted.

I can’t tell you how many times I’ve thought of what I believed were the stupidest songs in the world. I wrote them down anyway, and then when my friends heard them, they loved them! One man's trash, another man's treasure...

The way a composer thinks of his or her theme is usually different than how the audience thinks of it. If you think of a theme, you’ll have an opinion that is loaded with all these extra thoughts: changes you made while writing it, ideas you had but decided not to use, and emotional attachments to certain parts are just some of these. Just try it out, and ask a friend to give you an honest opinion on it.

A trick I often use is, write down a song, then come back to it in about a day or two. Work on something else. By then, you probably will have forgotten exactly how it sounds. (If you still remember, that’s a good sign that it’s a good song!) Listen to it now, and then if you still like it, it’s a keeper. If you don’t like it still, then that probably means it’s not a good one. Keep it anyway, it’s not good to waste songs. You’ll probably find a use for it in the future. I’ve got some songs that I’ve written years ago, but I still haven’t found uses for them. Key thing to remember here: Never delete a composition!

It’s almost mandatory for it to be completely quiet when you are trying to think of songs. Use your eyes to think of new songs, just look around. If you want to think of a sad, emotional song, look at something that reminds you of something sad that happened to you, usually one that wasn’t resolved. If you broke up with your girlfriend and then you got back together, you usually won’t get into the "sad" mood when you think about her. If you really loved your girlfriend, and then she broke up with you because she wanted to date your best friend, and she stole your wallet, now that’s a tragedy. Now, looking at a picture of her and then sitting down with a musical instrument, what's likely to come from your fingers is a song in a minor key, either slow and sad or heavy, loud and angry. That’s one of the ways that musicians vent--if they are sad about something, they write a song about it, and they feel a bit better. They express themselves through music.

Events in your life can inspire you to write better music. Take the great Ludwig Van Beethoven, for example. By his 30s he was completely deaf. He was insulted at the kids at school because he was "dirty," and "different." He wrote Fur Elise for a woman named Elise. He proposed, and she said no. He wrote the moonlight sonata, one of the most beautiful piano pieces ever written, for a Countess named Giulietta Guicciardi. He proposed, but she was married off to a count. The point of that little history lesson was, experience makes you stronger. Use experiences you’ve had to get you into the mood.

Of course, I’m not saying that you should cause yourself to experience emotional pain just so you can get the songs. If you are one of the lucky people who haven’t had a sad experience before, then watch a sad movie or something. Read a story. Get emotional depth. Music composition is an artistic pursuit, something which can't be done mechanically according to a formula or set of procedures. One needs to feel music to truly understand it.

Usually, when developing a game, the team makes a sample of the game, and then gives it to the musician, so that he can have an easier time thinking of a song. If time is not a problem, I think this is a good thing to do. That way the musician can just look at the game, or screenshots of the game, and think, "what would sound perfect in this situation?" While doing this, make sure to keep a piano or another musical instrument next to you, so once you think of a theme, it can be written down and not forgotten or changed. You want to try to avoid having too many changes made to an original game idea, because usually that change is made so that it can sound more like a song that was already written. Earlier I said that it would be good to make changes to a song a bit, and with a time interval of a few days in between each time you make a change to the song. This is different, because each time you make your changes, there will be a different song in your head, and therefore a different song you are trying to change it to. Yes, I know that you’re thinking, "he’s not right. When I make changes to my songs, I’m not trying to make it into a song I already know." Yet, somewhere, subconsciously you might be.

Also remember that creativity improves with practice. If you first start and you can’t even think of one song, just keep trying. As time passes by, you’ll think of songs, and if you work diligently, they will get much better. If you tried once and then gave up, and then tried again a month later and gave up, and then tried again a year later and gave up, you probably won’t be able to come up with good songs. At that rate, it would take years for you to get better.

Instrumental music (music without human voices talking or singing) is the kind of music most commonly used in games. If you plan to use human voices (a chorus singing, or somebody rapping or singing, etc.) then keep in mind that you’ll actually have to have somebody perform if you want others to hear the music. You might actually have to pay somebody, or you’ll actually have to teach somebody your music. (Unless of course, you plan to sing yourself or have some good friends that are willing.) If you only use instrumental music, then all you have to do is have a good synthesizer.

The Software Side, and Various


File Formats


It's likely most of you already know about the different types of music files that are out there, but here is a brief summary anyway, of the three music formats you're probably going to spend most of your time dealing with.

Midi Files (.mid) – These are files that actually store the information like individual notes, instruments, etc. This used to be the dominant format for music on the internet, due to its small size and quick download time. The problem is that the computer itself uses its own prerecorded sounds to synthesize the file into music, so it sounds different on each computer.

Wave Files (.wav) – These files, on the other hand, are much larger because of the fact that they store the actual recording of the musical performance. Most musical files derive from this format. If you want to store the most amount of detail in your music, wave files are the way to go.

MP3 Files (.mp3) – Currently the dominant form of music, mp3 files use an effective compression algorithm to reduce the size of a musical recording.

Choosing the Right Software


Now comes the time to choose which software you want to use to write and produce your music. If you want to get into it to a deep level, the best software can run from $100 to $500 per license. There are three primary ways to store original music.

Writing It Through Software – is when you actually specify the notes, the volume levels, the type of instrument, and everything else that we learned in this article manually. A good program should be able to store the information exactly as you entered it, and export it to a file format that you choose.

Recording the actual performance – Obviously makes it so that you won't be able to view or edit the actual note data, but can make for a more high quality sound (it's how the professionals do it). For this you'll need a good, sound proof room in which to record, a good microphone, and of course, good software.

Recording the instrument data – is somewhere in between the above two solutions. An example of this is when you have a keyboard connected directly to the computer, and it records not the sound of what you're playing, but the actual notes being pressed. This usually stores the data in a midi-type format and is much less tedious than inputting each note manually.

A high quality, expensive piece of music composition software should be able to do all three of these and more. That in mind, here is a list of some links to software that some hobbyists and professionals use:

http://www.flstudio.com
http://www.propellerheads.se/products/reason/
http://www.cakewalk.com
http://www.sonycreativesoftware.com/products/acidfamily.asp
http://www.sibelius.com

Tips for the Broke


You don’t need thousands of dollars to start writing; in fact if you just want to get started for free there are a lot of options. Here are some simple, free midi sequencers for windows:

http://www.anvilstudio.com/
http://www.buzzmachines.com/
http://noteedit.berlios.de/

and a more detailed list, including software for mac and linux, can be found at:
http://en.wikipedia.org/wiki/List_of_MIDI_editors_and_sequencers

Of course, because most of these programs don't allow you to export to anything commonly used other than MIDI, you'll want to find a nice, free midi to mp3 converter. A quick Google search can turn up many useful results.

Publication – Getting Out there


If you only want to write music for your game and stop there, this is probably where you're done reading. But if you plan on taking a more active role in the game music industry, then the first step is clear: start writing! Start writing music and start saving them in categories of what type of project they could be used for. When you get hired for a game project you'll already have a collection of themes from which you can choose.

The next step is to start looking for projects. The forums on GameDev.net are a good place to look first. Look for projects that look reliable and volunteer your musical talents. Don't expect much money if any at all to come out of the first few projects, you want to create a portfolio of work you can display on a personal website.

The next thing you can do is create an account somewhere that you can use to share your music. Myspace.com and Newgrounds.com are great for this. Create an account, start uploading your music, and hopefully small game developers will come to you. I've gone to Newgrounds many times when I was looking for music for a small project I was programming.

Using the Work of Others


If, in a small project, you decide you want to work on the programming or art side instead, it's always possible to find a musician to write music for you. In that case you have two choices, original compositions or already-written music. For small projects I generally prefer the latter, because then I know exactly what I'm getting before I agree to anything.

A great way to find pre-written pieces of music is to browse public profiles, on http://music.myspace.com or http://www.newgrounds.com/audio . Myspace music is becoming a bit more commercialized than it was in the beginning, so you may not be able to find small, independent artists as easily there anymore, but Newgrounds has tons of small authors with compositions you can listen to for free. It's much easier to get someone who's already written music to agree to letting you use that piece of music on your project, as long as you give the proper credit and share an agreed-upon cut of the profit if you make any.

For bigger projects, asking an artist to write an original composition for your game isn't much different, except that there's more work involved and generally if they're getting paid they'll expect a little more than the previous option. In this case you need to be as specific as possible with what you want; provide the musician with an entire design document and as much art as you can, so they can get a feel for the setting of the game. You need to list exactly how many compositions you need, write descriptions of each one and decide a general length. The artist also needs to know if it will be a loop or not. Because so much detail is needed, generally the person who makes these decisions about what type of music is needed is someone who is familiar with composition him or herself. If you know almost nothing about the subject and don't want to know anything, then either delegate the responsibility to someone else or give the musician more freedom. Creativity doesn't flourish very well under oppression. Finding that balance between allowing enough freedom for creativity and being specific enough to create the desired effect is a difficult skill to acquire.

BE HONEST! It's important that you have an agreement before you start using any of their work and way before any income comes in, if any. If you're not expecting any income be honest about that as well. Many small developers will want to participate in projects for experience and a completed project they can put on their resume or website, so stress that benefit if money is not an option.

Finally, be realistic with your expectations. If you have a composer who has never done any games before, who only has one or two sample tracks, you can't expect them to throw together a masterpiece symphony in a week. Know who you're working with and know what they're capable of!

Conclusion


Music in video games is an industry that can only expand and grow as games become more detailed. It's such a deeply embedded expectation in the minds of most gamers that it's not even thought about much when it's there, but when it's missing they'll notice.

We've gone over the basics of music theory, enough to get you started on an instrument and plucking away at notes until you can come up with something workable. Even if you end up not writing a single song for an actual game, exercising your musical side a bit always does good for you. It's always a fun party trick to bust out the Tetris theme on the piano, or the theme from Yoshi's island.

And if you do decide that game music is what you want to get into, be the best you can at it. You are the modern day Mozart, striving to become the master of your craft. As I've said many times before, the best way to be good at composing is to just start composing. Even if your creations sound like pieces of junk, as long as you keep learning you'll eventually get to the level you're reaching for.

I hope you got what you needed out of this article. Good luck!

Taking Slender apart, an Introduction to Horror Games

$
0
0
Slender is one of the few games that truly delivers a gripping, horrifying experience. While there is a so called "Survivor Horror" genre in the AAA games industry, when it comes to scaring your playerbase very few games of late actually play in the same league as Slender. Which is weird because Slender is more of a first pencil sketch of something than a full sized painting, it doesn't even feel finished, yet it seems to do a better job.

That is why Slender is a great game to analyze, because it seems unfinished and bare bones, you can see each individual part more clearly. So if you too are a sadistic human being, who only finds pleasure in torturing peasants, then take my metaphorical hand and let us wreak havoc!

Links and Stuff


From this point on, you should have played Slender (It is free!) at least once, also you should have read the Article about Mechanics Dynamics Aesthetics or this dissection won't be as useful to you as it could.

While I am trying to not needlessly compare other games with Slender, I couldn't help myself to take Dead Space 2 in the equation. You don't need to have played the game, you just need to know the start of the game which you can watch in a Let's Play youtube video.

It helps a lot to watch people play the game you are trying to take apart. In this article, I am going to referene Nova's first Slender video. He played the game while he talked about his current gaming experience, GREAT! Usability technicians have to specifically ask a test user to talk out loud, that they talk about their experience. And here on Youtube there are hundreds of testpersons doing this all by themselves. Now that we got that out of the way, let's get cracking!

Concepts and Inner Fears


If you are out to scare your players, you need a scary concept, a setting for your game to play in. This can be almost everything from an abandoned spaceship to a haunted castle. Many horror projects just come up with an arbitrary dark place and venture on. But you could do a lot more with it, some concepts are more powerful than others. While you can horrify your gamers on an intergalactic cruiser, you can not haunt them in their real world, the gamers can simply turn off the computer and leave the horror behind. The reason why they can do that is they probably don't live on a huge space ship, there is nothing in the real world that would remind them of their harrowing experience. Most game designers would shrug their shoulders and leave it at that, but we are too evil to just walk away. So let's have a look how Slender did it:

Note:  You are trying to scare a human being, a human being with primal fears. Evolutionary speaking, we are not one step away from our tribal ancestors, we are hard wired to feel threatened or scared by certain things.


You are in a fenced in forest, searching for sketches and walk away from a skinny guy in a business suit. At first glance this doesn't really look like a good idea for a horror game, but believe me it is a spark of genius.

First, in order to be scared, the player needs to immerse into the world. It is hard to do that when you have no clue about what you are doing and why you are here. Since Slender is plain simple, it doesn't require a lot of exposition to get you strapped in, the exposition it needs can actually be fed to the player via gameplay mechanics - but more to that later.

The other great thing about it is, we are already scared in forests at night. If you have been strolling around in the woods after sunset, you know what I am talking about. In a dark wood, your mind starts to play tricks on you, connects loose contours to monsters, your heart is beating faster, you are on alert. You have been hard wired to feel uncomfortable in such an area, it was beneficial to humans the first couple of thousand years they existed. We still have this primal fear in us, and Slender exploits for its personal enjoyment. Plus you have a chance that the player is visiting a forest at dusk after he or she played the game, the forest might remind them of their experience in Slender.

Starting off right


Time to immerse and the Monster


Compare the beginning of Slender to the first ten minutes of Dead Space 2 (walkthrough video here). The first 3 minutes of the game are plain cutscene exposition thrown at you. After that, a guy transforms into a monster you should be scared of right in front of your face! It would be an understatement to say that Dead Space lacks subtlety, horror doesn't work when the game tells you: "Alright I am going to scare you now; BOOOO! Are you scared yet? BOOOO, BOOOOOOOOH. How about now?"

Horror needs subtlety, horror needs time. That is why Slender lets you walk around in the forest for several minutes before showing anything remotely scary (other than the forest itself). When you watch Nova playing Slender, you see how he first screws around with the controls, how he tries to get his bearings before he can start concentrating on the game, and even then he needs some time before he starts connecting with the game, until Nova forgets that he is sitting in front of a PC screen and starts walking in the shoes of the protagonist, only then he starts to be sensitive to our game mechanics. So trying to scare the player before is just a waste of time and may even turn the uncomfortable setting to a ridicolous one. And we definitely don't want the player laughing at us.

It also doesn't help to show your monster cinematically lit right at the start of your game. No matter how scary your monster is, no matter how hideous it is, it isn't as scary as the monsters our immagination gives us. So instead of showing the monster before you even started the game, you should rather take the Amnesia approach. Let the player see your monster rarely in the dark, from a distance, distorted and loosely shaped. An unknown monster is usually more scary than one you know. If you do it right, if you just show bits and pieces of your monster, the player will create his own image that scares him or her to the bones. If you do it right, you can startle your player by just playing a faint growl of your monster.

Exposition with no words


Slender does a very good job at explaining the small settings in it without any words. Let us analyze Nova's first experience with Slender's exposition:

While he is busy reading the title screen, he hears somebody walking around in the grass. Note that Nova says: "What's that noise, that's a fence". Then he already has control over the game, the first thing Nova does is turn around. He sees the fence and concludes that he climbed the fence and can't go back. That's a beautiful way to tell the player something without using one single word. He also doesn't ask why he climbed the fence in the first place. Climbing a fence is not abnormal, maybe the protagonist was curious, maybe he or she tried to cut through the area and save some time on the way home.

After all that, the game shows the only text message "Collect all 8 pages". Now you might think the exposition ends, but no, the game hasn't even started yet. Now the player has time to figure out the controls, you see Nova screwing around with the flashlight and searching for a sprint function. Slender also introduces the player to trails and split ups, Nova will be encountering those later on on a regular basis.

At 2:40, Nova finds his first page, he hears the heartbeat sound and concludes: "I bet that means the game has started", yes it does. Now the game has finally started, but I'd say the exposition is still not finished, Slender has to introduce Slender Man.

With only one page found, Slender Man always watches you from a distance, that is how you usually see him the first time. With the heartbeat sound, you know that he isn't here for your tax return, he doesn't walk towards you, but you know you should better run away.

Tools of Terror


The HUD of Nothingness


In Slender, there is almost nothing that resembles a HUD, and it is missing for a reason. You are used to In-Game HUDs, it is a small reminder that you are still playing a game. So they did the most minimalistic HUD they could. The only thing the HUD ever tells you is how to pick up pages. You don't necessarily need to know how to toggle the flashlight or how to sprint but picking up pages is essential. Everything else though is communicated via mechanics and sound effects. With practically no HUD, there is also nothing to stop you from forgetting that you are playing a game, that you are not in a forest with a business consultant.

Static


The static has an obvious mechanic, it shows how close you are to losing of course. But it also has a function that is very helpful for a horror game: It obscures the monster.

We touched upon this before, a monster stays scarier the less you see about it and Slender Man is no exception. If you see this guy in a brightly lit room with time to examine him, he loses his scary potential as soon as you can start laughing at him. That's why the static is a very good tool for Slender Man, it ensures that you don't get a good loock at him even when he is standing right in front of your face.

The Map of Disorientation


I guess you have already figured out that the Level Design tries to disorient the player. But how did they do that?

Now let's play try dissecting the map design. Go and play the game, don't take any pages. Instead, try to draw a map, what way you should go to get from one note to an other.

Have you caught their little tricks?

In general, you feel lost when you can't make any sense where you should be going, but you are only truly lost when everything looks the same to you. The developers played right into that. First by only using a limited number of models and textures for the trees and by reusing different set pieces with slight modifications. Not having the resources of a AAA studio can be beneficial too. I've counted at least two different bathroom buildings both looking very similar, but their pages are in very different places. Chances are the player has found the page in the first bathroom in the first playthrough. In the second round he or she has found the second building and searches at the place it was in the first building. This only helps to confuse the player and when they are being chased by the Slender Man.

But the set pieces are not the only tools to create confusion. The paths are also an essential piece of the puzzle. Each fork of the pathway looks almost indistinguishable. Together with the similar set pieces, they create another feeling of confusion, a general lost of direction: "I am walking in circles". The beauty behind that is, sometimes the player isn't, but when he or she can't distinguish a set piece from an other, it creates this feeling. It makes it a lot harder to keep track of your path "OK, I was at the truck and I took a left, then I was at the bathroom stall. I am now at the truck again so let's take a left again" and the player finds him or herself somewhere completely different. As if the paths are changing.

Sound of Immersion


Let's break up the sound design of Slender, I think the sound design mainly serves three different purposes:

Immersion

As we concluded already, the silent beginning is here to let the player immerse. The tricky part is to make it feel organic, real. Go back and play the beginning again, before you have collected any pages, you hear a familiar chirping. Also very important, there are different sound effects for when you are walking in the grass or on a dirt path.

Unsettlement and Pressure

The sounds you hear when the game has started is basically for this, unsettling the player.

The first sound effect you hear is the famous heartbeat track. It is good at telling the player "something is here with you, you are not alone!". As you collect pages, the game puts in more and more sound effects. First a weird humming noise, which enforces the strange feeling the player already has, that Slender Man isn't from this world. Later on, Slender introduces the howling wind noise which makes the player feel as if the whole forest is after him.

It is also important to note that because the sound effects come over time, they create a feeling of "everything is getting worse, everything gets more dangerous" as you get closer and closer to your goal, it feels like you are going straight towards your doom. Which is an excellent feeling for a horror game.

The Piano of Shock

There is sadly very little to say about the sound effect itself. It is an awesome sound effect that fits perfectly, done.

It is worth considering however, when the effect is played. The guys behind Slender did an awesome job to analyze when a player actually sees Slender Man, when it is a shock moment that needs to be enforced by this sound for maximum shock effect.

Decisions of Doom


While playing Slender, you are constantly making decisions. Yes you are, you just don't notice it. Go back to Nova and watch him again strolling away from the fence the first time. He says once: "Oh wait, this shit splits". Yes indeed it does, you have to make an arbitrary decision. This mechanic alone seems a bit werid, but have patience, it will become clear when we talk about Slender Man.

How the Accountant brings it all together


Now, let's talk about Slender Man. He alone isn't actually as interesting as for example the Level Design, but when you look at him together with the other Tools of Terror, you start to see what the Dynamics of the game are. Now, Slender Man has two completely different mechanics that they may be considered different Slender Men:

The Accountant of Stalking


This is the normal Slender Man, always watching you from a distance when you turn around. That is to say, almost always. He sometimes isn't there, which makes him a bit more strange and confusing. Together with the unsettling sound, he provides pressure to the player. The player doesn't actually need to sprint as much as he does, but it feels necessary.

The sound effects and Slender Man together with the decisions the player has to make, forms a dynamic of increasing panic. You have to decide what way to take, one, both or none can lead you to a place you have already been. You don't know, you can't know, but you have to take the right way. The player has to do such decisions regularly, with the flashlight, with the path, even with the sprint function all while he feels increasingly uncomfortable, while he gets more and more panicky. Increasing panic means the player gets more and more sensitive to when Slender Man goes in for the kill.

Accountant of Instant Transmission


I guess you have noticed already, Slender Man is able to teleport around the map as much as he likes. As the game progresses, he gets more and more aggressive with his teleportations. It is a bit counter intuitive, but Slender is actualy scarier when the player knows about it. Together with the trees or claustrophobic bathroom buildings,it forms tension. Slender Man could at any moment be around the next corner. You know he is going to be behind a tree at some point, you look again but he isn't there this time, maybe around the next tree... it gives tension similar to russian roulette, it builds up together with the panic.

Now the player is ready for the shock moment, when Slender Man is suddenly standing in front of him. Together with the sound effect, it forms a shocking experience that doesn't lose its power even as the player knows what is happening.

The End of all


Slender really ends when you collected all eight pages, but what does happen? All the sound effects stop, for a brief moment you think you have survived this, but then Slender Man takes you. No matter what you do, no matter how good you are, Slender Man will take you. This is very important, because if the game would end differently, you could feel accomplished, it would be easier to leave this unpleasant memory behind. The next time you pick up Slender, you know you are doomed, you can't get away no matter what.

And that's it, Slender works with simple tools but the genius behind the game is how each piece plays together. They knew exactly what their horror experience is made of, what dynamics they needed and how they can deliver on those with their mechanics.

From a Game Design perspective, horror games are extremely interesting. Because their mechanics are not fun, you don't like collecting pages. It is solely how the mechanics play together, what feelings they manage to bring up, why the gamers play Slender. So horror games should interest any aspiring Game Designer, they are a great platform for experimenting with how different mechanics play together and what effect they have on the player. In the end, that is what we are creating. Experiences.


Article Update Log


19 April 2013: updated "HUD of Nothingness"
18 April 2013: Initial release

D3D11 Tessellation In Depth

$
0
0

The Pipeline


Consider the typical flow of data through the programmable pipeline:

Input assembler -> Vertex shader -> Pixel shader

Buffers containing per-vertex data are bound to the input assembler. The vertex shader is executed once per vertex, and each execution is given one vertex worth of data from the input assembler.

Say, however, that we wish to process control points and patches instead. The vertex shader by itself isn't particularly well-suited for handling the manipulation of patches; we could store the control points in a buffer and index with SV_VertexID, but this is not very efficient especially when dealing with 16+ control points per patch.

To solve this problem, D3D11 adds two new programmable stages: the hull shader and the domain shader. Consider the following pipeline.

Input assembler -> Vertex shader -> Hull shader -> Tessellator -> Domain shader -> Pixel shader

Normally, the input assembler can be configured to handle points, lines, line strips, triangles and triangle strips. It turns out that it is quite elegant to add new primitive types for patches. D3D11 adds 32 new primitive types: each represents a patch with a different number of control points. That is, it's possible to describe a patch with anywhere from 1 to 32 control points.

For the purpose of this example, say we've configured the input assembler to handle patches with 16 control points, and also that we're only rendering one patch. We will use a triangular patch domain.

Since we're rendering one patch, we'll need a buffer with 16 points in it -- in this context, these points are control points. This buffer is bound to the input assembler as usual. The vertex shader is executed once per control point, and each execution is given one control point worth of data from the input assembler. Similar to the non-patch primitive types, the vertex shader can only see one control point at a time; it cannot see all 16 of the control points on the patch.

When not using tessellation, the next shader stage is executed once the vertex shader has operated on all of the vertices of a single primitive. For example, when using the triangle primitive type, the next stage is run once per every three executions of the vertex shader. The same principle holds when using tessellation: the next stage isn't executed until all 16 control points have been transformed by 16 executions of the vertex shader.

Once all 16 control points have been transformed, the hull shader executes. The hull shader consists of two parts: a patch constant function and the hull program. The patch constant function is responsible for computing data that remains constant over the entire patch. The hull program is run per control point, but unlike the vertex shader, it can see all of the control points for the entire patch.

You might be wondering what the point of the hull program is. After all, we did already transform the control points in the vertex shader. The important part is that the hull program can take into account all of the control points when computing the further transformed output control points. D3D11 allows us to output a different number of control points from the hull program than we took in. This means we can perform basis transformations -- for example, using a little math we could transform 32 control points into 16 control points, which saves us some processing time later on down the pipeline. At this point, further clarification is helpful: the hull program runs once per output control point. So, if we've configured the hull program to output 4 control points, it will run 4 times total per patch. It will not run 16 times, even though we have 16 input control points.

The next stage is the tessellator unit itself. This stage is not programmable with HLSL, but has a number of properties that can be set. The tessellator is responsible for producing a tessellated mesh and nothing more; it does not care at all about any user-defined data or any of our control points. The one thing it does care about, however, are tessellation factors -- or, how much to tessellate regions of the patch. You may be wondering where we actually output these values. Since the tessellation factors are determined once per patch, we compute these in the patch constant function. Thus, the only thing given to the tessellator is the tessellation factors from the patch constant function.

The topologies produced by the tessellator vary depending on how it is setup. For this example, using a triangular domain means that the tessellator will produce a tessellated triangle topology described by 3D barycentric coordinates. How cool is that?

So, by this point we've transformed each control point in the vertex shader, performed a possible basis transformation of the control points in the hull program, and have determined the tessellation factors for this patch in the patch constant function, along with any other user-defined data. The tessellation factors have been run through the tessellation hardware, which has created a shiny new tessellated mesh: in this case, a tessellated triangle described with barycentric coordinates. I would like to emphasize once again that the tessellator does not care at all about anything besides the tessellation factors and a small number of configuration properties set at shader compile-time. This is what makes the D3D11 implementation so beautiful: it is very general and very powerful.

You're probably wishing we could transform the tessellated mesh in arbitrary ways, and, well... we can! The next stop is the domain shader. The domain shader can be thought of as a post-tessellation vertex shader; it is run once per tessellated vertex. It is handed all of our output control points, our patch constant data, as well as a special system value which describes the barycentric coordinate of the tessellated vertex we're operating on. Barycentric coordinates are very handy when working in triangular domains, since they allow us to interpolate data quite easily over the triangle.

At this point, the flow of data is familiar: the output from the domain shader is handed to the pixel shader. It is important to note that in general, 32 float4s can be passed between every shader stage. We can pass 32 float4s from the vertex shader to the hull shader, 32 float4s from the patch constant function to the domain shader, 32 float4s from the hull program to the domain shader, and 32 float4s from the domain shader to the pixel shader. In other words, a lot of data can be passed using interstage registers, not to mention we can also bind shader resource views to the vertex, hull, domain, geometry and pixel shader stages.

I have left the geometry shader out of this explanation to simplify things, but it is very possible to throw a geometry shader into the mix to do some very interesting things -- one example that comes to mind is eliminating portions of a patch, or breaking it up into individual triangles to form new topologies. It is also possible to use stream-out with tessellation.

Due to the general nature of the pipeline, we can even use tessellation without binding any actual control point data to the pipeline at all. Consider that the vertex shader is able to see the vertex ID (control point ID in this case) and instance ID. The hull and domain shaders can see the primitive ID (which is basically a patch ID). Using this information alone, very interesting and useful things can be accomplished: a good example is producing a large mesh consisting of many individual patches. The patches can be placed appropriately by using the primitive ID.

Earlier I touched on the tessellation stages having compile-time settings. These settings are specified with the hull program. Here is an example declaration of settings.

[domain("tri")]
[partitioning("integer")]
[outputtopology("triangle_cw")]
[outputcontrolpoints(16)]
[patchconstantfunc("HSConst")]

domain(x) - This attribute specifies which domain we're using for our patches. In this example, I specified a triangle domain, but it's also possible to specify a quadrilateral or isoline domain.

partitioning(x) - This attribute tells the tessellator how it is to interpret our tessellation factors. Integer partitioning means the tessellation factors are interpreted as integral values; there are no "in-between" tessellated vertices. The other partitioning schemes are fractional_even, fractional_odd and pow2.

outputtopology(x) - This attribute tells the tessellator what kind of primitives we want to deal with after tessellation. In this case, triangle_cw means clockwise-wound triangles. Other possibilities are triangle_ccw and line.

outputcontrolpoints(x) - This attribute describes how many control points we will be outputting from the hull program. We can choose to output anywhere from 0 to 32 control points which are then fed into the domain shader.

patchconstantfunc(x) - This attribute specifies the name of the patch constant function, which is executed once per patch.

Each stage is given different data. To illustrate this, I will show one possible function signature for each stage.

VS_OUTPUT VS(IA_OUTPUT input, uint vertid : SV_VertexID, uint instid : SV_InstanceID);

HS_CONSTANT_OUTPUT HSConst(InputPatch<VS_OUTPUT, n> ip, OutputPatch<HS_OUTPUT, m> op, uint pid : SV_PrimitiveID);
HS_OUTPUT HS(InputPatch<VS_OUTPUT, n> ip, uint cpid : SV_OutputControlPointID, uint pid : SV_PrimitiveID);

DS_OUTPUT DomainShader(HS_CONSTANT_OUTPUT constdata, OutputPatch<HS_OUTPUT, m> op, uint pid : SV_PrimitiveID, float3 coord : SV_DomainLocation);

SV_DomainLocation's type depends on the chosen patch domain. For the triangular domain, SV_DomainLocation is a float3 For the quad domain, it is a float2. For the isoline domain, it is a float2 (for reasons which I will touch on in a future post). n stands for the number of input control points and m stands for the number of output control points.

As stated earlier, the patch constant function (HSConst in this case) is required to output at least the tessellation factors. The number of tessellation factors depends on the patch domain. For the triangular domain, there are 4 factors (3 sides, 1 inner). For the quadrilateral domain, there are 6 factors (4 sides, 2 inner). For the isoline domain, there are 2 factors (detail and density).

Let's take a look at the topology produced by the tessellator by using the wireframe rasterization mode, a quadrilateral domain, and integer partitioning.

In the following patch constant function, I have chosen to use hard-coded tessellation factors. In practice, the tessellation factors are computed dynamically. The tessellation factors are not required to be hard-coded constants!

struct HS_CONSTANT_OUTPUT
{
float edges[4] : SV_TessFactor;
float inside[2] : SV_InsideTessFactor;
};

HS_CONSTANT_OUTPUT HSConst()
{
HS_CONSTANT_OUTPUT output;

output.edges[0] = 1.0f;
output.edges[1] = 1.0f;
output.edges[2] = 1.0f;
output.edges[3] = 1.0f;

output.inside[0] = 1.0f;
output.inside[1] = 1.0f;

return output;
}


Sample Tessellations


The edge factors are held constant at 1, 1, 1, 1 and the inside factors at 1, 1. The tessellator produces the following mesh:
Attached Image: 1.png
What about edge factors of 3, 1, 1, 1 and inside factors of 1, 1?
Attached Image: 2.png
Edge factors of 5, 5, 5, 5 and inside factors of 1, 1:
Attached Image: 3.png
Edge factors of 1, 1, 1, 1 and inside factors of 2, 1:
Attached Image: 4.png
Edge factors of 1, 1, 1, 1 and inside factors of 4, 1:
Attached Image: 5.png
Edge factors of 1, 1, 1, 1 and inside factors of 4, 4:
Attached Image: 6.png
Edge factors of 4, 4, 4, 4 and inside factors of 4, 4:
(Same as edge factors of 3.5, 3.8, 3.9, 4.0 and inside factors of 3.1, 3.22!)
Attached Image: 7.png
Edge factors of 4, 4, 4, 1 and inside factors of 4, 4:
Attached Image: 8.png
It should be noted that when using integer partitioning, the implementation is essentially using the ceiling of the written tessellation factors. Let's take a look at the output from the fractional_even partitioning scheme.

Edge factors of 2, 1, 1, 1 and inside factors of 1, 1:
Attached Image: fraceven1.png
Edge factors of 2.1, 1, 1, 1 and inside factors of 1, 1:
Attached Image: fraceven2.png
Edge factors of 2.2, 1, 1, 1 and inside factors of 1, 1:
Attached Image: fraceven3.png
Edge factors of 2.5, 1, 1, 1 and inside factors of 1, 1:
Attached Image: fraceven4.png
Edge factors of 3, 1, 1, 1 and inside factors of 1, 1:
Attached Image: fraceven5.png
Here's a funky one with edge factors of 3, 3, 3, 3 and inside factors of 4, 6, using the fractional_odd partitioning scheme:
Attached Image: fracodd1.png
Obviously hard-coded tessellation factors are only so useful. The real usefulness of tessellation comes into play when computing the tessellation factors dynamically, per patch, in realtime based on factors such as level of detail in a height map, camera distance, or model detail.

Patches and Geometry Shaders


You might be wondering how the geometry shader interacts with the new shader stages and the new patch primitive types.

Consider a pipeline with a vertex shader, geometry shader and pixel shader. The vertex shader runs per-vertex, and once one primitive's worth of vertices have been processed, the geometry shader runs. The geometry shader runs per-primitive and outputs vertices of a potentially different primitive type.

Now add a hull and domain shader to the mix. Say the input assembler primitive type is a patch with n control points. The vertex shader runs n times per patch, then the hull shader runs another n times per patch, processing a total of m control points. The tessellator feeds the domain shader each tessellated vertex, and the domain shader outputs the processed vertex. From here, we head to the geometry shader.

Recall that the tessellator can produce lines or triangles. This determines the incoming primitive type to our geometry shader. For the sake of this example, assume the tessellator is configured to output a triangular topology. Say we're emitting points from the geometry shader. This means the signature to the geometry shader looks something like this:

void GS(triangle DOMAIN_SHADER_OUTPUT input[3], inout PointStream<geometry_shader_output> stream);

Had the tessellator been configured to deal with isolines, then we would be using line DOMAIN_SHADER_OUTPUT input[2] instead.

So, there you have it. The geometry shader integrates seamlessly into the tessellation model. Recall that the domain shader runs per tessellated vertex, and so we have little control over each individual triangle in that stage. A geometry shader can be used to break a patch up into individual primitives, which can be independently transformed, culled, duplicated, etc. Not to mention that geometry shaders can be instanced now... that's for a future post. :)

What happens if we configure the input assembler to use a patch primitive type, but do not bind hull and domain shaders to the pipeline? Remember that the geometry shader operates on primitives, and that the new patch types are primitives... therefore, the geometry shader can operate on patch primitives!

Here are some example geometry shader signatures.

Input primitive type of point:
void GS(point VERTEX_SHADER_OUTPUT pt[1], ...);

Input primitive type of line:
void GS(line VERTEX_SHADER_OUTPUT pt[2], ...);

Input primitive type of triangle:
void GS(triangle VERTEX_SHADER_OUTPUT pt[3], ...);

Input primitive type of a 25-point patch:
void GS(InputPatch<VERTEX_SHADER_OUTPUT, 25> pt, ...);

Excited yet? You should be! What this essentially means is that you can make up your own primitive types (with anywhere from 1 point to 32 points) that the geometry shader can operate on. Wish you had a quad primitive type? Use a 4-point patch with a geometry shader and emit two triangles!

Tesselation Example


Now that I have explained a bit about tessellation, it's time for an actual example. We'll start off with a basic cubic Bézier spline renderer.

Let's start by looking at the parametric function used to compute a cubic Bézier curve. The control points are represented by P0, P1, P2 and P3.

Vertex shader


Recall that the vertex shader is run once per control point. For this example, we just pass the control points through to the next stage.

struct IA_OUTPUT
{
    float3 cpoint : CPOINT;
};

struct VS_OUTPUT
{
    float3 cpoint : CPOINT;
};

VS_OUTPUT VS(IA_OUTPUT input)
{
    VS_OUTPUT output;
    output.cpoint = input.cpoint;
    return output;
}


Hull shader


The patch constant function (HSConst below) is executed once per patch (a cubic curve in our case). Recall that the patch constant function must at least output tessellation factors. The control point function (HS below) is executed once per output control point. In our case, we just pass the control points through unmodified.

struct VS_OUTPUT
{
    float3 cpoint : CPOINT;
};

struct HS_CONSTANT_OUTPUT
{
    float edges[2] : SV_TessFactor;
};

struct HS_OUTPUT
{
    float3 cpoint : CPOINT;
};

HS_CONSTANT_OUTPUT HSConst()
{
    HS_CONSTANT_OUTPUT output;

    output.edges[0] = 1.0f; // Detail factor (see below for explanation)
    output.edges[1] = 8.0f; // Density factor

    return output;
}

[domain("isoline")]
[partitioning("integer")]
[outputtopology("line")]
[outputcontrolpoints(4)]
[patchconstantfunc("HSConst")]
HS_OUTPUT HS(InputPatch<VS_OUTPUT, 4> ip, uint id : SV_OutputControlPointID)
{
    HS_OUTPUT output;
    output.cpoint = ip[id].cpoint;
    return output;
}


Tessellator


The actual tessellator is not programmable with HLSL, but it is worth noting that the actual tessellation takes place between the hull shader and the domain shader. The tessellation factors and compile-time settings (domain, partitioning, output topology, etc.) influence the tessellator.

Domain shader


Note that up until now, we have not used the cubic Bézier curve parametric function. The domain shader is where we use this function to compute the final position of the tessellated vertices.


struct HS_CONSTANT_OUTPUT
{
    float edges[2] : SV_TessFactor;
};

struct HS_OUTPUT
{
    float3 cpoint : CPOINT;
};

struct DS_OUTPUT
{
    float4 position : SV_Position;
};

[domain("isoline")]
DS_OUTPUT DS(HS_CONSTANT_OUTPUT input, OutputPatch<HS_OUTPUT, 4> op, float2 uv : SV_DomainLocation)
{
    DS_OUTPUT output;

    float t = uv.x;

    float3 pos = pow(1.0f - t, 3.0f) * op[0].cpoint + 3.0f * pow(1.0f - t, 2.0f) * t * op[1].cpoint + 3.0f * (1.0f - t) * pow(t, 2.0f) * op[2].cpoint + pow(t, 3.0f) * op[3].cpoint;

    output.position = float4(pos, 1.0f);

    return output;
}

Because this is an example, I omitted optimizations to maintain clarity.

Pixel shader


This is a simple pixel shader that produces black lines.

struct DS_OUTPUT
{
    float4 position : SV_Position;
};

float4 PS(DS_OUTPUT input) : SV_Target0
{
    return float4(0.0f, 0.0f, 0.0f, 1.0f);
}

API setup


Control points are treated the same way as vertices.

Input assembler signature:


D3D11_INPUT_ELEMENT_DESC desc[] =
{
    {"CPOINT", 0, DXGI_FORMAT_R32G32B32_FLOAT, 0, 0, D3D11_INPUT_PER_VERTEX_DATA, 0}
};
Input assembler binding code:

UINT strides[] = {3 * sizeof(float)}; // 3 dimensions per control point (x,y,z)
UINT offsets[] = {0};
g_pd3dDC->IASetPrimitiveTopology(D3D11_PRIMITIVE_TOPOLOGY_4_CONTROL_POINT_PATCHLIST); // 4 control points per primitive
g_pd3dDC->IASetInputLayout(layout);
g_pd3dDC->IASetVertexBuffers(0, 1, &controlpoints, strides, offsets);

// Bind the shaders
// ...

// Render 4 control points (1 patch in this example, since we're using 4-control-point primitives).
// Rendering 8 control points simply means we're processing two 4-control-point primitives, and so forth.
// Instancing and indexed rendering works as expected.
g_pd3dDC->Draw(4, 0);

Now that the shaders are out of the way, it is a good time to explain the purpose of two tessellation factors for isolines rather than just one. Recall that a single tessellation factor can be no greater than 64. When dealing with isolines, this number is rather small; it is desirable to render a single isoline patch with a high degree of tessellation. To alleviate this problem, D3D11 allows us to specify two isoline tessellation factors: a detail factor and a density factor.

To understand what these factors mean, visualize a square. Now imagine that the detail factor describes how much to divide up the y axis, while the density factor describes how much to divide up the x axis. Now imagine connecting the dots along the x axis to form lines.

Another way to think about this: the density factor describes how much to tessellate a line, while the detail factor describes how many times to instance the tessellated line. We can find the location within a tessellated line by using SV_DomainLocation.x and we can find which line we're evaluating by using SV_DomainLocation.y. This effectively lets us chain the lines together into one, ultra-tessellated line. Darn good use of parallelism if you ask me.

Back to the example at hand: let's run some control points through this shader and see what we end up with.

Consider the following control points:

P0 = [-1, -0.8, 0]
P1 = [ 4, -1,   0]
P2 = [-4,  1,   0]
P3 = [ 1,  0.8, 0]

Attached Image: cubic1.png

Keep in mind that we're using a hard-coded density tessellation factor of 8 here, which is why the result looks low-resolution. Let's up the factor to 64 and see what we get.

Attached Image: cubic2.png

Much better.

There are a number of things we could do to improve upon this example. For example, to obtain more than 64 divisions per patch, we can use the detail factor to "instance" the line up to 64 times, and piece together the instanced, divided lines in the domain shader. Another thing we could do is create a geometry shader which transforms lines into triangles. We could procedurally perturb the control points in the vertex shader for animation effects. We could compute the tessellation factors as a function of the control points.

Managing Decoupling Part 3: C++ Duck Typing

$
0
0
Previous Articles
Some systems need to manipulate objects whose exact nature are not known. For example, a particle system has to manipulate particles that sometimes have mass, sometimes a full 3D rotation, sometimes only 2D rotation, etc. (A good particle system anyway, a bad particle system could use the same struct for all particles in all effects. And the struct could have some fields called custom_1, custom_2 used for different purposes in different effects. And it would be both inefficient, inflexible and messy.)

Another example is a networking system tasked with synchronizing game objects between clients and servers. A very general such system might want to treat the objects as open JSON-like structs, with arbitrary fields and values:

{
    "score" : 100,
    "name": "Player 1"
}

We want to be able to handle such “general” or “open” objects in C++ in a nice way. Since we care about structure we don’t want the system to be strongly coupled to the layout of the objects it manages. And since we are performance junkies, we would like to do it in a way that doesn’t completely kill performance. i.e., we don’t want everything to inherit from a base class Object and define our JSON-like objects as:

typedef std::map OpenStruct;

Generally speaking, there are three possible levels of flexibility with which we can work with objects and types in a programming language:

1. Exact typing - Only ducks are ducks


We require the object to be of a specific type. This is the typing method used in C and for classes without inheritance in C++.

2. Interface typing - If it says it’s a duck


We require the object to inherit from and implement a specific interface type. This is the typing method used by default in Java and C# and in C++ when inheritance and virtual methods are used. It is more flexible that the exact approach, but still introduces a coupling, because it forces the objects we manage to inherit a type defined by us.

Side rant: My general opinion is that while inheriting interfaces (abstract classes) is a valid and useful design tool, inheriting implementations is usually little more than a glorified “hack”, a way of patching parent classes by inserting custom code here and there. You almost always get a cleaner design when you build your objects with composition instead of with implementation inheritance.

3. Duck typing - If it quacks like a duck


We don’t care about the type of the object at all, as long as it has the fields and methods that we need. An example:

def integrate_position(o, dt):
	o.position = o.position + o.velocity * dt

This method integrates the position of the object o. It doesn’t care what the type of o is, as long as it has a “position” field and a “velocity” field.

Duck typing is the default in many “scripting” languages such as Ruby, Python, Lua and JavaScript. The reflection interface of Java and C# can also be used for duck typing, but unfortunately the code tends to become far less elegant than in the scripting languages:

o.GetType().GetProperty(ÃÃÃÃâPositionÃÃÃÃâ).SetValue(o, o.GetType().
	GetProperty(ÃÃÃÃâPositionÃÃÃÃâ).GetValue(o, null) + o.GetType().
	GetProperty(ÃÃÃÃâVelocityÃÃÃÃâ).GetValue(o, null) * dt, null)

What we want is some way of doing “duck typing” in C++.

Let’s look at inheritance and virtual functions first, since that is the standard way of “generalizing” code in C++. It is true that you could do general objects using the inheritance mechanism. You would create a class structure looking something like:

class Object {...};
class Int : public Object {...};
class Float : public Object{...};

and then use dynamic_cast or perhaps your own hand-rolled RTTI system to determine an object’s class.

But there are a number of drawbacks with this approach. It is quite verbose. The virtual inheritance model requires objects to be treated as pointers so they (probably) have to be heap allocated. This makes it tricky to get a good memory layout. And that hurts performance. Also, they are not PODs so we will have to do extra work if we want to move them to a co-processor or save them to disk.

So I prefer something much simpler. A generic object is just a type enum followed by the data for the object:


Attached Image: duck_typing_1-300x72.png


To pass the object you just pass its pointer. To make a copy, you make a copy of the memory block. You can also write it straight to disk and read it back, send it over network or to an SPU for off-core processing.

To extract the data from the object you would do something like:

unsigned type = *(unsigned *)o;
if (type == FLOAT_TYPE)
    float f = *(float *)(o + 4);

You don’t really need that many different object types: bool, int, float, vector3, quaternion, string, array and dictionary is usually enough. You can build more complicated types as aggregates of those, just as you do in JSON.

For a dictionary object we just store the name/key and type of each object:


Attached Image: duck_typing_2-1024x138.png


I tend to use a four byte value for the name/key and not care if it is an integer, float or a 32-bit string hash. As long as the data is queried with the same key that it was stored with, the right value will be returned. I only use this method for small structs, so the probability for a hash collision is close to zero and can be handled by “manual resolution”.

If we have many objects with the same “dictionary type” (i.e. the same set of fields, just different values) it makes sense to break out the definition of the type from the data itself to save space:


Attached Image: duck_typing_3-1024x312.png


Here the offset field stores the offset of each field in the data block. Now we can efficiently store an array of such data objects with just one copy of the dictionary type information:


Attached Image: duck_typing_4-1024x162.png


Note that the storage space (and thereby the cache and memory performance) is exactly the same as if we were using an array of regular C structs, even though we are using a completely open free form JSON-like struct. And extracting or changing data just requires a little pointer arithmetic and a cast.

This would be a good way of storing particles in a particle system. (Note: This is an array-of-structures approach, you can of course also use duck typing with a sturcture-of-arrays approach. I leave that as an exercise to the reader.)

If you are a graphics programmer all of this should look pretty familiar. The “dictionary type description” is very much like a “vertex data description” and the “dictionary data” is awfully similar to “vertex data”. This should come as no big surprise. Vertex data is generic flexible data that needs to be processed fast in parallel on in-order processing units. It is not strange that with the same design criterions we end up with a similar solution.

Morale and musings


It is OK to manipulate blocks of raw memory! Pointer arithmetic does not destroy your program! Type casts are not “dirty”! Let your freak flag fly!

Data-oriented-design and object-oriented design are not polar opposites. As this example shows a data-oriented design can in a sense be “more object-oriented” than a standard C++ virtual function design, i.e., more similar to how objects work in high level languages such as Ruby and Lua.

On the other hand, data-oriented-design and inheritance are enemies. Because designs based on base class pointers and virtual functions want objects to live individually allocated on the heap. Which means you cannot control the memory layout. Which is what DOD is all about. (Yes, you can probably do clever tricks with custom allocators and patching of vtables for moving or deserializing objects, but why bother, DOD is simpler.)

You could also store function pointers in these open structs. Then you would have something very similar to Ruby/Lua objects. This could probably be used for something great. This is left as an exercise to the reader.


Reprinted with permission from The Bitsquid blog.

Notes on GameDev: Jenova Chen

$
0
0
Originally published on NotesonGameDev.net
October 27, 2008


Jenova Chen, creator behind the multi award-winning student game Cloud and flOw, co-founder of thatgamecompany, is dedicated to expanding the emotional spectrum of video games and making them available for a much wider audience. And how did Jenova "make it" as an independent developer? With a lot of support and a drive for innovation.

Can you tell us a little bit about your interest in game development and where it all started?

When I was 10 years old, my Dad, who worked in the software industry, took me to a special Computer Programming school for kids hoping I'd become Bill Gate's one day. However, I had no interest in learning programming; instead I got to play my very first computer game at the school. And from that point on, video games were pretty much my obsession. My first attempt in making video games happened when I was 12, and my enthusiasm quickly faded due to a bad 5 inch floppy disk which carried a week's worth of my work.

When I went to college around 1999, I was pretty much bored with the math and programming, and I started to put all my spare time on digital animation and 3D graphics. At the time, there were no domestic video game development studios in China and video game education was also a vacuum. And by accident, I met some very enthusiastic students in the college who wanted to make video games. It seemed like a good place where I could put my digital art skill to use. Once the training started, the adventure and joy from game development has never stopped.

Speaking of college... What was your role in Cloud and how did it come to be?

My first big student team project in the grad school at USC Interactive Media Division was not Cloud but Dyadin (IGF 2005), where my role was lead artist. It was the first video game made by student team in our division. The big success brought a lot of attention to the school, therefore the school started a grant to encourage students to team up and make more innovative games. The grant was open to the entire university. As one of the applicants I came up the rough idea of making a game about clouds and rallied around students and faculties. Once the cloud game idea won the grant and got funded by the school, we put a team together. My role was team lead. As a result I worked with the team on many aspects of the game: gameplay prototyping, game design, story and all the visual arts.

What do you think made Cloud the 2006 IGF Student Showcase Winner?

Being one of a kind—a fresh emotional experience that's different from anything on the mainstream market.

Following Cloud, you went right on to working on flOw. How did Cloud's success influence you?

It's not the success part of Cloud influenced me but the failure of Cloud. So many people downloaded our game, including people who never played games. I guess they were lured to the childhood fantasy. As a result, their lack of game knowledge prevented them from enjoying the relaxing experience---instead, their frustration of learning how to control the game ruined the experience. I learned from Cloud that there is a huge market for games that evoke a different emotional experience. However, new markets mean new audience. In order to search for a design methodology that enables a game to satisfy both experienced gamers and not so experienced ones, I started the flOw project.

Interesting concept to work with! How was flOw conceptualized and developed?

As part of my master degree thesis at USC, flOw, the original web game, was made for the sole purpose of testing whether the design methodology I developed based on Flow theory works.

In the academia, there was a lot of many research about how to use an A.I. to read player's performance and alter the gaming experience. However, through playing those games myself, I feel there are so many cases where the A.I. can't assess player's true feeling based on rigid formulas. As a side effect, the false reaction of the A.I. broke my "sense of control", a key condition to enter the Flow state. Therefore, through learning successful video games with mass appeal, I came up a different approach to adjust the difficulties of the game. I call it Active Dynamic Difficulty Adjustment, which uses player's choice to change the difficulty of the gaming experience. The trick is to embed the difficulty adjustment choices in the core gameplay mechanics so that when player makes those choices, he won't feel interrupted from the core gameplay. In flOw, player's only action is swimming and eating, and the way the player engages different content with different difficulties is also through swimming and eating. And the result of the testing was amazing

flOw is now available on PS3, something that indie developers aspire to. How did you make the leap to console?

My business partner Kellee Santiago and I were very lucky to have studied at the USC Interactive Media Division where we took a class called business of interactive entertainment. It's that class that opened our eyes that starting up a company and chasing your dream is not a fairy tale; instead it's something totally possible for normal people like us who had no money, but a passion.

We had a sneak peek at the great potential and promising future of video games through Cloud. And we really hope the maturing of video games as an interactive medium could happen faster. We want to push the boundary of video games and allow more people around the world to see games like Cloud, to awaken the dormant market so that more people can join us to further expand video games' emotional range and meet various needs from the public. Not just things made for excitement and leisure but also things that are thought evoking and deeply emotional.

With that goal, we started to pitch the grand idea of Cloud, the commercial version to almost all the publishers in North America. Quickly, we realized that based on the experience we had fresh out of school and the ridiculous budget we asked, there was simply no one who would take the risk with us.

It had to be the timing and pure luck that we encountered the opportunity of making games for the digital distribution platform for next generation console like Wii and PS3. Both of Sony and Nintendo were going to launch their new gaming consoles, and they were both dying for new content on their digital distribution channel. The fact that flOw was a rather complete game concept made with two students in three months helped us to convince Sony that they could trust us for a much smaller game than Cloud. And then the leap was made.

Well that's great! What are you working on now?

We are finishing up our second title for Sony's Playstation Network, Flower. A game that is a sister piece after Cloud and flOw. Our version of a video game poem dealing with our inner desires towards the wild nature and urban life.

What would you say is the biggest challenge you've faced so far as an indie?

The biggest challenge is to grow up, to become experienced from inexperience. We made so many mistakes in running a startup company and in game development. Though we've overcome all the challenges, the taste is still yummy pain.

Heh heh. What about your biggest triumph then?

Thatgamecompany is still up and running. And we are making games that we believe will push the boundary of what video games can communicate.

What advice do you have out there for those aspiring to join game industry as an indie?

Really consider indie game developer within our industry. Just look around at what's happened in the past two years. How many of your favorite indie games have shown up on the commercial platforms? How many highly reviewed video games are from independent studios? This is the golden time of independent video games. We see so many talented new faces coming out of school and even veterans who left the big studios to form their company and chase their dreams.  The renaissance of video games is already happening.

Pitch Your Game: Pitching Tips from a Game Industry Catcher

$
0
0
In the past few years as a producer for GarageGames I’ve reviewed hundreds of video game pitches from developers and studios.  Having seen the good and the bad, I offer practical tips to help developers successfully pitch themselves or their game to any publisher without boring the publisher or losing their interest.

The range of pitches I’ve reviewed is huge, from literally two word emails (”you like?” with an attached movie) to 30 page design docs complete with appendix detailing every mouse click. Everything from casual puzzle games to WOW clones; from someone who’s never shipped a game requesting a third of a million dollars to start their business to experienced developers delivering sober and intriguing proposals. Here’s my industry experience advice.

Note:  
This article was originally published on Jeff Tunnel's blog Make It Big In Games back in 2007. In 2008 it was included in the book Business and Production: A GameDev.net Collection, which is one of 4 books collecting both popular GameDev.net articls and new original content in print format.


Research the Publisher


First things first – do your homework.  This is true for any type of publishing, be it books or film.  If the publisher is Popcap, don’t pitch them the next Half-Life. If the only casual game a company has made was 5 years ago, chances are they won't fund your match three clone. Target publishers in your genre for a greater response rate. Look at each publisher’s portfolio to see what they are interested in. If you do not do this work, you are wasting their time and yours. That is time you could spend targeting more likely publishers.

A Picture is Worth a Thousand Words


If your pitch contains only text, it will be scanned over, and crucial details may be missed. While it takes time to process words, visual scenes are processed quickly by the brain. And game industry people, especially creatives, are visual communicators. A quickly mocked up in-game screen will tell more about the game than a page worth of text. The more clearly you can communicate your idea, the better it can be weighed, and the more likely it is to be of interest. A picture draws a viewer into its scene — it says, “imagine this interactive, animated, and brought to life.” It captures the viewer’s imagination in ways that the best placed words cannot. Photoshop mock-up, programmer art, MS-PAINT, it doesn’t matter – any sketch is better than none. If you have a real concept artist and include pre-production art in the pitch, it is that much stronger, and shows you put that much more thought into all aspects of the pitch.

“No” Can Happen in One Sentence


Present your high level concept first, with one sentence. If the high concept is accepted, the publisher will continue to read for greater detail. If the high concept is rejected, the publisher stops right there, and any work you did on further details for the pitch are irrelevant. For example, your high level concept may be a genre the publisher does not work with, may be something considered too risky (an MMO), or the publisher may already have a title in the works that is too similar to consider a second. Don’t assume or expect the publisher to read the whole pitch, it can end at the first sentence. Which brings us straight to the next point.

Have Many Things to Pitch


Don’t put all your eggs in one basket. If the publisher rejects one pitch, that doesn’t mean the end of the relationship — if you have more pitches up your sleeve. Be prepared to pitch multiple different projects, and a diverse range of projects (though not all across the board and too diverse). I know one developer whose game a publisher loved.  He pitched them an idea for his next game. The publisher wasn’t impressed and was having second thoughts about the developer. Luckily he had a backup pitch for another game which was an instant hit, making the publisher forget all about the weak first pitch. He got signed. One game was RPG-like, the other arcade-like. The second pitch was not a trivial variation of the first, but not as widely divergent as MMO/match-3 either. By that token, don’t have so many games to pitch that you’re just firing in the dark and seeing what sticks. Anyone can do that and it shows no commitment on your part.

Be Professional


Your pitch should be professional in presentation, not informal. You are, after all, formally requesting publishing services and/or funding. A conversational style is indirect and meandering. If you want to be seriously considered, be serious.

Be Passionate about What you Pitch


This is harder with a paper pitch than an in-person one, but despite being professional in a pitch, passion comes through nonetheless. It’s simple: if a developer is passionate about a project, they are more likely to make sure they create a fantastic product and follow through on deadlines. If they seem ambivalent, then guess what, so will the publisher, and they'll find a passionate studio elsewhere.

Know What you are Making


Know what your core game concept is. Know what elements support that. Know your design inside and out. Publishers will not pay you to experiment or prototype. Granted, your design may change through the course of development, but you are not pitching a direction, you are pitching a specific game. Make sure you know what that is and can communicate it simply and clearly. Be able to answer why you are making the game that you are beyond just “I think I will like it.”

Know Budgets


I’ve been pitched by developers who, upon asked what their proposed budget is, said they had no idea. I’ve seen budgets whose only line item is “the game” with the total amount listed and no further details. Make sure you know what you are asking payment for. How much will be needed for art? For code? For administrative overhead? Are you familiar with contractor costs for these things? Do you have ballparks of man hours required for various features? How much of your budget could be saved by cutting feature X? By adding feature X? As much of this should be known upfront, not discovered later on. What's the commercially reasonable quality level that the publisher contractually expects, and how much will that cost to produce?

You can be Greedy or Stupid but not Both


If you have a great proposal, but are asking for too much money and too many “deal points” (no exclusivity, no right to sequel, no alternate format publishing) you can still be negotiated with. If you have a great proposal and at the right price, but are missing a big piece of the picture (neglecting customer service costs for an MMO, or neglecting the true difficulty of implementing a certain feature for example), you are still potentially in business. But if you are both greedy and stupid there is no reason for a publisher to work with you no matter how great your game is. There are simply far too many intelligent, humble, capable developers out there for the publisher to work within your place. This industry has a surplus of people wanting to be in it, not a shortage. Avoid these pitfalls.

Be Almost-Greedy


I am showing my indie developer colors here, but it’s good advice and bears passing along. It’s true not just in the video game industry but for any business deal. We have a tendency to shortchange ourselves or to expect the execution to be perfect with no bumps and fail to account for the unforeseeable. Rule of thumb, ask for slightly more than you’re comfortable with. At the same time, be prepared for slightly less than you’re comfortable with. Somewhere in that zone your game will get made.

License and Registration, Please


In a publisher’s eyes the team you have is as important as the game or concept itself. Ask yourself these questions and be prepared to answer them: What have you shipped? What is your industry experience? What contract work have you successfully completed? Be honest with yourself. Now ask, do the answers to these match up with what you’re proposing and asking for? Make sure they do. Publishers do not see just the project but the faces behind them.  They need a reliable team behind the game to minimize the risk that they will not get a return on their investment.  In sales it is cheaper to get repeat customers than find new ones. Publishing is no different — it is more effective to work with existing partners than identify and orient new ones. More often than not publishers are looking for long term developers to trust. If all you see is the one game, or all you’re showing is one game, and not the value of the team behind it, your vision is too narrow.

When’s it Shipping?


Have a timeline and associated costs for dates. Milestones can be feature based (prototype/campaign/multiplayer/final art/bugs) or stage based (alpha/beta/RC/gold) or both. There is no absolute standard except that without this information, the publisher is going to be left wondering how long your project will take. Moreover, the publisher needs to know how much you need at each of these stages so they can project their internal budget accordingly. You’re not going to get paid entirely upfront, or entirely upon completion, so set your needs and expectations here, and be ready to negotiate.

Competitors


Capably discuss your game’s position in the marketplace. More is better than not enough. How have other games in the genre performed? What was the last succeeding similar product? How is your game similar to and unique from competing products? Who are your competitors and why is your game better? These are all important questions to answer. A pitch that is weak but that deeply understands its competitors is as likely to succeed as a pitch that is strong and dismisses or misses the mark on its competitors. Showing that you know who else has your same idea and who has executed well on it (and who has failed) tells the publisher that you are that much more likely to succeed yourself. It shows that you deeply understand your genre and have done your homework.

Now with 8-way Joystick and Second Button!


Platform matters! If it’s an arcade cabinet game, how will you leverage that? If it’s a cellphone game, or a web game, or a LAN party game, how will you leverage those? Miss this and nobody will notice. But include it, and get it right, it’s that much more firepower to ignite the flame of a green light.

“It’s for Hardcore Gamers… AND my little sister!”


Know who your target consumer is. “Everyone” or “people who like racing games” does nothing but tell the publisher that you didn’t do your homework or don’t really understand the game industry. There is no one right answer to this or right way to do it, but it should be some blend of age/gender/hobby/lifestyle/game preferences and the range should not be too broad. If “9 to 90″ is your “target” that’s not really a target is it? You can’t help but hit it. Find something and aim for it. Then find ways to strengthen the pitch for that particular market.

What you Do, Do That


Stay within your limits. A publisher is not going to pay for you to shoot for never-before-attempted feats to see if you can. Where there is money, there is by necessity certainty. Staying within limits reduces the risk of failure for both parties. If you’ve never done networked games, don’t pitch a networked racing game. If you’ve never worked with physics, don’t pitch a game that relies on physics as a key component.

To the Point


Stay to the point. You do need to share the plan for how you will produce the game. You don’t need to detail what source control methods and what team management techniques you will use. You do need to state clearly what the game content will be. You don’t need to share the plan of how you will run the details of your business and which HMO you will be choosing for your employees. Stay relevant to the publisher. If you need an affirmative pat on the back for the details of your other plans, get that from a fellow developer or a friend, not from the publisher. They have neither the time nor the interest.

Business is Business


Don’t get personal or take things personally. The games industry is a business. The people reviewing your game are not there to make you feel good about yourself, they are there to further mutual and legitimate business interests. They are in that business because it satisfies personal interests they have, including creative and social ones, but that does not make things personal. You will make friends, and business relationships blur into social relationships, but at the end of the day, and especially with a new potential partner, business is business.

Don’t Ramble (like me)


Less is more. Publishers get dozens of pitches a day. Your pitch is not an essay or book.  The more text you have, the less likely they will read it. If your “killer feature” is buried on page 28 in section 3 subsection B, they will never get to it. Make bulleted lists and summarize things until more detail is requested. Your first pitch should be three pages: an introduction letter, a one page overview, and some mock-ups or concept art (ideally with a link to a demo) with an invitation to see more if there is interest. You have all day to write up the most detailed proposal on earth. Publishers do not have all day to read dozens of them. And they get only dozens a day if they’re lucky. I’ve heard of publishers that field hundreds every day.

Tie-in


The more relevant you can be to the publisher’s history the better. Do your homework. For example if they made a hit FPS game, acknowledge it or try to tie your game to it (“like your game X, my game has an emphasis on team co-op”). But don’t go to absurd lengths (“like your game X, my game also has graphics!”). Yes, this is partly ego-stroking. And yes, it does work (but will only get you so far).

Originality


Your pitch should be original. As soon as it’s “X but with Y” most publishers will no longer look at what you’re doing, and will instead focus on who you are. Anyone can come up with “X but with Y” but only a very talented team that knows what it’s doing could pull it off. If the best you have is a rip-off of an old game with some different features, or a mash-up of some popular games, don’t bother unless you’ve successfully done it before.

Orson Welles Syndrome


Be flexible with your features. This isn’t about the publisher trying to creatively control your project. They don’t have the time or desire to do that. If a publisher is interested in your game, but wants to scale up or down, react accordingly. If they don’t like a certain feature and you’re not married to it, let it go. Don’t be too defensive or worried about “the publisher designing your game for you” until you actually feel like it’s happening. Asking to drop a certain feature or set is not a slippery slope and is common practice. This does not mean the publisher is designing your game.

I am Error


Don’t try to impress the publisher with your knowledge of games or gaming history. It’s irrelevant to the pitch. If you have a good pitch or idea your knowledge of games will be self-evident.

“Zzzz...” is not the Sound of Approval


This is not an insider industry tip.  If you bore the publisher, your proposal will not be looked at, and you will be passed over.  Keep this in mind as a general rule of thumb when preparing any part of your pitch.

Who What Where When How Why


Make sure to go back and ask yourself if you’ve covered all the basics: who, what, where, when, how, and why. Who are you making the game for, who will be working on it. What is the game itself. Where will the game live (on what platform is it ideal for — certain platforms cater better to certain markets than others, PC/strategy for example). When can you start, how long will it take, what are your milestones. How will you develop the game, with what tools and tech, with what kind of team (in-house or contractors). Why do you believe the game will be a success and is worth looking at (without being a three page impassioned essay about how you’ve been playing games since you were five and know everything about them).

LET ME PLAY!!!


A playable prototype or demo is golden. No graphics, no sound, no building out of the game, just core game proof of concept. A pitch with pictures will get ten times further than a pitch without. A pitch with a prototype will get a HUNDRED times further than a pitch without. Don’t apologize for the demo, they’ve heard “this isn’t the final game art or gameplay” as many times as I’ve heard “please excuse the mess” walking into a perfectly nice home. Even if a pitch is rejected, if you re-submitted it with a playable demo, it could be re-considered. Many publishers will not accept unsolicited pitches without a playable demo.

Mess Up


You’ll make mistakes and it’s OK. If you think there’s people in the industry that know everything and never make mistakes you’re wrong. You don’t need to be that person because that person doesn’t exist. If the publisher raises an issue that you hadn’t yet considered, don’t front — the publisher is smarter than that. Fess up to it and tell them you’ll discuss it with your team and follow up. Then actually do that. Especially the follow up part. Be humble.

This is by no means a step by step guide on how to pitch, this is general advice for studios or individuals of all sizes, professional or not, on how to pitch publishers, solicited or not. I've worked with some great developers and studios over the years and hope to keep working with plenty more.

Creative process in conceptual and graphics development in videogames

$
0
0

Conceptual image


The conceptual image is linked to an idea’s development whose elements try to define it in broad strokes. In the artistic creation field it’s quite common to use it as first resource to represent the idea.
In some way, it impress the essence with which the final realization, only keeping in mind the minimum basic aspects needed to be able to configure the mental image.

While it’s true that the conceptual image must be understood as the first draft; useful as an example of the full idea’s development, in some spheres of the plastic creation, the image,captured in any given format, becomes so relevant that it’s seen as a final work (conceptual art). Nonetheless, in most of cases, it keeps being part of the artists’ scratch pad, which is used to make note of their ideas, in a graphical way, and subsequently develop them.

Summarizing, we may conclude that:

The idea is the inspiration’s product. This one creates mental images that right after we can develop and capture in graphical images, giving as result the Conceptual image.


Attached Image: conceptual4GrandeWeb.png
Imagen conceptual: Paisaje Planetario 1. © Francis Viña - www.reactorheart.com


The Draft and the Sketch


Draft:


The first note made in the draw is called draft. The draft tries to simplify the idea, in this sense it’s closely related with the conceptual image, even to the extent of treating them as homonyms. Within the representation context, it doesn’t offer an accurate depiction of the product but an schematic approach of the idea. Thus, visual and primary appealing prevail over the figure’s proportions.


Attached Image: Sketch-2_2.png
Bosquejos en editor de pixel y técnica tradicional grafito. © Francis Viña - www.reactorheart.com


The draft execution, in traditional art, is easily identified since it is carried out by mean of pencil, ballpen, fountain pen, and so forth; done on paper, without rejecting the digital tools (Image processing programs, vector graphics editors, pixel art creation apps, etc.), essential today, given his versatility and fast response in graphics generation, mostly due to printing methods, as well as the fact of being able to publish on internet using compatible image file formats.


Attached Image: 0tuercas.png
Bosquejos en editor de pixel y técnica tradicional grafito. © Francis Viña - www.reactorheart.com


Sketch:


If the draft provides a slight vision of what the artists have in mind, the sketch brings a more detailed and refined idea. And that’s the reason why is considered things like shading, lighting, colour, texture,etc. And also its own composition in comparison to the final format in which it will be made. The sketch is intended to show unbiased and decisive information of the work to be represented. Nevertheless, it is subject to future modifications that may appear during the creative process. Regarding the realization, the tools and means are the same as the ones described in the previous section.

The sketch as a resource belongs to the set of universal instruments to express ideas. Thus, it is obvious its use in the videogames graphics’ creation.


Attached Image: articuloSketch-5.png
Bocetos: Técnica bolígrafo. © Francis Viña - www.reactorheart.com


One of the current plastic trends in this field, put us in a retro visual aesthetic,where the usage of pixelated images coexists among others with a degree of realism by far higher and with much more graphic power. It’s not surprising the boom of tutorials explaining, with a wealth of detail, the exclusive techniques to create high quality sprites. In this sense, we can observe how the sketch can be straight rendered by means of specialized computer applications on the pixel art technique or on image processing


Attached Image: 2Articulo-Pixel-Conceptual-Art.png
Attached Image: CalimoComposicion.pngAttached Image: ComposicionMineralesPixel.png


Republished as-is and with permission from www.reactorheart.com
© Francisco Javier Viña Rodríguez

Managing Decoupling Part 4: The ID Lookup Table

$
0
0
Previous Articles
Today I am going to dig deeper into an important and versatile data structure that pops up all the time in the BitSquid engine -- the ID lookup table.

I have already talked about the advantages of using IDs to refer to objects owned by other systems, but let me just quickly recap.

IDs are better than direct pointers because we don’t get dangling references if the other system decides that the object needs to be destroyed.

IDs are better than shared_ptr and weak_ptr because it allows the other system to reorganize its objects in memory, delete them at will and doesn’t require thread synchronization to maintain a reference count. They are also POD (plain old data) structures, so they can be copied and moved in memory freely, passed back and forth between C++ and Lua, etc.

By an ID I simply mean an opaque data structure of n bits. It has no particular meaning to us, we just use it to refer to an object. The system provides the mechanism for looking up an object based on it. Since we seldom create more than 4 billion objects, 32 bits is usually enough for the ID, so we can just use a standard integer. If a system needs a lot of objects, we can go to 64 bits.

In this post I’m going to look at what data structures a system might use to do the lookup from ID to system object. There are some requirements that such data structures need to fulfill:
  • There should be a 1-1 mapping between live objects and IDs.
  • If the system is supplied with an ID to an old object, it should be able to detect that the object is no longer alive.
  • Lookup from ID to object should be very fast (this is the most common operation).
  • Adding and removing objects should be fast.
Let’s look at three different ways of implementing this data structure, with increasing degrees of sophistication.

The STL Method


The by-the-book object oriented approach is to allocate objects on the heap and use a std::map to map from ID to object.

typedef unsigned ID;

struct System
{
	ID _next_id;
	std::map<ID, Object *> _objects;

	System() {_next_id = 0;}

	inline bool has(ID id) {
		return _objects.count(id) > 0;
	}
	
	inline Object &lookup(ID id) {
		return *_objects[id];
	}
	
	inline ID add() {
		ID id = _next_id++;
		Object *o = new Object();
		o->id = id;
		_objects[id] = o;
		return id;
	}
	
	inline void remove(ID id) {
		Object &o = lookup(id);
		_objects.erase(id);
		delete &o;
	}
};

Note that if we create more than four billion objects, the _next_id counter will wrap around and we risk getting two objects with the same ID.

Apart from that, the only problem with this solution is that it is really inefficient. All objects are allocated individually on the heap, which gives bad cache behavior and the map lookup results in tree walking which is also bad for the cache. We can switch the map to a hash_map for slightly better performance, but that still leaves a lot of unnecessary pointer chasing.

Array With Holes


What we really want to do is to store our objects linearly in memory, because that will give us the best possible cache behavior. We can either use a fixed size array Object[MAX_SIZE] if we know the maximum number of objects that will ever be used, or we can be more flexible and use a std::vector.

Note:  
If you care about performance and use std::vector<t> you should make a variant of it (call it array<t> for example) that doesn’t call constructors or initializes memory. Use that for simple types, when you don’t care about initialization. A dynamic vector<t> buffer that grows and shrinks a lot can spend a huge amount of time doing completely unnecessary constructor calls.


To find an object in the array, we need to know its index. But just using the index as ID is not enough, because the object might have been destroyed and a new object might have been created at the same index. To check for that, we also need an id value, as before. So we make the ID type a combination of both:

struct ID {
	unsigned index;
	unsigned inner_id;
};

Now we can use the index to quickly look up the object and the inner_id to verify its identity.

Since the object index is stored in the ID which is exposed externally, once an object has been created it cannot move. When objects are deleted they will leave holes in the array.


Attached Image: id_lookup_1.png


When we create new objects we don’t just want to add them to the end of the array. We want to make sure that we fill the holes in the array first.

The standard way of doing that is with a free list. We store a pointer to the first hole in a variable. In each hole we store a pointer to the next hole. These pointers thus form a linked list that enumerates all the holes.


Attached Image: id_lookup_2.png


An interesting thing to note is that we usually don’t need to allocate any memory for these pointers. Since the pointers are only used for holes (i. e. dead objects) we can reuse the objects’ own memory for storing them. The objects don’t need that memory, since they are dead.

Here is an implementation. For clarity, I have used an explicit member next in the object for the free list rather than reusing the object’s memory:

struct System
{
	unsigned _next_inner_id;
	std::vector<Object> _objects;
	unsigned _freelist;

	System() {
		_next_inner_id = 0;
		_freelist = UINT_MAX;
	}

	inline bool has(ID id) {
		return _objects[id.index].id.inner_id == id.inner_id;
	}
	
	inline Object &lookup(ID id) {
		return _objects[id.index];
	}
	
	inline ID add() {
		ID id;
		id.inner_id = _next_inner_id++;
		if (_freelist == UINT_MAX) {
			Object o;
			id.index = _objects.size();
			o.id = id;
			_objects.push_back(o);
		} else {
			id.index = _freelist;
			_freelist = _objects[_freelist].next;
		}
		return id;
	}
	
	inline void remove(ID id) {
		Object &o = lookup(id);
		o.id.inner_id = UINT_MAX;
		o.next = _freelist;
		_freelist = id.index;
	}
};

This is a lot better than the STL solution. Insertion and removal is O(1). Lookup is just array indexing, which means it is very fast. In a quick-and-dirty-don’t-take-it-too-seriously test this was 40 times faster than the STL solution. In real-life it all depends on the actual usage patterns, of course.

The only part of this solution that is not an improvement over the STL version is that our ID structs have increased from 32 to 64 bits.

There are things that can be done about that. For example, if you never have more than 64 K objects live at the same time, you can get by with 16 bits for the index, which leaves 16 bits for the inner_id. Note that the inner_id doesn’t have to be globally unique, it is enough if it is unique for that index slot. So a 16 bit inner_id is fine if we never create more than 64 K objects in the same index slot.

If you want to go down that road you probably want to change the implementation of the free list slightly. The code above uses a standard free list implementation that acts as a LIFO stack. This means that if you create and delete objects in quick succession they will all be assigned to the same index slot which means you quickly run out of inner_ids for that slot. To prevent that, you want to make sure that you always have a certain number of elements in the free list (allocate more if you run low) and rewrite it as a FIFO. If you always have N free objects and use a FIFO free list, then you are guaranteed that you won’t see an inner_id collision until you have created at least N * 64 K objects.

Of course you can slice and dice the 32 bits in other ways if you hare different limits on the maximum number of objects. You have to crunch the numbers for your particular case to see if you can get by with a 32 bit ID.

Packed Array


One drawback with the approach sketched above is that since the index is exposed externally, the system cannot reorganize its objects in memory for maximum performance.

The holes are especially troubling. At some point the system probably wants to loop over all its objects and update them. If the object array is nearly full, no problem, But if the array has 50 % objects and 50 % holes, the loop will touch twice as much memory as necessary. That seems suboptimal.

We can get rid of that by introducing an extra level of indirection, where the IDs point to an array of indices that points to the objects themselves:


Attached Image: id_lookup_3.png


This means that we pay the cost of an extra array lookup whenever we resolve the ID. On the other hand, the system objects are packed tight in memory which means that they can be updated more efficiently. Note that the system update doesn’t have to touch or care about the index array. Whether this is a net win depends on how the system is used, but my guess is that in most cases more items are touched internally than are referenced externally.

To remove an object with this solution we use the standard trick of swapping it with the last item in the array. Then we update the index so that it points to the new location of the swapped object.

Here is an implementation. To keep things interesting, this time with a fixed array size, a 32 bit ID and a FIFO free list.

typedef unsigned ID;

#define MAX_OBJECTS 64*1024
#define INDEX_MASK 0xffff
#define NEW_OBJECT_ID_ADD 0x10000

struct Index {
	ID id;
	unsigned short index;
	unsigned short next;
};

struct System
{
	unsigned _num_objects;
	Object _objects[MAX_OBJECTS];
	Index _indices[MAX_OBJECTS];
	unsigned short _freelist_enqueue;
	unsigned short _freelist_dequeue;

	System() {
		_num_objects = 0;
		for (unsigned i=0; i<MAX_OBJECTS; ++i) {
			_indices[i].id = i;
			_indices[i].next = i+1;
		}
		_freelist_dequeue = 0;
		_freelist_enqueue = MAX_OBJECTS-1;
	}

	inline bool has(ID id) {
		Index &in = _indices[id & INDEX_MASK];
		return in.id == id && in.index != USHRT_MAX;
	}
	
	inline Object &lookup(ID id) {
		return _objects[_indices[id & INDEX_MASK].index];
	}
	
	inline ID add() {
		Index &in = _indices[_freelist_dequeue];
		_freelist_dequeue = in.next;
		in.id += NEW_OBJECT_ID_ADD;
		in.index = _num_objects++;
		Object &o = _objects[in.index];
		o.id = in.id;
		return o.id;
	}
	
	inline void remove(ID id) {
		Index &in = _indices[id & INDEX_MASK];
		
		Object &o = _objects[in.index];
		o = _objects[--_num_objects];
		_indices[o.id & INDEX_MASK].index = in.index;
		
		in.index = USHRT_MAX;
		_indices[_freelist_enqueue].next = id & INDEX_MASK;
		_freelist_enqueue = id & INDEX_MASK;
	}
};


Reprinted with permission from The Bitsquid blog.
Viewing all 17825 articles
Browse latest View live


<script src="https://jsc.adskeeper.com/r/s/rssing.com.1596347.js" async> </script>