Quantcast
Channel: GameDev.net
Viewing all 17825 articles
Browse latest View live

12 Tricks to Selling Your Ideas, Your Game & Yourself

$
0
0
I was on the 35th floor in the north conference room. Through the window, I could see the gray, rainy Toronto skyline. I was here to learn about government funding programs for Digital Media. At my table was a television/documentary producer, a toy manufacturer, and two suits who looked so dull and cliché that I didn't even introduce myself. The panel consisted of several government agency workers, a consultant, and a game developer. The information shared over two hours was good, but I enjoyed the spicy chicken wrap from the buffet a lot more. As a wrap up, the organizer asked the panel what final words they would like to share with the roughly 40 people in attendance.

With only 20% of all applicants being selected for funding, the two agency reps and the game developer stressed how important it is to sell yourself. It wasn't until this moment, when the slightly scruffy toque-wearing game developer said this, that I realized how important sales technique is for the indie dev. Fortunately, this is something I have experience with. And I am happy to share these techniques with the rest of the indie dev community.

In this article, I attempt to demystify the science and psychology of selling (pitching). I will focus on selling to EXTERNAL parties (strategic partners, customers, etc.). If people see value in this, then I'll take the time to describe how to sell to INTERNAL parties (your team, your boss, etc.).

I'm writing primarily for small indie game developers who will often need to pitch themselves -- perhaps to journalists, publishers, investors, potential hires, strategic partners, game contests, government organizations, incubators, and many more. However, these principles of selling aren't specific to game development. Anyone can use them to build their business, land a job, or convince someone to marry them :)

Before I take advice from anyone, I like to know their experience. So before I go any further, let me digress a moment to summarize my professional sales experience.


bestbuy.jpg


I began selling as a full time commission-only computer sales person at a Canadian electronics retailer called Future Shop (similar to Circuit City or Best Buy). The company paid 25% of the profit of whatever you sold. As you can quickly see: 1) recruits either learn to sell FAST or die; and 2) if you can sell, you have unlimited maximum income. I took to it like a fish to water. But I also took my new profession seriously: I learned everything I could from the extensive training program (based on the Xerox method), managers, co-workers, books, tapes, and video training series from motivational speakers such as Zig Ziglar. I did well and eventually became a sales trainer for new recruits in the corporate head office.

Now sales execs generally look down on one-to-one business-to-consumer (B2C) sales, and retail in particular -- for some good reasons, I must admit. It's usually done very poorly. But here is one important advantage: The number of pitches you can do in a day in retail is astronomical: 20-40 pitches a day every day compared to business-to-business (B2B), which allows for 1-2 a day at best. That kind of regularity, repetition, and low cost of failure (if you misspeak and lose a sale, someone new will be along in the next 5 minutes) is the perfect training ground for learning how to pitch.

I moved into B2B sales first for a web dev company (1 pitch a month), then into business for myself (about 1 pitch a month). I was still 100% dependent on my ability to sell, but now with the pressure of supporting my staff and other overhead, too! For more than 10 years, I sold custom mobile software projects ranging from small ($25-50k) to large ($700-900k). Over the years, I reckon I've sold about $6+ million across 30+ projects with a 95% closing percentage. My pitches were primarily to a C-level audience (CEO, CFO, CTO, CMO, COO).

To conclude this summary, I'll share one of my proudest sales moments:

I was about two years into my business. I was introduced by conference call to a mammoth prospective customer: We had 4 employees, and they had $4 billion in annual revenue. They used IBM for most of their IT consulting and were considering a mobile software project -- and using IBM for it. I flew into town (I still can't believe I managed to get the client to pay for my flight and hotel!), spent a day with the CTO in the board room, flew home, and closed the deal the following week by phone. Take that, Big Blue! :)

Definitions


B2B sales is most similar to what the typical indie faces -- whether you are pitching your game to a console manufacturer or a journalist. I will use the lingo of "Customer" to mean the party you are selling to.

When I use the term sale, I want to be clear what I mean. Simply put, a "sale" is when you convince someone of something. It is a transaction of the mind. It’s like Inception – but this time everyone is awake :) Once this is accomplished, handing over money, signing contracts, creating a feature article, or any action the customer does is secondary. It wouldn't have happened if you hadn't convinced them it was worth doing in the first place.

OK, let's get to it!

1. Every Buy Decision is a Largely an Emotional One.


color%20idea%20head.jpg


This is the most important and shockingly counter-intuitive truth I can share with you. If you don't remember any other principle, remember this one!

When making a decision, people like to think they are rational and logical. While they know they have emotions, they don't understand or believe that emotions make up probably 80% of their decisions. Don't burst their bubble! The poor souls living in the Matrix are happy there!

For example, let's say you are house shopping with your spouse. You look at two houses with roughly the same features, location, and price. But the more expensive house that is slightly older and needs more work just has a great living room that seems perfect for family visits. On a pro/con list, you should not choose this one -- but most people do. Why? Because you have an emotional attachment that drives a seemingly fully rational decision.

Ever got a job you were slightly unqualified for? Ever NOT get a job you were overqualified for? If your answer is “yes,” you know from experience the huge role emotion plays in human decision-making.

It is NOT all about features, merit, dollars and cents, brand or background; sales technique can overcome ANY weakness or hurdle if executed the right way. You too can beat IBM! Or you can be in the best position (factually and objectively) and totally blow it :) Success is within your grasp -- something you can control through sheer determination.

What I’m trying to say is that time spent learning and practicing sales technique will increase your closing percentage -- NOT because your product changed, but because of how you pitched it. More features won't sell your game; you will!

Pro Tip: My good friend and English professor taught me when writing persuasion (sales) literature for a friendly audience to save your strongest point for last. But when writing to a skeptical audience, use your strongest point first because they may never read any further. Good advice!

2. Sell Because it's Your Job.


yesterdaytoday.jpg


No one else will sell you but you. If you won't sell you, you are screwed.

Most people are uncomfortable selling. I think salespeople rank just below politicians and lawyers on the Slimy Job Top Ten list.

I believe two major factors contribute to this:

  1. Because you gain something out of selling, somehow this makes the act immediately feel disingenuous. Your motives don't feel pure.
  2. Selling requires risking personal rejection and failure. Someone may make a face at you, respond with something hurtful, or (worse) ignore you completely.

This was true for me. I'm an introverted computer nerd who tried to attract the ladies with well-crafted autoexec.bats. I dislike meeting new people. I'll never forget the lesson a Future Shop manager shared when he noticed several shy new recruits reluctant to approach customers:

Have you ever been at a bar and seen a really attractive person across the room you'd like to meet? But you are too afraid to approach him or her? Maybe you think they are out of your league, or just want to be left alone, or look busy, or some other excuse.

Now consider this: What if you were hired by the bar owner to be a greeter. He made your job very clear: "I want you to make sure people have a good time here, so make sure you talk to each person at least once and see how they are doing."

Now how would you feel about approaching the attractive person? It's way easier! Whether it goes well or poorly, it doesn't matter anymore; you are just doing your job. You no longer feel threatened -- or threatening.

The difference between the two scenarios is not one of facts or features. Neither you nor the other person has changed. The change happened inside you. Now you feel permission or even the right to make the first move.

You need to get to the place where you give yourself permission to approach that publisher, journalist, voice actor, or general public. Until then, you will simply give yourself too many excuses not to sell.

Pro Tip: In every discussion with a customer a sale is being made. You are selling your ideas, but the customer is selling too! Either you are convincing them to buy, or they are convincing you why they shouldn't. Who will be the better salesperson?! Notice in the conclusion statement that you either give yourself permission or you give yourself excuses. A sale is being made here too! You either sell to yourself that you are allowed to sell, or you sell to yourself you aren't.


3. If you Don't Believe It, No One Else Will.


biebs.jpg


Humans are born with two unique abilities:

  1. to smell a fart in an elevator
  2. to smell a phony

In order to sell well, you must have conviction. You have conviction if you truly believe in yourself and your product. While I must admit it is possible for the highly skilled to fake conviction, there is no need to do so. Real conviction is easy and free when you are in love with your product. It will ooze out of every pore; little things like the tone of your voice, word choice, the speed at which you speak, and the brightness of your eyes. Conviction is infectious. People want to be caught up in it. Which goes right back to point #1 about the emotionality of selling.

But why does conviction sell? Because a customer is constantly scanning you to see if what you are saying is true. Conviction is important in how the customer reads you. Imagine you are trying to convince a friend to see a movie. Your friend thinks:

  1. He appears quite excited about this movie.
  2. I would only be that excited and passionate if it was a really good movie.
  3. Ergo, the movie must be really good.


prince-of-persia.gif


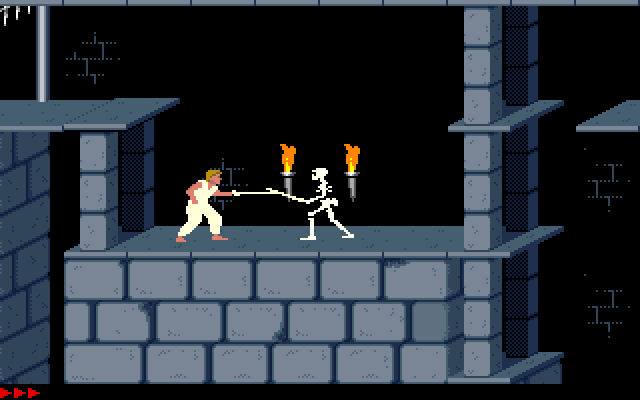
In Jordan Mechner's book, The Making of Prince of Persia, he records the process of making the first Prince of Persia game (which was incredible for its time). The production team believed in the project immensely, but the marketing department did not. When they chose the box art and shipped the title, this great game had dismal sales for the first year. Only when a new marketing department came in, believed in the product, and revisited the box art and marketing plan did the game start selling.

Conviction gives the customer the data needed to sell themselves into believing what you are saying.

This dovetails nicely with my next point.

4. Want What is Best for the Customer.


give.jpg


I'm currently doing a sales job on you (oops, I seem to have broken the fourth wall!) I'm trying to convince you that what I am saying is true -- and when put into practice, will make you better at pitching your game.

Why am I typing this at 2:36 a.m. when I could be sleeping -- or better yet, playing Mario Kart 8? Because I genuinely believe this information will help someone. It costs me very little (some time at the keyboard) and could make a real difference in someone's life.

See, I'm not typing this article for me; I'm doing it for you. Whether or not I benefit from doing so, my primary motivator is to do something good for you.

If you want to get your game featured on a certain site, stop thinking about how it is good for you to be featured and start thinking about how it is good for them to feature you. Reasons (arguments) made from the perspective of their good will impact deeper and resonate longer.

So how can you know what is good for your prospective customer / journalist / publisher / government agency?

Do your homework. Know what makes your target tick. Find out what motivates them. Discover what is important to them. More importantly, find out what is not important to them.

For the conference I attended, the purpose of the government program was to generate digital media jobs in our province. The overseer specifically told us: "When you write your proposal, be sure to point out how this will lead to job creation."

This is great advice for two reasons: The customer is not only saying "Tell me how it's good for me," but also "I'm lazy, so make it easy for me." In other words, the customer is ‘tipping his hand’ by saying "All things being equal, the proposal that more easily shows what's in it for me will be chosen."

Don't rely on your target audience to do the work of understanding. Your pitches will vastly improve if you spoon feed them the goodness!

Pro Tip: Knowing what NOT to say is just as important as what TO say. For example, I regularly listen to the Indie Haven Podcast. On one specific episode all four journalists went on a bit of a rant that if you are contacting them for the first time, do not tell them about your KickStarter. Tell them about your GAME! They said if you start your email about your KickStarter they will stop reading. So know what NOT to say and avoid the virtual trash bin!

5. Don't say what is True, say what is Believable


sail.jpg


I had just started my software company and was having lunch with a veteran entrepreneur millionaire friend to get some advice.

During the soup course he asked, "So what does your software company do?"

"We make amazing custom software," I answered.

"I understand that, but what specifically are you good at?"

"Here's the thing, we are so good with such a great process we can literally make any kind of software the customer wants -- be it web portal, client server, or mobile. We are amazing at building the first version of something, whereas many companies are not."

"That may be true, but it isn't believable."

I dropped my spoon in shock.

Maybe your role-playing game is 10x more fun than Skyrim -- not just to you, but empirically through diligent focus group testing. But don't try and approach a journalist or publisher with those claims. It may be true, but it certainly isn't believable.

What is true and believable is, "If you liked Skyrim, you'll like RPG-I-Made." Ever seen a byline or quote like that in an app description? Yep, because that is as far as you can go without crossing the line into the "unbelievable" territory.

6. Create the Need


onering.jpg


Every sales pitch is like a story, and every story is like a sales pitch. Let me explain.

You can't give an answer to someone who doesn't have the question. You can walk up and down the street yelling "42!" to people -- but if they aren't struggling to know the answer to Life, the Universe, and Everything, it won't mean a thing to them.

You can't sell a product/idea to someone who doesn't have a need. Every pitch follows the three-act story structure:

Act 1: Setup
Act 2: Establish the need
Act 3: Present your solution

We see this in The Lord of the Rings:

Act 1: Frodo is happy at home, life is good. We meet a bunch of characters are Bilbo's birthday party. -- Setup
Act 2: A ring will destroy everything Frodo loves. And people are coming to get it right now. -- Need
Act 3: The fires of Mount Doom can unmake the ring. Frodo tosses it in, by way of Gollum. -- Solution

Study the first part of infomercials to see how need can be quickly established.

Humans have plenty of basic latent needs/desires you can tap into. You don't need to manufacture a new one. When it comes to gaming, one simple one is "to feel awesome." Pretty much every game I play makes me feel awesome. Now I may or may not be awesome in real life, but I have a need/desire to feel awesome -- and games fill that need nicely.

Bringing it back to the government program, what is their need? They are handing out money and tax incentives. At first blush, there doesn't seem to be a need that I can tap into. But applying principle #4 of what's good for them, we can do our homework and discover that if the program has 20 million dollars, they HAVE to give that money out. The people working there are not evaluated by how much money they keep; they are rewarded by how much they give away. They literally have a need to give away money. But not to just anyone; they need to give it to studios that will manage it well and create long-term jobs in digital media.

As a final example, notice how I establish need for this article in paragraphs 5 and 6. This article is based on the common need for indie game devs to promote themselves.

7. Talk to the Real Decision Maker


sauron.jpg


Who is the best person to pitch you? You. So don't expect all the time and effort spent pitching a minion means they will pitch their boss on your behalf just as well.

Aragorn did not find a mid-level orc, explain his position, then hope the orc makes as impassioned a presentation to Sauron. Aragorn knew he needed to climb the corporate ladder. He went directly to the Black Gate to take his issue up with Sauron directly!

Throughout most of my B2B sales career, I initially got in the door through a mid-level manager like a project manager, IT director, or operations manager. These people have "felt need". Their team needs to do something new or is inefficient and needs software to solve it. But a $250k decision is way beyond their pay grade; they need the CFO and maybe CEO to make the decision. You can spend hours and hours pitching the minion with amazing props and demonstrations, and they turn it into a 3-line email to their boss saying your presentation was very nice. Aaarrrggghhhh!!!

Even worse, what if the competition is talking to the CEO over lunch at the country club while you are spending all your efforts on the minion?! Flanking maneuvers like this are a common reason for losing a sale.

Remember in point #1 how all decisions are really emotional? By filtering your pitch through someone to the CEO, all of the emotional trappings disappear; it literally is just features/functions on a page. Meanwhile, the sales guy at the country club is showing interest in the CEO's children, sharing stories of his own, and having a good laugh. All things being equal, 9 out of 10 times when the CEO has to decide, he'll go with the person he met. Everyone trusts what they see with their own eyes more than what was reported to them by another. Use this to your advantage.

This doesn't mean you shouldn't talk to minions or treat them like a waste of time. That is mean and dehumanizing. You won't get anywhere with that. My point is not to RELY on the minion to do the sales job for you. You have to climb the corporate ladder to the actual decision maker and give it your best. A concrete example is when I organize a pitch session with the mid-level manager, I make sure their boss is invited to the meeting. Or I do the whole pitch to the mid-level manager and then ask, "Do you think your boss would see value in having this information, too? I would be happy to come back and run through it." If they are impressed with what you've done, they are more than willing to move you up the ladder.

Now, big companies are wise to these ways and may have strict rules on who can meet with external parties. This is frustrating. The best you can do is to find the closest person to the actual decision maker and pitch your heart out.

Personally, I find this ladder-climbing the most difficult aspect of selling. But then I have to remember principle #2: It's my job. If I don't do it, no one will.

8. Sell the Appointment, not the Product


appointments.png


When are you at your best, selling-wise? In front of the person with all your tools, demos, snappy dress -- and sharing fancy coffees.

When is it harder to say “no” to someone -- over the phone/email or in person? In person.

Most people suck at cold calling/emailing. While it is a sucky task, one big reason people fail is because they have the wrong objective. They think that as soon as they get the person's attention, it is time to pitch. By-the-power-of-Grayskull no!!!

When you first encounter someone you need to pitch, your goal is to get a meeting where the person is relaxed, focused, and mentally prepared to listen to what you have to say. Your email or call may have interrupted their day between meetings, or baby bottles -- and they don't have the headspace to listen, never mind think. You will get a “no” at this stage. So give yourself every chance of success; book the meeting!

To get the meeting, you must be diligent about three things:

Keep the conversation as short as possible.
Tell just enough to whet their appetite. DO NOT tip your hand -- build the need/desire for the meeting.
Keep steering them back to the appointment

Granted, this one takes some practice -- but here is a quick example to get you started:

"Hi Mrs. Big Shot. I'm Thomas, and I am making a new kind of role playing game that I think would be a great addition to your platform. Could I schedule just 15 minutes of your time to show you what I'm working on? I really think you will like what I have to show you. "

"Role-playing game, eh? Dime a dozen, pal. What's so great about yours?"

"Well, I have some new A.I. techniques and combat mechanics that haven't been seen before. I’d love to meet with you to go over the key features of the game and even show you some gameplay. How about a quick meeting later this week?"

"Have you made anything before, or this your first time?"

"I've released two games previously, but I would be more than happy to go over my qualifications and previous experience with you when we meet. Is next week better than this week?"

"I'm pretty busy this week, but schedule something next week with my assistant."

"Thank you Mrs. Big Shot! I look forward to meeting you!"

Why does this work? Because curiosity sells. Since you haven't given Mrs. Big Shot something yet to reject, she is open and slightly curious to see if maybe, just maybe, you have the next big thing.

9. Inoculation


inoculation.jpg


The ability to inoculate against objections is probably the single biggest gain a newbie sales person can make. Removing and eliminating objections is the key to closing the sale.

In real life, we get vaccinations to prevent disease. The process is to introduce a small weak version of the disease into your body against which your immune system will build a proper defense for the long term. When the actual disease comes along, you are immune.

Inoculation (in sales) is the process by which a salesperson overcomes objections before they have a chance to build up and fester. The longer the objections gestate in the customers’ minds, the quicker the "virus” takes hold. You do this by bringing up the objection first yourself, and then immediately answering it. If you bring up the objection first, the virus is in its weakest possible state -- and the customer becomes impervious to it.

So after you prepare your pitch -- whether it’s website text, or email -- you have to look at it from the customer’s perspective and see where your weaknesses are. Maybe get a friend to help you with this.

Let's imagine you've come up with three likely objections to your game:
A) You've never made a game before.
B) Your selected genre is oversaturated.
C) Your scope is aggressively large.

Before I go any further, let's reflect for a minute on how likely you are you to close the deal with those three objections hanging in the customer’s mind. Not very likely. Even if they haven't voiced them yet, just thinking them will torpedo your chance of success.

Now imagine all three of those objections have been inoculated against. It's clear sailing to closing the deal!

So here is an important principle: If someone raises an objection when you try to close, what they are really saying is that you haven't successfully pre-empted the objection by inoculating against it. Learn from this! Remember this objection for next time. Spend time thinking through possible ways to inoculate against it. The more chances you have to pitch, the more experience you will have with objections, and the more inoculations you can build into the next version of your pitch. Sales is a real time strategy game! Prepare your defenses well!

Another principle to remember: Customers are not necessarily truthful and forthright. They may have objections but haven’t shared them with you. If they don't share them, you have no way to overcome them -- and your sale dies right then and there. Inoculation is the best defense against this.

Pro Tip: Don't save all your inoculations for the end of your pitch; it's too late then. Sprinkle them throughout the pitch; they are more easily digested one at a time. Early in the presentation, you should be inoculating against conceptual objections such as, "Is this even a good idea?" Later on in the presentation when you are about to go for the close, you need to address implementation objections such as, "Do you have a realistic team to build this?"

A further benefit of inoculation is that by bringing up your perceived weakness yourself, you gain credibility and show that you can think critically. This goes to character, and people generally want to work with credible people who can think critically.

So how can we inoculate against those three example objections?

A) You've never made a game before.

Early in the presentation, like when you are sharing your background or how you came up with the concept of the game. Say something like, "Now this is the first game I'm making myself. However, I have X industry experience doing Y. I also have two mentors who have released several titles that I meet with regularly. When I don't know what to do, I lean on their experience. "

B) Your selected genre is oversaturated.

Mid-presentation, show some screenshots or demo -- and the genre will be known. You can say something like, "Now I know what you are thinking: Another First Person Cake Decorating game? And initially when I was designing it, I felt the same way. But here is why I think our First Person Cake Decorator is unlike anything else in the market . . ."

C) Your scope is aggressively large.

Late presentation just before the close addresses objections like this. "Now I recognize that our scope seems too large for our small team. But team member X worked on such and such, and it had 3 times as many A.I. agents as our game. And we are open to discussing the scope with experienced developers. At the end of the day, we want to make something new and compelling for the genre and are looking for key partners like you to help us get there."

Pro Tip: When the customer asks for implementation details such as scheduling, resources, costs, specific technologies, start getting excited. These are buying signals. The customer is rolling your proposal around in their mind trying to imagine working with you. So make sure you answer all the questions truthfully and completely!

10. Leave Nothing to the Customer's Imagination


reality.jpg


Since I was pitching custom software, I had nothing to show because it didn't exist yet. It's one thing to pitch a car or house that is right there in front of the customer. But to pitch an idea? And they have to agree to spend the money first before they see anything tangible? This is extremely difficult!

Now I imagine in the game space that the people you meet probably exercise their imaginations regularly. But in the business space, I can assure you that the CFOs are NOT hired for their creative imaginations. More likely, their lack of it.

So what do we do?

Do not rely on the customer's imagination to understand what you intend to do or build. Make it as concrete for them as possible. Words are cheap, so use props.

One reason my software company closed many deals despite being up against larger, more experienced competitors is the lengths we would go to show the customer how their eventual software may work. Our competitors would hand in four-page proposals; ours were 20-30 pages. We spent dozens of hours mocking up screens and writing out feature descriptions. Sometimes we would build a demo app and throw it on a handheld. All this so they could see, touch, and taste the potential software in the board room and close the deal. Even if our software solution cost more and would take longer to complete, the customer would go with us because our presentation was more concrete. They could see success with us; whereas, they would have to imagine success with the competitor.

In games, you can make a demo. But if that is too much, you can at least get an artist to make mock screens, get some royalty-free music that fits the theme, and then show footage from other games that inspire you.

Props beat words every day of the week.

Pro Tip: When up against competitors, you always want to present last. I've been in many "showcase showdowns" over the years where the customer will hear presentations from 3 or 4 companies throughout a day. The reason you want to go last is whatever presentations they saw before yours creates "the bar," the standard of excellence. If you are better than that, it will be so completely obvious to them that half your work is already done. But what if you aren't way better than the competition? However amazing the first presentation may have been, it fades in the customer's memory. Perhaps by the fourth presentation, they have forgotten all the glitz of the first. It's sucky to lose that way, but remember: The decisions are emotionally charged and based on faulty humans rather than faultless computers. Go last, have the strongest last impression, and improve your chances of winning!

11. Work Hard! Earn it!


rudy.jpg


The movie Rudy is a great example of this principle. Based on a true story, Rudy wants to play football for Notre Dame. Trouble is he isn't big, fast, or particularly good at football. But he tries! Oh how he tries! He practices more and with greater gusto than anyone else. Finally, at the end of the movie, Rudy is given the chance to play in a game. The crowd chants and the movie audience cries because it's all just so wonderful!

Almost all of the software deals I closed were bid on by multiple competitors. Canadians love the "3 quotes" principle. When I would check in on my client waiting to hear that we won the job, it would boggle my mind to hear the decision is delayed because one of the competitors was in late with their proposal. Are you kidding me?!

We delivered our proposals on time every time. That may have meant some late nights, but failure wasn't an option. And as previously mentioned, we always delivered more in our proposals than our competitors did.

Everyone likes to reward a Rudy because we all want to believe you can overcome your weaknesses through hard work and dedication and achieve your goals.

Working hard during your pitch says more about your character than anything else. It gives the customer the impression, "If they work hard here, they will work hard for the whole project.” The reverse is also true: "If they are lazy and late here, they will be lazy and late for the whole project." Again, talent isn't everything; who you are inside and how you work is.

I have personally awarded work to companies/contractors because they worked harder for it than the others, even though they weren't the best proposal I received.

Pro Tip: Be the best to work with. When I am in the process of pitching someone, I am "all hands on deck" for instant responses to questions or ideas from the customer. An impression is not just made with how you answer but how quickly you answer. If customers encounter a question and get an email response within 12 minutes, they are impressed and know you are "earning it.”


12 You Have to Ask for the Close


agreement.jpg


You miss 100% of the shots you don't take. – Wayne Gretzky

I'm not great at networking or cold calling. I’ve already shared that I'm not great at ladder climbing. But where I really shine is closing. Closing a deal is like winning a thousand super bowls all wrapped up into a single moment.
With a bow.
And sparklers.

I could write a whole article just on closing (and there are books dedicated to it), so I've limited our time to just the most important, most missed principle: You have to ask for the close.

I have seen great sales presentations fail because the presenter never asked for the deal. They talked and talked and said lots of wonderful things, but then just sat there at the end. What were they expecting? The customer to jump out of their seat screaming, "I'll take it!" Or maybe it's as if there is a secret that the salesperson is there to make a sale and they don't want to blow their cover by actually saying, "So, will you choose us?"

If you don't ask for the close, you won't get the objections -- and if you don't get past the objections, you won't win. So ask for it!

Now to some specific techniques to help you.

First, be clear about asking for the close. If you want an interview, say "So do you think you can interview us?" If you want a meeting with someone, say "So can we book a meeting for Tuesday?"

If you really struggle with what I just said, try the pre-close to boost your confidence:
"So what do you think so far?"

That is not a close. That is a non-threatening temperature check. The customers are just sharing their thoughts, tipping their hand to tell you what they like and any immediate objections that come to mind. After you discuss their thoughts, you still have to circle back around to booking that interview or the meeting.

Second, when you ask for the close, the next person who speaks loses. Silence is generally uncomfortable for people, so this one requires real grit and determination. Many salespeople say something during the silence to try and help their case. They are doing the opposite. Asking for the close is a pointed question that requires the customer to make a mental evaluation and then a decision. If you say anything while they are doing the mental process, you will distract them and cause the conversation to veer away from the close to something else: tertiary details, objections, etc.

I was in a meeting with a potential client when I had the unfortunate task of telling them their software wouldn't be $250k but $400k and take months longer. I explained why and then asked for the close: "This is what it costs and how long it takes to do what you want to do. It will work exactly as you want. Would you like to go ahead?"

They were visibly mad at the ballooned cost/time. I sat in silence for what felt like hours but was probably 3-4 minutes as the VP stared at the sheets I'd given him. Finally, he said "I don't like it, I'm not happy, but ok. But this date has to be the date -- and no later!" The silence put the burden of making a decision squarely on the VP, and he decided.

Third, expect objections. Even if you did all your inoculations correctly, there will be something you never thought of that they did. Hopefully, you got the big ones out of the way -- but I don't think I've been in a meeting where they just said, "Great presentation. Let's do it!"

Sometimes people bring up objections for emotional reasons: They just don't want to work with you. Like the girl who won't go out with you because she has to wash her hair that night. There really is nothing you can do at that point. You've failed to build rapport or show how you can meet their needs. You won't recover these blunders at the closing stage.

But for real objections, these are legitimate reasons preventing them from going with you. Get past those, and it's time for the sparklers!

It is critical to first get all the objections in one go. This is most easily done with a simple question, "Other than X, is there anything else preventing us from working together?" I'll show you why this is important in a moment.

If possible, write down every objection they give you. Most people get hung up on one or two. In my hundreds of meetings I have never seen someone able to list 4+ objections to a pitch.

Now work through each one of the objections in turn -- treating them seriously. Treat them like they are the end of the world if unresolved; because they are! Before moving on to the next objection, say "Does what I just shared address your concern?" If they say yes, cross that off the list.

Pro Tip: You don't have to deal with the objections in the same order they raised them in. If there are some quick ones and then a hard one, get the quickies out of the way first, build up momentum, turn the room temperature in your favor, and go for the hard one. Also, if you do handle them out of order you maintain complete control of the conversation because they can't anticipate what is coming next.

Once you have dealt with each of the listed objections, say something like, "Well we've addressed A, B, and C. So now do you think we can work together?"

By gathering the list of objections first, you have achieved several things. First, you've shown you listened to them. Listening and understanding can overcome much of the objection. Second, it brings a natural path back to the close! They listed out the agenda, and you dealt with it; there is nothing left to do but close! Finally, you are preventing them from coming up with new objections. This is a psychological trick, since you gave them every opportunity to list out their objections earlier -- now that time has passed. They look foolish if they do it again. Sort of like when you get to a certain point in a conversation, it's just too late to ask the person their name. If they raise new objections at this point, it looks like they are just stalling or delaying. Maybe that is what they are doing -- because the objections were emotional ones.

These principles apply to writing as well! Like a website "squeeze" page to get newsletter subscribers. You have to be clear and obvious about what you want: You want a newsletter signup. Well, make it clear and easy for them to do that!

Pro Tip: When negotiating (which is just a sale in a different form), when is it better to name a price? Should you go first -- or let them be first instead? Common knowledge is to go last, which happens to be the wrong answer. According to the Harvard Business Essentials: Negotiation book you should speak first. The person who speaks first frames the rest of the conversation and is more likely to get it to go their way.

I saw the truth of this early on in my business. I went to downtown Toronto to meet with a client and negotiate the value of something. I sat down with the CFO, and he was going on and on about how what he wanted wasn't very valuable to me. Then he said, "What do you think its worth, Thomas?" I said $30,000 -- and he almost fell backwards out of his chair. He was thinking only $1,000-2,000. But since I went first, his paltry fee looked insulting and ridiculous. We ended up at $15,000. Half of what I wanted, but 8x-15x more than he thought going in. Speaking first works.


Conclusion


Well, there you have it: roughly 12 years of sales experience boiled down to 12 principles.

Did I "close" you? Was this information helpful in improving your pitches? Use the comments to let me know!

SDG

You can follow the game I'm working on, Archmage Rises, by joining the newsletter and frequently updated Facebook page.

You can tweet me @LordYabo

When do videos need voiceovers?

$
0
0
This is a question we often hear from our clients. Recently we produced two video trailers for mobile games. The trailers were in the same style – epic battles, swords, Viking knights – but there was one big difference. One trailer had voiceovers and the other did not.

Looking at the results, we wanted to share our thoughts about when videos need voiceovers, and when they don’t. There are important pluses and minuses we think everyone should be aware of. And while we’re at it, we wanted to ask your thoughts on the matter too.

Here are the trailers:


With voiceover


Videos provide an enormous advantage when you deliver your message to potential customers: you can involve more sensory and cognitive inputs by offering visuals, sound and voice.

People use their ears to augment what they see. When we see events that are “mute”, we subconsciously think that something is wrong. We are less trusting and prepare ourselves for danger.

In terms of evolutionary psychology, think of our ancestors who survived by hearing their enemies coming in the distance. After thousands of years of living in society, people are really good at picking up on the subtle nuances and intonation of how others speak! We use this information to form impressions of the people we talk with. So when we hear information given in a pleasant, confident voice, we begin to subconsciously trust the speaker. Voice, timbre and tone are an important way of influencing viewers.

Voice is also the simplest way of conveying emotion and setting the tone of a video.

Example. Darklings II Teaser

And if you have an information-dense video – such as a presentation or tutorial – voiceovers are a critical tool.

Without voiceover


If your video’s main message can be expressed visually (as can be done for some simple and obvious products), voiceovers may not be needed at all. For products like these, it’s hard to write a good voiceover text because there is almost nothing to say.

Example. Two teasers

But if you skip voiceovers, you must compensate by putting more effort into graphics and animation. Sometimes a voiceover and music set the mood and the visuals do not have to be 100% polished in order to achieve the right effect. In a video without voiceovers, every second of video must be spick-and-span. But these videos can offer savings due to the absence of recording and studio work.

The #1 advantage of going voiceover-less is that these videos are immediately understandable to any viewer anywhere in the world. And even if the video contains bits of text, these words can be easily localized into other languages.


7624ed57eb0046508e03d0a6ea1090bb.jpg
Localizing a video without voiceovers is easy! Just change the labels shown on screen.


By comparison, localizing voiceovers takes a lot of time and money. Translating the text, finding voice talent and assessing pronunciation in languages you don’t know – that’s the easy part. The hard part is that all the animation needs to be redone for each new voice, since different languages have different timings. That is why making the visuals sync up with the audio in a new language can cost 50 to 70% of the amount of the original animation.

The bottom line is that if your product is simple, you have a simple and understandable message for your viewers, and you want to cheaply make a video that everyone can understand, you probably do not need voiceovers. But if your goals are loftier, our advice is to do it right the first time and get the most out of your video by adding voice.

What do you think?

Rendering with the NVIDIA Quadro K5200

$
0
0
NVIDIA gave me a chance to review the Quadro K5000 graphics board back in 2011 and now here, a short three years later, they've come up with the Quadro K5200 board. Initially, this seemed like a short little jump from the previous board with only a simple 2 tacked on, but after taking this board for a spin, I'm even happier than before.

First, a little follow up on the previous board. I've been using the Quadro K5000 board in my machine since writing the review and it works so well that I don't notice it is even there, except when I render a seriously complex scene. When it cranks up to full steam, I can hear its fan kick on and start spinning. Needless to say, it kicks on quite a lot. The Quadro board has literally saved me hundreds of hours or render time that I've taken for granted.

A good example of this is a realistic Earth rendering project that I recently worked on. The scene used high-res maps of the Earth surface along with two layers of cloud data. The textures for the scene were almost 3GB in size. When I rendered this complex scene it took some time to load all the textures into memory, but once loaded, I could render the Earth from any viewpoint in under 5 minutes per frame. As a result of the Quadro board, I was able to complete an animated project of 300 frames in one evening instead of weeks.

I have noticed that occasionally the board will hiccup and reset itself, but all I see when this happens is that the screen will flicker for a split second and then come back with a simple warning dialog box that basically says, "I had some trouble, but I'm okay now." The hiccups never interrupted my workflow or halted my rendering.

The Installation


When you first pull this graphics card out of the box, it really is a thing of beauty (see Figure 1). It is a hefty board filling two slots with its own fan and a sleek design that lets you know that it really means business. The board was a monster to fit into my computer and I had to remove the hard drive to even get it installed, but once it was installed, I made a quick visit to the NVIDIA website for the latest driver. Once the driver was installed, it found and set my display to use my same previous settings. The entire installation process took less than an hour and I'm productive once again.


Attached Image: fig1.png
Figure 1: The NVIDIA Quadro K5200 graphics board looks like a self-contained system itself. Image provided by NVIDIA.


First Impressions


The first thing I tried once the card was up and running was to load a heavy scene provided by NVIDIA for the last review. The scene was a high-res model of a Bugatti Veyron car complete with detailed materials. I rendered the scene using 3ds Max's iray renderer with 500 iterations and it screamed through the job.

I used the exact same file with the same settings so I could compare the results to the previous graphics card. When this image (see Figure 2) was rendered with the Quadro K5000 graphics card, the image at 1300 by 900 was rendered in just over 5 minutes. The same scene was rendered again with the Quadro K5200 graphics card in just 3 minutes and 31 seconds.


Attached Image: fig2.png
Figure 2: This beautiful model of a Bugatti Veyron was rendered using the NVIDIA Quadro K5200 graphics card in just 3 minutes and 31 seconds.


Some of the credit needs to go to the software. The development teams behind 3ds Max and iray have also been busy updating their rendering pipeline and make the software more efficient. The software has also been designed to take advantage of the incredible hardware found in this graphics card.

Upgrade Details


Within the Technical Details document, the extent of the upgrade for this new board is explained. The first big difference is that the number of CUDA Cores has increased from 1536 for the K5000 board to 2304 for the K5200. The Memory Size has doubled from 4GB to 8GB and the Memory Bandwidth has also increased from 173 GB/s to 192 GB/s. This allows data to be pumped to the board faster. The Single Precision Computer Performance as measured against standardized benchmarks has increased from 2.2 TFLOPS to 3.0 TFLOPS. The only other difference is that the K5200 card consumed more power at 150W verses 122W for the K5000 card.

Each Quadro graphics board can be connected to up to four monitors per GPU. This gives you ample real-estate to keep everything with your project organized. The direct outputs from the board include two Display Ports, one Dual-Link DVI-I and one Dual-Link DVI-D. The Quadro K5200, like its predecessor, also supports Quadro Sync, which allows up to four K5200 boards to work together to synchronize 16 monitors simultaneously (see Figure 3). This requires a separate Quadro Sync card.


Attached Image: fig3.png
Figure 3: Several Quadro graphics boards that can synchronized to create a "power wall" of monitors. Image provided by NVIDA.


The Quadro 5000 board also supports OpenGL 4.4, Shader Model 5.0 and DirectX 11.

Summary


In summary, several years ago, I was blown away with the speed and power of the Quadro K5000 graphics board and the new Quadro K5200 graphics board improves on the original. I found installation and setup to be simple and quick and the graphics board has worked seamlessly with all my 3d modeling, animation and rendering packages.

You can find more information on 3ds Max and NVIDIA iray at the www.autodesk.com web site and more information on the Quadro line of professional graphics cards is available at www.nvidia.com/quadro.

Barebones of Quests

$
0
0
I'll go ahead and start with the obligatory "I've been gaming for as long as I can remember". Around 14-15 years ago, games evolved from being just fun and exciting challenges and finally something that players can use to escape from reality. You had great titles such as Morrowind that were rich in lore and story. Sometimes the history of the world you're in would explain itself through quests. And of course, it's very hard to pull off a progressive story without some variant of quests or missions. It's just one major question that a lot of designers ask themselves:

What's the character's incentive for going on this quest?

The overall structure of quest design is surprisingly simple. Let's take a look at what most quests in video games are made of.

Don't worry about the story


Well, not yet, anyway. After all, the #1 priority in the creative side of games should be the challenges players have to go through. Before we go any further, let's put ourselves in a position where a designer cares more about progressing his story in a scenario as opposed to making a fun quest.

Jonas was a powerful Battlemage. He had unlocked all five sacred runes and was fully prepared to enter the Dark Wizard's lair. Except a Stone Guardian stood in front of the entrance. Jonas fought the Stone Guardian, who shattered to pieces. When he went inside the lair, the Dark Wizard decided to absorb the Stone Guardian's soul and grew stronger than ever.


Okay, not my best work, but you get the idea. This sounds like it'd be really enjoyable to go through because the story's so deep. Hey, even from a gameplay perspective it's pretty neat. The Dark Wizard has new powers in the final boss battle!

Except, there's one thing missing. The depth. Not the kind of depth you look for in a story, either. I'm talking about the sequence of actions the player must take in order to complete his mission. When you think about it, the final quest really just boils down to the player going to the lair and killing two people. He should have built his story off of the barebones of a fun quest.

Barebones of quests


I think you've seen them in games before, too. You've played enough mediocre and just plain awful RPG games to see that all quests have this skeletal structure of blandness that's added on to by story. These barebones often include basic quest structures such as:
  • Go find this item.
  • Go kill this mob.
  • Bring this mob to this location safely.
  • Go kill X amount of mobs and bring me their substance.
The sad thing is that many games out there do not add "meat" to their structure. Instead, the quest-givers will often say something along the lines of "Go to this cave and find this because it's important to me. I will give you gold." . Sound familiar? How about, "Those thugs stole my stuff. Go to their camp and bring it back for me." ?

Of course, a few "simple" side-quests here and there don't hurt, but it's when they outnumber the good stuff and sometimes even take place in the main plot that it gets out of hand.

A good way to avoid "skinny" plots is to always ask, "Why?" when adding another part to the sequence. Like this:

Go kill those spiders and bring me their venom

Because they've been kidnapping children and it's too dangerous to step directly into their lair. We need to know whether or not this venom is instantly lethal.

Sneak into that abandoned house and steal this journal

Because that house isn't abandonded, these spiders are possessed by a witch living in there. We need her notes. Try not to startle her, will you?

Go into their lair and bring this little boy to the Castle

Because that's the Prince and we just found out that he might just still be alive. We went over the witch's notes, she wants to extract his youth and live for eternity. We also found out that the reason these spiders didn't eat her before she attempted magic on them was because she mixed their venom with Vampire Dust. This renders you invisible to these spiders, so drink this.

So, now you have a somewhat interesting quest about this evil witch trying to possess nearby spiders to bring children to her lair so that she will be young forever. This was all from expanding the "Why's" of a pretty basic quest sequence.

Conclusion


Now we know how to give a quest both an interesting story and a fun sequence of action. Basic tasks can be expanded into something really deep with a bit of effort, and it's up to you to either conform your stories to your quests, or the other way around. This method can be used for those who aren't good at coming up with stories and need to create an incentive to play the game, or for those who are great with stories and need to create quests that can also stand as a fun and challenging experience.

Standard Gameplay and IAP Metrics for Mobile Games (Part 3)

$
0
0
This article continues on from my previous articles (Part 1 and Part 2).

In this article we will be looking at using analytics to optimize in app purchases in our example game "Ancient Blocks". As before, the example game featured in this article is available on the App Store if you want to see the game in full.

The reports shown in this series were produced using Calq, but you could use an alternative action based analytics service or even build these metrics in-house. This series is designed to cover "What to measure" rather than "How to measure it".

Optimizing in-app purchases (IAPs)


The goal of most mobile games is to either generate brand awareness or to provide revenue. Ancient Blocks is a commercial offering using the freemium model and revenue is the primary objective.

The game has an in game currency called "Gems" which can be spent on boosting the effects of in game power ups. Using a power up during a level will also cost a gem each time. Players can slowly accrue gems by playing. Alternatively a player can also buy additional gems in bulk using real world payments.


Attached Image: AncientBlocks-IAP-Screens.jpg


Our goal here is to increase the average life time value (LTV) of each player. This is done in 3 ways: converting more players into paying customers, making those customers pay more often, and increasing the value of each purchase made.

Some of the metrics we will need to measure include:
  • Which user journey to the IAP screen gives the best conversions?
  • The number of players that look at the IAP options but do not go on to make a purchase.
  • The number of players that try to make a purchase but fail.
  • Which items are the most popular?
  • The cost brackets of the most popular items.
  • The percentage of customers that go on to make a repeat purchase.
  • The customer sources (e.g. ad campaigns) that generate the most valuable customers.

Implementation


Most of the required metrics can be achieved with just 4 simple actions, all related to purchase actions:
  • Monetization.IAP - When a player actually buys something with real world cash using in-app purchasing (i.e. buying new gems, not spending gems).
  • Monetization.FailedIAP - A player tried to make a purchase the transaction did not complete. Some extra information is normally given back by the store provider to indicate the reason (whether that be iTunes, Google Play etc).
  • Monetization.Shop - The player opened the shop screen. It's important to know how players reached the shop screen. If a particular action (such as an in-game prompt) generates the most sales, then you will want to trigger that prompt more often (and probably refine its presentation).
  • Monetization.Spend - The player spent gems in the shop to buy something. This is needed to map between real world currency and popular items within the game (as they are priced in gems).

ActionProperties
Monetization.IAP
  • ProductId - The number / id of the product or bundle being purchased.
  • MaxLevel - The highest level the user has reached in the game when making this purchase.
  • ScreenReferrer - Identifies the screen / prompt / point of entry that eventually triggered this purchase.
  • $sale_value (added by trackSale(...)) - The value of this sale in real world currency.
  • $sale_currency (added by trackSale(...)) - The 3 letter code of the real world currency being used (e.g. USD).
Monetization.FailedIAP
  • ProductId - The number / id of the product or bundle that failed to be purchased.
  • Response - A response code from the payment provider (if given).
  • Message - A message from the payment provider (if given).
Monetization.Shop
  • Screen - Which shop screen this was (such as the main shop, the IAP shop etc).
  • ScreenReferrer - Identifies the screen / prompt / point of entry that resulted in the shop being displayed.
Monetization.Spend
  • ProductId - The number / id of the item being spent on.
  • Type - The type of spend this is (Item Upgrade, Cooldown, Lives, etc).
  • Gems - The number the games (in game currency) being spent.
  • MaxLevel - The highest level the user has reached in the game when making this purchase.
  • ScreenReferrer - Identifies the screen / prompt / point of entry that eventually triggered this purchase.

In addition to these properties Ancient Blocks is tracking range of global properties (set with setGlobalProperty(...)) detailing how each player was acquired (which campaign, which source etc). This is done automatically with the SDK where supported.

IAP conversions


One of the most important metrics is the conversion rate for the in game store, i.e. how many people viewing the store (or even just playing the game) go and make a purchase with real world currency.

Typically around 1.5 - 2.5% of players will actually make a purchase in this style of freemium game. The store-to-purchase conversion rate however is typically much lower. This is because the store is often triggered many times in a single game session, once after each level in some games. If a game is particularly aggressive at funnelling players towards the store screen then the conversion rate could be even lower - and yet still be a good conversion rate for that game.

To measure this in Ancient Blocks a simple funnel is used with the following actions:

  1. Monetization.Shop (with the Screen property set to "Main") - the player opened the main shop screen.
  2. Monetization.Shop (with the Screen property set to "IAP") - the player opened the IAP shop (the shop that sells Gems for real world money).
  3. Monetization.IAP - the player made (and completed) a purchase.


Attached Image: IAP-Conversion-Funnel.png


As you can see, the conversion rate in Ancient Blocks is 1.36%. This is lower than expected and is a good indicator that the process needs some adjustment. When the designers of Ancient Blocks modify the store page and the prompts to trigger it, they can revisit this conversion funnel to see if the changes had a positive impact.

IAP failures


It's useful to monitor the failure rates of attempted IAPs. This can easily be measured using the Monetization.FailedIAP action from earlier.

You should look at why payments are failing so you can try to do something about it (though some of the time it might be out of the developers' control). Sharp changes in IAP rates can also indicate problems with payment gateways, API changes, or even attempts at fraud. In each of these cases you would want to take action pro-actively.


Attached Image: IAP-Failures.png


The reasons given for failure vary between payment providers (whether that's a mobile provider such as Google Play or the App Store, or an online payment provider). Depending on your provider you will get more or less granular data to act upon.

Comparing IAPs across customer acquisition sources


Most businesses measure the conversion effectiveness of acquisition campaigns (e.g. the number of impressions compared to the number of people that downloaded the game). Using Calq this can be taken further to show the acquisition sources that actually went on to make the most purchases (or spend the most money etc).

Using the Monetization.IAP or Monetization.Spend actions as appropriate, Calq can chart the data based on the referral data set with setGlobalProperty(...). Remember to accommodate that you may have more players from one source than another which could apply a bias. You want the query to be adjusted by total players per source.


Attached Image: GameExample-IAP-Sources.png


The results indicate which customer sources are spending more, and this data should be factored in to any acquisition budgets. This technique can also be used to measure other in game actions that are not revenue related. It's extremely useful to measure engagement and retention by aquisition source for example.

Series summary


This 3 part series is meant as a starting point to build upon. Each game is going to be slightly different and it will make sense to measure different events. The live version of Ancient Blocks actually measures many more data points than this.

Key take away points:
  • The ultimate goal is to improve the core KPIs (retention, engagement, and user LTVs), but to do this you wil need to measure and iterate on many smaller game components.
  • Metrics are often linked. Improving one metric will normally affect another and vice versa.
  • Propose, test, measure, and repeat. Always be adding refinements or new features to your product. Measure the impact each time. If it works then you refine it and measure again. If it doesn't then you should rethink or remove it. Don't be afraid to kill to features that are not adding any value!
  • Measure everything! You will likely want to answer even more business or product questions of your game later, but you will need the data there first to answer these questions.

From Never Doing Game Code or Game Art... To A Full Game In Unreal Engine 4

$
0
0

Going From Zero To One


Well it took me literally 5 months to go from ZERO to ONE! Five months ago I decided to dive deep into game development.

Keep in mind…
  • Never coded before UE4
  • Never created 2d or 3d game art before UE4
  • Never created game animation before
  • Never used UE4 (Unreal Engine) before

EN_screen1_Retina_2048x15361.jpg

At the time of this journal entry for myself, I would have classified myself as a CEO who would usually hire a developer and artist. That has changed, simply because I wanted to learn every facet of the game business. Also I knew in the back of my mind that this was a small step in a larger journey.

The Larger Journey


Sure, it may be old hat for an experienced coder, but it's been monumental for myself to finish this game, with no coding experience and to learn a completely new engine. I would never invest so much of my time and energy unless I truly enjoyed the experienced and believed I could... in the years to come give back to the community and our gamers.

As of this writing, I released the game on mobile to test out the waters and balance out game play. Now Eye Guy is on Steam Green Light with a completely new PC/Mac version. Sure, it's not your typical PC Steam Game, some may say knock it, others will love it, but for me it's about getting something out to the community and getting feedback for the next round of development.

And this process of...
  1. Releasing
  2. Learning
  3. Iteration/modify

Has been a a fantastic end-less loop that has taught me so much.

A Little Promo Video Of Eye Guy


https://www.youtube.com/watch?v=pvRCwqnaJ8M

Eye Guy – Reaction Time Rush is now on Steam Greenlight. If you have a minute, consider sending me a “YES” vote.


In The Beginning


Starting Up


When I started Dream Bot Studios, I really did mostly game design and learned the basics from working with developers, artists, and releasing games into the marketplace.

My studio pushed out some simple games testing the waters of the mobile game market. Some did well, like Turbo Train and Vlad The Angry Viking. They even had write ups from Game Sauce and one of my games was an Indie Prize candidate at Casual Connect!
It was a great learning experience, although I never felt I was able to contribute my ideas and creativity like I really wished for. Also, profits were very dismal and nothing really to build a business around.
As an entrepreneur you are always told to hire someone to do the project if you have the budget. I live by this philosophy; it's great advice and I will always hire specialists when I can or think it's a good investment.
But I knew making games and entertainment was what I loved.

Something deep down was telling me I needed to understand all facets of game development as well as marketing the game by understanding more of the intricate processes of producing a game. Then when the business is ready to grow I would have a tight grasp on game development to build projects myself or have team members work with me.

My Little 20 Year Vision...


This means I will be developing really great games and entertainment for the next 20 years of my life.
So when you look at a 20 year vision, it makes taking a year or more to dive into a new game engine like UE4, learning visual scripting, learning coding, learning game art and animation not that overwhelming.

This meant starting from scratch. I been building businesses since 2002 specializing in technology and internet businesses and creating unique experiences for customers.

I am a entrepreneur and have been my whole life, but there was that creative aspect I needed fulfilled. For years now I have been literally seeing huge beautiful worlds in my head with unique characters that were brought to life by scripting and AI, so I made the decision to make time to learn to build games.
I wanted to give my self some confidence since I knew very little about game coding and the Unreal Engine.
I watched a great Ted talk by Josh Kaufman that explained that by taking 30 minutes to an hour every day for month you can learn anything.

https://www.youtube.com/watch?v=lB6K60mkmho

He was right, doing consecutive learning exercises of just watching and/or doing I started to get a small grasp on things.

During this time I would run my other businesses with help of my team, but at the end of the work day I would take my dinner break after 6pm or 7pm and put my head down and start learning the Unreal Engine.
I watched videos, did small little projects and tested my logic in visual scripting. In the beginning it was about understanding the Blueprint system and acquiring a grasp on how to visually code using this new game engine.

At times I would get stuck and could not figure out things for 2 to 3 days sometimes. I would request help on Answer Hub and the UE4 forums. Over time, I learned to step away and just think about the logic of how this mechanic would work. Then if needed, present the question to the forums of UE4 or simply dive into the engine and figure it out.

Every time it worked… and with more problem solving I became more knowledgeable in developing games.


Benefits Beyond What Was Expected


Programming and Visual scripting has really helped me think more clearly. My way of creating processes and solving problems in work and daily life has become exponentially easier.

Doing scenarios for my business became much clearer.

For example, I was able to foresee when my other business would have inventory issues or if our margins would be too low for the amount of marketing spend and cost we have scheduled.

I simply used a spreadsheet and began presenting scenarios like I did when I code a video game. Running each step of a process…

It was really enlightening for me to begin seeing multiple benefits of doing something I was passionate about.


Committing To A New Vision


Like anything, if you decide on something you must cut off from something else.

I was quite alright cutting off parts of my personal life and free time, although some of my colleagues, friends and family were not exactly ok with it, which I totally understood. But this was important to me, so I began to prepare to learn and succeed faster. Of course you take time to spend with family and friends, but you must decide to work when work and play when you play. It’s a critical balance... yet I used free time to recuperate and think about how to learn game development faster.

For an athlete, you train your body. I believe for a programmer, artist, or anyone else who builds with ideas in one's head, you have to make sure your brain is relaxed, in shape and not toxic.

I was using my brain differently than I had usually been when managing my business.

For me, this meant that I would need to increase my focus and have a clear thinking of what I wanted to create.

I need more thinking power!

So over a few weeks I began developing a routine. In the beginning this way transition in it’s simplest form... it was simply:

Morning:

  • Do Qi Gong, Tai Chi or Yoga
  • Meditation To Relax The Mind
  • Journal Entry (Optional To Track Your Success)
  • Green Juice (Healthyt Vegetable/Fruit Juice)
  • Normal Business Tasks (Do What’s Funding Your Dream)

Mid Day:
  • 30 Min Exercise (Walk, Jog, Swim or Basketball)
  • Quick Lunch (Tried Not To Over Eat)
  • Normal Business Tasks (Do What’s Funding Your Dream)

End of Day
  • Finished Normal Business Tasks
  • Took 30m to 60min Break (Ate Small Dinner)
  • Began Learning Game Development
  • 1st Starting Learning Coding and UE4
  • Then Learned Game Art and Other Things As Needed

It took discipline, but it was important not to tie myself down to a computer all day trying to solve my game development problems in one sitting. I knew this would take months to understand, maybe years.

I was ok with that as this was a 20 year plan and I would be happy know after 20 years when I am 50+ years old, I have acquired some new skills and could pick up a computer and begin building a game from scratch with the knowledge I have committed to learning.

Seeing The Light

The Unreal Engine has been fantastic to work with. I tried Unity and felt it was a great tool, started learning C#, but really fell in love with Visual Scripting using Unreal’s new Blueprints.

blueprint_gamemode.png

Was I knew Unreal would be 100% backing and investing time in making the blueprint system. I decided to focus all my energy in their new engine.

The blueprint visual scripting allowed me to learn the logic I needed visually. Now when solving problems or trying to figure out how I can build a mechanic, I would visualize it in a similar graph manner as the Unreal Engine 4 blueprint system.

I also learned how to setup iOS and Android apps and certificates with the help of the community from Unreal Engine.

I learned lots by working with Unreal Engine and can’t stress enough the benefits it has given me as a creative entrepreneur who just wanted to build something great.

Finally A Completed Game... Well, Until My Next Update


Well, no game is ever complete -- you can always add more cool stuff for your players.

Eye Guy was monumental for me.

Eye_Guy.jpg

So many games are created, yet many of them are never finished by developers. The are just prototypes. This is mostly because it is first really hard to create a game, then to have all the pieces and art working correcting, then the score and many other mechanics in unison. Wow… that is really quite a feat!

So that’s why with my first game i wanted something simple. I chose to use Paper 2d from Unreal. It was a good way to play around with 2d games and allowed me to create and distribute a game on mobile devices and then on the PC as well.

Once I complete the coding part of the game, connecting leaderboards, combos, to the app store and google play.
I began focusing on creating art for the game. I did the same process as I did for learning the Unreal Engine. Taking small tidbits of my day to learn Adobe Illustrator, Photoshop, and a new tool to animate the 2d art called Spine.

I created my EyeGuy, something simple which would have a few animations and not really any big body to animate. Just and Eye, arms and legs.

This was all planned so I can drop a great main character in the game and not worry about too many animations and collisions.

My Original Simple Game Trailer Before The Update


https://www.youtube.com/watch?v=pvRCwqnaJ8M

I took the enemy art from the approved licensed art the engine gives you. There were some cool 2d sprites from Kenny Sprites Pack I used. I simply added these as the enemies so I could implement something and get the game out to the public to test and play.

Then the background, I used from another game Dream Bot Studios developed. It was a very nice background I really liked and rather than re-designing it myself, I used it in the game and will be adding on to it in new versions.

Lastly, I made some cool particle effects using the Unreal Engine. This was difficult at first because I had never used this tool before.

But then once I used it and tested the particles on a mobile device, some particles were just too intense for mobile processors. So I learned a lot by trial and error.


A Quick Game To Pick Up And Play


One thing I learned playing games is I didn’t want a huge game. Also, I did not want something with a huge learning curve. Simple and easy to pickup and play immediately. I didn’t want to sit and re-learn how to play the game each time I started after not playing for a few days.

So while Eye Guy version 1.0 is a small, easy to pick up game, it is monumental in my journey as a game developer and working with the Unreal Engine.

The Mobile Ready Version


EN_screen1_IPad_1024x768.jpg

It’s available on the following platforms at the time of writing:
Apple App Store (iOS) **Big v1.1 Update Waiting To Approved Included**
Google Play (Android) **Some Devices Giving Users Errors, So I Made It Free**

My Latest Update... I Made A PC Build Just For Steam GreenLight


EN_screen1_Retina_2048x15361.jpg

Eye Guy – Reaction Time Rush is now on Steam Greenlight. If you have a minute, consider sending me a “YES” vote.

The Grand Plan To Reduce Costs And Inrease Revenue


I learned something very important when hiring other developers and artist for other games I designed. It was expensive if you're not getting income from the sales of the game, in app purchases or advertisements.
So I developed this code so I could constantly re-use it and build different gameplay.

This is why we see Call of Duty and Assassins Creed continue using similar game play, just keep adding on and updating their work.

It’s more efficient and over time you will be able to create better work faster for your players.

This is what I plan on doing with Eye Guy. Depending on reviews and testing from our players. I have scheduled to add unique mechanics that will give the game a more deeper and connected experience. Not only that, it will allow me to learn more and add these specific game mechanics into the source code so I can re-use it for many future games I plan on releasing.

So this is the journey… and here is a small game, yet a monumental step in my opinion in growing Dream Bot Studios.


Wait... If You Have A Minute


If you have a minute, please stop what you're doing and send me a “YES” vote on Steam Green Light. It would be greatly appreciated and I am already planning to journal the success to share with other Indie Developers.

This article was originally posted (in a slightly different form) on my website at Dream Bot Studios.

Article Update Log

12 Dec 2024: Initial release

The Top 10 Languages for Localizing Your Mobile Game

$
0
0
Every third client requesting localizations from us at Alconost asks a very basic, but very important, question: “And what other languages do you recommend translating my game/app/site into?”

To answer this question at least for developers of mobile games, we researched sales figures for mobile games on Google Play and the App Store in different countries. We were so surprised by the results that we made an entire video:


In this article, you’ll find more information about the top 10 languages for localizing mobile games.

5fd93e46da3244f5b703c8cf6308ca7f.jpg

Let’s start with the behemoths:

Japan – the biggest source of game sales on both Google Play and the App Store. So while Japanese buying preferences can seem unusual to outsiders, localizing your game and promoting in Japan can bring fantastic results.

U.S. — no surprises here. English is a “must” for any game that is sold internationally.

Korea is ahead of even the U.S. in Android game sales.

For perspective: Just three countries – Japan, the U.S. and Korea – account for 75% of game sales on Google Play!

China is present only in the App Store for now but iOS sales have been impressive indeed. Google recently announced its return to the Chinese mobile app market and it will be interesting to see the numbers for Google Play in China a year from now.

Germany and France look small compared to the others, but for developers in North America and Western Europe, understanding French and German tastes is usually easier than Korean or Japanese ones. And who knows – maybe your game will strike a chord and be a massive hit in Germany or France?

Don’t forget about Taiwan, which despite its small size is number 10 on the list. Did you know that Taiwan uses Traditional Chinese, which is very different from the Simplified Chinese used on the Chinese mainland? A person from Taiwan is lucky to understand even half of something written in Simplified Chinese!

If your localization budget allows it, you might also consider markets that do not make the top 10 but show good growth in mobile sales: Russia, Latin America (Spanish) and Brazil.

So here is our list of the top 10 languages you should consider when localizing your mobile game:
  • Japanese
  • English
  • Korean
  • Simplified Chinese
  • German
  • French
  • Traditional Chinese
  • Russian
  • Spanish
  • Brazilian Portuguese
Data courtesy of App Annie.

P.S. We made this video in our free time because it seemed neat. We like to make videos “just for fun”: check out our video about $100 as seen by modern artists and video infographic about the cost of adding a second to site loading times. If you have interesting, unusual or unique data or ideas that could help us to make another video, let us know!

Making Machines Learn

$
0
0

General note on this article


The following article is all about AI and the different ways that we, at GolemLabs, have decided to address some challenges regarding the development of the EHE (Evolutive Human Emulator), our technological middleware. The idea of a completely dedicated AI middleware that can adapt to multitudes of types of game play, and that does the things we're making our technology do, is quite new in the industry. So we've decided to start promoting these things with the hope of increasing awareness, dialogue and interest in this field of research.

It's important to note, though, what we mean by "AI". Today more than ever before, AI has become a buzzword that encompasses anything and everything. We believe AI will be the next big wave, not only in gaming (replacing the current focus that has been on graphics for a number of years now) but in many other areas as well. Sensing the opportunity, marketing-type individuals affix the name "AI" to a lot of different things, most of which we're not agreeing with.

I'll surrender the point from the get-go that our view of what constitutes artificial intelligence is the view of purists. A fridge that starts beeping when the door is left opened for too long, for example, isn't "intelligent", no matter what the company says. If the fridge found out your patterns, detected that you fell asleep on the couch, and closed the door all by itself because you're not coming back - now, that would be a feat, and would certainly qualify better. Many companies today market physics engines, path finding, rope engines, etc. as "intelligent". While their technology are often impressive at what they do, this isn't how we've decided to (narrowly) define what constitutes artificial intelligence.

Our research and development has focused on the technology of learning, adapting, and interpreting the world independently. The state of the EHE today, and the next iterations of development that we'll start presenting here, will focus on personality, emotions, common core knowledge, forced feedback loops, and other such components. We hope that the discussions they will bring will generate ideas, debates, and innovations on this very important and often misused field.


“Making Machines Learn”


At the core of any adaptive artificial intelligence technology is the idea of learning. A system that doesn't learn is pre-programmed - the "correct" solution is integrated inside the program at launch, and the task of the system is to navigate through a series of conditions and caveats to determine which end of the pre-calculated decisions best fits its current condition. A large percentage of AI engines works that way. A "fixed" system like that certainly has its advantages:

1. The outcomes are "managed" and under control.
2. The programmers can better debug and maintain the source code.
3. The design teams can help push any action in the desired direction to move the story along.

These advantages, especially the second one, have traditionally outweighed the scale towards creating such pre-programmed decision-tree systems. The people responsible for creating AI in games are programmers, and programmers like to be able to predict what happens in any given moment. Since, very often, designers indications on artificial intelligence revolve around "make them not too dumb", it's no secret that programmers will choose systems they can maintain.

But these advantages also have a downside:

1. New situations, often introduced by human players finding unforeseen circumstances overlooked during development, aren't handled.
2. Decision patterns can be deducted and "reverse-engineered" by astute players.

Often, development teams circumvent these disadvantages by giving these "dumb" AI opponents superior force, agility, hit points, etc. to level the playing field with the player. An enemy bot can, for instance, always hit you between the eyes with his gun as soon as he has a line of sight. The balance needed to create an interesting play experience is difficult to achieve, almost impossible to please both novice players and experienced ones. Usually, once a player becomes more expert in a game, playing against the AI doesn't offer an interesting experience and the players look for human opponents online.

But what if the system could reproduce the learning patterns of the human player: starting inexperienced and, by being thought by actions, how to play better? After all, playing a game is reproducing simple patterns in an always more complex set of situations, something computers are made to do. What would it mean to make the system learn how to play better, as it's playing?

To answer that question, we need to look outside the field of computer software and go into psychology and biology - what does it mean to learn, and how is the process shaping our expertise in playing a game? How come two different players, playing the same game, will build two completely different styles of playing (a question we're addressing on our next article about personalities and emotions)?


Attached Image: A1I1.jpg


Let's look at three different ways of learning, and see how machines could use them.

The first kind is learning through action: the stove top is turned on, you stick a finger on it, it burns, and you just learned the hard way not to touch the stove. This (Pavlovian?) way of learning is a simple example of action/reaction. Looking at the consequence of the action, the effects are so negative and severe that the expected positive stimulus (taking food now) is outmatched. Teaching computers to learn through this process is not that difficult - you need to weight the consequences of an action and compare them with the expected consequences, or ideal consequences. The worse the real effects are, the harder you learn not to repeat the specific action.


Attached Image: A1I2.jpg


The second kind builds upon the first one: learning through observation. You see the stove top, and you can see the water boiling. You deduct that there is a heat source underneath, and putting your finger there wouldn't be wise. This means that you can predict the consequences of an action without having to experience it yourself. A computer that would do it would, of course, need basic information on the reality of the world - it needs to know what a heat source is, and it's possible side effects. Even without having experienced direct harm, it's possible to have it "know" the effects nonetheless. This is achieved through what we call the common core knowledge and will be the topic of an upcoming article. Basically, we know that the stove burns because some people got burned before us. They learned through action, their effects were severe (maybe fatal), and society as a whole learned from the mistakes of these people. The common core (or "Borg" as we call it) is designed to reproduce that.


Attached Image: A1I3.jpg


The third kind, the most interesting for gamers, is learning through planning. Again, it builds on its predecessor. If putting you in contact with the stove top inflicts important, possible fatal damages, then it's possible to use that information on others. Like a nemesis, for instance (by essentially doing the same reasoning as above, but with different measurements of what would be a positive or a negative outlook). I don't want to burn myself, but I might want to burn someone else. Again, I've never burned myself, and I haven't use the stove top ever in my life before, but I have general knowledge of its use and possible side effects, and I'm using that to project in time a plan during a fight. If I push my opponent now on the stove top, it should bring him pain, and this brings me closer to my goal of winning the fight.


Attached Image: A1I4.jpg


These three types of learning get exponentially more complex to translate in computer terms, but yet they represent simple, binary ways of thinking. Breaking down information and action into simple elements enables computers to comprehend them and work with them. This creates a very different challenge to the game designers and programmers - instead of scripting behaviors in an area, they need to teach the system about the rules of the world around them, and then let the system "understand" how best to use them. The large drawback is the total forfeiture of the first big advantage of fixed systems we listed above, namely to control the behavior of the entities. If the system is poorly constructed, and the rules of the physical world aren't translated properly to the system, then the entities will behave chaotically (Garbage-in-garbage-out rule).

Building and training the systems to go through the various ways of learning is the main challenge of a technology like the EHE, but we believe the final outcome is well worth the effort.

But what about the roles & effects of emotions and personality on learning? On the decision-making process?

What about the concept of common core knowledge?

That part of the article will probably seem a little weird to some as it deals with emotions and personalities. Why "weird"? Because if there's one thing we usually are safe in asserting, is that machines are cold calculators. They calculate the odds and make decisions based on fixed mathematical criteria. Usually, programmers prefer them that way as well.

When companies talk about giving personality and emotion to AI-driven agents, they usually refer to the fixed-decision making pipeline that we mentioned in this article. Using different graphs will generate different types of responses to these agents, so we can code one to be more angry, more playful, more curious, etc. While these are personalities, the agents themselves don't really have a choice in the matter and don't understand the differences in the choices they're making. They're only following a different fixed set of order.

Science-fiction has often touched the topic of emotional machines, or machines with personalities. This is the last step before we get to the sentient machine, a computer system that knows it exists.

You can rest assured, though. I won't reveal here that we've created such a system. But these concepts are what constitutes the weirdness of this part of the article, and the often unsettling analysis of its consequences.

Personality


Attached Image: A2I1.jpg


Earlier in this article, I mentioned how many companies use buzz-words as marketing strategies, thus the "intelligent" fridge beeped when the door was left opened. In the same vein, many companies will talk about personality in machines and software. Let's define how we're addressing it to lessen the confusion: for the EHE, a personality is a filter through which you understand the world. A "neutral" entity, without any personality, will analyze that they're 50% hungry. That is the ratio it finds of food in system vs. need. But we humans usually don't view the situation as coldly as this. Some of us are very prone to gluttony, and will eat all the time, with even the minimal level of hunger. Some others are borderline anorexic and will never eat, no matter how badly we physically need it. Then there's the question of the interactions with the other needs - I'd normally eat, but I'm playing right now, so it'll have to wait. In short, the "playing computer games" need trumps the "hunger" need. But if I'm bored and have nothing else to do, my minimal hunger will be felt as more urgent.

All these factors, and dozens more, vary from one individual to another. This is why you can talk about someone and say things like "Don't mention having a baby to her, she'll break down crying". Or "Get him away from alcohol or he'll make a fool of himself". We know these traits in the people close to us because we can anticipate how they'll react to various events. We're even much better to notice these traits in others than in ourselves, and are often surprised when someone will mention such a trait about us. We see them in others most of the time because they differ than ours.

For some events - let's continue using the "hunger" example - we will, of course, feel that we're "normal", so our own perception of how someone should react to food is based on how we ourselves would react. For instance, if someone reacts less strongly than we would, then this surely means that this person has a low appetite. But if this person reacts way less strongly when hungry, then we become worried about their health. The opposite is also true, if the person has a stronger reaction when starving.

These levels of reactions to various events in our lives are what we define as being our personality. It is the filter with which we put a bias on the rational reality of our lives. Without it, everyone would be clones, reacting the same way to everything happening. But because of various reasons (cultural, biological, taught) we're all unique in these aspects.

Our EHE-driven agents also have such elements to filter up or down the various events that happen to them. An agent that is very "campy" and guarded will react much more strongly to danger than another one who is more brazen. The same event will be felt by both entities differently, the first one ducking for cover and the second one charging, all of this dynamically determined based on the situation at hand, not pre-scripted for each "types".

Emotions


Attached Image: A2I2.jpg


If a personality filters differently the "in" component of an EHE entity, emotions filters the "out". If a personality shapes how we perceive the various events in our lives, our emotions will modulate how we determine our reactions to them. Thus, emotions are used a little bit like an exponential scale that starts to block rational thinking.

The way we're approaching this is to say that someone who isn't emotional is logical, cold, and cerebral. That person will analyze the situation and take the best decision based on facts. One of the events in the movie I, Robot illustrates this perfectly when a robot rescues Del Spooner - the Will Smith character - from drowning. The robot analyzed that Spooner had more chances of survival than the little girl next to him, so it saved him. It was a cold decision based on facts and probabilities, not on our human tendencies to save children first, and be more affected by the death of a child (or a cute animal).

On the contrary, someone who is overtly emotional will become erratic, unhinged, crazy, etc. That person will react to events in unpredictable, illogical ways. They will not think of the consequences of their actions and, as would a more rational person would do, do whatever seems best to address the situation right away. I'm angry at you? I'll punch you in the face. That is an emotional response. I “saw red", I "wasn't thinking", etc. That is, I stopped caring about what would happen next. I simply went to the most brutal and efficient way to address my anger.

Normally, the EHE will consider outside consequences when dealing with a problem to solve. This is one of the core tenants of the technology. If I'm angry at you, there's a number of things that I could do, ranging from ignoring, to politely arguing, to yelling, to fist-fighting. These things escalate in efficiency to solve the problem - ignoring you doesn't address my anger in the slightest (until a certain amount of time will have passed), but it does the least collateral damages. On the other end of the spectrum, punching you in the face is probably the most satisfying way of addressing my anger, but it has the unpleasant consequence of possibly landing me in jail.

If I'm in control of my emotions, I'll juggle the satisfaction of punching you in the face with the unpleasantness of going to jail, and will probably judge that going to jail is more unpleasant than punching is pleasant, thus the action will be discarded from the range of things that I should do.

But if ignoring you doesn't solve the problem (and possibly even increases it), and if trying to sort things out doesn't solve it as well, then me being "angry at you" is starting to be a real problem, and my inefficiency at solving it is increasing my "anger" emotion. The more it rises, the less I start considering the collateral effects of my actions. So after a certain amount of time, the punching-in-the-face action that was completely discarded earlier will become a totally sane response, because I've temporarily forgotten some of the consequences of it and focuses only on "does it solve my angry at you problem?".

Of course, an emotion can also be positive. Who hasn't done something stupid because of joy? Or because of love? Who hasn’t done something he or she later regretted, wondering "What was I thinking?". Well, that’s precisely the point: this person wasn't thinking, and was temporarily blinded by a high level of emotion, incapable of seeing outside consequences of what he or she was doing.

When broken down like that, personalities and emotions become manageable for computers, and they can then reproduce convincing behaviors without direction or scripts. Depending on the definitions of the world, they can adapt and evolve in time, and become truly believable characters.

With that being said, two problems that were identified earlier in this article start to appear: unpredictability and the limitations of a closed system. Even if we do a very good job at creating entities that are dynamic and evolving, our world - the computer game in which this technology lives - is behaving according to fixed rules. Even if the data of the world evolves, the reality of the game is finite, and thus the possibility of the entity to learn is bound by that limitation.

It becomes a problem when, for some freak reason, the AI starts to learn the "wrong" thing. It happens a lot, and we usually blame the human player for that.

Why?

Because we, humans, play games for various reasons. And not all of them logical. Sometimes, we just want to see what will happen if we try to do something crazy like that. Sometimes we want to unlock a specific goody, cinematic, prize, etc. Sometimes we're just finding a specific animation funny and want to see it again and again. Also, a human player can suck at the game, especially at first. What happens then? How is the AI supposed to learn and adapt based on the reality of the world under which it's thrown when the parameters of that reality are not realistic themselves?

We made a game a while back called Superpower 2 (newly re-released on Steam; :-) ). In this game, the player would select a country and play it in a more detailed version of Risk, if you will. But sometimes, the player would just pick the US and nuke Paris, for no particular reason. Absolutely nothing in the game world explained that behavior, but here we were anyway. The AI was, in situations like this one, understandably becoming confused, and reacting outside the bounds of where we had envisioned it, because the player itself was feeding the confusion. The EHE would then learn the wrong thing, and in subsequent games would confront the player under these parameters that were wrong in the first place, causing further confusion for the players.

The memory hub (or Borg) comes in to help alleviate these situations. Let's look at it, using, once more, traditional human psychology.

The human race is a social one, and it's one of the reasons explaining our success. We work together, learn from one another, and pass on that knowledge from generation to generation. That way, we don't always reset knowledge with each new generation, and become more and more advanced as time passes. We also use these social interactions to validate each other to conform into a specific "mold" that varies from society to society, and evolves with time. A specific behavior that was perfectly fine a generation ago could get you in trouble today, and vice-versa. That "mold" is how we define normalcy - the further you are from the center, the more "weird" you become. If some weirdness in you makes you dangerous to yourself (if you like to eat chairs, for example) or to others (you like to eat other people), then society as a whole intervenes to either bring you back towards the center ("stop doing that") or, in cases where it's too dangerous, to cut you away from society. The goal is always the same, even if we celebrate each other’s individuality and quirky specifics. We still need to be consistent with what is considered "acceptable behavior".

These behaviors are what society determined what "works" to keep it functional and relatively happy. Just a couple of decades ago, gays could be put in prison for being overtly… well… gay. This was how a majority of people thought, and their reasoning was logical, back then: gays were bad for children; this is how God wants it, etc. These days, the pendulum is changing direction: a majority of people don't see gays as a danger to society any longer, as more civil rights are now given to them. This is how society works best to solve its problems because it is what a majority of people came to accept as being normal. Back in the 1950’s, someone who said there was nothing wrong with being gay would’ve been viewed as outside the mainstream. Today, such an opinion is considered the norm.

The memory hub thus serves as a sort of aggregate of the conditions of what works for every EHE entity. Imagine a game coming out powered by the EHE. That game would be connected to the memory hub, and remain connected to be validated and updated based on the shared knowledge of thousands of other players around the world.

The hub would be used to do multiple things:

1. Upon initial boot, and periodically after that, the AI would be updated with the latest logic, solutions and strategies to better "win", based on the experience of everyone else who has played so far.
2. Your EHE learns individually based on your reality, but it always checks in to validate that its memory matrix isn't too far off course. When the particular cases of a player (like the nuking players mentioned above) mean that their EHE becomes confused, it can reassure itself with the mother ship and disregard knowledge that would have been proven "wrong".
3. When the particular experience of an EHE makes it efficient at solving a specific problem - because a player confronted it in a specific fashion, for instance - the new information can be uploaded to the hub and shared back to the community.

So while the game learns by playing against you, and adapts to your style of playing, it also shares the knowledge of thousands of other players around the world. This knowledge means that an EHE-powered game connected to the hub would have tremendous replay value, as the game's AI is continually evolving and adapting to the game's circumstances and experience of play.

The hub, viewed as a social tool, can also be very interesting. How would the community react to a specific event, or trigger? Are all players worldwide playing the same way? All age groups…? Studying the memory hub based on how it evolves and reacts would be a treasure trove of information for future games, but also for the game designers working on a current game: if an exploit arises or a way to "cheat" is found, the memory hub will learn about it very quickly, thus being able to warn game designers what players are doing, how they're beating the game or, on the other side, how the game is always beating them under determined conditions, thus guiding the designers to adjust afterwards, almost in real time, based on real play data.

In the end, we propose the Borg not only as a safeguard against bad memory, but as a staging ground for better learning, and better dissemination of what is being learned for the shared benefit of all players.

Of course, we welcome your questions, comments, and thoughts on this article.

Proper Input Implementation

$
0
0

Theory


A input system in a simulation becomes difficult to visualize. Even with tons of informations around the web about input handling in a game, the correct way it's rare to found.

There are tons of low-level informations that should be considered in a input system article, but here I'll explain it more directly—since it's not a book. You'll be able to apply to your project having knowledge of simple resources. 

The intuition says that input events should be requested each time before we update the simulation, and handled at game-logical side via callbacks or virtual functions, making the player entity to jump or shoot in a enemy. Requesting inputs in a certain time it's also known as polling. Such thing it's something that we can't avoid—since we poll all inputs that ocurred since the last request in a certain time, but there are a lot of drawbacks doing it in such brute-force methodology. Here we use the word polling as meaning requesting input events at any time—polling input events at any time

Not using Google Tradutor here, but what matters it's that you understand the article.

What is the problem with polling inputs every frame? The problem is that we don't know how fast our game it's being updated, and you may not want to update faster than the real time; updating the game faster than the real time (or slower) means that you're advancing the game simulation in a variant way; the game will run slower in a computer when it could be running faster or vice-versa, and its entities behaviours won't be updated at fixed increments; the concept of fixed time-step it's mandadory to apply in modern games (and very unified too), and its implementation details are out of topic. Here, I'll assume that you know what a fixed-time step simulation is. A fixed-time step update will be referred here as one logical update (a game logical update).

A logical update updates our current game time by a fixed-time step—which it's generally 16.6ms or 33.3ms. If you know what a logical update in respect to the real time elapsed is, you know that we can update our game by N times each frame, where N approaches to the current elapsed time—the game logic time should be very close to the current time but updated in fixed steps, meaning that we've updated the game as faster that we could (we did all possible logical updates up to the current time).

The basic loop of a fixed-time step game simulation follows:

UINT64 ui64CurTime = m_tRenderTime.Update();
while ( ui64CurTime - m_tLogicTime.CurTime() > FIXED_TIME_STEP ) {
        m_tLogicTime.UpdateBy( FIXED_TIME_STEP );
        //Update the logical-side of the game.
}

where m_tRenderTime.Update() updates the render timer by the real elapsed time converted to microseconds (we want maximum precision for time accumulation), and m_tLogicTime.UpdateBy( FIXED_TIME_STEP ) updates the game by FIXED_TIME_STEP microseconds.

Returning to inputs... what happens if we press a button at any time in the game, poll all inputs in the beginning of a frame (before the loop start) and we release that button during the game logical update? The answer it's that if we update N times, and that button changes its state in between, the button will be seen as if got pressed during the entire frame. This is not a problem if you're updating small steps because you'll transit to the next frame faster, but if the current time it's considerable larger than the time step, you can get into problems by just knowing the state of the button on the start of that frame. To avoid that issue, you may want to time-stamp the input events when they ocurred to measure it's duration, and synchronize it with the simulation.

We saw that polling inputs any time and time-stamping it it's a damn good information to keep; it's not only necessary but it's mandatory—to eat the right amount of inputs at any time. With all these informations in hands, our input system should be able to request inputs anywhere (can be a frame update, a logical update, etc.) and process that somewhere later. You may have noticed that it's basically buffering inputs, which it's a good idea because if we can keep time-stamped inputs at any time and process that means that we can process all inputs before takes place at the logical updates, fire input actions, measure it's duration, at the same time being synchronized with the game logical time.

So, what's the ideal solution to keep our input system synchronized with our game simulation? The answer it's to consume inputs that ocurred up to the current game time each logical update. Example:

Current time = 1000ms.

Fixed time-step = 100ms.

Total game updates = 1000ms/100ms = 10.

Game time = 0.

Input Buffer:

X-down at 700ms;

X-up at 850ms;

Y-down at 860ms;

Y-up at 900ms;


1st logical update eats 100ms of input. No inputs until that, go to the next logical update(s).

...

7st logical update eats 100ms of input. Because the logical game time was updated 6 times by 100ms, our game time is: 600ms, but there are no inputs up to that time, so, we continue with the remaining updates...

8st update. Game time = 800ms. X-down along with its time-stamp can be eated, so we eat it. The current duration of X it is the current game time subtracted by the time key got pressed, that is, the duration of button X = 800ms - 700ms = 100ms. Now, the game it's able to check if a button it's being held for certain amount of time, which it's a good thing for every type of game. Also, we know that (in the example) we can fire an input action here, because it's the first time that we've pressed the X button (in the example, of course, because there was no X-down/up before). Since we get all inputs in this logical update, we can re-map X to some game-side input action.

9st update. Game time = 900ms. X-up, and Y-down along with its time-stamps can be eated, so we eat those. Wait, the X button was released, that means that the total duration of X it's the current game time subtracted by the time key got pressed, that is, the duration of the button X = 900ms - 700ms = 300ms, since we got an key-hold termination event we may want to log that. Y was pressed, we repeat the same thing we did to X in the last update, but now for Y.

and finally...

10st update. Game time = 1000ms. We repeat the same thing we did to X in the last update for Y and we're done.

Practice


If you're running Windows®, you may have noticed that you can poll pre-processed or raw input events using the message queue. It's mandatory to keep input polling in the same thread that the window was created, but it's not mandatory to keep our game simulation running in another. In order to try to increase our input frequency, what we can do it's to let our pre-processed input system polling input events in the main thread, and run our game simulation and rendering in another thread(s). Since only the game affects what will be rendered, we don't need synchronization.

I hope what each class do stay clear as your read.

Example:

INT CWindow::ReceiveWindowMsgs() {
	::SetThreadPriority( ::GetCurrentThread(), THREAD_PRIORITY_HIGHEST ); //Just an example.
	MSG mMsg;
	m_bReceiveWindowMsgs = true;
	while ( m_bReceiveWindowMsgs ) {
		::WaitMessage(); //Yields control to other threads when a thread has no other messages in its message queue.
		while ( ::PeekMessage( &mMsg, m_hWnd, 0U, 0U, PM_REMOVE ) ) {
			::DispatchMessage( &mMsg );
		}
	}
	return static_cast(mMsg.wParam);
}

To request up-to current game time in the game thread, we must synchronize our thread-safe input buffer timer with all game timers, so no time it's more advanced than other, and we can measure it's correct intervals (time-stamps for our case) at any time.

//Before the game start. InputBuffer it's every possible type of device. We synchronize every timer.
void CEngine:Init() {
        //(...)
        m_pwWindow->InputBuffer().m_tTime = m_pgGame->m_tRenderTime = m_pgGame->m_tLogicTime;
}

Here, we'll use the keyboard as the input system that I've described, but it can be translated to every another type of device if you want (GamePad, Touch, etc). Let's call our thread-safe input buffer as keyboard buffer.

When a key gets pressed (or released), we should process that window message in the window procedure. That can be done as following:

class CKeyboardBuffer {
public :
	enum KB_KEY_EVENTS {
		KE_KEYUP,
		KE_KEYDOWN
	};

	enum KB_KEY_TOTALS {
		KB_TOTAL_KEYS = 256UL
	};

	void CKeyboardBuffer::OnKeyDown(unsigned int _ui32Key) {
	   CLocker lLocker(m_csCritic);
	   m_tTime.Update();
	   KB_KEY_EVENT keEvent;
	   keEvent.keEvent = KE_KEYDOWN;
	   keEvent.ui64Time = m_tTime.CurMicros();
	   m_keKeyEvents[_ui32Key].push_back(keEvent);
        }

        void CKeyboardBuffer::OnKeyUp(unsigned int _ui32Key) {
	   CLocker lLocker(m_csCritic);
	   m_tTime.Update();
	   KB_KEY_EVENT keEvent;
	   keEvent.keEvent = KE_KEYUP;
	   keEvent.ui64Time = m_tTime.CurMicros();
	   m_keKeyEvents[_ui32Key].push_back(keEvent);
        }
        //(...)
protected :
	struct KB_KEY_EVENT {
		KB_KEY_EVENTS keEvent;
		unsigned long long ui64Time;
	};

	CCriticalSection m_csCritic;
	CTime m_tTime;
	std::vector m_keKeyEvents[KB_TOTAL_KEYS];
};

LRESULT CALLBACK CWindow::WindowProc(HWND _hWnd, UINT _uMsg, WPARAM _wParam, LPARAM _lParam) {
	switch (_uMsg) {
	case WM_KEYDOWN: {
		m_kbKeyboardBuffer.OnKeyDown(_wParam);
		break;
	}
	case WM_KEYUP: {
		m_kbKeyboardBuffer.OnKeyUp(_wParam);
		break;
	}
    //(...)
}

Now we have time-stamped events. The thread that listens to inputs it's aways running on the background, so it cannot interfere directly in our simulation.

We have a buffer that holds keyboard information, what we need now it's to process that in our game logical update. We saw that the responsability of the keyboard buffer was to buffer inputs. What we want know it's a way of using the keyboard in the game-side, requesting information such "for how long the key was pressed?", "what is the current duration of the key?", etc. Instead of logging inputs (which it's the correct way, and trivial too!), we keep it simple here and use the keyboard buffer to update our keyboard, which has all methods for our simple keyboard interface that can be seen by the game (the game-state, of course).

class CKeyboard {
        friend class CKeyboardBuffer;
public :
	CKeyboard();

	inline bool KeyIsDown(unsigned int _ui32Key) const {
               return m_kiCurKeys[_ui32Key].bDown;
        }
        unsigned long long CurKeyDuration(unsigned int _ui32Key) const {
               return m_kiCurKeys[_ui32Key].ui64Duration;
        }
        //(...)
protected :
	struct KB_KEY_INFO {
		/* The key is down.*/
		bool bDown;

		/* The time the key was pressed. This is needed to calculate its duration. */
		unsigned long long ui64TimePressed;

		/* This should be logged but it's here just for simplicity. */
		unsigned long long ui64Duration;
	};

	KB_KEY_INFO m_kiCurKeys[CKeyboardBuffer::KB_TOTAL_KEYS];
	KB_KEY_INFO m_kiLastKeys[CKeyboardBuffer::KB_TOTAL_KEYS];
};

The keyboard it's now able to be used as our final keyboard interface on the game-state, but we still need to transfer the data coming from the keyboard buffer. We will give our game an instance of the CKeyboardBuffer. So, each logical update we request all keyboard events up to the current game logical time from the thread-safe window-side keyboard buffer, and transfer that to our game-side keyboard buffer, then we update the game-side keyboard that will be used by the game. We'll implement two functions in our keyboard buffer. One that transfer thread-safe inputs and other that just update a keyboard with it's current keyboard events.

void CKeyboardBuffer::UpdateKeyboardBuffer(CKeyboardBuffer& _kbOut, unsigned long long _ui64MaxTimeStamp) {
	CLocker lLocker(m_csCritic); //Enter in our critical section.

	for (unsigned int I = KB_TOTAL_KEYS; I--;) {
		std::vector& vKeyEvents = m_keKeyEvents[I];

		for (std::vector::iterator J = vKeyEvents.begin(); J != vKeyEvents.end();) {
			const KB_KEY_EVENT& keEvent = *J;
			if (keEvent.ui64Time < _ui64MaxTimeStamp) {
				_kbOut.m_keKeyEvents[I].push_back(keEvent);
				J = vKeyEvents.erase(J); //Eat key event. This is not optimized.
			}
			else {
				++J;
			}
		}
	}
} //Leave our critical section.
void CKeyboardBuffer::UpdateKeyboard(CKeyboard& _kKeyboard, unsigned long long _ui64CurTime) {
	for (unsigned int I = KB_TOTAL_KEYS; I--;) {
		CKeyboard::KB_KEY_INFO& kiCurKeyInfo = _kKeyboard.m_kiCurKeys[I];
		CKeyboard::KB_KEY_INFO& kiLastKeyInfo = _kKeyboard.m_kiLastKeys[I];

		std::vector& vKeyEvents = m_keKeyEvents[I];

		for (std::vector::iterator J = vKeyEvents.begin(); J != vKeyEvents.end(); ++J) {
			const KB_KEY_EVENT& keEvent = *J;

			if ( keEvent.keEvent == KE_KEYDOWN ) {
				if ( kiLastKeyInfo.bDown ) {
				}
				else {
					//The time that the key was pressed.
					kiCurKeyInfo.bDown = true;
					kiCurKeyInfo.ui64TimePressed = keEvent.ui64Time;
				}
			}
			else {
				//Calculate the total duration of the key event.
				kiCurKeyInfo.bDown = false;
				kiCurKeyInfo.ui64Duration = keEvent.ui64Time - kiCurKeyInfo.ui64TimePressed;
			}

			kiLastKeyInfo.bDown = kiCurKeyInfo.bDown;
			kiLastKeyInfo.ui64TimePressed = kiCurKeyInfo.ui64TimePressed;
			kiLastKeyInfo.ui64Duration = kiCurKeyInfo.ui64Duration;
		}

		if ( kiCurKeyInfo.bDown ) {
			//The key it's being held. Update its duration.
			kiCurKeyInfo.ui64Duration = _ui64CurTime - kiCurKeyInfo.ui64TimePressed;
		}

		//Clear the buffer for the next request.
		vKeyEvents.swap(std::vector());
	}
}

Now we're able to request up-to-time inputs, and we can use that in a game logical update. Example:

bool CGame::Tick() {
	m_tRenderTime.Update(); //Update by the rela elapsed time.
	UINT64 ui64CurMicros = m_tRenderTime.CurMicros();
	while (ui64CurMicros - m_tLogicTime.CurTime() > FIXED_TIME_STEP) {
		m_tLogicTime.UpdateBy(FIXED_TIME_STEP);
		UINT64 ui64CurGameTime = m_tLogicTime.CurTime();
		m_pkbKeyboardBuffer->UpdateKeyboardBuffer( m_kbKeyboardBuffer, ui64CurGameTime ); //The window keyboard buffer pointer.
		m_kbKeyboardBuffer.UpdateKeyboard(m_kKeyboard, ui64CurGameTime); //Our non thread-safe game-side buffer will update our keyboard with its key events.
		
                UpdateGameState();//We can use m_kKeyboard now at any time in our game-state.
	}
	return true;
}

What we have done here was dividing our input system in small pieces synchronizing it with our logical game simulation. After you got all informations you can start re-mapping those and logging, etc—what matters is that it's synchronized with the logical game time and the game it's able to interface with that without losing input information.

It's not optimized because was not my intention to do any production code here, but some of the articles never get into implementation because it depends how many devices you have or for some other reason.

Send me a message if you have any question and I'll answer as possible I can with or without code, but try to visualize the solution by yourself for a moment.

Cheers,
Irlan.

4 Simple Things I Learned About the Industry as a Beginner

$
0
0
For the last year or so I have been working professionally at a AAA mobile game studio. This year has been a huge eye opener for me. Although this article is really short and concise, I`d really like to share these (although seemingly minor) tips for anyone who is thinking about joining, or perhaps has already joined and starting in the professional game development industry.

All my teen years I had only one dream, to become a professional game developer, and it has finally happened. I was most excited, but as it turns out, I was not ready. At the time of this post, I`m still a student, hopefully getting my bachelors degree in 2016. Juggling between school and a corporate job (because it is a corporation, after all) has been really damaging to my grades, to my social life, but hey, I knew what I signed up for. In the meantime I met lots of really cool and talented people, from whom I have learned tons. Not necessarily programming skills (although I did manage to pick up quite a few tricks there as well), but how to behave in such an environment, how to handle stress, how to speak with non-technical people about technical things. These turned out to be essential skills, in some cases way more important than the technical skills that you have to have in order to be successful at your job. Now, don't misunderstand me, the fact that I wasn’t ready doesn’t mean I got fired, in fact I really enjoyed and loved the environment of pro game development, but I simply couldn’t spend so much time anymore, it has started to become a health issue. I got a new job, still programming, although not game development. A lot more laid back, in a totally different industry though. I plan to return to the game development area as soon as possible.

So, in summary, I’d like to present a few main points of interest for those who are new to the industry, or are maybe contemplating becoming game developers in a professional area.

1. It’s not what you’ve been doing so far


So far you’ve been pretty much doing what projects you wanted, how you wanted them. It will not be the case anymore. There are deadlines, there are expectations to be met, there is profit that needs to be earned. Don’t forget that after all, it is a business. You will probably do tasks which you are interested in and you love them, but you will also do tedious, even boring ones.

2. Your impact will not be as great as it has been before


Ever implemented a whole game? Perhaps whole systems? Yeah, it’s different here. You will probably only get to work with parts of systems, or maybe just tweaking them, fixing bugs (especially as a beginner). These games are way bigger than what we’re used to as hobbyist game developers, you have to adapt to the situation. Most of the people working on a project specialize in some area (networking, graphics, etc.). Also, I figured that lots of the people in the team - including myself, I always went with rendering engines, that's what my thing is :D - have never done a full game by themselves (and that is okay).

3. You WILL have to learn to talk properly with managers/leads, designers, artists


If you’re working alone, you’re a one man team and you’re the god of your projects. In a professional environment talking to non-technical people about technical things may very well make the difference between you getting to the next level, or getting fired. It is an essential skill that can be easily learned through experience. In the beginning however, keep your head low.

4. You WILL have to put in extra effort


If you’re working on your own hobby project, if a system gets done 2 days later than you originally wanted it to, it’s not a big deal. However, in this environment, it could set back the whole team. There will be days when you will have to work overtime, for the sake of the project and your team.

Essentially, I could boil all this down to two words : COMMUNICATION and TEAMWORK.

If you really enjoy developing games, go for the professional environment, however if you’re not sure about it, avoid it. All of the people manage to be successful here by loving what they do. Love it or quit it.

14 Jan 2015: Initial release

How to create game rankings in WiMi5

$
0
0

Introduction


Each game created with WiMi5 has a ranking assigned to it by default. Using it is optional, and the decision to use it is totally up to the developer. It’s very easy to handle, and we can sum it up in three steps, which are explained below.

  1. Firstly, the setup is performed in the Ranking section of the project’s properties, which can be accessed from the dashboard.
  2. Then, when you’ve created the game in the editor, you’ll have a series of blackboxes available to handle the rankings.
  3. Finally, once it’s running, a button will appear in the game’s toolbar (if the developer has set it up that way) with which the player can access the scoreboard at any time.

It is important to know that a player can only appear on a game’s scoreboard if they are registered.

Setting up the Rankings


Note:  Remember that since it’s still in beta, the settings are limited. So we need you to keep a few things in mind:

- The game is only assigned one table, which is based both on the score obtained in the game and on the date that score was obtained. In the future, the developer will be able to create and personalize their own tables.

- The ranking has several setup options available, but most of them are preset and can’t be modified. In later versions, they will be.


In the dashboard, in the project’s properties, you can access the rankings’ setup by clicking on the Rankings tab. As you can observe, there is a default setting.


image04-1024x517.png


For configuring the ranking, you will have the following options:

Display the button in the game’s toolbar


This option is selected by default, and allows the button to show rankings to appear on the toolbar that’s seen in every game. If you’re not going to use rankings in your game, or don’t want that button to appear, in order to have more control over when the scoreboard will be shown, all you have to do is deactivate this option. The button looks like this:

image05.png

Only one result per user


NOTE: The modification of this option is turned off for the time being.

This allows you to set up whether a player can have multiple results on the scoreboard or only their best one. This option is turned off by default, meaning all the player’s matches with top scores will appear.

It’s important to note that if this option is turned off, the player’s best score is the only one that will appear highlighted, not the last. If the player has a lower score in a future match, it will be included in the ranking, but it may not be shown since there’s a better score already on the board.

Timeframe Selection


NOTE: The modification of this option is turned off for the moment, and is only available in all-time view, which is further limited to the 500 best scores.

This allows the scoreboard to have different timeframes for the same lists: all-time, daily, monthly, and yearly. The all-time view is chosen by default, which, as its name implies, has no time limit.

Match data used in rankings


NOTE: The modification of this option is turned off for the moment. The internationalization of public texts is not enabled.

This allows you to define what data will be the sorting criteria for the scoreboard. The Points item is used by default; another criterion available is Date (automatically handled by the system), which includes the date and time the game’s score is entered.

Of each of the data that is configured, we have the following characteristics reflected in the board columns:
  • Priority: This indicates the datum’s importance in the sorting of the scoreboard. The lower the number, the more important the datum is. In the default case, for example, the first criterion is points; if there are equal points, then by date.
  • ID: Unique name by which the datum is identified. This identifier is what will appear in the blackboxes that allow the rankings’ data to be managed.
  • Type: The type of data.
  • List order: Ascending or descending order. In the default case, it will be descending for points (highest number first), and should points be equal, by ascending order by date (oldest games first).
  • Visible: This indicates if it should be shown in the scoreboard. That is to say, the datum is taken into account to calculate the ranking position, but it is not shown later on the scoreboard. In the default case, the points are visible, but the date and time are not.
  • Header title: The public name of the datum. This is the name the player will see on the scoreboard.
It is possible to add additional data with the “+” button, to modify the characteristics of the existing data, as well as to modify the priority order.

Once the rankings configuration is reviewed, the next step is to use them in the development of the game.

Making use of the rankings in the editor


When you’re creating your game in the editor, you’ll find in the Blackboxes tab in the LogicChart that there’s a group of blackboxes called Rankings, in which you will find all the blackboxes related to the management of rankings. From this link you can access these blackboxes’ technical documentation. Nevertheless, we’re going to go over them briefly and see a simple example of their use.

SubmitScore Blackbox


This allows the scores of the finished matches to be sent.

image03.png

This blackbox will be different depending on the data you’ve configured on the dashboard. In the default case, points is the input parameter.

When the blackbox’s submit activator is activated, the value of that parameter will be sent as a new score for the user identified in the match.

If the done output signal is activated, this will indicate that the operation was successful, whereas if the error signal is activated, that will indicate that there was an error and the score could not be stored.

If the accessDenied signal is activated, this will mean that a non-registered user tried to send a score, which will allow you to treat this matter in a special way (like showing an error message, etc.).

Finally, there is the onPrevious signal. If you select the blackbox and go to its properties, you’ll see there is one called secure that can be activated or deactivated. If you activate it, this blackbox will not send the game’s result as long as the answer to a previously-sent result is still pending. Therefore, onPrevious will activate if you try to send a game result when the answer to a previously-sent result is still pending, and the blackbox’s secure mode is activated.

ShowRanking Blackbox


This allows the scoreboard to be displayed (for example, at the end of a match). It has the same result as when a player presses the “see rankings” button on the game’s toolbar.

image00.png

When this show input is activated, the scoreboard will be displayed. If it was displayed successfully, the shown output signal will be activated, and when the player closes the board, that will activate the closed output signal, which will allow us to also personalize the flow of how it’s run.

Example of the use of the blackboxes


If you want, for example, to send a player’s final score at the end of a match so that it appears on the scoreboard, you can do that this way:

Suppose you have a Script you manage the end of the game with and it shares a parameter with the points the player has accumulated up to that moment:


image02.png


You’d have to create a SubmitScore blackbox...


image06.png


…and join the gameEnded output (which, let’s say, is activated when the game has ended) to the submit input in the blackbox you just created. It will also be necessary to indicate the variable the score has that we want to send, points from the DetectGameEnd script in our case. So, click and drag it to the SubmitScore blackbox to assign it. With these two actions, you’ll get the following:


image01.png


And the game would then be read to send scores. The player could check the board at any time by clicking on the menu button that was created for just that purpose, as we saw the setup section.

However, you could want the scoreboard to appear automatically once the match is over. To do that, use the ShowRankings blackbox which, for example, could join to the done output in the SubmitScore blackbox and thus show the scores as soon as the score has been sent and confirmed:


image07.png


And with that you have a game that can send scores and show the scoreboard.

Running the game


Once a game that is able to send match results is developed, you have to remember that it behaves differently in “editing” than in “testing” and “production” mode.

By “editing” mode, we mean when the game is run directly in the editor, in the Preview frame, to perform quick tests. In this mode, the scores are stored, but only temporarily. When we stop running it, those scores are deleted. Also, in this mode, the scoreboard is “simulated”; it’s not real. This means that there’s no way to access the toolbar button, since it doesn’t really exist.

Sending and storing “real” scores is done by testing the games or playing their published versions. To test them, first you have to deploy them with the Deploy option on the Tools roll-down menu, and then with the Test option (from the menu or from the dialogue box you see after the Deploy one) you can start testing your game. In this mode, the scoreboard is real, not simulated, so the match scores are added to the ranking definitively.

Conclusion


Dealing with rankings in WiMi5 is very easy. Just configure the rankings you want to use. Then use the rankings blackboxes and let your players challenge between them trying to get the best score. If you don´t want to use a ranking in your game, just click on the settings to hide this feature.

Estimating Effort for Small Projects

$
0
0

Overview


Everybody has to report status or estimate a work task to their boss. Even "the boss" usually has to report status, if only to shareholders or the owners.

This article discusses an approach using some simple formulas and Excel (or your favorite Excel substitute) to give your status a more scientific basis than "off the cuff". It also allows you to answer "what if" questions fairly quickly without a lot of "hand waving".

Giving good estimates will have positive effects for you, your team, and your management (who expect you to make them look good while rewarding you with [FILL IN YOUR DREAMS AND WISHES HERE]).

I may be stretching this last part a bit, or living in positive-moral-ethical-symbiotic-seeming-dreamscape that does not really exist. Trust me, though, try it out. Giving good numbers will make you feel better than pulling penguins out of your...um...imagination.

Problem Statement


At some point early in your career as a developer, you are going to be asked two questions that every sane developer has come to dread:

  1. What is your progress on [FILL IN YOUR TASK HERE]?
  2. When will it be finished?

Initially, you will probably be asked for these "estimates" (you are not counting photons, after all) after you have already started the work. These will be used for:
  • Figuring out if you are "getting stuff done".
  • Enabling others to know you need help before you may realize it yourself. Keeping your nose in the code creates its own kind of myopia.
  • Coordinating the work of others (your teammates, the test team, marketing, sales...you know...those "other folks" who go into the office as well but do not seem enthralled by what you do...yet for some reason are interested in the outcome...) so you can "join" up at the proper time.
Sooner or later, you will be asked these before the work even starts and these estimates that you create will:
  • Form the basis of how your team leader plans the tasks for the others on your team.
  • Be used to estimate the overall project cost (and perhaps decide if it happens).
  • Probably come back to haunt you.
That is to say, plan the project, determine if it is going into the weeds, plan intersection points for the project, allocate budgets, and in general make everybody feel that the chaos is "managed".

While it is true you can try to wave off or swag these questions with an off-the-cuff answer, it will usually work out better for everybody involved if you develop a strategy for answering these questions with some credibility.

I Have a Great Tool


If this sounds a lot like something that belongs in the Scrum or DSDM tool you have been using (Jira, Scrumwise, pick your favorite), you are correct. However, before you dash off to read a good book on Game Programming Patternsir?t=nonlideainc-20&l=as2&o=1&a=09905829, you might consider the following:
  • LOTS of companies do not have high-end project management tools. You may work for one already. You may work for one in the future. Better to practice it now and be ready for that interview question about how you manage your manager's expectations.
  • Your company may work for many different clients and tools are at the project level, so you only get the good ones if you are on those projects.
  • If the inputs to the tools have a lot of "bottom up" granularity, you might already have all you need. If they do not, you have the option of spending time putting the items into the tool or coming up with the numbers and putting a "next level up" number in. This is a decision about how much granularity you have in your tool.
  • It is really hard to run "what if" scenarios with these tools. They are more geared to predicting based on current state. Dinking with them to flip around assignments, order of execution, weight on tasks, etc., can have unintended and complex outcomes. Sometimes the "UNDO" is REALLY hard to find.
The reality is that this is a skill that is not specific to estimating a software project. It's a skill for estimating ANY project.

Basic Approach


As a computer scientist, the idea of giving an "estimate" may rankle you a little bit. Fortunately, many scientists have gone before us and they seem to have had some success with it, so we can skip right past the "feels icky" concern and get right to "how can we make numbers make sense". It's better than penguins.

Sequential Operations


The first thing you have to realize, and this will probably NOT come as a shock, is that everything you do has a "Start" and an "End". When you start, you are 0% complete. When you end, you are 100% complete. You start, go through the steps sequentially, and reach the end. It is the steps in the middle you have to count.

I'm going to use the example of a rather pedestrian task, fixing bugs. Without getting too deep into the process of your company, the rough list of what you need to do to resolve a bug in a production system is as follows:
  • Investigate the bug.
  • Write or change some code to fix it.
  • Perform some kind of desk check or unit test to verify it works. You may have to write the unit test.
  • Check it in so that others can see it.
  • Integrate your change and verify you have not destroyed the universe.
  • Wait for QA to bless and it and close/complete it.
You could just as easily have a more exciting example where you have to design a game engine; you still have individual pieces to build and the same basic SDLC steps for each one (design, code, unit test, integrate, lather, rinse, repeat, ...).

The Recipe


We are going to use a spreadsheet (I am using Excel, you can use any one you wish, they all support something like these operations) to keep track of the "state" of completion for each task you have to work. Practically speaking, you can really only do one thing at a time. You may be spread across other projects, but we can handle that a different way. Assume, for now, that you are going to "start", execute a series of steps to carry you along, and then finally "end" when it will be done.
  • You assign a percentage complete (0.0-1.0, you will see why later) to each state.
  • You assign a state to each task you must complete.
  • Map each state to a percentage complete for the step.
  • Add up all the "percent completes" and divide by how many there are to get the average completion (how much you are done).
As this is not a course in Excel, I have put all this into a .zip file with Excel Spreadsheets in both .xls and .xlsx format. Attached File  Estimating Projects.zip   82.58KB   25 downloads


Attached Image: EstimatingProjects_1.png


You do not have to follow this format explicitly. I am going to enumerate and describe all the elements in this particular incarnation:

  1. This is just a list of the item numbers. This way I can add charts or whatever at the top by moving the tables down and not have to worry about referring to specific "Excel" row; I always refer to #XXX.
  2. This table is for bugs. It could also be "component" or "API Method", etc.
  3. It always helps to have a reminder what the numbers refer to. No secret sauce here.
  4. These are the states you modify. Each is set up as a "Data Validation" with a "List" type (the list items are column G). I STRONGLY ENCOURAGE you to do this. Validation Lists like this stop people from randomly typing junk into things that should have a fixed set of items and breaking your house of cards. You don't let people other developers use cast to set their own values to your enum instances, right?
  5. This is a bit of the secret sauce. The value in D is looked up in G and the returned index from H is placed here. Just like a [tt]std::map<blah>/tt] lookup.
  6. This is the list of states. If you want to add a new one, just add a new element in the middle (to both column G and H) and the D/E columns will honor it. Nifty when you want to add/remove states. NOTE: I am using "past tense verbs" for states. As in "this has already been done". Be consistent in your language choice.
  7. This is the percentage looked up. A bit more secret sauce here. The space between the steps are NOT LINEAR, unless you want them to be. It takes longer to code and test than investigate, so the % complete reflects that by going from 0 - 0.2 - 0.5.
  8. A bright yellow box gives you a perfect eye-draw-point for the review where you will have to show this. It looks a little sad at 0.0% right now, though...

First Pass - Basic Estimates of Completion


Now that we have the basic template down, let's plug in some "actual work done" and update the numbers.


Attached Image: EstimatingProjects_2.png


  1. So we completed two items and one of them has been unit tested. And that moves us to about 34% done. That seems pretty straight forward.
  2. The drop down on each of these boxes means you cannot fat-finger in the wrong state.

One important point to "point out" is that you need to check that the states all work as expected. Move all of them to "coded" and you should get 50%. Move all of them to "integrated", 90%. And so on.

Depending on how the "lookup" method works, it may require a sorted or non-sorted list for G (this one does NOT require a sorted list). Be aware of that if you start to see numbers not lining up. Always do a "unit test" to make sure you are not reporting junk.

Second Pass - Better Estimates of Completion


You could stop with the first pass and that might be fine. Your boss comes up to you and says, "how long will it take". You take each item, multiply it by an "average" number of hours for each and now you have the "Total Work Estimate". (1 - % Complete) X Total Work Estimate = Hours Remaining. So, you report this, get back to work, and coding bliss ensues.

BUT, if you add one more "knob" to the calculation, you are going to add a dimension that lies at the heart of every savvy developer's very personal contribution to the project: YOUR KNOWLEDGE OF THE DOMAIN SPACE.

If you look at the list in C, a few alarms should be going off. It is reasonable to assume that "Change Background Color" will take a considerably shorter time than "System time randomly sets to future." However, the linear-state-estimator we have gives all these tasks the same "weight" in terms of how much effort they require for that type of "state operation." What you want to do is "weight" them based on "how hard they are because you know how hard that part is going to be to fix".

You can do this a lot of ways. I tend to follow the 1, 2, 4, 9 model. Also known as "trivial", "some work", "some real work", and "send out for pizza". Truth be told, this started as a square approximation for difficulty, but "2" kept showing up because there was no middle ground between "1" and "4". You can choose your own scale. The key point here is that because you have knowledge of the system, this is where you get to put it to good use. You can defend your estimates because you know "where the bones are buried". If this is not that kind of task or project, maybe you rely on your hard-earned-experience to come up with some estimates. It is still better than penguins.

This is what it looks like:


Attached Image: EstimatingProjects_3.png


There are some interesting things here to notice:

  1. Our percentage completion for the same "states" we had before jumped from 34% to 63%. So completing a couple of "big chunks" up front really improves the number quickly. On the other side, if you are going through the project and you are not "weighting" but you do all the small stuff up front, you could be in for a nasty surprise, time-wise, when you start working on the bigger items. This is the advantage of using your domain knowledge to make these estimates. The "Complete" calculation consists of SUM(G)/SUM(F).
  2. The points chart is manually entered and fairly straight forward.
  3. The calculation here is just "%" X Points.
  4. A calculation for "Counts" is done by counting how many times the state (I) shows up in the states (D). This is handy for a quick look at where you are overall when the number of rows gets large.

Third Pass - Time


Now that we have a better estimator for how much work is in front of us and how much work has been done, we can add another dimension: Time. After all, your boss is going to still ask "how long will it take?"

This is relatively easy to add. Decide how many "points" of work you can reasonably do in an hour, then do some basic unit cancellation and you get the following:


Attached Image: EstimatingProjects_4.png


  1. I'm a big fan of "Meaningful Units". Do they still teach unit cancellation?
  2. The number of Points Per Hour is up to you, but should be reflective of the values you choose in F and your knowledge of the domain.
  3. Total Days = SUM(F) / (Points Per Hour X Hours Per Day).
  4. Days Remaining is just (1- % Complete) X Total Days. Weeks Remaining is this value divided by Days Per Week.

Really, It Is Better Than Penguins


Suppose you are really terrible at estimating. If you screw up a number here or there, the odds are good that you are going to go too high on some and too low on others. A funny thing happens with numbers called "The Law of Large Numbers." What this boils down to is that making and adding up a number of small estimates will average out and yield an estimate that is usually not so bad. Yes, you will royally screw up one here and there, but on average, it should work.

Of course, there is ONE slight qualifier to this. You may be an "over" or "under" estimator. That is to say, you think too much (or too little) of your skills and have an internal "multiplier" on your estimates. Personally, I underestimate EVERY TIME how long it will take me to do something (so clearly my ego is healthy). But I (and I feel this is in line with most people) am consistent with my underestimation. I'm always off by about 1/2. So at the end, I always have a "multiply everything by this one factor", and my factor is 2X. DO NOT factor this in while doing your estimates...multiply it as a constant factor at the end on your Points Per Hour value. Or you can adjust your PPH value accordingly. Remember, your goal is to get a reasonable estimate quickly, not generate more work.

If you don't want to figure out your factor, don't worry about it. Your boss will. If he is a good boss, he may mention it once or twice, but will probably just factor it in without telling you after that. It will be better if you come to terms with it though and just stick it in there.

Playing "What If" Games


Once you gotten this put together, you can play the "what if" game and answer questions quickly and easily.

  1. Your boss asks how much time can you save if they decide to abandon a fix for this cycle - Set it to "complete" or add a new state of "abandoned" and give it a % value of 1.0.
  2. Your boss says he will add a second person to do the work - Modify your Points Per Hour so you work faster (though not 2X, because nine women still cannot make a baby in one month).
  3. Your boss says "work more hours in the day" - Ok. The reason it says "6" in the sheets is because that is about how much effective actual work time developers have. You can get "more" from "crunch time", but how much more and for how long before diminishing returns make it worthless is a complicated question. That being said, you can increase the Hours Per Day, but my money says your Points Per Hour should probably go down a bit...sleepy eyes make mistakes.
  4. Your boss decides to time share you with another project. Reduce your Points Per Hour by a factor to account for this. If you are spread between two projects, you should drop your PPH by at least half (though probably more depending on your personal context switching). If your boss wants you on more projects...well...you may consider this article to be interesting. Share it with your boss at your discretion...when you run out of good options, you are left with bad ones.

Conclusion


If you are in the software world and think about Scrum and "burn down charts", it should be obvious that the technique presented here is definitely in the same ballpark. This technique uses a tool that is ubiquitous and the approach can be easily extended to other domains easily.

Article Update Log

28 Jan 2015: Minor cleanups and added article reference.
24 Jan 2015: Initial release

GDC Social Tips

$
0
0
I wrote some tips on meeting people at GDC a while ago. It was the GDC that lead me to my current job (more on this here). Recently, I got some friends asking me for advice on breaking into the game industry, how to present yourself, and how to meet people at GDC. So I decided to write another post about it. This will be a collection of what I learned from the Career Service Center and the career workshops at DigiPen, plus my own experience.

These tips worked for me, but they might not suit everyone. Feel free to disregard any of them at your discretion.

Email, Twitter, Domain Name


Before doing anything else, you should have a professional-looking email address. Don't use random internet names like AwesomeDude7345; that makes your address look unprofessional. Make sure the only thing present in the name part of the address is your name. The email address I share with people is MingLun.Chou[at]gmail.com.

Applying the same rule to your Twitter handle and domain name can help them appear more professional as well. My Twitter handle is TheAllenChou, and my domain name is AllenChou.net. Of course, you can always throw in some variation if that helps express more about yourself, such as JasonGameDev.net or AmysArt.net.

LinkedIn


LinkedIn is a professional social network where you can build online professional connections. You can join groups and follow companies on LinkedIn. Your profile page is the place to show people your professional side; maintain it well. Many recruiters actively look for potential hires on LinkedIn by going through his/her 1st, 2st, and 3rd degree connections. It is important that you build connections with people in the industry on LinkedIn. I constantly receive messages on LinkedIn from recruiters in the game industry and software engineering industry.

You can customize your LinkedIn profile page's URL. Choose one that follows the aforementioned rule for your email address. My LinkedIn profile page URL is linkedin.com/in/MingLunChou.

Business Cards


Always keep a stack of business cards with you, so you are prepared when the time has come for you to exchange contact information, or when you just want to present yourself to others. To make yourself appear more professional, use a card holder. It looks much more professional to pull out business cards from a card holder than from a jeans pocket.

After you give someone your business card and leave, that person might want to write down some notes about you on your business card, so they can still remember you after meeting many other people at GDC. Choosing a material that is easy to write on for your business card would make this process easier, as well as using a light color on the back of your card and leaving some writing space.

Make sure your name is the most noticeable text element on your business card. If you want to, just use a few stand-alone words to describe your profession. Don't try to squeeze a wall of text that describes every positive thing you have to say about yourself. Once I received a card with a wall of text, saying how passionate a designer the person is and his many holy life goals as a designer. I read the first few sentences and put the card away, never bothering finishing it. This is a business card, not a cover letter.

Below is my current business card design. My name is the largest text element and is at the direct center. I put down four of my primary professional skills (Physics, Graphics, Procedural Animation, and Visuals) below my name. My contact information is at the bottom, including my website URL, email address, LinkedIn profile URL, Twitter handle, and Google+ handle.

Attached Image: business card.jpg

Resumes


Most recruiters prefer resumes with only one page, but some recruiters prefer two pages. So I just keep my resume one-page.

If you want to send a resume to a company that you are applying for, always tailor the resume to fit the company. One company, one specific resume. Look for the requirements for the position you are applying for on the company's website, and make sure they are the first things on your resume. Also, do not forget to include an objective line that states the position you intend to apply for.

In addition, prepare a generic version of the resume. This way, you can show it on your website, and present it at the company booths in the expo hall at GDC.

Personal Branding


Personal branding is optional, but it is a powerful tool if done right.
I put down Long Bunny, a little character I designed, on my business cards, resumes, and my website.

Attached Image: long bunny.png

At first, I designed Long Bunny just for fun, because I love bunnies. Then, I thought I could fill it in the extra space on my business cards and resumes. This turned out to be the right thing to do, and Long Bunny became my personal branding.

On a Sucker Punch company day at DigiPen, I gave the recruiter my business card and resume. The next time I talked to her at another company day one year later, she did not recognize me at first. But after I showed her my business card, she instantly remembered me, saying it's because of the Long Bunny. Also, in all my follow-up emails (a separate tip that will be covered later), I start with "Hi, I'm Allen Chou. My business card has a long bunny on it." Most people would remember me because of my personal branding.

The W Hotel Lobby


At GDC, it is well known that many attendees who want to socialize and do not have a party to go to will hang out at the lobby bar of The W Hotel. If you want to meet people from the game industry at GDC and have no party on your list, then The W Hotel is the place to go. My friends and I usually come back from the afternoon GDC activities to our hotel and chill out until 8pm. Then we would head out to The W Hotel's lobby bar. That is where we meet new people from the industry and introduce ourselves. We usually stay there at least until 11pm, and would stay longer if we are in a long conversation.

Starting A Conversation


The hardest part to meeting people is to start a conversation. The first time I went to GDC, I was too shy to walk up to a stranger and start talking. This is a skill you must practice if you want to meet people.

There is really nothing scary about opening a conversation. Almost everyone at The W Hotel's lobby bar during GDC is in the game industry, very laid back, and welcomes conversations. Just pick someone that does not seem to be occupied, say hi, and introduce yourself. I usually start with what I do and then ask what the other person does, and then at some point casually ask for a business card exchange, either by saying "here's my business card" or "hey, do you have a business card?" It's that simple.

If you feel like the conversation needs to be ended, either because the other person appears to be not interested in talking any more, or you are running out of things to say, say "nice meeting/talking to you", "I'm gonna take off", and leave. No hassle.

Follow-Ups


Following up with an email is very important after obtaining contact information. After the person that has given you his/her business card leaves, write down notes about the conversation you had and reminders for sending the person your work or resumes (if asked). Within 48 hours, write an email to re-introduce yourself, make comments on the conversation, and thank the person for talking to you. This shows that you care. Also, be sure to connect with the person on LinkedIn if you can find his/her page.

Tablets


I always bring a tablet with me to GDC, loaded with demo reels. I actively look for opportunity during a conversation to pull out my tablet and demonstrate my work. I also upload the demo reels to my phone, just in case my tablet runs out of battery.

Notepads & Pens


It's convenient to carry a mini notepad and a pen with you at all times. GDC is quite a busy event, and people can quickly run out of business cards. When you give someone your business card and the person is out of cards, you can ask the person to write down contact information on your notepad with your pen.

That's It


I hope these tips will help you prepare for the upcoming GDC this year. Go meet people and have fun!

Making a Game with Blend4Web Part 7: Enriching the Game World

$
0
0
We continue our gamedev series about the adventures of Pyatigor! (Yes, this is how we decided to name our protagonist.) In this article, we'll explain how to create environment FX and other details which make the game world more diverse and dynamic.


Attached Image: mg_p7_img01.jpg


Environment FX


By running the game or just viewing the screenshot above, you can see new elements in the scene. Let's take a look at them one by one:
  • heat haze, that is optical distortion due to differences in air temperature,
  • smoking near the perimeter of the level,
  • lava flaming,
  • small rocks floating in lava,
  • smoking in the sky.
First of all, let's talk about heat haze, smoking and lava flaming. All these effects were created using dynamically updated materials.


mg_p7_img02.jpg?v=2015012318494620150123


For the heat haze material, a solid encircling geometry in the form of a cylinder (1) was created around the islands. As a result, all objects behind this geometry will be distorted when viewing from the center.

For the smoking material, geometry around the islands was created as well, but with spaces (2).

Lava flaming geometry (3) is situated in places where other objects make contact with lava.

Heat Haze


This effect is based on the refraction effect coupled with UV animation of a normal map. Let's take a look at the material.


mg_p7_img03.jpg


The normal map (1) is at the heart of this material and is used with different scaling twice. Thanks to a Time Blend4Web-specific node, which is being added to one of the UV channels (2), this texture glides through the material creating an illusion of rising heated air.

The normal map is passed to a Refraction node (3), which is yet another Blend4Web-specific node. Also, a mask is generated (4) to be passed into this Refraction node in order to specify in which places distortions will be observed, and in which places it will not.

The Levels Of Quality nodes (5) situated before the final color and alpha cause this material to disappear at low quality settings, where the refraction effect is not available.


mg_p7_img04.jpg?v=2015012318494620150123


The above picture shows how it works. On the left the original red sphere is shown ("clean"), then the mask is pictured ("mask"), more to the right the normal map is shown ("normal") which glides through the UV. This will result in visible distortions ("refraction") of the sphere when observing it through the material.

Smoking Material


The material for smoking effect is made similar to the heat haze.


mg_p7_img05.jpg


It is based on the tile texture resembling smoke (1), which is passed to the alpha channel of the material. It moves along the UV coordinates under the influence of the Time node (2) and is combined with the vertex color with a different scale (3 and 4). This vertex color fades the material out on the edges of the geometry.


mg_p7_img06.jpg?v=2015012318494620150123


In the above picture you can see how it works. In this case, black color corresponds to fully transparent areas.

Lava Flaming


mg_p7_img07.jpg?v=2015012318494620150123


Lava flames are located near bunches of stones. Their geometry is constructed of groups of spreaded polygons, which are painted with a black and white vertex color mask, darker to the top.


mg_p7_img08.jpg


Again, this material uses the same UV animation principle. Moreover, it uses the same tile smoke texture (1). With a Time node it is being shifted through the UV in three different directions (2). The resulting color obtained from this shifting is combined with the vertex color, and then all this is used to generate the alpha mask (3). In addition, this texture is mixed a bit differently, painted with fire-like colors (4) and passed into the diffuse channel of the output.

Floating Stones


In order to add further details, I have also added small stones floating in lava.


mg_p7_img09.jpg?v=2015012318494620150123


While the source .blend file only keeps five different stones, I managed to make seven variations by adding or excluding different stones from the groups. For optimization purposes, I re-used the island material for these stones.

If you launch the game, you may notice that these stones are slightly rocking. This effect was achieved using procedural vertex animation, namely Wind Bending, which is normally used for grass, bushes and so on. This animation can be enabled for objects under the Blend4Web panel.


mg_p7_img10.jpg?v=2015012318494620150123


In this particular case I only needed to tweak two parameters: Angle for max object inclination and Frequency, which is how fast the bending will happen.

Note:  The wind bending effect is a simple and resource-conserving way to deform geometry compared with animation of any other types. Its settings are described in detail in the user manual.


Smoking in the Sky


mg_p7_img11.jpg?v=2015012318494620150123


If you stare at the sky, you may notice that it is now much more diverse because of smoking. I did that with dynamically updated material.


mg_p7_img12.jpg


Once again, I re-used the smoke texture (1) and made it shifting with a Time node (2). The important distinction from the above mentioned materials is that the texture is moving not through the UV coordinates but through global coordinates. The only thing left was to paint this texture with the right colors (3). It is also worth noting the Levels Of Quality node which switches the material to a primitive two-color gradient at the low quality mode.

Note:  The Levels Of Quality node allows to create parallel settings inside a single material for rendering at different quality modes.


mg_p7_img13.jpg?v=2015012318494620150123


Now the scene looks much more lively and detailed. However, the most interesting things are still ahead: I mean the gameplay elements for the player to interact with and for which this small virtual space was created. But about that you'll find in one of the following articles, don't miss it!

Launch the game!

Note:  Move with WASD. Attack with Enter.
Kill the golems, collect the gems and put them into the obelisks. Each obelisk require 4 gems. Golems can knock gems out of the obelisks.


The source files will be included in the upcoming release of the free Blend4Web SDK.

10 Tips From Global Game Jam 2015

$
0
0
This year Global Game Jam took place in more than 70 cities all over the world! My team, Galante, participated in Warsaw edition of GGJ – PolyJam2015.

The Choice – the game we created won the design award. We want to share our conclusions and knowledge with you after that great event :)


Attached Image: 2015-01-25 02.20.57.jpg


10 tips


1. Prepare


Prior preparation of the project and configuration along with a connection to the code repository allowed us to immediately start relevant work. Moreover, we took with us a power strip, mobile internet and supply of food for the night. All of them turned out to be useful, especially our mobile internet, when the public network got short of breath.

2. Think about the idea


It’s worth taking a few hours to thoroughly think about an idea for a game that will be created. At first we thought that 5h was a lot, but finally we did not regret – it was a good decision.

3. Design


Think about the game design from the technical side for the next 30-60 minutes. We did not do that, we hoped that the idea itself is enough. We lost a lot of time solving problems we could have predicted at the beginning.

4. Do not kidnap of a wild-goose chase


We know that everyone would like to present their best at the GGJ, presenting stunning 3D real-time strategy set in space, but this is not the time, not the place. Remember, you have only 48 hours. We wanted to add multiplayer on the two devices, but rightly we gave up on that idea, because we still had trouble finishing our application on time. Remember, presenting a simpler but finished game will bring you more satisfaction than presenting only scraps of broken code.

5. Use the tools you know well


Jam is not the time to experiment (unless you do not think about winning), so testing a new engine to create games for this type of event is not the best idea. We took advantage of the proven Cocos2d-x-js 2.2.6 and have no regrets. No trick is to use the GIT during the jam and create 34 branches for every programmer and then wasting hours on resolving conflicts. Use the tools in such a way as to assist, rather than hindering operation.

6. Headphones


Probably the most popular tool to focus on your job ;-) With headphones you can cut off from the prevailing noise in the room, and by the way you can relax with your favorite music too. It greatly helped us in the most difficult moments, when the concentration was necessary.

7. Rest


Productivity and focus on creative work is very important. Sleeping in our own beds for a few hours gave us a lot.

8. Take a break. Get some fresh air


Do not be afraid to spend 30 minutes a day just relaxing. It will give you a shot in the arm and rest your mind from hard work. We took two big breaks: After brainstorming – before coding and Saturday evening. Those breaks definitely helped us.

9. Take with you a good designer


Graphic designer to your development team is like a healer to your RPG team. A game is made of more than code. There is a reason we received the desgin award. Our graphic designer has proven invaluable. :D

10. The team


None of the above tips will be useful if you and your friends don’t make a good team. Many times we were getting into complex problems and situations, with no visible way out. For example, on Saturday evening, we had virtually no running application. It is important to approach this kind of issues with humor and do not blame each other.


Attached Image: 2015-01-25 19.45.51.jpg


That's all


Remember, it’s just a game.
Good luck on the next jams! :)

Quick look on The Choice game


Heroes


Attached Image: postacie.png


Screenshot


Attached Image: wykop.png


Gameplay


Link to youtube

Article Update Log


02 February 2015: Initial release

Are You Letting Others In?

$
0
0

Introduction


A good friend and colleague of mine recently talked about the realization of not letting others in on some of his projects. He expressed how limiting it was to try and do everything by himself. Limiting to his passion and creativity on the project. Limiting to his approach. Limiting to the overall scope and impact of the project. This really struck a chord with me as I’ve recently pushed to do more collaborating in my own projects. In an industry that is so often one audio guy in front of a computer, bringing in people with differing, new approaches is not only freeing, it’s refreshing.

The Same Ol' Thing


If you’ve composed for any amount of time, you’ve noticed that you develop ruts in the grass. I know I have. Same chord progressions. Same melodic patterns. Same approaches to composing a piece of music. Bringing in new people to help branch out exposes your work to new avenues. New opportunities. So, on your next project I’d challenge you to ask yourself – am I letting others in? Even to just evalute the mix and overall structure of the piece? To review the melody and offering up suggestions? I’ve been so pleasantly surprised and encouraged by sharing my work with others during the production process. It’s made me a better composer, better engineer and stronger musician. Please note that while this can be helpful for any composer at ANY stage of development, it's most likely going to be work best with someone with at least some experience and some set foundation. This is why I listed this article as "intermediate."

Get Out of the Cave


In an industry where so many of us tend to hide away in our dark studios and crank away on our masteripieces, maybe we should do a bit more sharing? When it’s appropriate and not guarded by NDA, of course! So reach out to your friends and peers. Folks that play actual instruments (gasp!) and see how they can breathe life into your pieces. Make suggestions as to how your piece can be stronger. More emotional. For example, I’d written out a flute ostinato that worked well for the song but was very challenging for a live player to perform. My VST could handle it all day… but my VST also doesn’t have to breathe. We made it work in a recording studio environment but if I ever wanted to have that piece performed live, I’d need to rethink that part some.

Using live musicians or collaborating can also be more inspiring and much more affordable than you might first think! Consult with folks who are talented and knowledgible at production and mixing. Because even the best song can suck with terrible production. I completely realize you cannot, and most likely WILL NOT, collaborate on every piece you do. But challenging yourself with new approaches and ideas is always a good thing. Maybe you’ll use them or maybe you’ll confirm that your own approach is the best for a particular song. Either way, you’ll come out ahead for having passed your piece across some people you admire and respect.

My point?


Music composition and production is a life long path. No one person can know everything. This industry is actually much smaller than first impressions and folks are willing to help out! Buy them a beer, coffee or do an exchange of services. When possible throw cash. Or just ask and show gratitude! It’s definitely worked for me and I think it would work for you as well. The more well versed you are, the better. It will never hurt you.

Article Update Log


28 January 2015: Initial release


GameDev.net Soapbox logo design by Mark "Prinz Eugn" Simpson

Visual Tools For Debugging Games

$
0
0

Overview


How much of your time do you spend writing code? How much of your time you spend fixing code?

Which would you rather be doing? This is a no-brainer, right?

As you set out to develop a game, having a strategy for how you are going to illuminate the "huh?" moments well before you are on the 15th level is going to pay dividends early and often in the product life cycle. This article discusses strategies and lessons learned from debugging the test level for the 2D top down shooter, Star Crossing.


Attached Image: iPad_1.png


Intrinsic Tools


Before discussing the tools you do not have by default, it seems prudent to list out the ones you will generally have available in most modern development tool chains.
  • Console output via printf(...). With more advanced loggers built into your code base, you can generate oceans worth of output or a gentle trickle of nuanced information as needed. Or you can just have it print "here 1", "here 2", etc. To get output, you have to actually put in code just for the purpose of outputting it. This usually starts with some basic outputs for things you know are going to be helpful, then degenerates into 10x the number of logging messages for specific issues you are working on.
  • Your actual "debugger", which allows you to set breakpoints, inspect variables, and gnash your teeth at when you try to have it display the contents of a std::map. This is your first line of defense and probably the one you learned to use in your crib.
  • A "profiler" which allows you to pinpoint where your code is sucking down the frame rate. You usually only break this out (1) when things go really wrong with your frame rate, (2) when you are looking for that memory leak that is crashing your platform, or (3) when your boss tells you to run before shipping even though the frame rate is good and the memory appears stable, because you don't really know if the memory is stable until you check.
All these tools are part of the total package you start out with (usually). They will carry you well through a large part of the development, but will start to lose their luster when you are debugging AI, physics, etc. That is to say, when you are looking at stuff that is going on in real time, it is often very hard to put the break point at the right place in the code or pull useful information from the deluge of console output.

Random Thoughts


If your game has randomness built into it (e.g. random damage, timeouts, etc.), you may run into serious trouble duplicating failure modes. Someone may even debate whether the randomness is adding value to your game because of the headaches associated with debugging it. As part of the overall design, a decision was made early on to enable not-so-random-randomness as follows:
  • A "cycle clock" was constructed. This is lowest "tick" of execution of the AI/Physics of the game.
  • The cycle clock was set to 0 at the start of every level, and proceeded up from there. There is, of course, the possibility that the game may be left running forever and overflow the clock. Levels are time limited, so this is not a concern here (consider yourself caveated).
  • A simple static class provided the API for random number generation and setting the seed of the generator. This allowed us to put anything we want inside of the generation so the "clients" did not know or care what the actual "rand" function was.
  • At the start of every tick, the tick value was used to initialize the seed for the random number system.
This allowed completely predictable random number generation for the purposes of debugging. This also has an added benefit, if it stays in the game, of the game evolving in a predictable way, at least at the start of a level. Once the user generates their own "random input", all bets are off.

Pause, Validate, Continue


The screenshot below shows a scene from the game with only the minimal debugging information displayed, the frame rate.


Attached Image: iPad_1a.png


The first really big problem with debugging a real-time game is that, well, it is going on in real-time. In the time it takes you to take your hand off the controls and hit the pause button (if you have a pause button), the thing you are looking at could have moved on.

To counter this, Star Crossing has a special (configurable) play mode where taking your finger off the "Steer" control pauses the game immediately. When the game is paused, you can drag the screen around in any direction, zoom in/out with relative impunity, and focus in on the specific region of interest without the game moving on past you. You could even set a breakpoint (after the game is paused) in the debugger to dig deeper or look at the console output. Which is preferable to watching it stream by.

A further enhancement of this would be to add a "do 1 tick" button while the game was paused. While this may not generate much motion on screen, it would allow seeing the console output generated from that one cycle.

The frame rate (1) is ALWAYS displayed in debug builds even when not explicitly debugging. It might be easy to miss a small slowdown if you don't have the number on the screen. But even a small drop means that you have exhausted the available time in several frames (multiple CPU "spikes" in a row) so it needs attention.

The visual debugging information can be turned on/off by a simple toggle (2). So you can leave it on, turn it on for a quick look and turn it off, etc. When it is on, it dropped the frame rate so it usually stayed off unless something specific was being looked at. On the positive side, this had the effect of slowing down the game a bit during on-screen debugging, which allowed seeing more details. Of course, this effect could be achieved by slowing down the main loop update.

Debug Level 1


The screen shot below shows the visual debugging turned on.


Attached Image: iPad_2a.png


Physics


At the heart of the game is a physics engine (Box2D). Every element in the game has a physical interaction with the other elements. Once you start using the physics, you must have the ability to see the bodies it generates. Your graphics are going to be on the screen but there are physics elements (anchor points, hidden bodies, joints, etc.) that you need to also see.

The Box2D engine itself has a capacity to display the physics information (joints, bodies, AABB, etc.). It had to be slightly modified to work in with Star Crossing's zooming system and also to make the bodies mostly transparent (1). The physics layer was placed low in the layer stack (and it could be turned on/off by header include options). With the graphics layer(s) above the physics, the alignment of the sprites with the bodies they represented was easy to check. It was also easy to see where joints were connected, how they were pulling, etc.

Location


Star Crossing is laid out on a floating point "grid". The position in the physics world of all the bodies is used extensively in console debug output (and can be displayed in the labels under entities...more on this later). When levels are built, a rough "plan" of where items are placed is drawn up using this grid. When the debug information is turned on, major grid locations (2) are displayed. This has the following benefits:
  • If something looks like it is cramped or too spaced out, you can "eye ball" guess the distance from the major grid points and quickly change the positions in the level information.
  • The information you see on screen lines up with the position information displayed in the console.
  • Understanding the action of distance based effects is easier because you have a visual sense of the distance as seen from the entity.

Entity Labels


Every "thing" in the game has a unique identifier, simply called "ID". This value is displayed, along with the "type" of the entity, below it.
  • Since there are multiple instances of many entities, having the ID helps when comparing data to the console.
  • The labels are also present during the regular game, but only show up when the game is paused. This allows the player to get a bit more information about the "thing" on the screen without an extensive "what is this" page.
  • The labels can be easily augmented to display other information (state, position, health, etc.).
  • The labels scale in size based on zooming level. This helps eye-strain a lot when you zoom out or in.

Debug Level 2


While the player is able to move to any position (that the physics will allow), AI driven entities in the game use a combination of steering behaviors and navigation graphs to traverse the Star Crossing world.


Attached Image: iPad_3a.png


Navigation Grid


The "navigation grid" (1) is a combination of Box2D bodies laid out on a grid as well as a graph with each body as a node and edges connecting adjacent bodies. The grid bodies are used for collision detection, dynamically updating the graph to mark nodes as "blocked' or "not blocked".

The navigation grid is not always displayed (it can be disabled...it eats up cycles). When it is displayed, it shows exactly which cells an entity is occupying. This is very helpful for the following:
  • Watching the navigation path generation and ensuring it is going AROUND blocked nodes.
  • The path following behavior does a "look ahead" to see if the NEXT path edge (node) is blocked before entering (and recomputes a path if it is). This took a lot of tweaking to get right and having the blocked/unblocked status displayed, along with some "whiskers" from the entity really helped.

Navigation Grid Numbers


Each navigation grid node has a label that it can display (2). These numbers were put to use as follows:
  • Verifying the path the AI is going on matches up with the grid by displaying the navigation graph index of the grid node. For example, an AI that must perform a "ranged attack" does this by locating an empty node a certain distance from the target (outside its physical body), navigating to that node, pointing towards the target, and shooting. At one point, the grid was a little "off" and the attack position was inside the body of the target, but only in certain cases. The "what heck is that" moment occurred when it was observed that the last path node was inside the body of the target on the screen.
  • Star Crossing uses an influence mapping based approach to steer between objects. When a node becomes blocked or unblocked, the influence of all blockers in and around that node are updated. The path search uses this information to steer "between" blocking objects (these are the numbers in the image displayed). It is REALLY HARD to know if this working properly without seeing the paths and the influence numbers at the same time.

Navigation Paths


It is very difficult to debug a navigation system without looking at the paths that are coming from it (3). In the case of the paths from Star Crossing, only the last entity doing a search is displayed (to save CPU cycles). The "empty" red circle at the start of the path is the current target the entity is moving toward. As it removes nodes from its path, the current circle "disappears" and the next circle is left "open".

One of the reasons for going to influence based navigation was because of entities getting "stuck" going around corners. Quite often, a path around an object with a rectangular shape was "hugging" its perimeter, then going diagonally to hug the next perimeter segment. The diagonal move had the entity pushing into the rectangular corner of the object it was going around. While the influence based approach solved this, it took a while to "see" why the entity was giving up and re-pathing after trying to burrow into the building.

Parting Thoughts


While there were a lot of very specific problems worked, the methods used to debug them, beyond the "intrinsic tools" are not terribly complex:

  1. You need a way to measure your FPS. This is included directly in many frameworks or is one of the first examples they give when teaching you how to use the framework.
  2. You need a way to enable/disable the debug data displayed on your screen.
  3. You need a way to hold the processing "still" while you can look around your virtual world (possibly poking and prodding it).
  4. You need a system to display your physics bodies, if you have a physics engine (or something that acts similar to one).
  5. You need a system to draw labels for "interesting" things and have those labels "stick" to those things as they move about the world.
  6. You need a way to draw simple lines for various purposes. This may be a little bit of a challenge because of how the screen gets redrawn, but getting it working is well worth the investment.

These items are not a substitute for your existing logging/debugger system, they are a complement to it. These items are somewhat "generic". You can get a lot of mileage out of simple tools, though, if you know how to use them.

Article Update Log


30 Jan 2015: Initial release

Persistent Mapped Buffers in OpenGL

$
0
0

It seems that it's not easy to efficiently move data from CPU to GPU. Especially if we like to do it often - like every frame, for example. Fortunately, OpenGL (since version 4.4) gives us a new technique to fight this problem. It's called persistent mapped buffers that comes from the ARB_buffer_storage extension.

Let us revisit this extension. Can it boost your rendering code?


Note:
This post is an introduction to the Persistent Mapped Buffers topic, see
the Second Part with Benchmark Results @myblog


Intro


First thing I'd like to mention is that there are already a decent number of articles describing Persistent Mapped Buffers. I've learned a lot especially from Persistent mapped buffers @ferransole.wordpress.com and Maximizing VBO upload performance! - javagaming.


This post serves as a summary and a recap for modern techniques used to handle buffer updates. I've used those techniques in my particle system - please wait a bit for the upcoming post about renderer optimizations.


OK... but let's talk about our main hero in this story: persistent mapped buffer technique.


It appeared in ARB_buffer_storage and it become core in OpenGL 4.4. It allows you to map buffer once and keep the pointer forever. No need to unmap it and release the pointer to the driver... all the magic happens underneath.


Persistent Mapping is also included in modern OpenGL set of techniques called "AZDO" - Aproaching Zero Driver Overhead. As you can imagine, by mapping the buffer only once we significantly the reduce number of heavy OpenGL function calls and what's more important, fight synchronization problems.


One note: this approach can simplify the rendering code and make it more robust, still, try to stay as much as possible only on the GPU side. Any CPU to GPU data transfer will be much slower than GPU to GPU communication.


Moving Data


Let's now go through the process of updating the data in a buffer. We can do it in at least two different ways: glBuffer*Data and glMapBuffer*.


To be precise: we want to move some data from App memory (CPU) into GPU so that the data can be used in rendering. I'm especially interested in the case where we do it every frame, like in a particle system: you compute the new position on CPU, but then you want to render it. CPU to GPU memory transfer is needed. Even more complicated example would be to update video frames: you load data from a media file, decode it and then modify texture data that is then displayed.


Often such process is referred as streaming.

In other terms: CPU is writing data, GPU is reading.


Although I mention 'moving', GPU can actually directly read from system memory (using GART). So there is no need to copy data from one buffer (on CPU side) to a buffer that is on the GPU side. In that approach we should rather think about 'making data visible' to the GPU.


glBufferData/glBufferSubData


Those two procedures (available since OpenGL 1.5!) will copy your input data into pinned memory. Once it's done, an asynchronous DMA transfer can be started and the invoked procedure returns. After that call you can even delete your input memory chunk.


buf_glbufdata.png


The above picture shows a "theoretical" flow for this method: data is passed to glBuffer*Data functions and then internally OpenGL performs DMA transfer to GPU...


Note: glBufferData invalidates and reallocates the whole buffer. Use glBufferSubData to only update the data inside.


glMap*/glUnmap*


With mapping approach you simply get a pointer to pinned memory (might depend on actual implementation!). You can copy your input data and then call glUnmap to tell the driver that you are finished with the update. So, it looks like the approach with glBufferSubData, but you manage copying data by yourself. Plus you get some more control about the entire process.


buf_glmap.png


A "theoretical" flow for this method: you obtain a pointer to (probably) pinned memory, then you can copy your orignal data (or compute it), at the end you have to release the pointer via glUnmapBuffer method.


... All the above methods look quite easy: you just pay for the memory transfer. It could be that way if only there was no such thing as synchronization...


Synchronization


Unfortunately life is not that easy: you need to remember that GPU and CPU (and even the driver) runs asynchronously. When you submit a draw call it will not be executed immediately... it will be recorded in the command queue but will probably be executed much later by the GPU. When we update a buffer data we might easily get a stall - GPU will wait while we modify the data. We need to be smarter about it.


For instance, when you call glMapBuffer</center> the driver can create a mutex so that the buffer (which is a shared resource) is not modified by CPU and GPU at the same time. If it happens often, we'll lose a lot of GPU power. GPU can be blocked even in a situation when your buffer is only recorded to be rendered and not currently read.


buf_sync.png


In the picture above I tried to show a very generic and simplified view of how GPU and CPU work when they need to synchronize - wait for each other. In a real life scenario those gaps might have different sizes and there might be multiple sync points in a frame. The less waiting the more performance we can get.


So, reducing synchronization problems is an another incentive to have everything happening on GPU.


Double (Multiple) Buffering/Orphaning


Quite recommended idea is to use double or even triple buffering to solve the problem with synchronization:

  • create two buffers
  • update the first one
  • in the next frame update the second one
  • swap buffer ID...

That way the GPU can draw (read) from one buffer while you will update the next one. How can you do that in OpenGL?

  • explicitly use several buffers and use round robin algorithm to update them.
  • use glBufferData with a NULL pointer before each update:
    • the whole buffer will be recreated so we can store our data in a completely new place
    • the old buffer will be used by GPU - no synchronization will be needed
    • GPU will probably figure out that the following buffer allocations are similar so it will use the same memory chunks. I remember that this approach was not suggested in older versions of OpenGL.

  • use glMapBufferRange with GL_MAP_INVALIDATE_BUFFER_BIT
    • aditionally use UNSYNCHRONIZED bit and perform sync on your own.
    • there is also a procedure called glInvalidateBufferData that does the same job

Triple buffering


GPU and CPU runs asynchronously... but there is also another factor: the driver. It may happen (and on desktop driver implementations it happens quite often) that the driver also runs asynchronously. To solve this even more complicated synchronization scenario, you might consider triple buffering:

  • one buffer for CPU
  • one for the driver
  • one for GPU

This way there should be no stalls in the pipeline, but you need to sacrifice a bit more memory for your data.


More reading on the @hacksoflife blog


Persistent Mapping


Ok, we've covered common techniques for data streaming, but now let's talk about persistent mapped buffers technique in more details.


Assumptions:

  • GL_ARB_buffer_storage must be available or OpenGL 4.4

Creation:


glGenBuffers(1, &vboID);
glBindBuffer(GL_ARRAY_BUFFER, vboID);
flags = GL_MAP_WRITE_BIT | GL_MAP_PERSISTENT_BIT | GL_MAP_COHERENT_BIT;
glBufferStorage(GL_ARRAY_BUFFER, MY_BUFFER_SIZE, 0, flags);

Mapping (only once after creation...):


flags = GL_MAP_WRITE_BIT | GL_MAP_PERSISTENT_BIT | GL_MAP_COHERENT_BIT;
myPointer = glMapBufferRange(GL_ARRAY_BUFFER, 0, MY_BUFFER_SIZE, flags);

Update:


// wait for the buffer   
// just take your pointer (myPointer) and modyfy underlying data...
// lock the buffer

As the name suggests, it allows you to map the buffer once and keep the pointer forever. At the same time you are left with the synchronization problem - that's why there are comments about waiting and locking the buffer in the code above.


buf_pmb.png


On the diagram you can see that in the first place we need to get a pointer to the buffer memory (but we do it only once), then we can update the data (without any special calls to OpenGL). The only additional action we need to perform is synchronization or making sure that GPU will not read while we write at the same time. All the needed DMA transfers are invoked by the driver.


The GL_MAP_COHERENT_BIT flag makes your changes in the memory automatically visible to GPU. Without this flag you would have to manually set a memory barrier. Although, it looks like that GL_MAP_COHERENT_BIT should be slower than explicit and custom memory barriers and syncing, my first tests did not show any meaningful difference. I need to spend more time on that... Maybe you would like some more thoughts on that? BTW: even in the original AZDO presentation the authors mention to use GL_MAP_COHERENT_BIT so this shouldn't be a serious problem :)


Syncing


// waiting for the buffer
GLenum waitReturn = GL_UNSIGNALED;
while (waitReturn != GL_ALREADY_SIGNALED && waitReturn != GL_CONDITION_SATISFIED)
{
    waitReturn = glClientWaitSync(syncObj, GL_SYNC_FLUSH_COMMANDS_BIT, 1);
}

// lock the buffer:
glDeleteSync(syncObj);
syncObj = glFenceSync(GL_SYNC_GPU_COMMANDS_COMPLETE, 0);


When we write to the buffer we place a sync object. Then, in the following frame we need to wait until this sync object is signaled. In other words, we wait till the GPU processes all the commands before setting that sync.


Triple buffering


But we can do better: by using triple buffering we can be sure that GPU and CPU will not touch the same data in the buffer:

  • allocate one buffer with 3x of the original size
  • map it forever
  • bufferID = 0
  • update/draw
    • update bufferID range of the buffer only
    • draw that range
    • bufferID = (bufferID+1)%3


buf_triple.png


That way, in the next frame you will update another part of the buffer so that there will be no conflict.


Another way would be to create three separate buffers and update them in a similar way.


Demo


I've forked a demo application of Ferran Sole's example and extended it a bit.


Here is the github repo: fenbf/GLSamples

  • configurable number of triangles
  • configurable number of buffers: single/double/triple
  • optional syncing
  • optional debug flag
  • benchmark mode
  • output:
    • number of frames
    • counter that is incremented each time we wait for the buffer

Full results will be published in post: at my blog.


Summary


This was a long article, but I hope I explained everything in a decent way. We went through the standard approach of buffer updates (buffer streaming), saw our main problem: synchronization. Then I've described usage of persistence mapped buffers.


Should you use persistent mapped buffers? Here is the short summary about that:


Pros

  • Easy to use
  • Obtained pointer can be passed around in the app
  • In most cases gives performance boost for very frequent buffer updates (when data comes from CPU side)
    • reduces driver overhead
    • minimizes GPU stalls

  • Advised for AZDO techniques

Cons

  • Do not use it for static buffers or buffers that do not require updates from CPU side.
  • Best performance with triple buffering (might be a problem when you have large buffers, because you need a lot of memory to allocate).
  • Need to do explicit synchronization.
  • In OpenGL 4.4, so only latest GPU can support it.

In the next post I'll share my results from the Demo application. I've compared glMapBuffer approach with glBuffer*Data and persistent mapping.


Interesting questions:

  • Is this extension better or worse than AMD_pinned_memory?
  • What if you forget to sync, or do it in a wrong way? I did not get any apps crashes and hardly see any artifacts, but what's the expected result of such a situation?
  • What if you forget to use GL_MAP_COHERENT_BIT? Is there that much performance difference?

References


Article Update Log


4th Feb 2015: Initial release

Why a Game Development Degree?

$
0
0
Recently there was an article published on gamedeve.net which basically advocates students aspiring to enter game design or programming career are better off pursuing a traditional computer science (CS) degree. Main point of the debate was that this way you can cast a wider net for software development jobs compared to a more narrow game programming degree. There are many points here that are either not brought up or not fully or duly explored. Here's a short response to this article which hopefully sheds light on some of these shortcomings in my opinion.

Why a game development degree


Game Programming/Design degrees come in all shapes and forms, from certificate programs which are usually short (at most 18 months) to full bachelor degree programs which usually run at a compressed 3 years length. The bachelor programs are usually fully certified by national education certification bodies and are monitored in terms of program contents and their graduates success rates continuously. These programs are career-oriented and to some or full extent are involved in students' placement in the workplace, either as co-op or as full-time employment.

All reputable GD bachelor programs have all the core courses of a general CS (Computer Science) degree, probably except for some of the more academic-oriented courses such as Compiler Theory or such. For example, in our program we have equivalent of one full year of C and C++ education at a general level. This is followed with 2 core courses on data structure, and many more general CS courses which are applicable to any serious career in software development. One of the main differences of a GD vs. CS course is strong emphasis on hands-on. As one of my students (who happens to have done a CS degree already!) puts it, in the GD program he get to do stuff, as well as learn stuff.

When a student graduates from a decent GD program he/she has already done at least one 2D game from scratch, and has worked in a team to fully design, develop, and deliver a 3D game in a very-similar-to-actual-workplace environment with the same metrics, expectations and peer evaluation. These skills are simply missing from any CS program and are exactly what a game company looking for filling junior positions would appreciate in a candidate.

Conclusion


So, in summary, doing a Game Development degree (a Bachelor one, NOT just a short certificate!) would probably be one of the best ways to enter into the gaming industry and learn the ropes directly from the qualified industry veterans and get better prepared for such a complex and diverse industry. I do agree if you are not still sure about what paths you'd take and gaming industry is just one of the options, then a general CS degree probably would suit you better.

Skeletal Animation Optimization Tips and Tricks

$
0
0
Skeletal animation plays an important role in video games. Recent games are using many characters within. Processing huge amount of animations can be computationally intensive and requires much memory as well. To have multiple characters in a real time scene, optimization is highly needed. There exists many techniques which can be used to optimize skeletal animations. This article tends to address some of these techniques. Some of the techniques addressed here have plenty of details, so I just try to define them in a general way and introduce references for those who are eager to learn more.

This article is divided into two main sections. The first section is addressing some optimization techniques which can be used within animation systems. The second section is from the perspective of the animation system users and describes some techniques which can be applied by users to leverage the animation system more efficiently. So if you are an animator/technical animator you can read the second section and if you are a programmer and you want to implement an animation system you may read the first section.

This article is not going to talk about mesh skinning optimization and it is just going to talk about skeletal animation optimization techniques. There exists plenty of useful articles about mesh skinning around the web.

1.Skeletal Animation Optimization Techniques


I assumed that most of the audiences of this article know the basics of skeletal animation, so I'm not going to talk about the basics here. To start, let's have a definition for a skeleton in character animation. A skeleton is an abstract model of a human or animal body in computer graphics. It is a tree data structure. A tree which its nodes are called bones or joints. Bones are just some containers for transformations. For each skeletal animation, there exists animation tracks. Each track has the transformation info of a specific bone. A track is a sequence of keyframes. A keyframe is transformation of a bone at a specific time. The keyframe time is specified from the beginning of the animation. Usually the keyframes are stored relative to a pose of the bone named binding pose. These animation tracks and skeletal representation can be optimized in different ways. In the following sections, I will introduce some of these techniques. As stated before, the techniques are described generally and this article is not going to define the details here. Each of which can be defined in a separated article.

Optimizing Animation Tracks


An animation consists of animation tracks. Each animation track stores the animation related to one bone. An animation track is a sequence of keyframes where each keyframe contains one of the translation, rotation or scale info. Animation tracks are one thing that can be optimized easily from different aspects. First we have to note that most of the bones in character animations do not have translation. For example we don't need to move fingers or hands. They just need to be rotated. Usually the only bones that need to have translation are the root bone and the props (weapons, shields and so on). The other body organs do not move and they are just being rotated. Also the realistic characters usually do not use scale. Scale is usually applied to cartoony characters. One other thing about the scale is that animators mostly use uniform scale and less non-uniform scale.

So based on this information, we can remove scale and translation keyframes for those animation tracks that do not own these two. The animation tracks can become light weighted and allocate less memory and calculation by removing unnecessary translation and scale keyframes. Also if we use uniform scale, the scale keyframes can just contain one float instead of a Vector3.

Another technique which is very useful for optimization of animation tracks, is animation compression schemes. The most famous one is curve simplification. You may know it as keyframe reduction as well. It reduces the keyframes of an animation track based on a user defined error. With this, the consecutive keyframes which have a little difference can be omitted. The curve simplification should be applied for translation, rotation and scale separately because each of which has their own keyframes and different values. Also their difference is calculated differently. You may read this paper about curve simplification to find out more about it.

One other thing that can be considered here, is how you store rotation values in the rotation keyframes. Usually the rotations are stored in unit quaternion format because quaternions have some good advantages over Euler Angles. So if you are storing quaternions in your keyframes, you need to store four elements. But in unit quaternions the scalar part can be obtained easily from the vector part. So the quaternions can be stored with just 3 floats instead of four. See this post from my blog to find out how you can obtain the scalar part from the vector part.

Representation of a Skeleton in Memory


As mentioned in previous sections, a skeleton is a tree data structure. As animation is a dynamic process, the bones may be accessed frequently while the animation is being processed. So a good technique is to keep the bones sequentially in the memory. They should not be separated because of the locality of the references. The sequential allocation of bones in memory can be more cache-friendly for the CPU.

Using SSE Instructions


To update a character animation, the system has to do lots of calculations. Most of them are based on linear algebra. This means that most of calculations are with vectors. For example, the bones are always being interpolated between two consecutive keyframes. So the system has to LERP between two translations and two scales and SLERP between two quaternion rotations as well. Also there might be animation blending which leads the system to interpolate between two or more different animations based on their weights. LERP and SLERP are calculated with these equations respectively:

LERP(V1, V2, a) = (1-a) * V1 + a * V2
SLERP(Q1, Q2, a) = sin((1-a)*t)/sin(t) * Q1 + sin(a*t)/sin(t) * Q2


Where 't' is the angle between Q1 and Q2 and 'a' is interpolation factor and it is a normalized value. These two equations are frequently used in keyframe interpolation and animation blending. Using SSE instructions can help you to achieve faster and more efficient results. I highly recommend you see the hkVector4f class from Havok physics/animation SDK as reference. The hkVector4f class is using SSE instructions very well and it's a very well-designed class. You can define translation, scale and quaternion similar to hkVector4f class.

You have to note that if you are using SSE instructions, then your objects which are using it have to be memory aligned otherwise you will run into traps and exceptions. Also you should consider your target platform and see that how it supports these kind of instructions.

Multithreading the Animation Pipeline


Imagine you have a crowded scene full of NPCs in which each NPC has a bunch of skeletal animations. Maybe a herd of bulls. The animation can take a lot of time to be processed. This can be reduced significantly if the computation of crowds becomes multithreaded. Each entity’s animations can be computed in a different thread.

Intel introduced a good solution to achieve this goal in this article. It defines a thread pool with worker threads which their count should not be more than CPU cores otherwise the application performance decreases. Each entity has its own animation and skinning calculations and it is considered as a job and is placed in a job queue. Each job is picked by a worker thread and the main thread calls render functions when the jobs are done. If you want to see this computation technique more in action, I suggest you to have a look at Havok animation/physics documentation and study the multithreading in the animation section. To have the docs you have to download the whole SDK here. Also you can find that Havok is handling synchronous and asynchronous jobs there by defining different job types.

Updating Animations


One important thing in animation systems is how you manage the update rate of a skeleton and its skinning data. Do we always need to update animations each frame? If true do we need to update each bone every frame? So here we should have a LOD manager for skeletal animations. The LOD manager should decide whether to update hierarchy or not. It can consider different states of a character to decide about its update rate. Some possible cases to be considered are listed here:

1- The Priority of The Animated Character: Some characters like NPCs and crowds do not have very high degree of priority so you may not update them in every frame. At most of the times, they are not going to be seen clearly so they can be ignored to be updated every frame.

2- Distance to Camera: If the character is far from the camera, many of its movements cannot be seen. So why should we just compute something that cannot be seen? Here we can define a skeleton map for our current skeleton and select more important bones to be updated and ignore the others. For example when you are far from the camera you don't need to update finger bones or neck bone. You can just update spines, head, arms and legs. These are the bones which can be seen from afar. So with this you have a light weighted skeleton and you are ignoring many bones to update. Don't forget that human hands have 28 bones for fingers and 28 bones for a small portion of a mesh is not very efficient.

3- Using Dirty Flags For Bones: In many situations, the bone transformation is not changed in two consecutive frames. For example the animator himself didn't animate that bone in several frames or the curve simplification algorithm reduced consecutive keyframes which are more similar. In these kind of situations, you don't need to update the bone in its local space again. As you might know the bones are firstly calculated in their local space based on animation info and then they will be multiplied by their binding pose and parent transformation to be specified in world or modeling space. Defining dirty flags for each bone can help you to not calculate bones in their local space if they are not changed between two consecutive frames. They can be updated in their local space if they are dirty.

4- Update Just When They Are going To Be Rendered: Imagine a scene in which some agents are following you. You try to run away from them. The agents are not in the camera frustum but their AI controller is monitoring and following you. So do you think we should update the skeleton while the player can't see them? Not in most cases. So you can ignore the update of skeletons which are not in the camera frustum. Both Unity3D and Unreal Engine4 have this feature. They allow you to select whether the skeleton and its skinned mesh should be updated or not if they are not in the camera frustum.

You might need to update skeletons even if they are not in the camera frustum. For example you might need to shoot an object to a character's head which is not in the camera. Or you may need to read the root motion data and use it for locomotion extraction. So you need calculated bone positions. In this kind of situations you can force the skeleton to be updated manually or not using this technique.

2.Optimized Usage of Animation Systems


So far, some techniques have been discussed to implement an optimized animation system. As a user of animation systems, you should trust it and assume that the system is well optimized. You assume that the system has many of the techniques described above or even more. So you can produce animations which can be friendlier with an optimized animation system. I'm going to address some of them here. This section is more convenient for animators/technical animators.

Do Not Move All Bones Always


As mentioned earlier the animation tracks can be optimized and their keyframes can be reduced easily. So by knowing this, you can create animations which are more suitable for this kind of optimization. So do not scale or move the bones if it is not necessary. Do not transform bones that cannot be seen. For example while you are making a fast sword attack, not all of the facial bones can be seen. So you don't need to move them all.

In the cutscenes where you have a predefined camera, you know which bones are in the camera frustum. So if you have zoomed the camera on the face of your character, you don't need to move the fingers or hands. With this you will save your own time and will let the system to save much memory by preventing to export or simplifying the animation tracks for bones.

One other important thing is duplicating two consecutive keyframes. This occurs frequently in blocking phase of animation. For example, you move fingers in frame 1 and again move them frame 15 and you copy the keyframe 15 to frame 30. Keyframe 15 and 30 are the same. But the default keyframe interpolation techniques are set to make the animation curves smooth. This means that you might get an extra motion between frame 15 and 30. Figure1 shows a curve which is smoothed with keyframe interpolation techniques.


Attached Image: Smooth curve.jpg
Figure1: A smoothed animation curve


As you can see in Figure1, the keyframe number 2 and 3 are the same. But there is an extra motion between them. You might need this smoothness for many bones so leave it be if you need it. But if you don't need it make sure to make the two similar consecutive keyframes more linearly as shown in figure 2. With this, the keyframe reduction algorithm can reduce the keyframe samples.


Attached Image: Linear Curve.jpg
Figure2: Two linear consecutive keyframes


You should consider this case for finger bones more carefully. Because fingers can be up to 28 bones for a human skeleton and they are showing a small portion of the body but they take much memory and calculation. In the previous example if you make the two similar consecutive keyframes linear, there would be no visual artifact for finger bones and you can drop 28 * (30 - 15 + 1) keyframe samples. Where 28 is the number of finger bones and 30 and 15 are the frames in which keyframes are created by the animator. The sampling rate is one sample per frame in this example. So by setting two consecutive keyframes to linear for finger bones, you will save much memory. This amount of memory can't be very huge for one animation but it can become huge when your game has many skeletal animations.

Using Additive and Partial Animations instead of Full Body Animation


Animation blending has different techniques. Two of them which are very good at both functionality and performance are additive and partial animation blending. These two blending schemes are usually used for asynchronous animation events. For example when you are running and decide to shoot. So lower body continues to run and the upper body blends to shoot animation.

Using additive and partial animations can help you to have less animations. Let me describe this with an example. Imagine you have a locomotion animation controller. It blends between 3 animations (walk, run and sprint) based on input speed. You want to add a spine lean animation to this locomotion. So when your character is accelerating the character leans forward for a period of time. First you can make 3 full body walk_lean_fwd, run_lean_fwd and sprint_lean_fwd animations which are blending synchronously with walk, run and sprint respectively. You can change the blend weight to achieve a lean forward animation. Now you have three full body animations with several frames. This means more keyframes, more memory usage and more calculation. Also your blend tree gets more complicated and high dimensional. Imagine that you are adding 6 more animations to your current locomotion system. Two directional walks, two directional runs and two directional sprints. Each of them have to be blended with walk, run and sprint respectively. So with this, if we want to have leaning forward, we have to add two directional walk_lean_fwd, two directional run_fwd and two directional sprint_fwd and blend them respectively with walk, run and sprint blend trees. The blend tree is going to be high dimensional and needs too much full body animations and too much memory and calculation. It becomes hard for even the user to manipulate.

You can handle this situation more easily by using a light weighted additive animation. An additive animation is an animation that is going to be added to current animations. Usually it's a difference between two poses So first your current animations are calculated then the additive is going to be multiplied to the current transforms. Usually the additive animation is just a single frame animation which does not really need to affect all of the body parts. In our example the additive animation can be a single frame animation in which spine bones are rotated forward, the head bone is rotated down and the arms are spread a little. You can add this animation to the current locomotion animations by manipulating its weight. You can achieve the same results with just one single frame and half body additive animation and there is no need to produce different lean forward full body animations. So using additive and partial animation blending can reduce your workload and help you to achieve better performance very easily.

Using Motion Retargeting


A motion retargeting system promises to apply a same animation on different skeletons without visual artifacts. By using it you can share your animations between different characters. For example you make a walk for a specific character and you can use this animation for other characters as well. By using motion retargeting you can save your memory by preventing animation duplication. But just note that a motion retargeting system has its own computations. So it is not just the basic skeletal animation and it needs many other techniques like how to scale the positions and root bone translation, how to limit the joints, ability to mirror animations and many other things. So you may save animation memory and animating time, but the system needs more computation. The computation may become a bottleneck in your game.

Unity3D, Unreal Engine4 and Havok animation all support motion retargeting. If you do not need to share animations between different skeletons, you don't need to use motion retargeting.

Conclusion


Optimization is always a serious part of video game development. Video games are among the soft real time software so they should respond in a proper time. Animation is always an important part of a video game. It is important from different aspects like visuals, controls, storytelling, gameplay and more. Having lots of character animations in a game can improve it significantly, but the system should be capable of handling too much character animations. This article tried to address some of the techniques which are important in the optimization of skeletal animations. Some of the techniques are highly detailed and they were discussed generally here. The discussed techniques were reviewed from two perspectives. First, from the developers who want to create skeletal animation systems and second, from the users of animation systems.

Article Update Log


13 Feb 2015: Initial release
Viewing all 17825 articles
Browse latest View live


<script src="https://jsc.adskeeper.com/r/s/rssing.com.1596347.js" async> </script>